In the last blog entry, “Something New“, I began revealing my designed big playset coming together. Now we begin to get past mere structure and on to how it will be used.
There are three doors into the playhouse level. These are for entrance and exit but also to act as railing should S and her friends want to spend the night aloft.

The climbing net will go here. The gate doubles as a table in the playhouse.

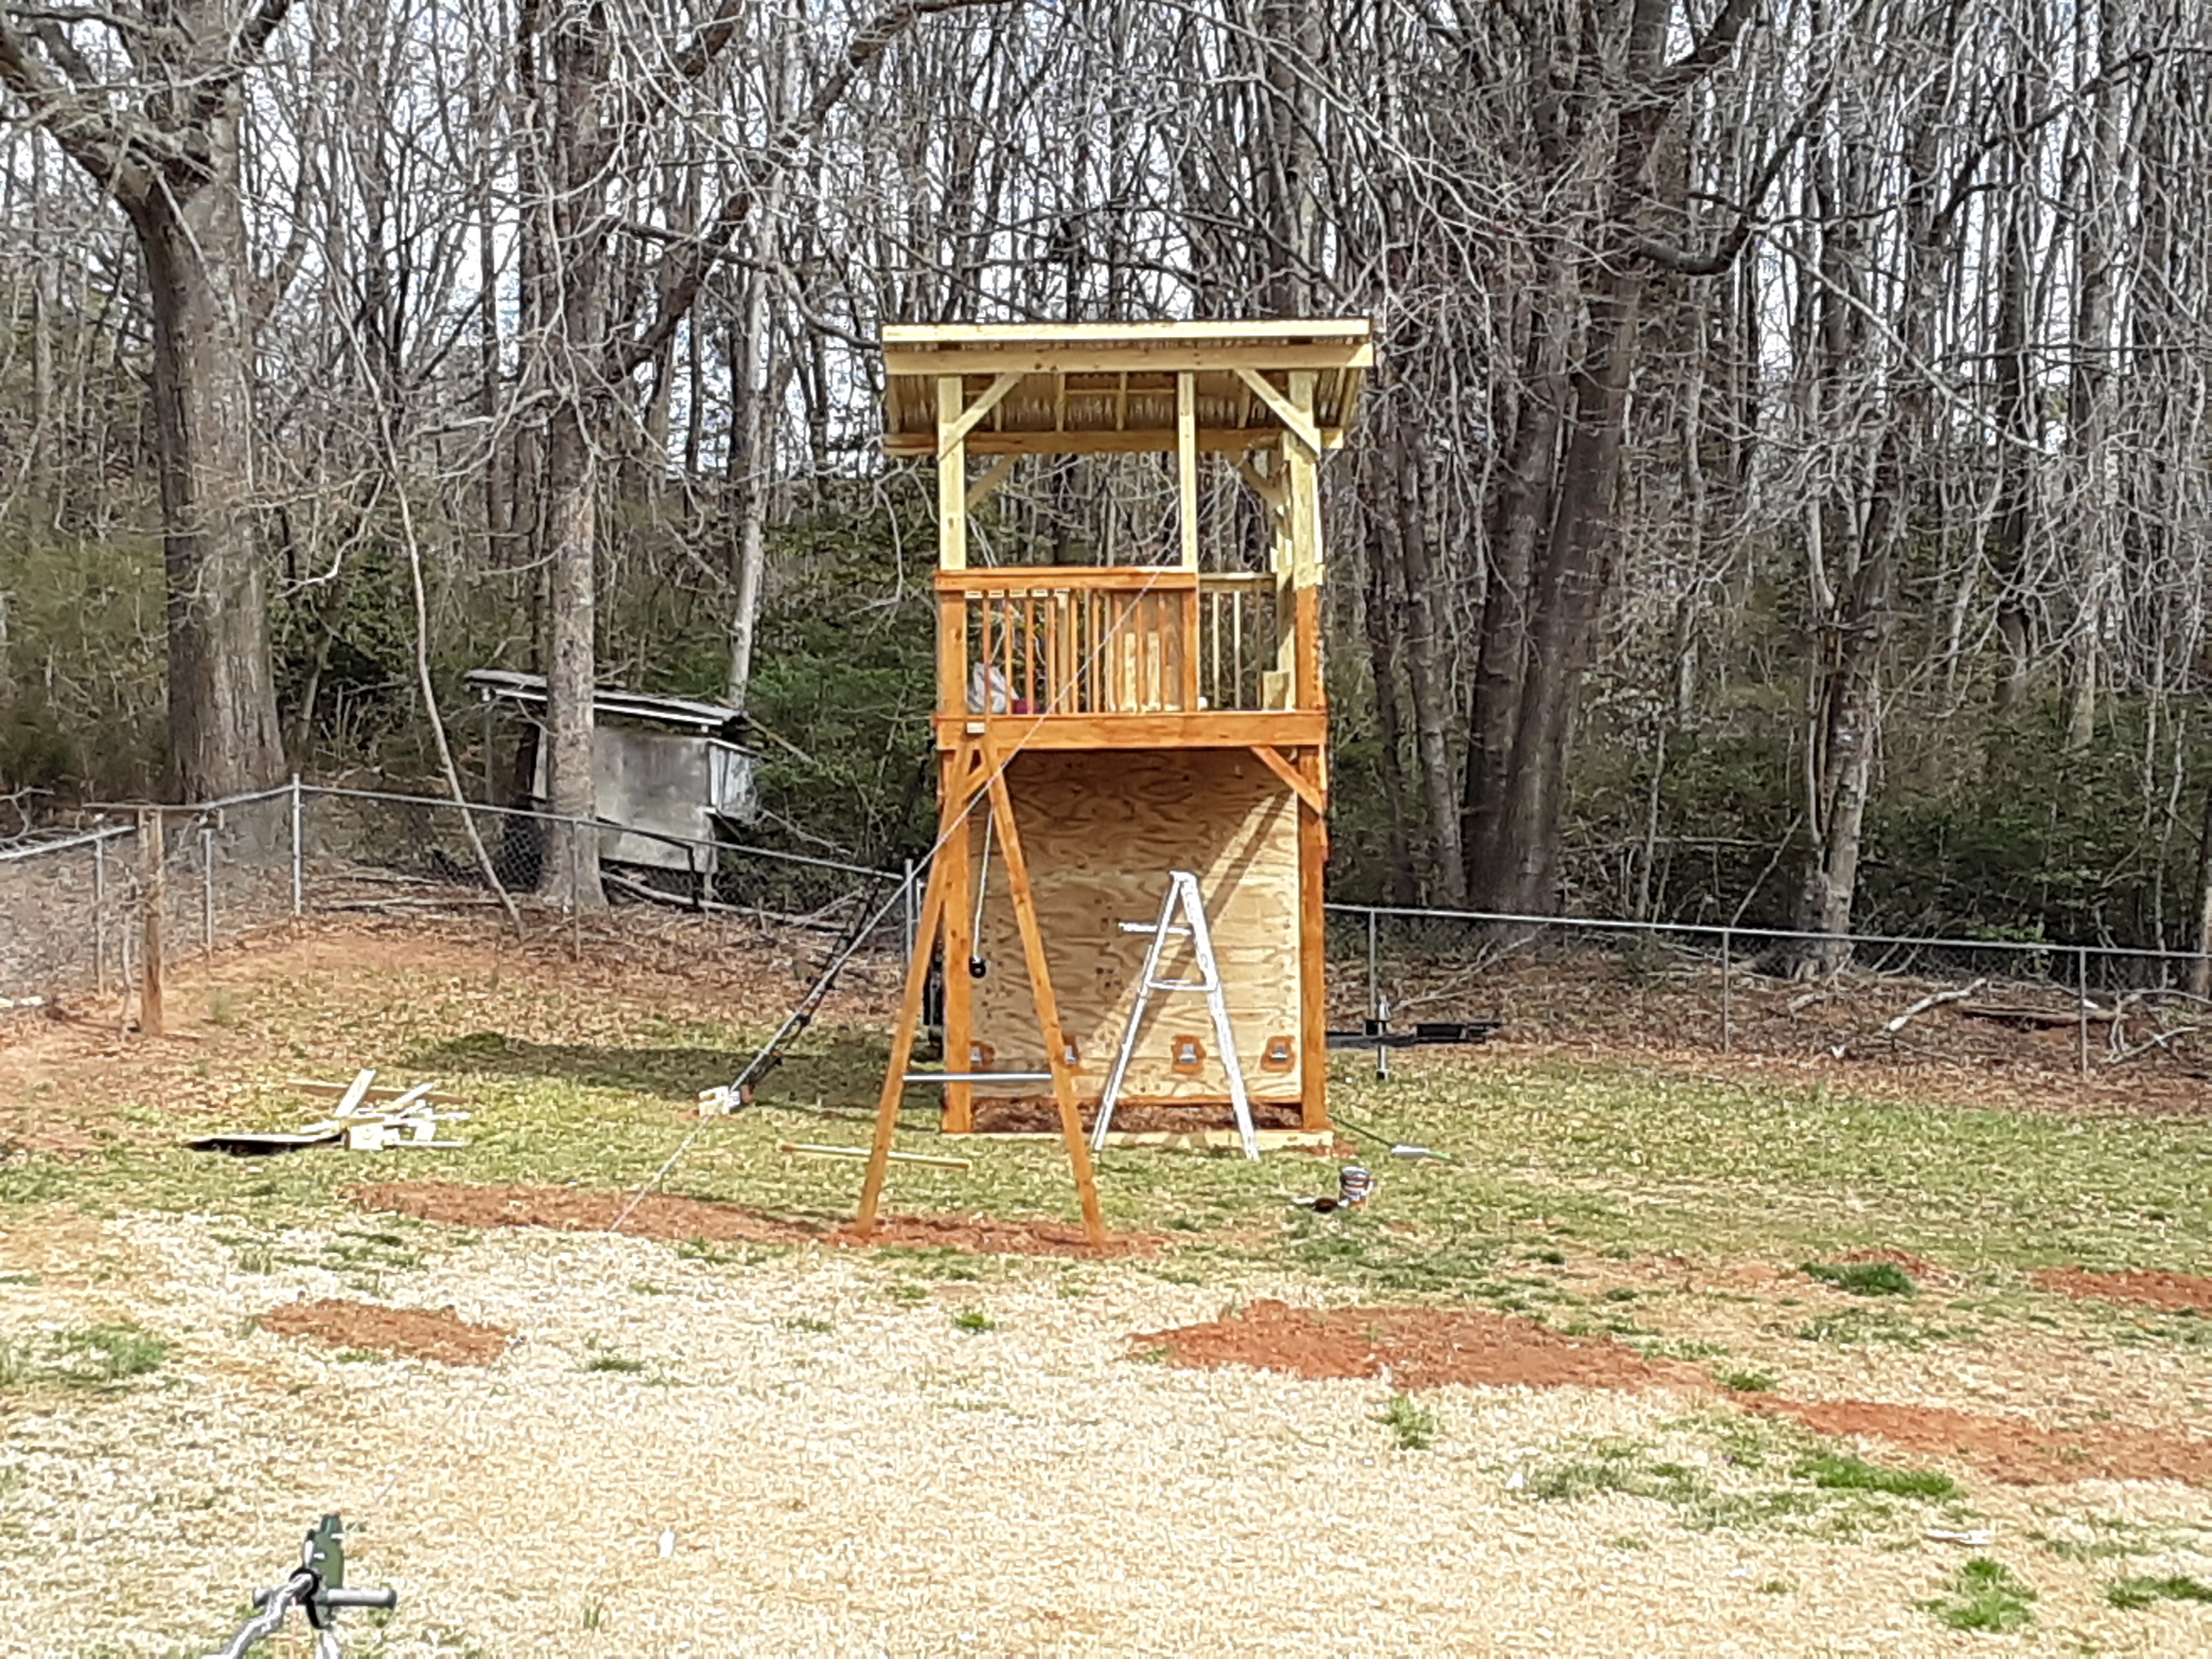
On a rainy, cold day I worked in the block shed you see in the pictures. I drilled holes and mounted T-nuts, installed 2 x 4 supports and mounted hinges on the treated plywood on my saw horses. A few days later I mounted the wall onto the footboard. The railing was a whole day job, too.

T-nuts allow moving the climbing holds around for new climbs and no boredom.

I designed the climbing wall to meet the owner’s requirement that the playhouse “grow with her.” I told her that meant that I needed to build a serious climbing wall. To wit I installed a winch in order to lower for overhanging climbs out to 40 degrees above horizontal.

Since the winch cable is only one mounting point, I installed to latches, one on each side to stabilize and strengthen the wall when slanted.


You can see the zipline is up and staining has begun. There are so many surfaces and angles that the staining took about 2 1/2 days. The A-frame for the rings and swings is in place as well.
The 4 x 6 x 20 treated beam was special order and took one month to arrive. It came straight from the sawmill they said. Notice the smooth bar in the A-frame. It is for spinning around on.

Picking out and ordering the climbing holds proved a challenge for the owner, so those came finally.

Soon I will reveal the finished product and the plans and how they changed throughout the project and why. It was slow with various delays, but it came together nicely.
