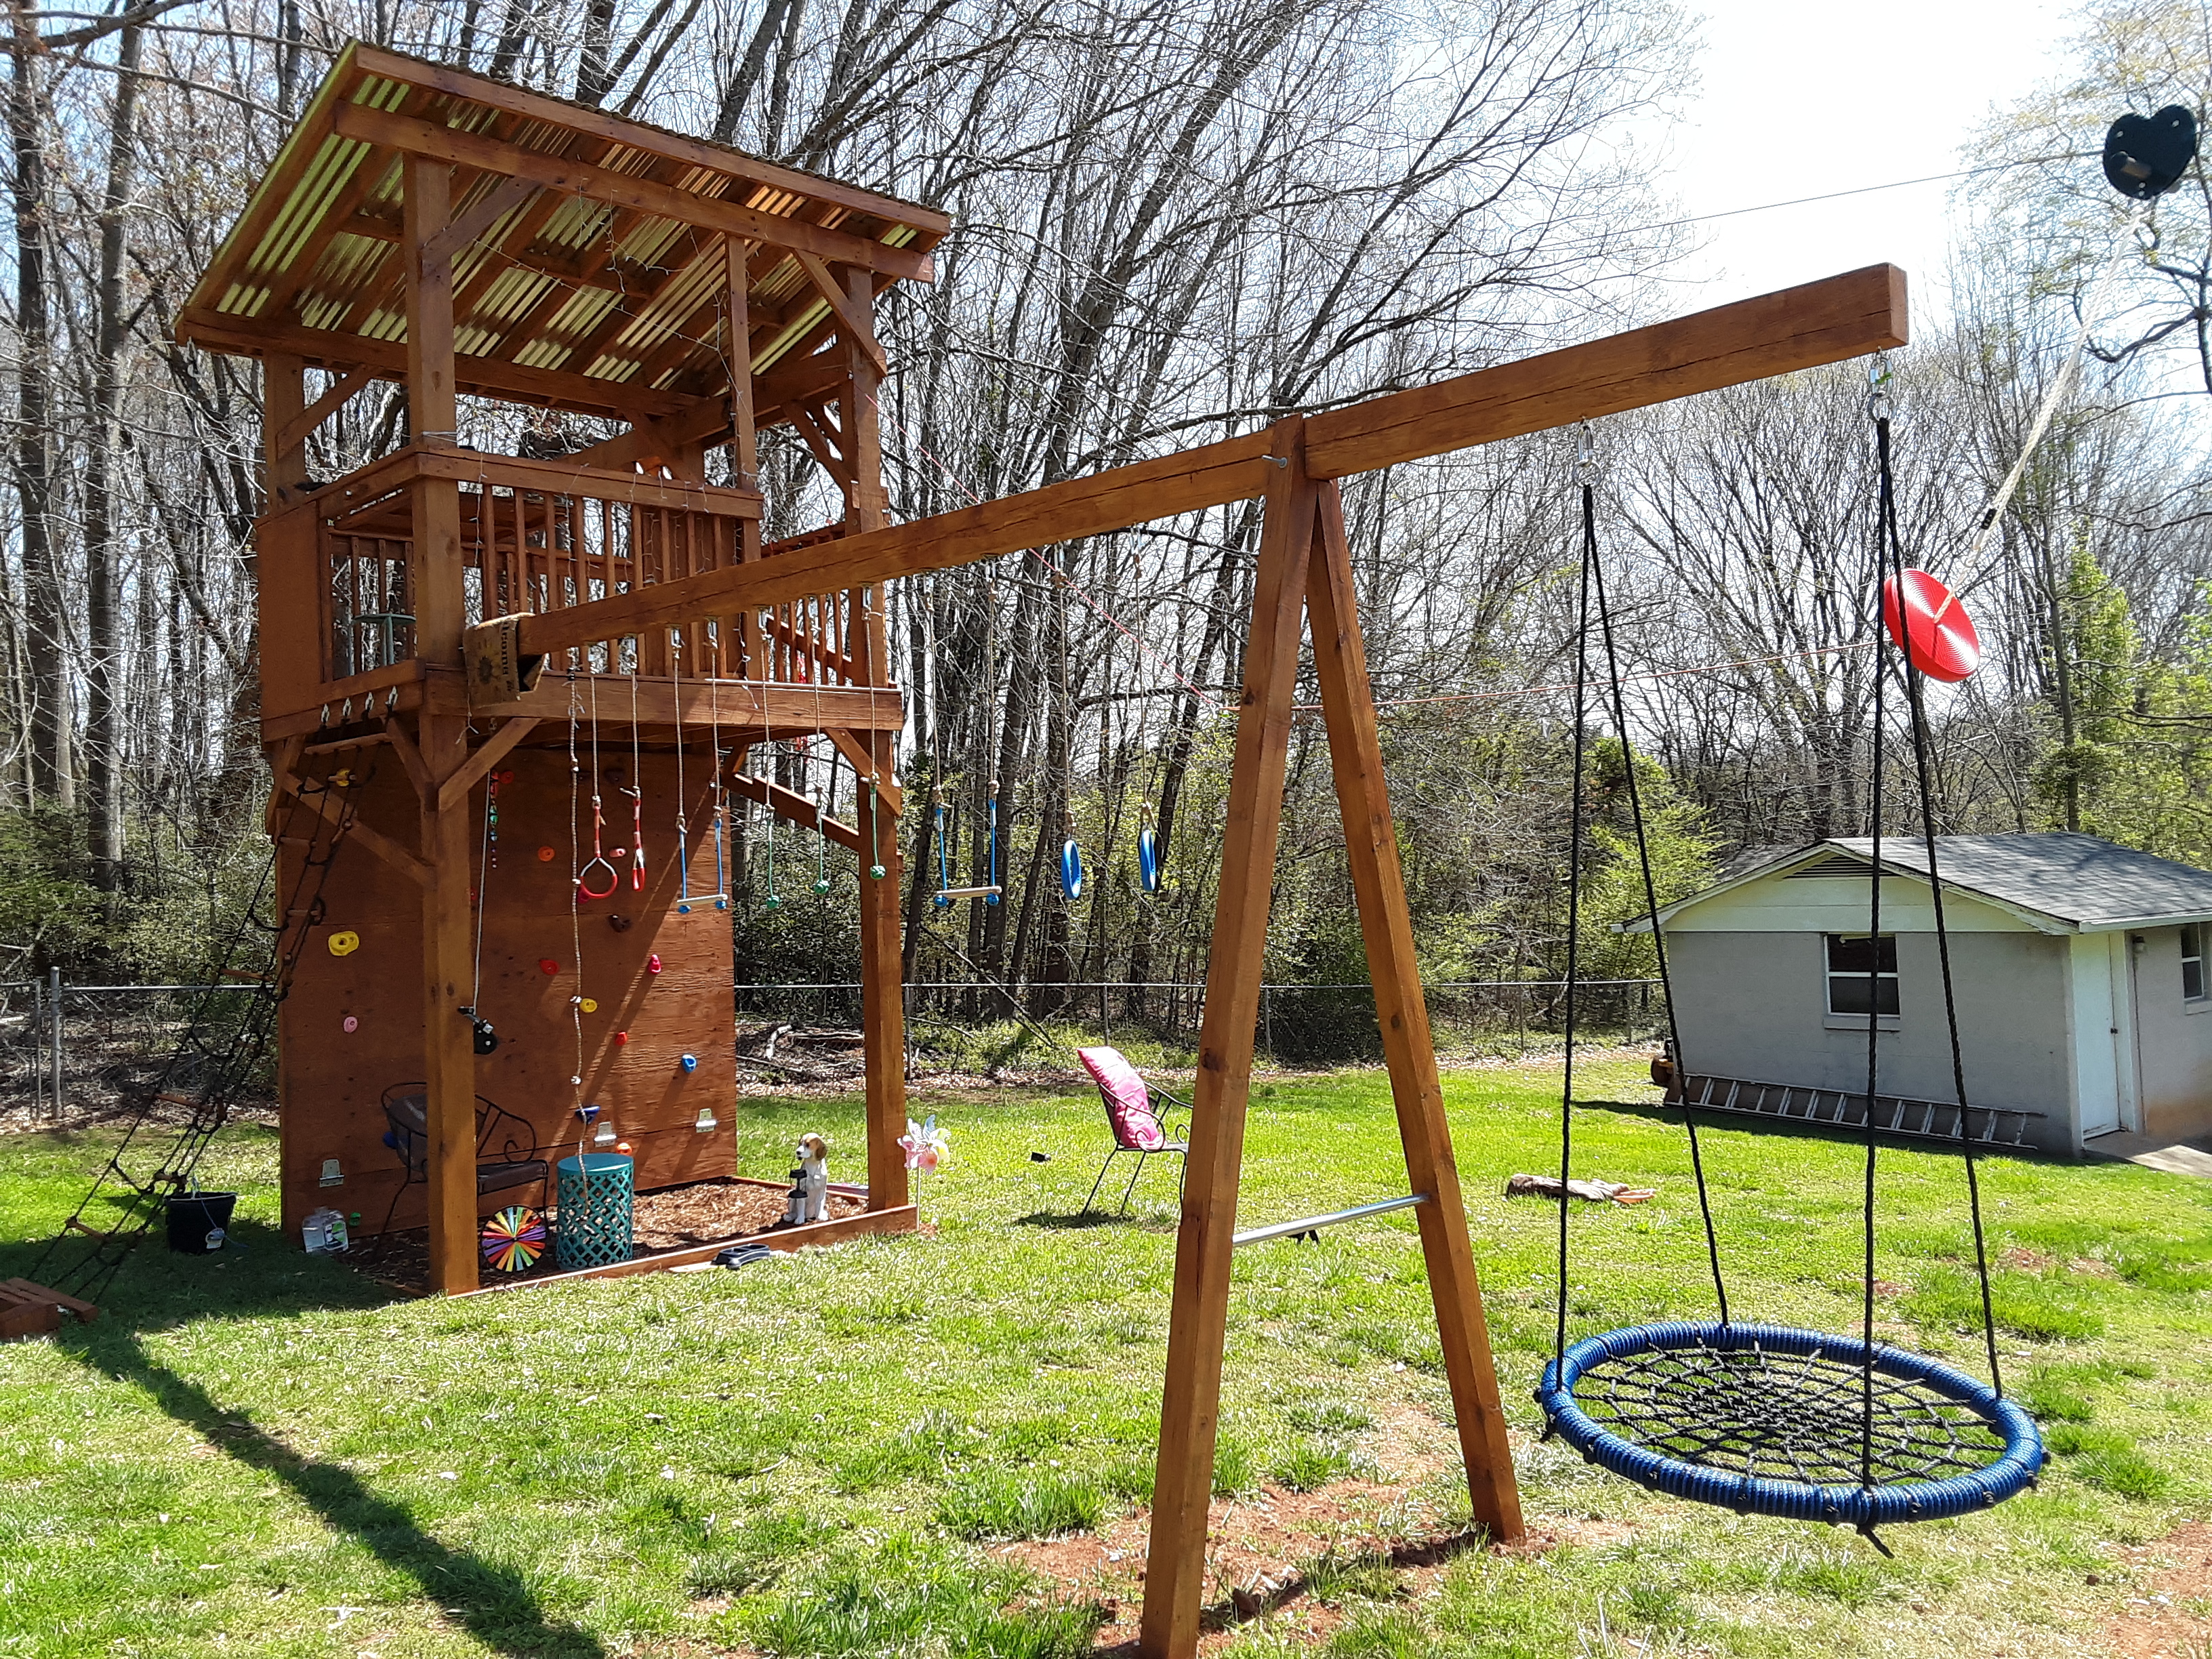
The owner installed the chain to hang the net swing temporarily, then asked me to move the swing. An outdoor aerial silk is supposed to reside here one day.
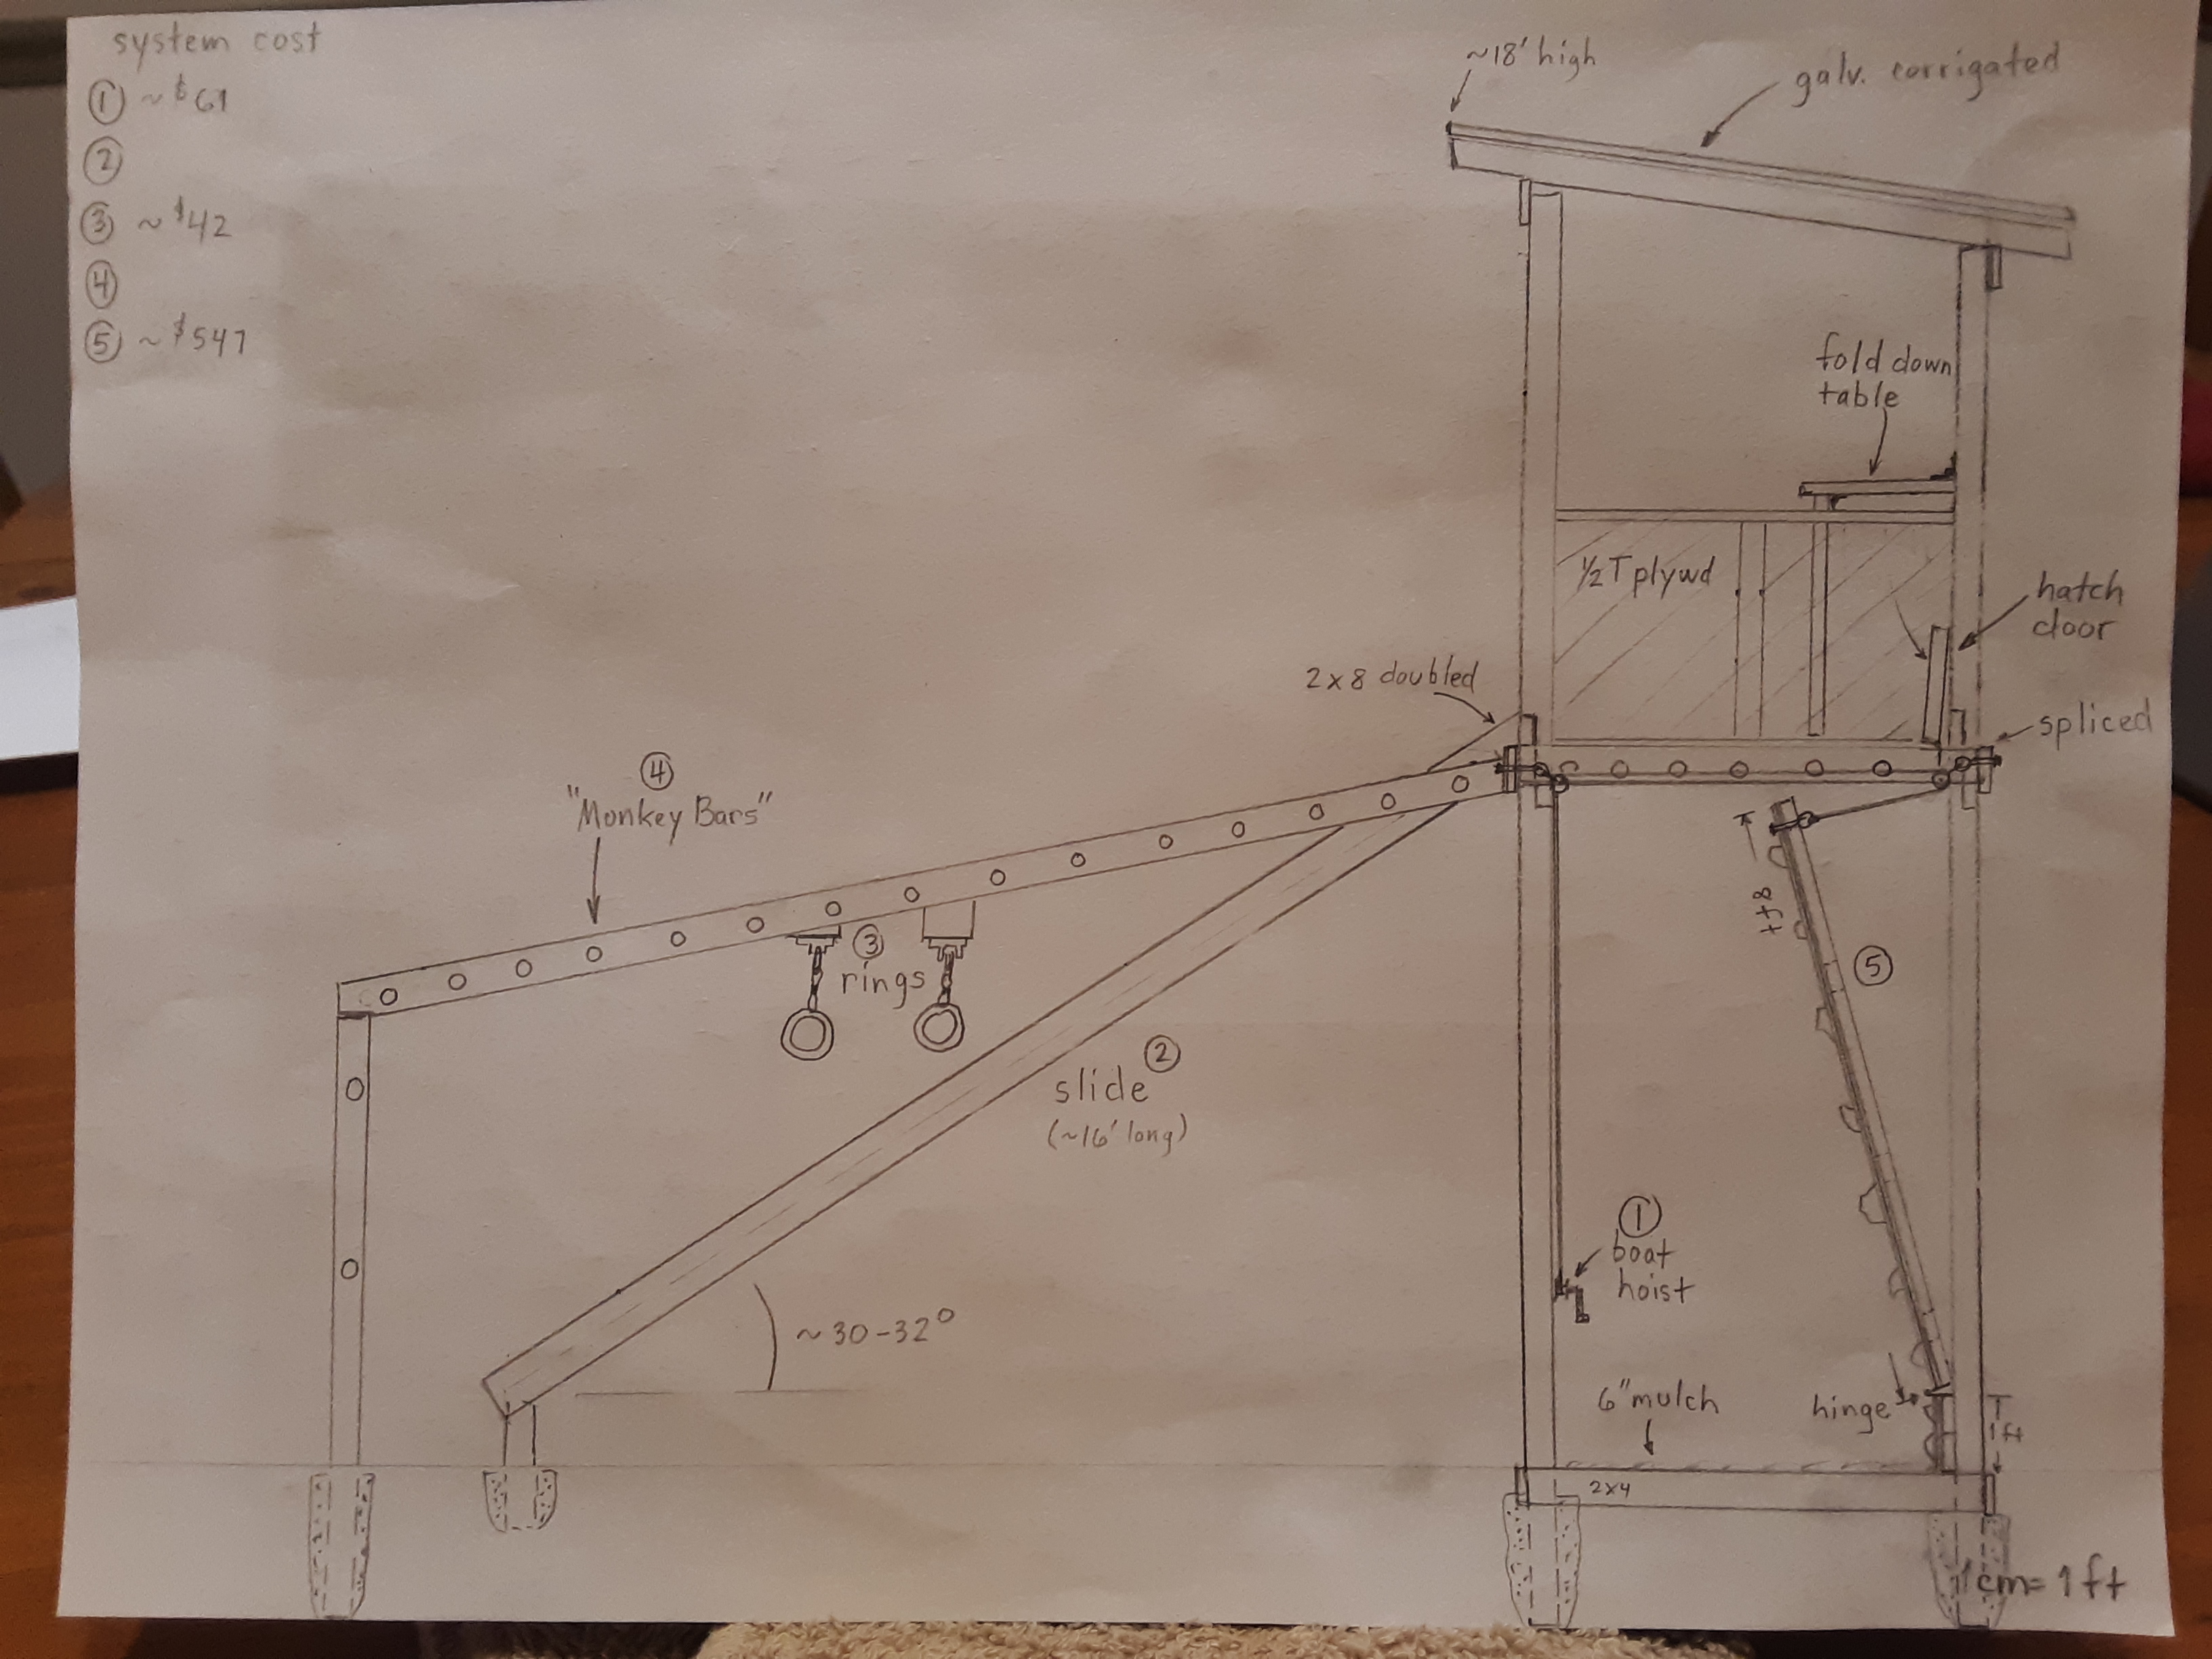
Check out the plans. The basic concept is there, but the homeowner wanted the addition of a climbing net, a zipline, a beam for the aerial silk, and a good place to mount the net swing. For cost reasons that eliminated the slide and monkey bars. The fold down table became a doorway for the climbing net. The climbing wall got lowered from 9′ to 8′ and 7′ wide to 8′ wide. The zipline resulted in changing from 4 x 4 posts to 6 x 6 posts and adding all of those diagonals.
The zipline, due to height of the playhouse and surrounding topography is steeper than suggested. So we began to look for a way to slow the ending. I added a spring and a friend added a magnetic break. They work on the same principle as dropping a magnet down a copper pipe. Copper does not magnetize but it does conduct electric current well. Therefore, when the magnet is moving down the pipe a current is induced which has a magnet field which just happens to be counter to the magnet’s field. The magnet is slowed by this counter-EMF. So is the magnet surrounding the zipline cable. The black bungee brings the magnet back to the point for the next braking action. So, the zipline is fast but has a controlled stop.
In the last blog entry, “Something New“, I began revealing my designed big playset coming together. Now we begin to get past mere structure and on to how it will be used.
There are three doors into the playhouse level. These are for entrance and exit but also to act as railing should S and her friends want to spend the night aloft.
The climbing net will go here. The gate doubles as a table in the playhouse.
On a rainy, cold day I worked in the block shed you see in the pictures. I drilled holes and mounted T-nuts, installed 2 x 4 supports and mounted hinges on the treated plywood on my saw horses. A few days later I mounted the wall onto the footboard. The railing was a whole day job, too.
T-nuts allow moving the climbing holds around for new climbs and no boredom.
I designed the climbing wall to meet the owner’s requirement that the playhouse “grow with her.” I told her that meant that I needed to build a serious climbing wall. To wit I installed a winch in order to lower for overhanging climbs out to 40 degrees above horizontal.
Since the winch cable is only one mounting point, I installed to latches, one on each side to stabilize and strengthen the wall when slanted.
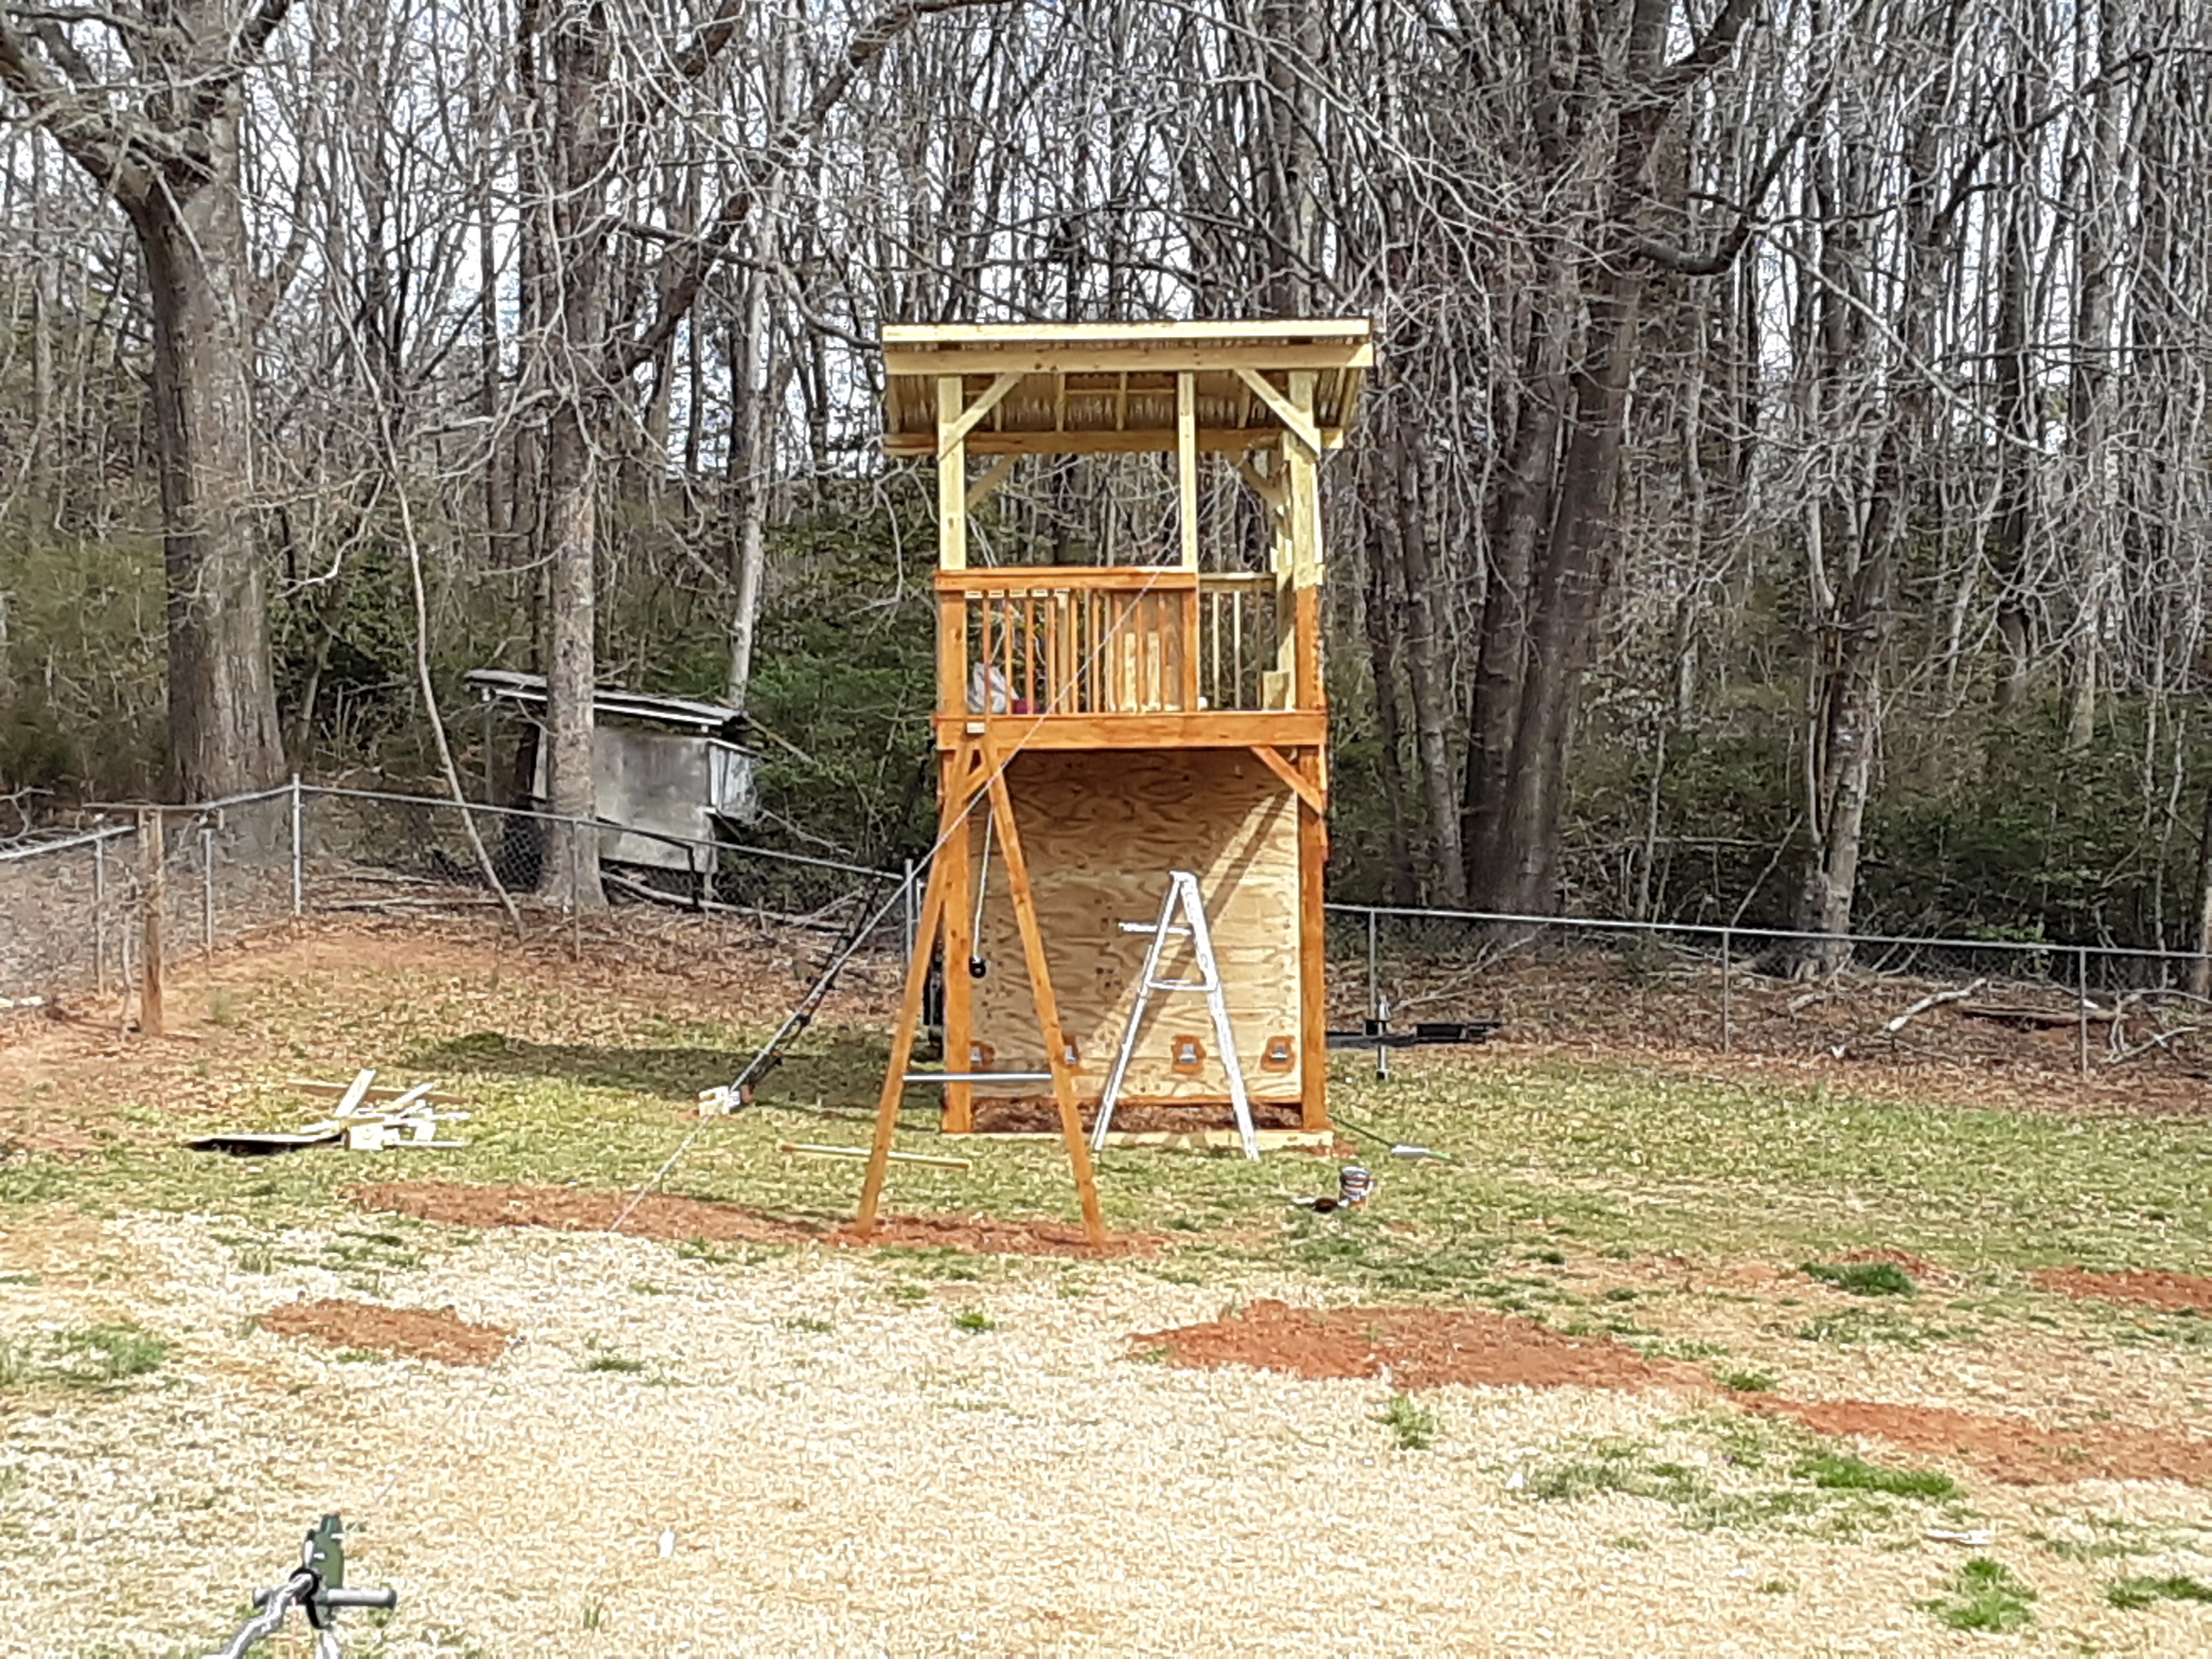
You can see the zipline is up and staining has begun. There are so many surfaces and angles that the staining took about 2 1/2 days. The A-frame for the rings and swings is in place as well.
The 4 x 6 x 20 treated beam was special order and took one month to arrive. It came straight from the sawmill they said. Notice the smooth bar in the A-frame. It is for spinning around on.
Picking out and ordering the climbing holds proved a challenge for the owner, so those came finally.
Soon I will reveal the finished product and the plans and how they changed throughout the project and why. It was slow with various delays, but it came together nicely.
I just finished a large project that took several months. Other responsibilities, weather, special order lumber, and specialty hardware delayed progress but did not prevent completion. It was an intense and satisfying project. Follow me as I show you the progress on S’s new playset.
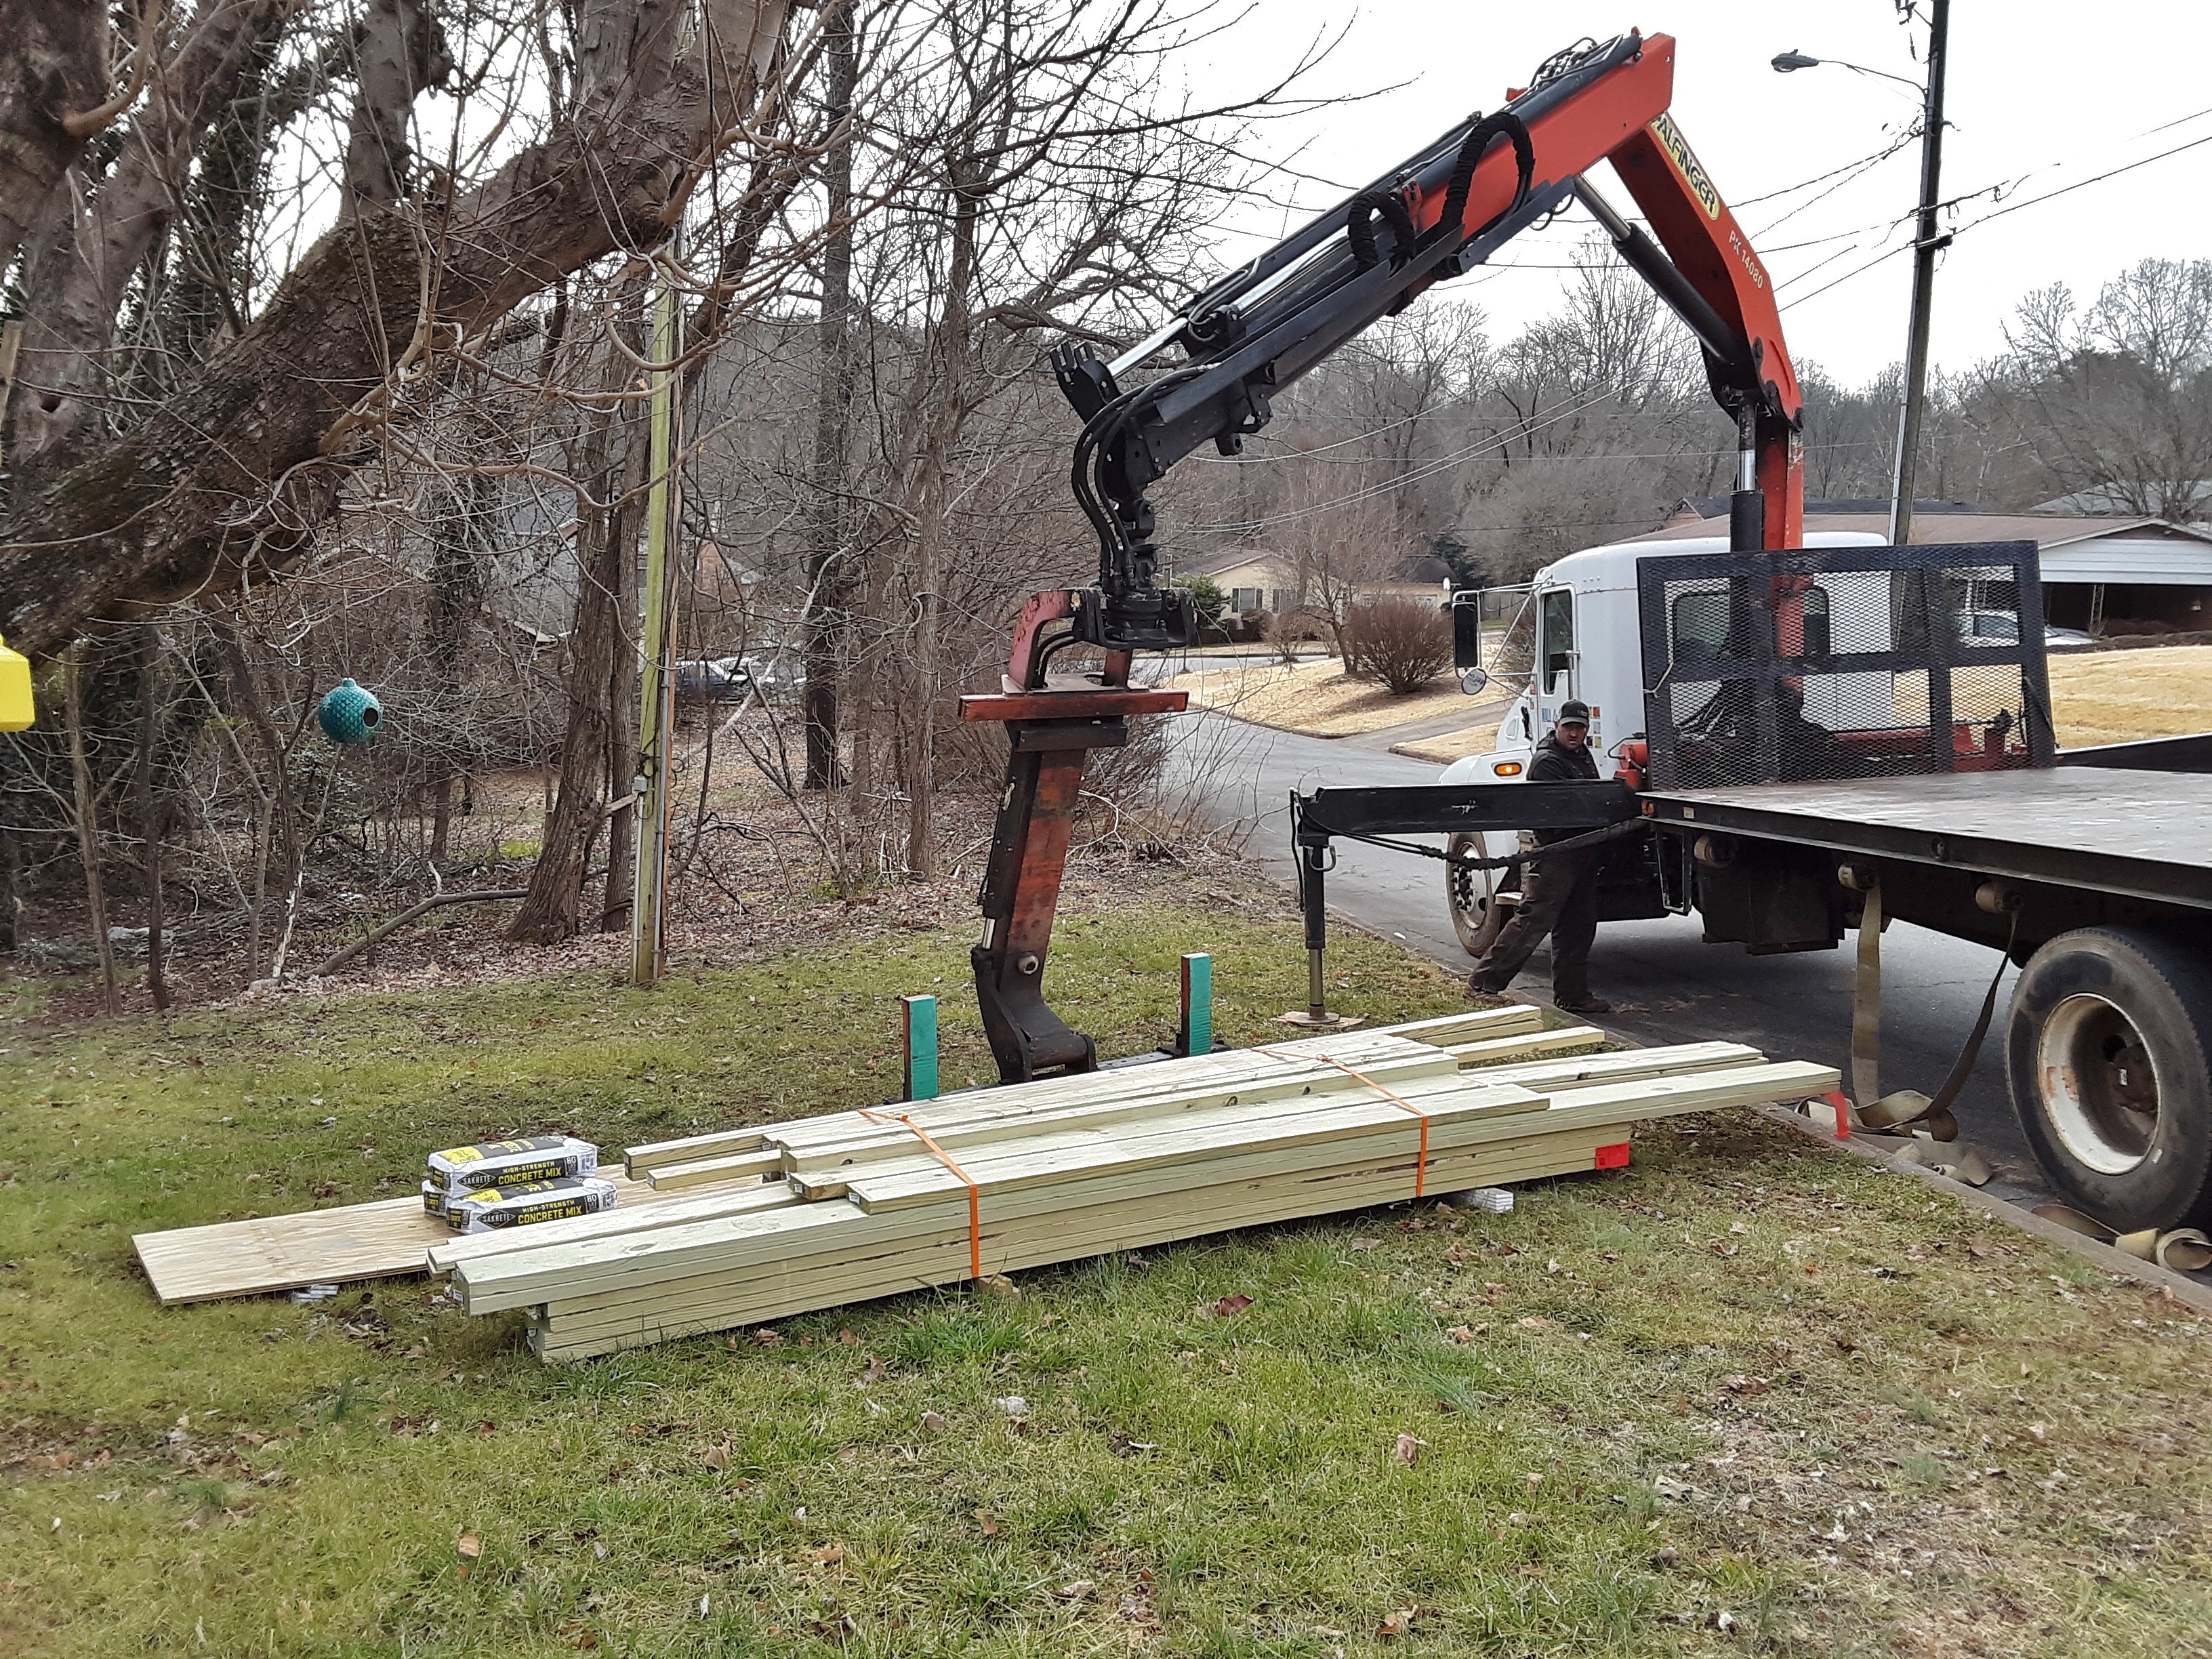
How do you haul and install 6 x 6 x 20 poles? Picking them up saved time in getting them and money for the customer.
I had help getting them in the hand dug 3′ deep holes.
The homeowner was amazed.
Next, the local lumber company delivered the majority of the lumber.
Because the winter was very wet, the truck could not bring it to the backyard, even though there was access. I hauled two or three boards at a time on my shoulders the next day.
Even though this is in the city, a vacant lot behind the worksite conceals a family of 7 deer. There are some very nice trees and thick underbrush to conceal the Whitetails.
Day 2 involved more digging and considerable plumbing (not water, but vertical with the world) and bracing.
My two helpers were always ready and waiting when I arrived, regardless of time of day or weather.
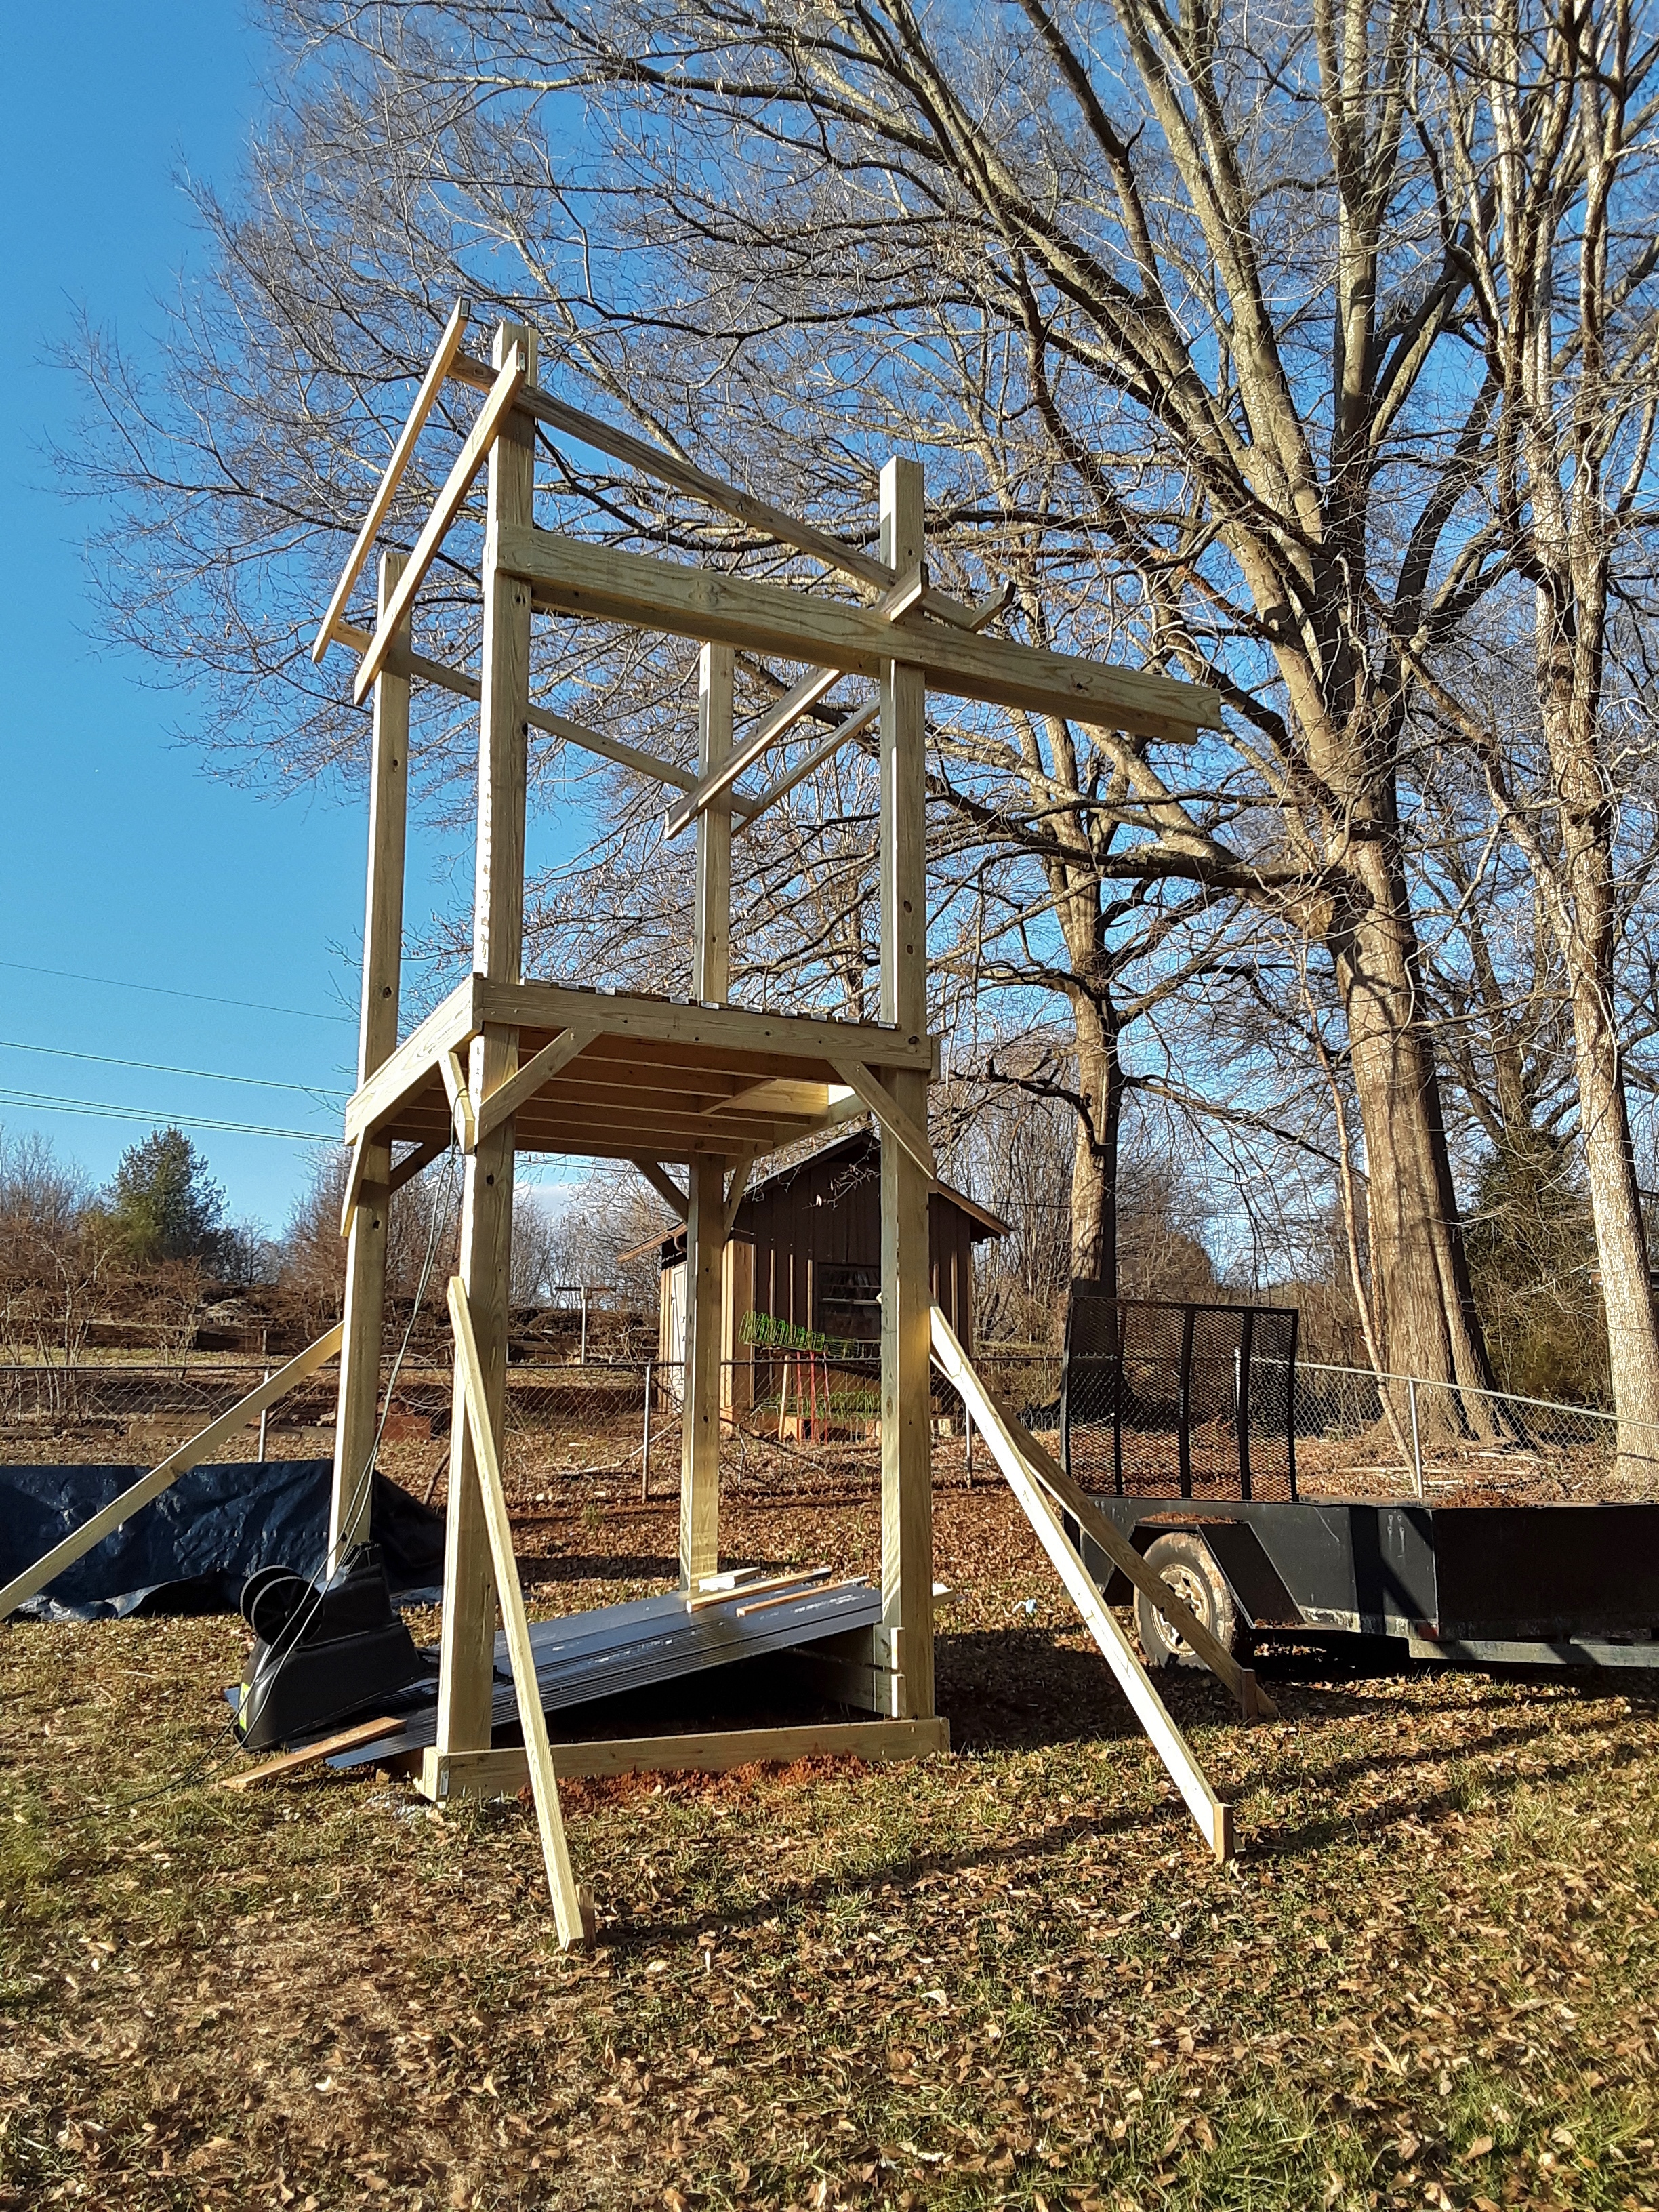
On day 3, I put in joists, the footboard for the climbing wall, and concreted the posts. The reason for the overkill on the posts’ depth, size and concrete was the planned zipline. Take note of the copious diagonals as it comes together. This structure is stiff.
Some days were longer than others and some saw more progress. The floor was satisfying and very useful for further progress. Hanging out on an extension ladder leaned against a single post putting up long boards is difficult for one person.
The double 2 x 8’s hanging 5′ off of the back will support an aerial silk. S, who is the ten year old girl this is being built for, is taking lessons.
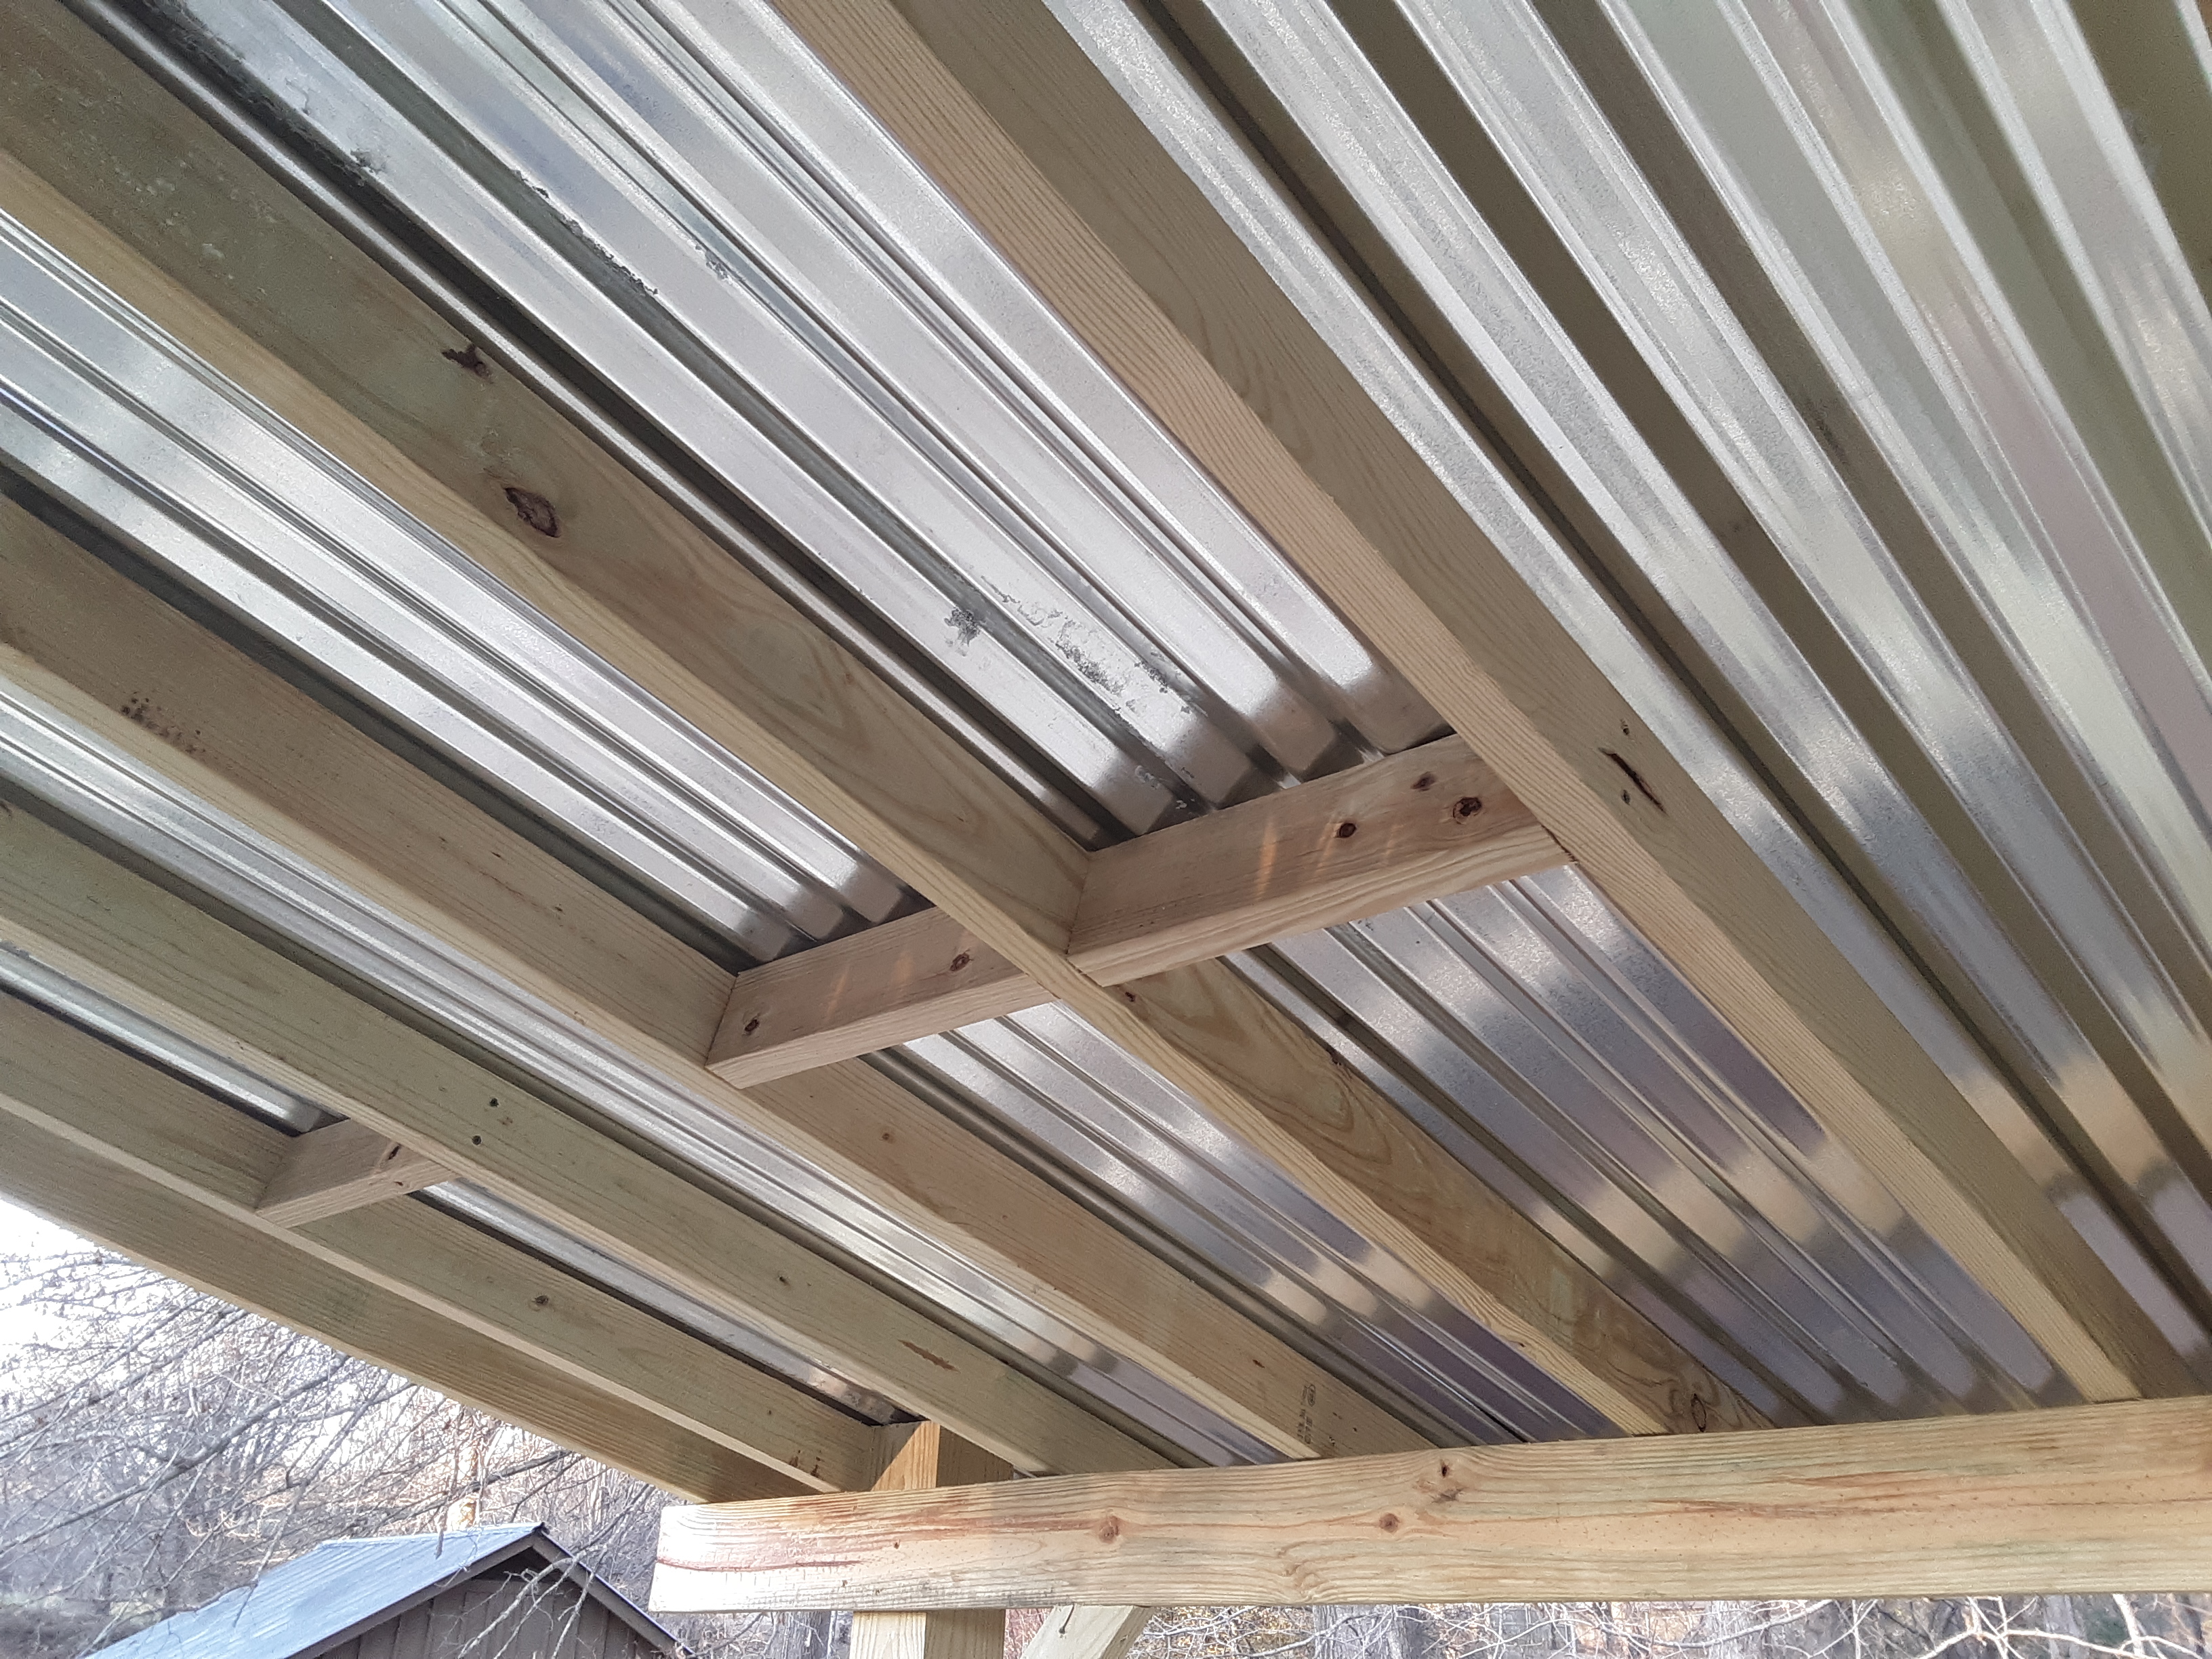
Day 5 saw the roof go on just in time to keep the floor dry from several days of torrent.
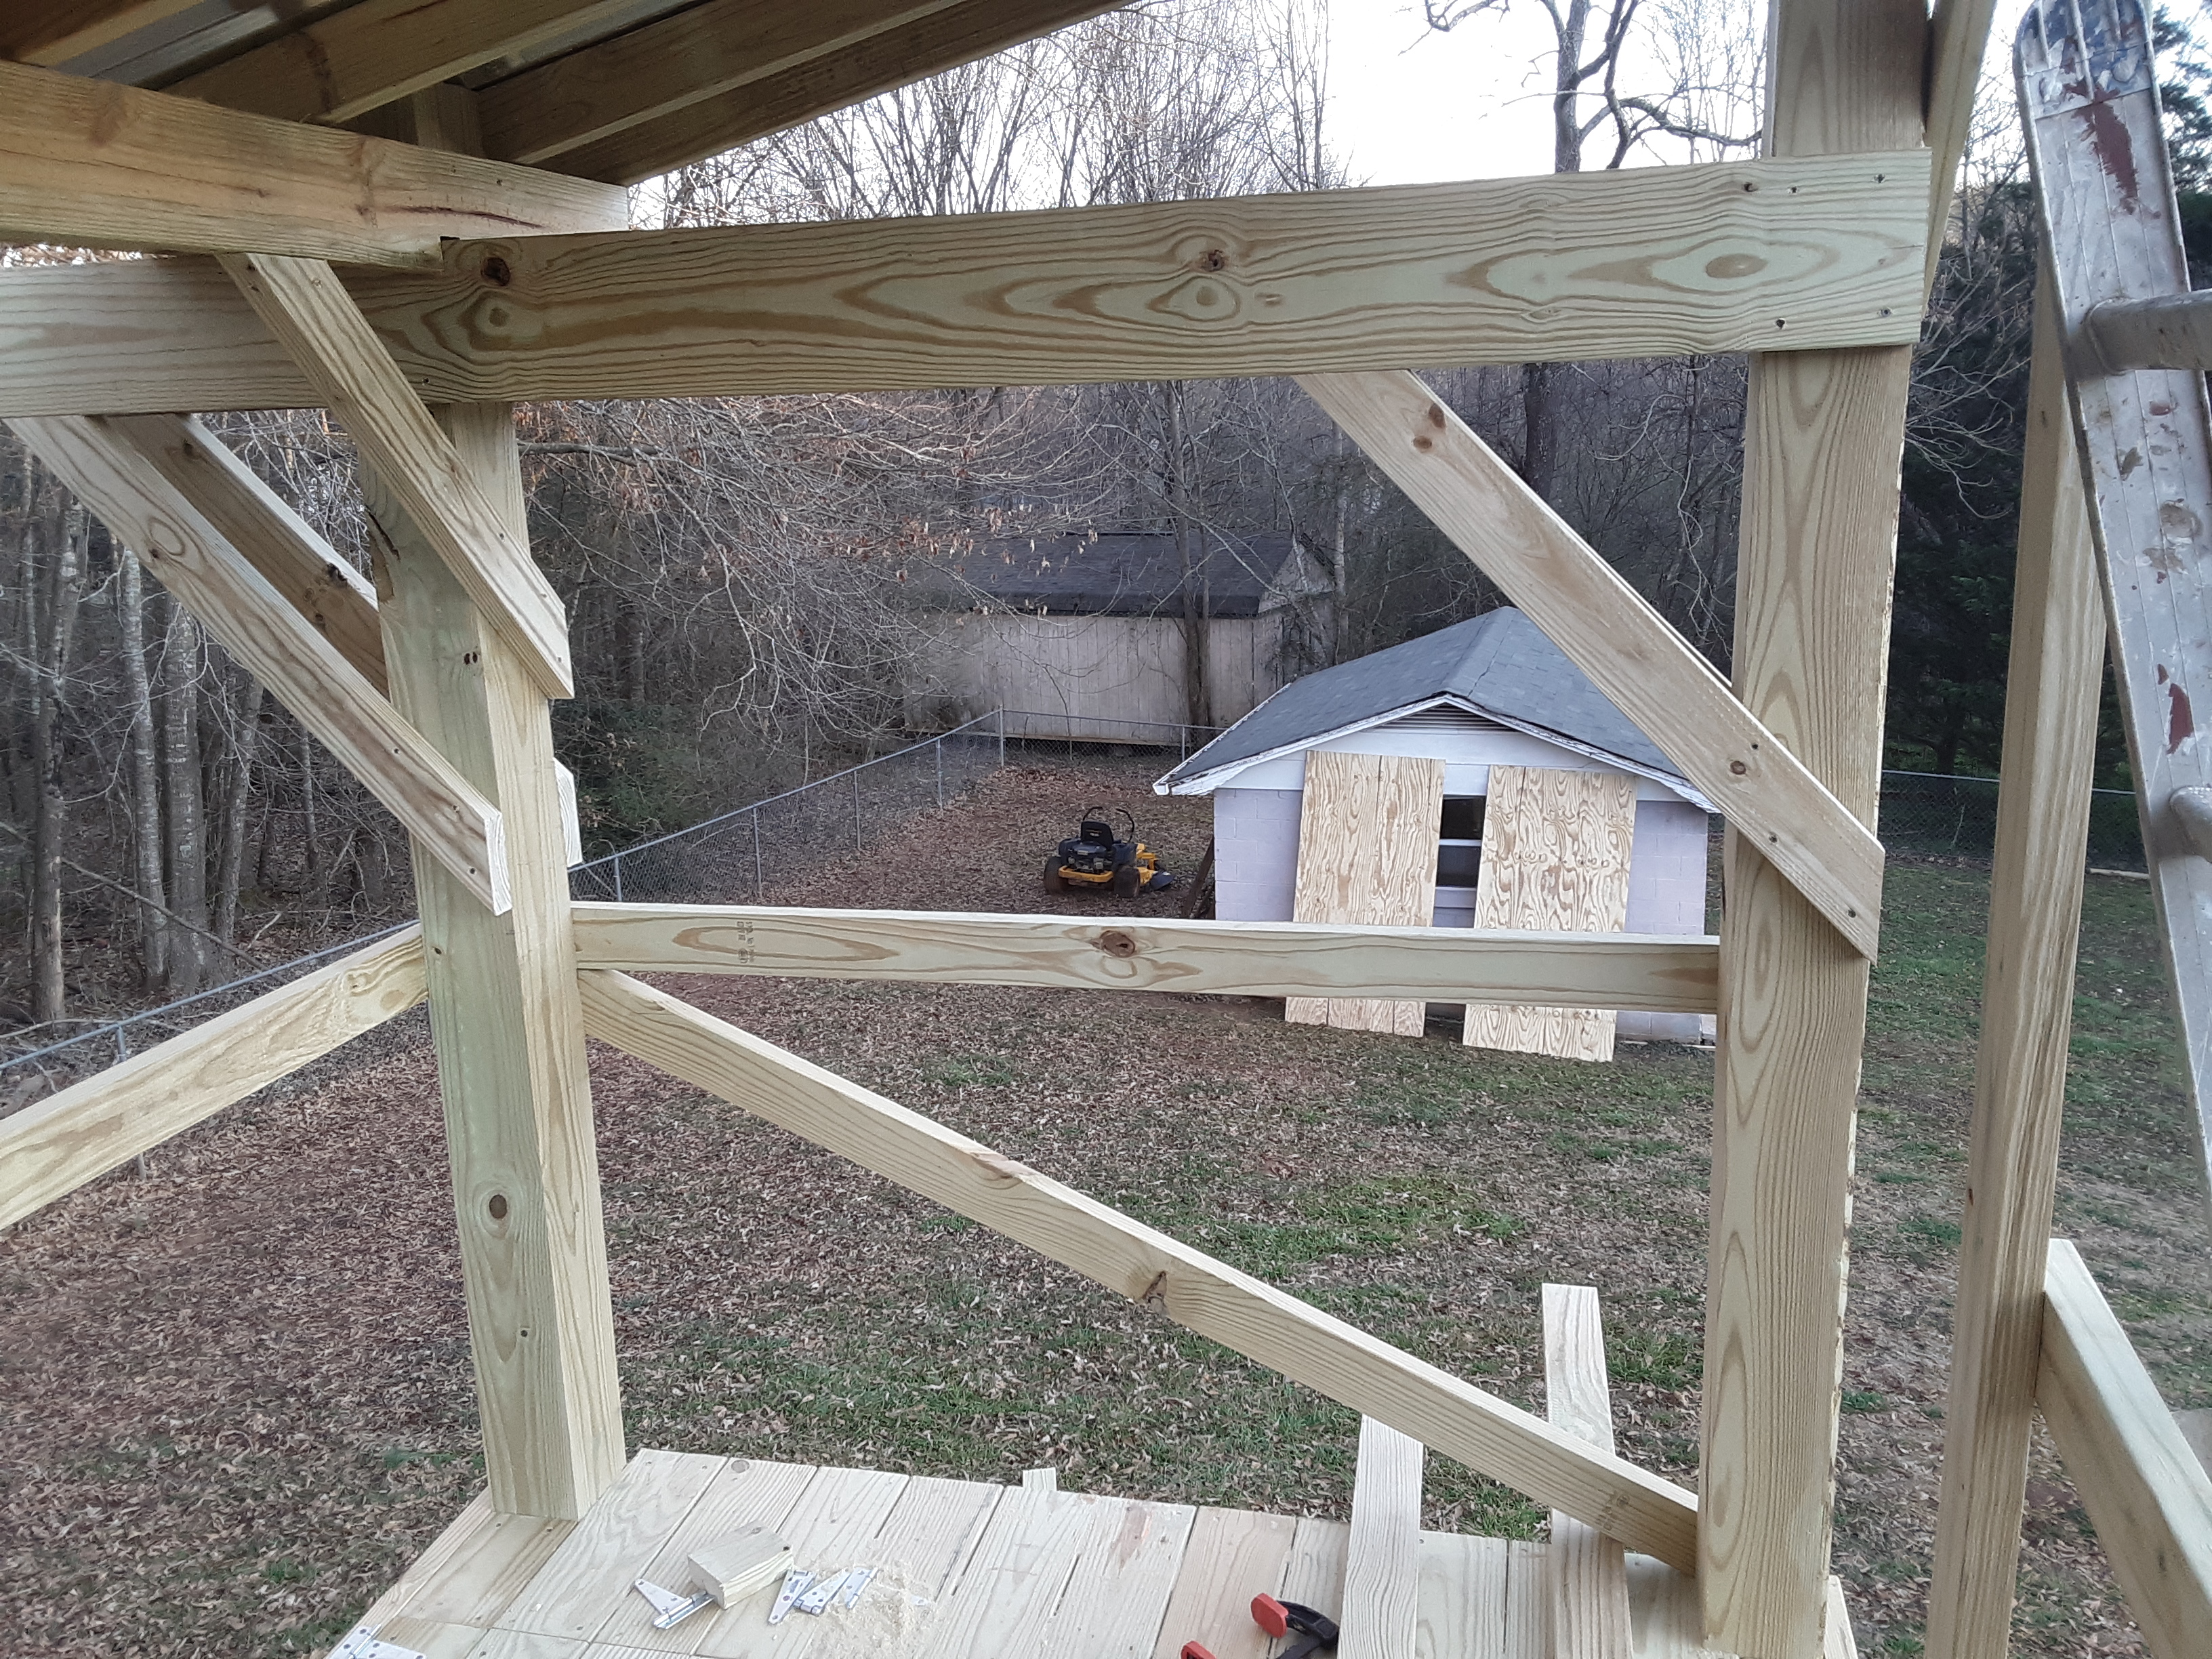
At about this point I lost track of what day I was on, since there were doctors’ appointments and multiple days of rain, short days and long days. I had nearly a whole day devoted to installing diagonals. The other part of that day saw the trapdoor go in. (1) I had to think like a kid when I designed this project. The trapdoor is an entrance from the top of the climbing wall. Think fun and adventure.
Can you guess where the zipline will attach? Diagonal City! Leaned against the shed are the 3/4″ treated plywood for the climbing wall.
We are along about day 8 so I will sign off for now. Another day I will show more progress on this cool playhouse. If you are interested in a playset, climbing wall, deck, and any number of other wood projects contact me through my facebook page, ww.facebook.com/decksandsuch
The trapdoor image appears upside down when I load it, even after flipping it in the file. What is that about?