Out of nothing? We create in the sense of making something not previously thought of or produced by man or else improving on previous creations. But we absolutely do not, nor can we, nor should we ever claim to create something out of nothing. And since we cannot even conceive of how that happens, many skeptics, even, if not especially educated ones, deny that it is possible and deny the creation of all things by God, even though Creation screams it. Logic also attests to its necessity since anything which has a beginning must have been created by something totally outside of itself, with sufficient power and intelligence to pull it off. Our God, as revealed in Scripture, is an infinite, immaterial spirit, all powerful, uncaused First Cause. Our ability to create in the sense of using existing materials to make something new is a testimony to our being made in the image of God (Zechariah 12:1), but we simply don’t speak to the emptiness, bringing about loveliness, order, information, and persistence of the material world.
The debate has too long raged over how many genders there be. God declares that he made them male and female (Genesis 1:27), end of discussion. If we don’t stand on the Word of God, we don’t stand at all, nor long will we stand. And consider the privileges of being created in His image. Dominion over the creatures and all of creation come first and most tangibly to our minds, but knowledge of self, God, and the world, and righteousness before God which was at first given and still available through His Son, are better and bigger.
All glory be to our Creator!
Question 13: What is the work of creation? Answer: The work of creation is God’s making all things [out] of nothing, by the word of his power and all very good. Genesis 1:1, 31; Hebrews 11:3; Exodus 20:11; Romans 4:17.
Question 14: How did God create man? Answer: God created man male and female, after his own image, in knowledge, righteousness, and holiness, with dominion over the creatures. Genesis 1:27-28; Colossians 3:10; Ephesians 4:24.
Soon after my last blog entry (Transitions), I had a realization about my thinking processes. See if this assertion rings true for you. I frequently think more clearly and find more insight into a subject if I am not directly focused on it. It seems that when I set to determine a course of action, develop and idea or conviction, or gain deeper understanding, I get bogged down in my thinking processes or research when I concentrate on it. If I, instead, look at it as if with peripheral vision, listening to others discuss the idea, having previously considered the subject, allowing rather than pushing my mental wheels to spin and weave a coherent answer or summary, I think and formulate more clearly. If you carefully read, I do not mean haphazardly blab opinionated platitudes, but rather having previously considered the subject and raised it to the light of Scripture. In fact, it is at the moment of so raising it by myself or others to the light of Scripture that I seem to make connections. And connections are the stuff of analysis leading to synthesis.
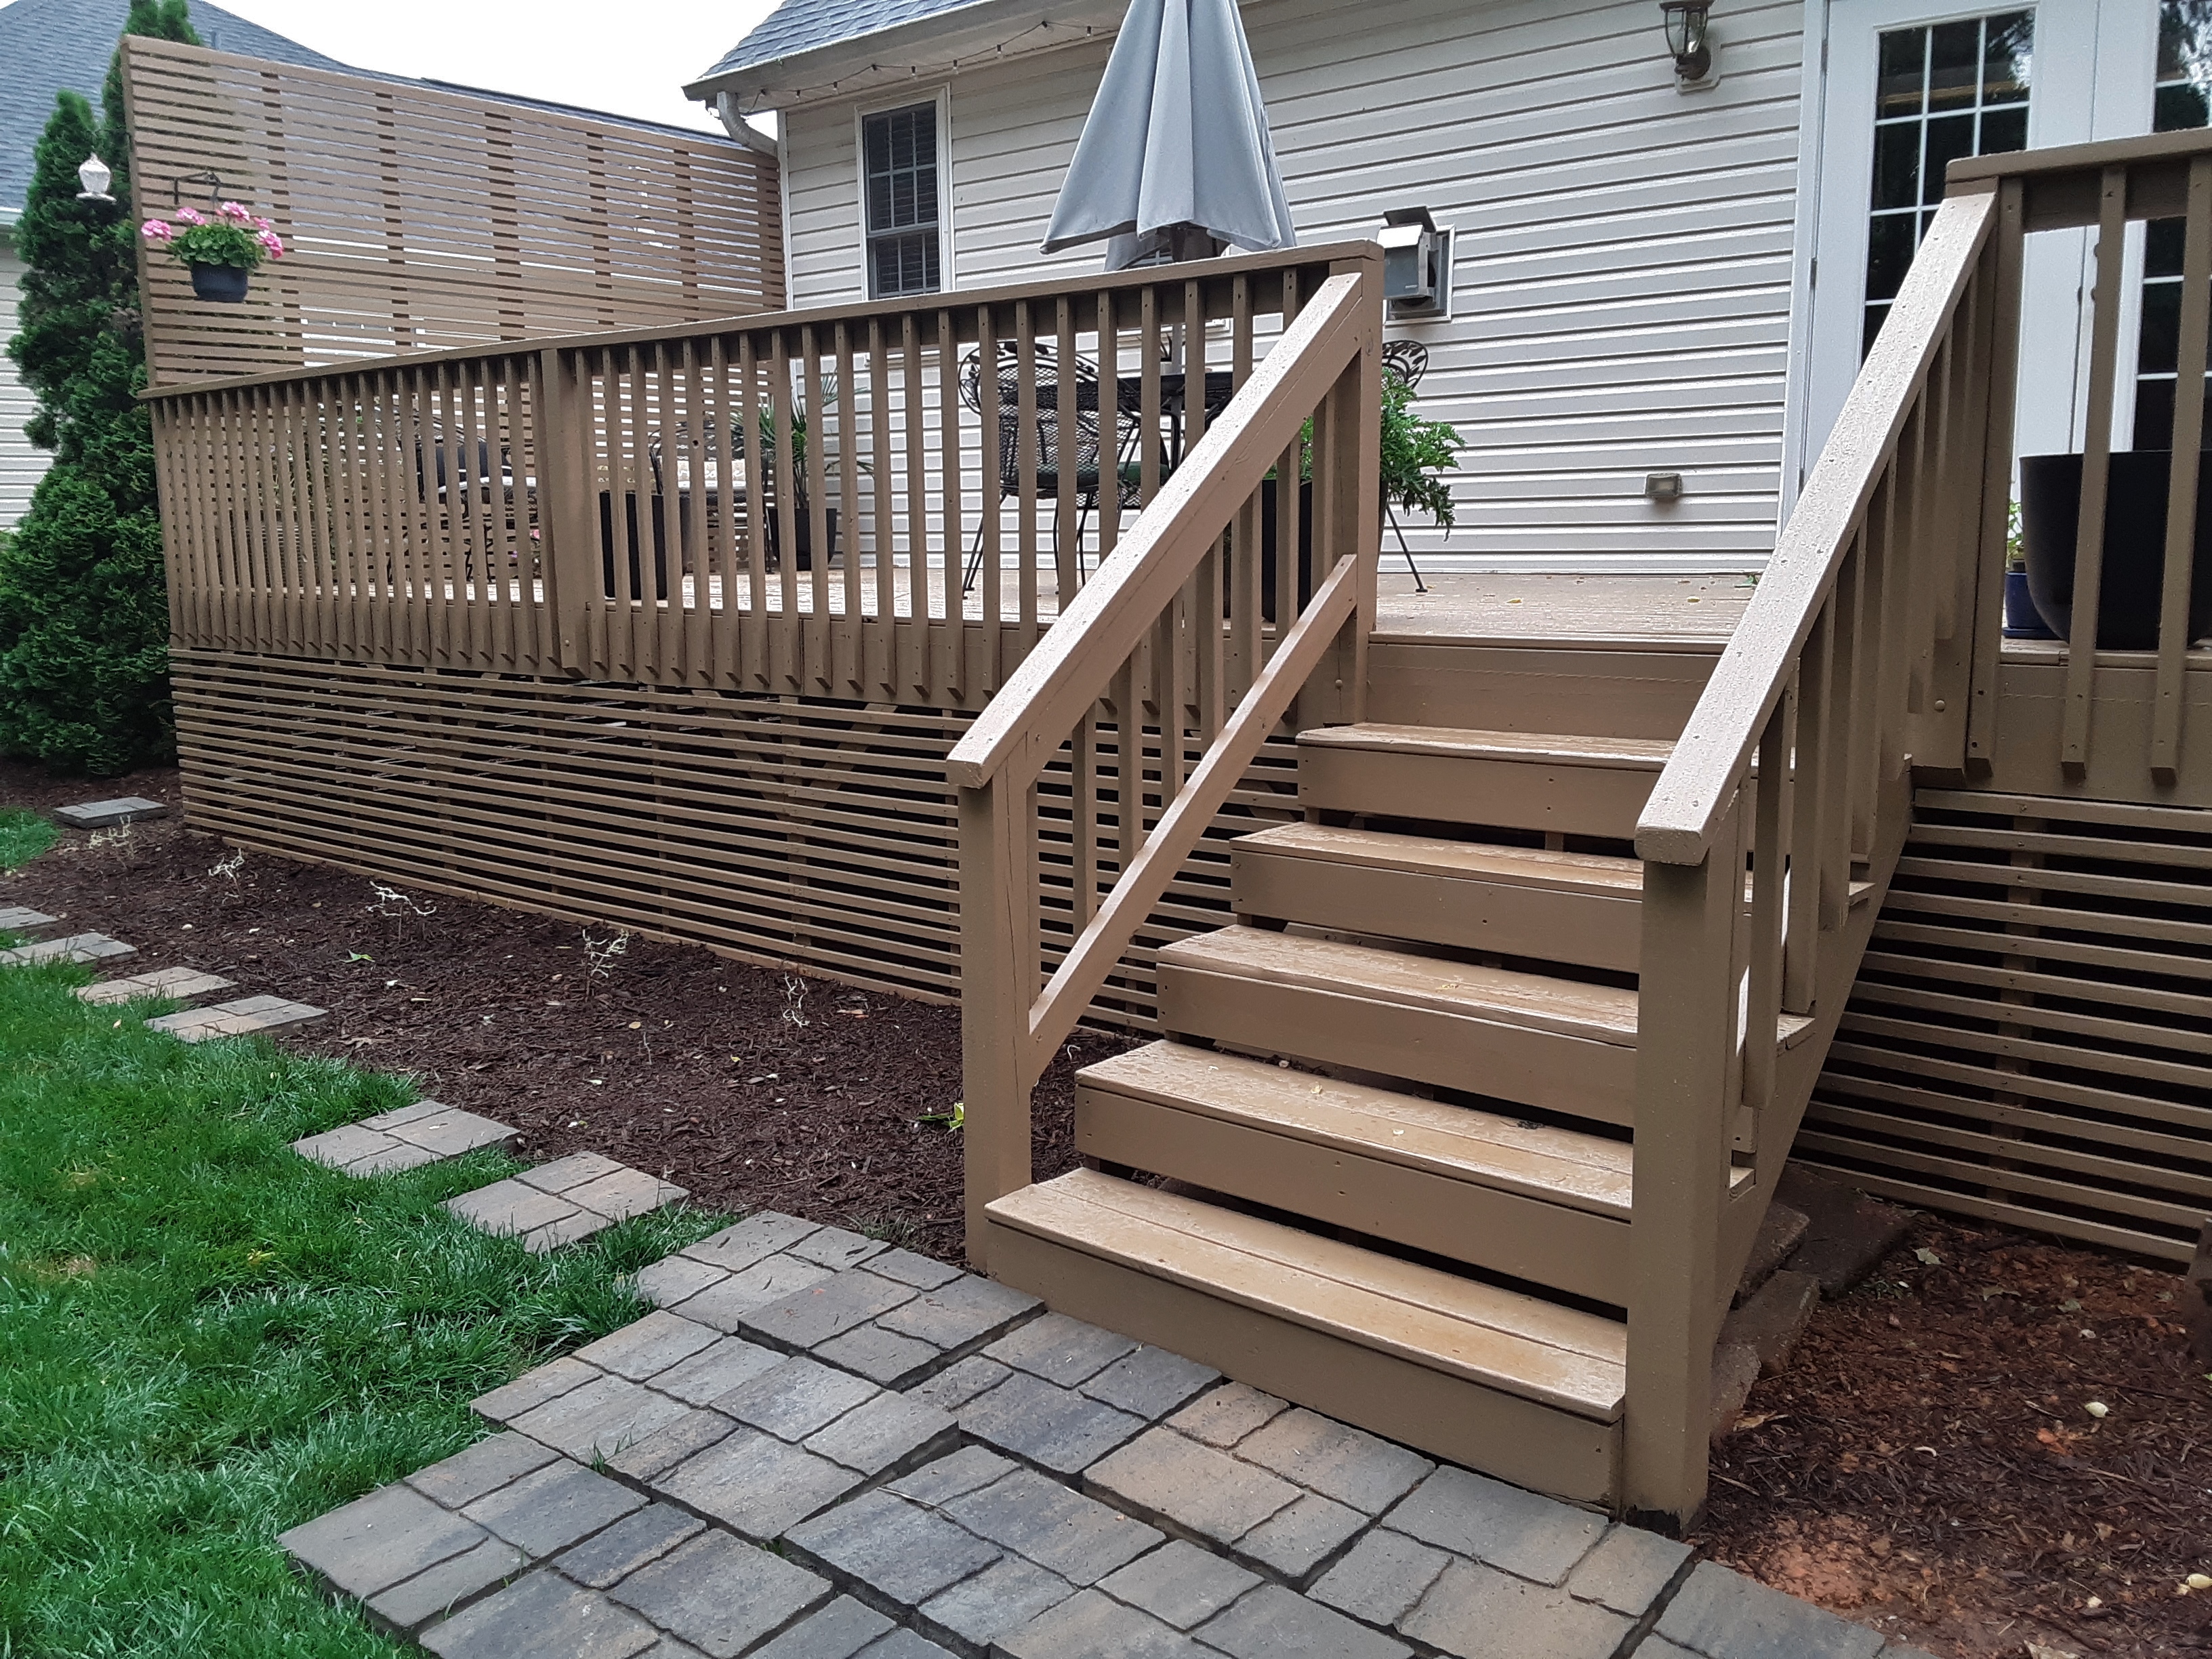
In this day of record high lumber prices, many people are opting for deck restoration rather than replacement. It is still not cheap since there may be nearly as much labor in restoring a deck as in building a new one. Following is an example of restoration and addition.
But how many boards do you replace? Is structural integrity the only criteria? Where does longevity or appearance or smoothness come into play and to what extent? Beyond structural integrity, the owner has preference and say that should be considered. For instance, this owner specified that the surface be smooth enough of children’s bare feet. But that still doesn’t answer how many boards should be replaced and how many should be sanded or screwed down better. How many boards would you replace in the following picture?
Notice also in the preceding picture that the deck was constructed with nails, and that via nail gun. The young girls of the family regularly pounded the nails down. Expansion and contraction and warping can work the nails out where they can snag a shoe sole or strip off some foot skin. For this reason, I prefer building decks with screws. I get it. A crew is supposed to put up a deck in a day and half and move on, but the result is not the best long-term. Screws cost more and definitely take longer to install, but the result is superior. The best new deck screws have star heads, called torx screws and the most common is T-25. They are so much easier to install than Philip’s Head screws because you don’t have to hold the tool perfectly perpendicular to the screw head and press down so hard. I added some additional screws to the deck and instructed the father to have the girls extract the nails as they come up so that he could replace them with screws that I left behind for that purpose.
The railing was particularly rough. In fact, all top surfaces are typically hard hit by the combination of UV radiation, heat, , heating-cooling cycles, moisture in terms of amount, wetting and drying, frost, and freeze-thaw cycles. For this reason I advise people to treat the top surfaces once a year to increase longevity of their deck. Railing balusters and undercarriage take by far the most time to stain and amount of stain, but the railing needs to be done initially for appearance and probably not more than once every 5-8 years afterwards depending on radiation and moisture exposure. Quick visual inspection will reveal if it needs to be done. Notice that I did not say anything about the undercarriage or joists. I’ve seen 20 year old decks that were not treated and are still sound with only the slightest deterioration between the decking boards. A deck that gets considerable leaf and litter fall is in more danger of joist deterioration, but that depends on how well the decking boards are maintenanced and if the gap between those boards is sufficient for litter to fall through. Boards placed to close together gather organic trash.
The cracks in the following post are not the biggest concern. The post was merely nailed on, and over time worked loose from people using it to steady their ascent and descent and temperature variations. For this reason I bolt railing posts on with a 3/8″ galvanized carriage bolt and screws. My father used to say, “Nothing holds like a nut and lockwasher.” Nails certainly do not. The staircase railing was shaky and that made the steps shaky. I ended up completely rebuilding the stair railing and more firmly attaching the stair stringers to the deck. (1)
I thought that it was quite creative to but a planter pot in the hole and under a table until the hole could be fixed.
The new railing looks nice, is smooth, and is well attached. It bothers me that people who stain decks are so sloppy. There are products that will clean stain off of vinyl siding without damaging it.
The new stair railing bottom posts are planted two feet in the ground, painted with tar, and concreted in. The railing is solid. The old balusters were fine and reusable, which saved more cost in re-cutting than materials.
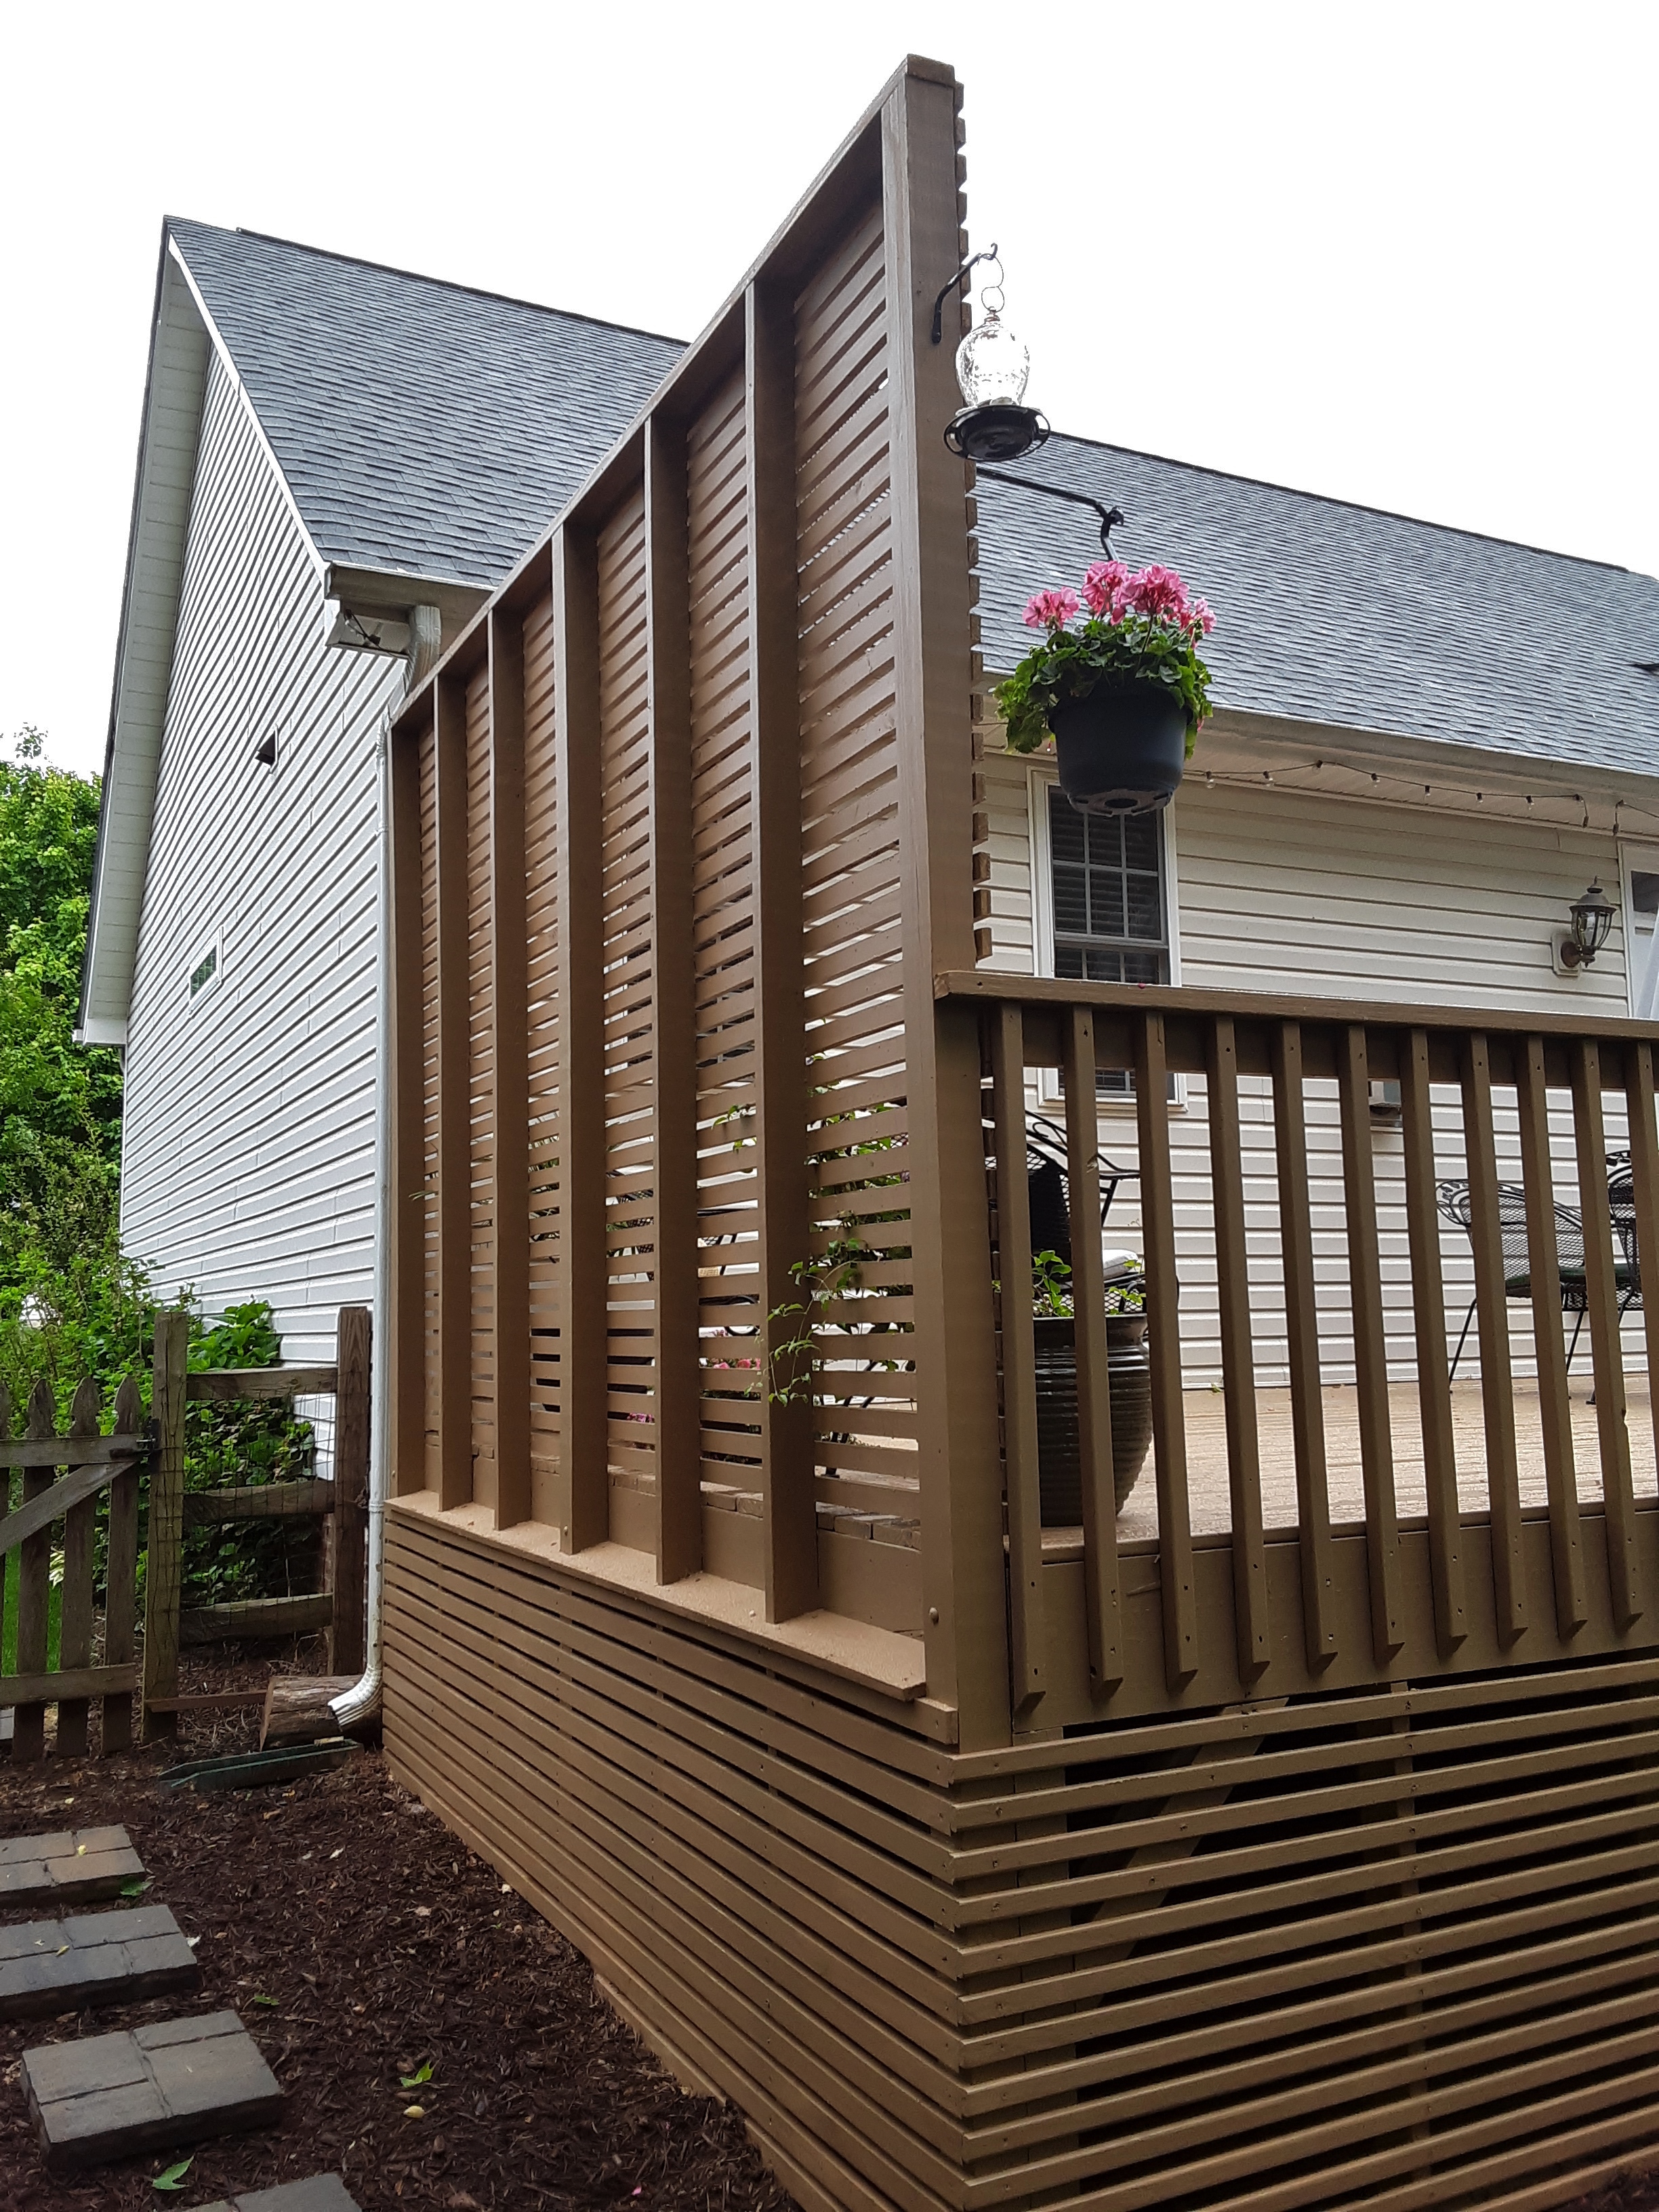
The owners also wanted a privacy fence and specified the height. I set three 4 x 4’s in concrete and bolted them to the deck. The slat boards were 1 x 4’s ripped on a table saw, meaning they were 1 11/16″ wide. (2) I might have built with wider boards but the owner had a certain aesthetic in mind. Notice additionally that I have begun the framing for the skirt to keep the dog and other critters out.
Yes, there is a 2 x 4 missing in the privacy fence. I had to take a second run to the lumber yard for a few missing boards. It is nearly impossible to go just once, especially on a repair job where new realizations of deterioration become evident. I put it in later, but didn’t want to stop work late in the day for a run to the lumber yard when I was making good progress. Also, this is the only picture where you can glance the result of the floor sander I rented.
Following are the results of the repair. Given time restraints I did not stain the balusters or skirt. The owners did. I like their taste in decor and stain color. To save the lawn and prevent wet or muddy feet, they also added stepping stones.
In two respects I had to be creative concerning the skirting. One was the transition from privacy fence to skirt. I opted for a water shedding wood ‘shingle’ that encased the uprights. The other is not pictured, a screwed in access ‘gate’ at the other end of the deck. If I hadn’t told you, you would never know it is there from looking. You never know when someone might throw or drop any number of things that go through the slats and need to be retrieved or some maintenance needed on the house that requires access under the deck.
Some of these old boards were installed incorrectly, crown down, so that water gathers on the deck. This is major reason to re-stain the deck yearly.
This flowering bush unknown to me is a great way to decorate in front of a garbage can fence. Functionality is great, but appearance is inviting. Extend this idea to God’s Creation. Ecologically self-replicating and self-cleaning and simultaneously visually inspiring and health-giving only begins to describe the depth of God’s gift to us of functionality and beauty in nature for which we should regularly give thanks and praise. Decks and such are only a vague reflection of that creativity.
A 1 x 4 is actually 3 1/2″ wide (dressed lumber). If you subtract the 1/8″ of sawdust made by the blade width and divide by 2, you get 1 11/16″. The lumber yard did not have the 1 x 2 inch stock and ripping produces straighter boards anyway. Being from out of town on this job, I asked the owner if a friend had a table saw that I could borrow. A brother in Christ was glad to assist.
In the last blog entry, “Something New“, I began revealing my designed big playset coming together. Now we begin to get past mere structure and on to how it will be used.
There are three doors into the playhouse level. These are for entrance and exit but also to act as railing should S and her friends want to spend the night aloft.
The climbing net will go here. The gate doubles as a table in the playhouse.
On a rainy, cold day I worked in the block shed you see in the pictures. I drilled holes and mounted T-nuts, installed 2 x 4 supports and mounted hinges on the treated plywood on my saw horses. A few days later I mounted the wall onto the footboard. The railing was a whole day job, too.
T-nuts allow moving the climbing holds around for new climbs and no boredom.
I designed the climbing wall to meet the owner’s requirement that the playhouse “grow with her.” I told her that meant that I needed to build a serious climbing wall. To wit I installed a winch in order to lower for overhanging climbs out to 40 degrees above horizontal.
Since the winch cable is only one mounting point, I installed to latches, one on each side to stabilize and strengthen the wall when slanted.
You can see the zipline is up and staining has begun. There are so many surfaces and angles that the staining took about 2 1/2 days. The A-frame for the rings and swings is in place as well.
The 4 x 6 x 20 treated beam was special order and took one month to arrive. It came straight from the sawmill they said. Notice the smooth bar in the A-frame. It is for spinning around on.
Picking out and ordering the climbing holds proved a challenge for the owner, so those came finally.
Soon I will reveal the finished product and the plans and how they changed throughout the project and why. It was slow with various delays, but it came together nicely.
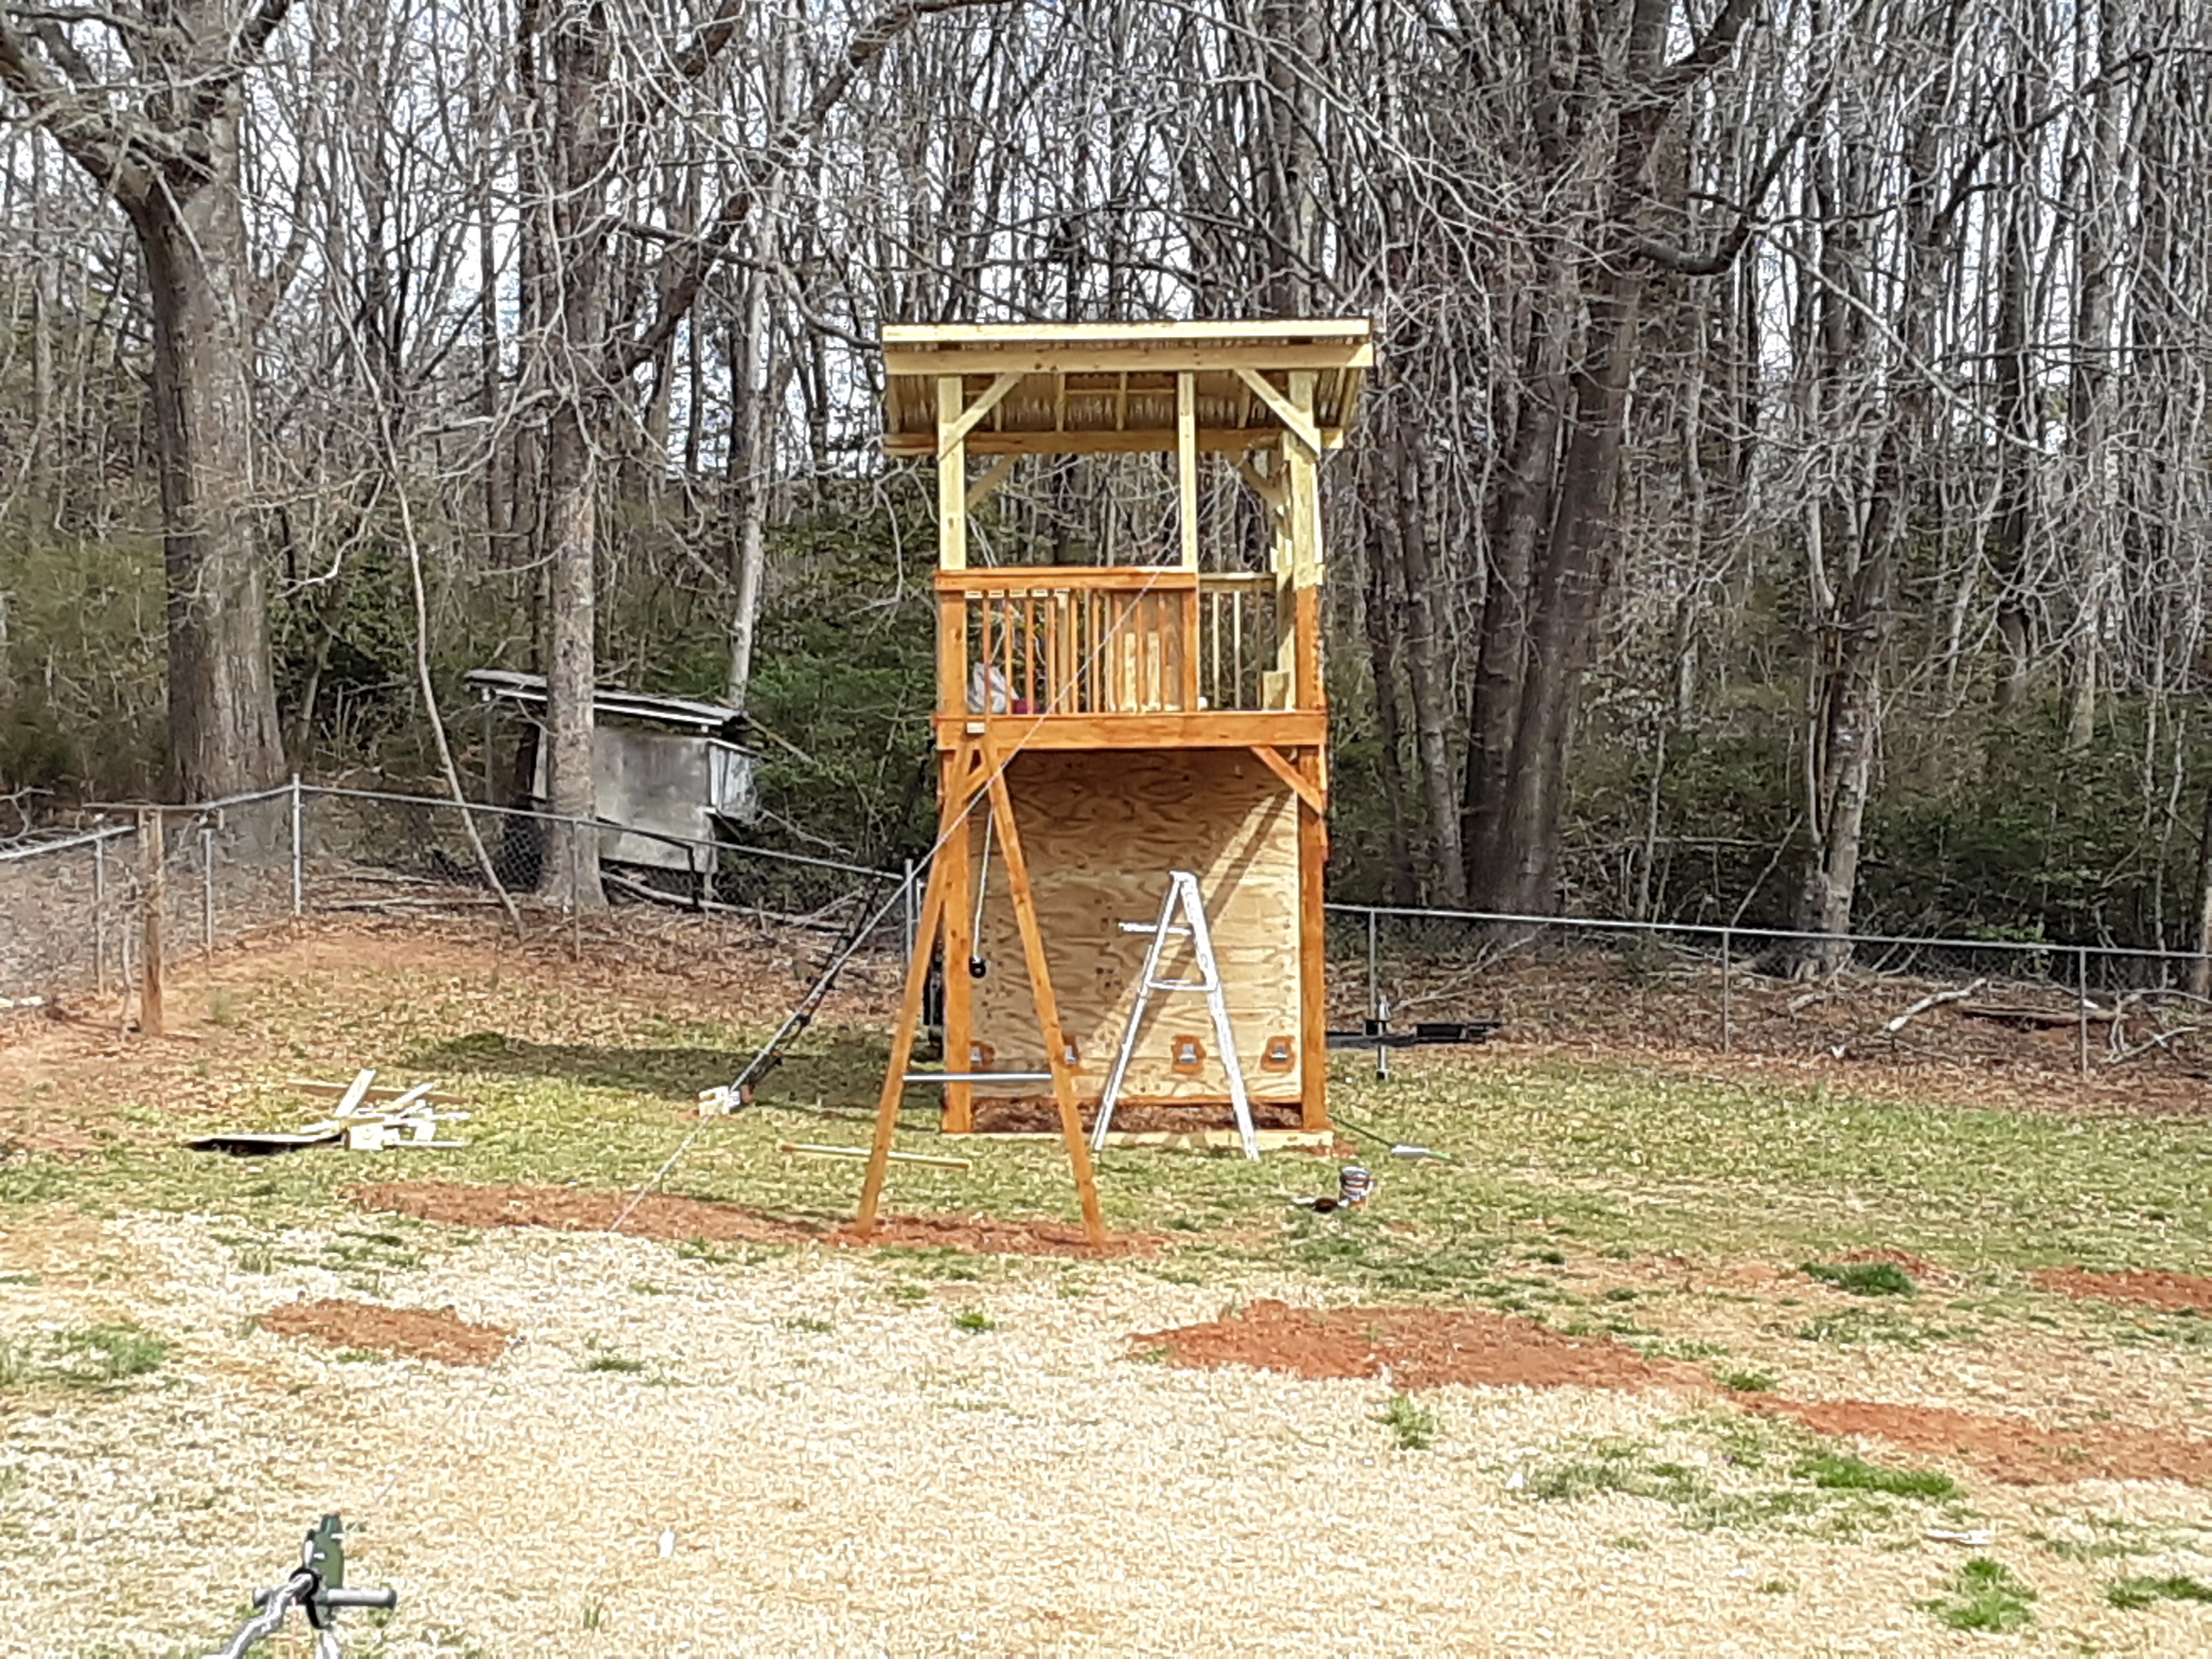
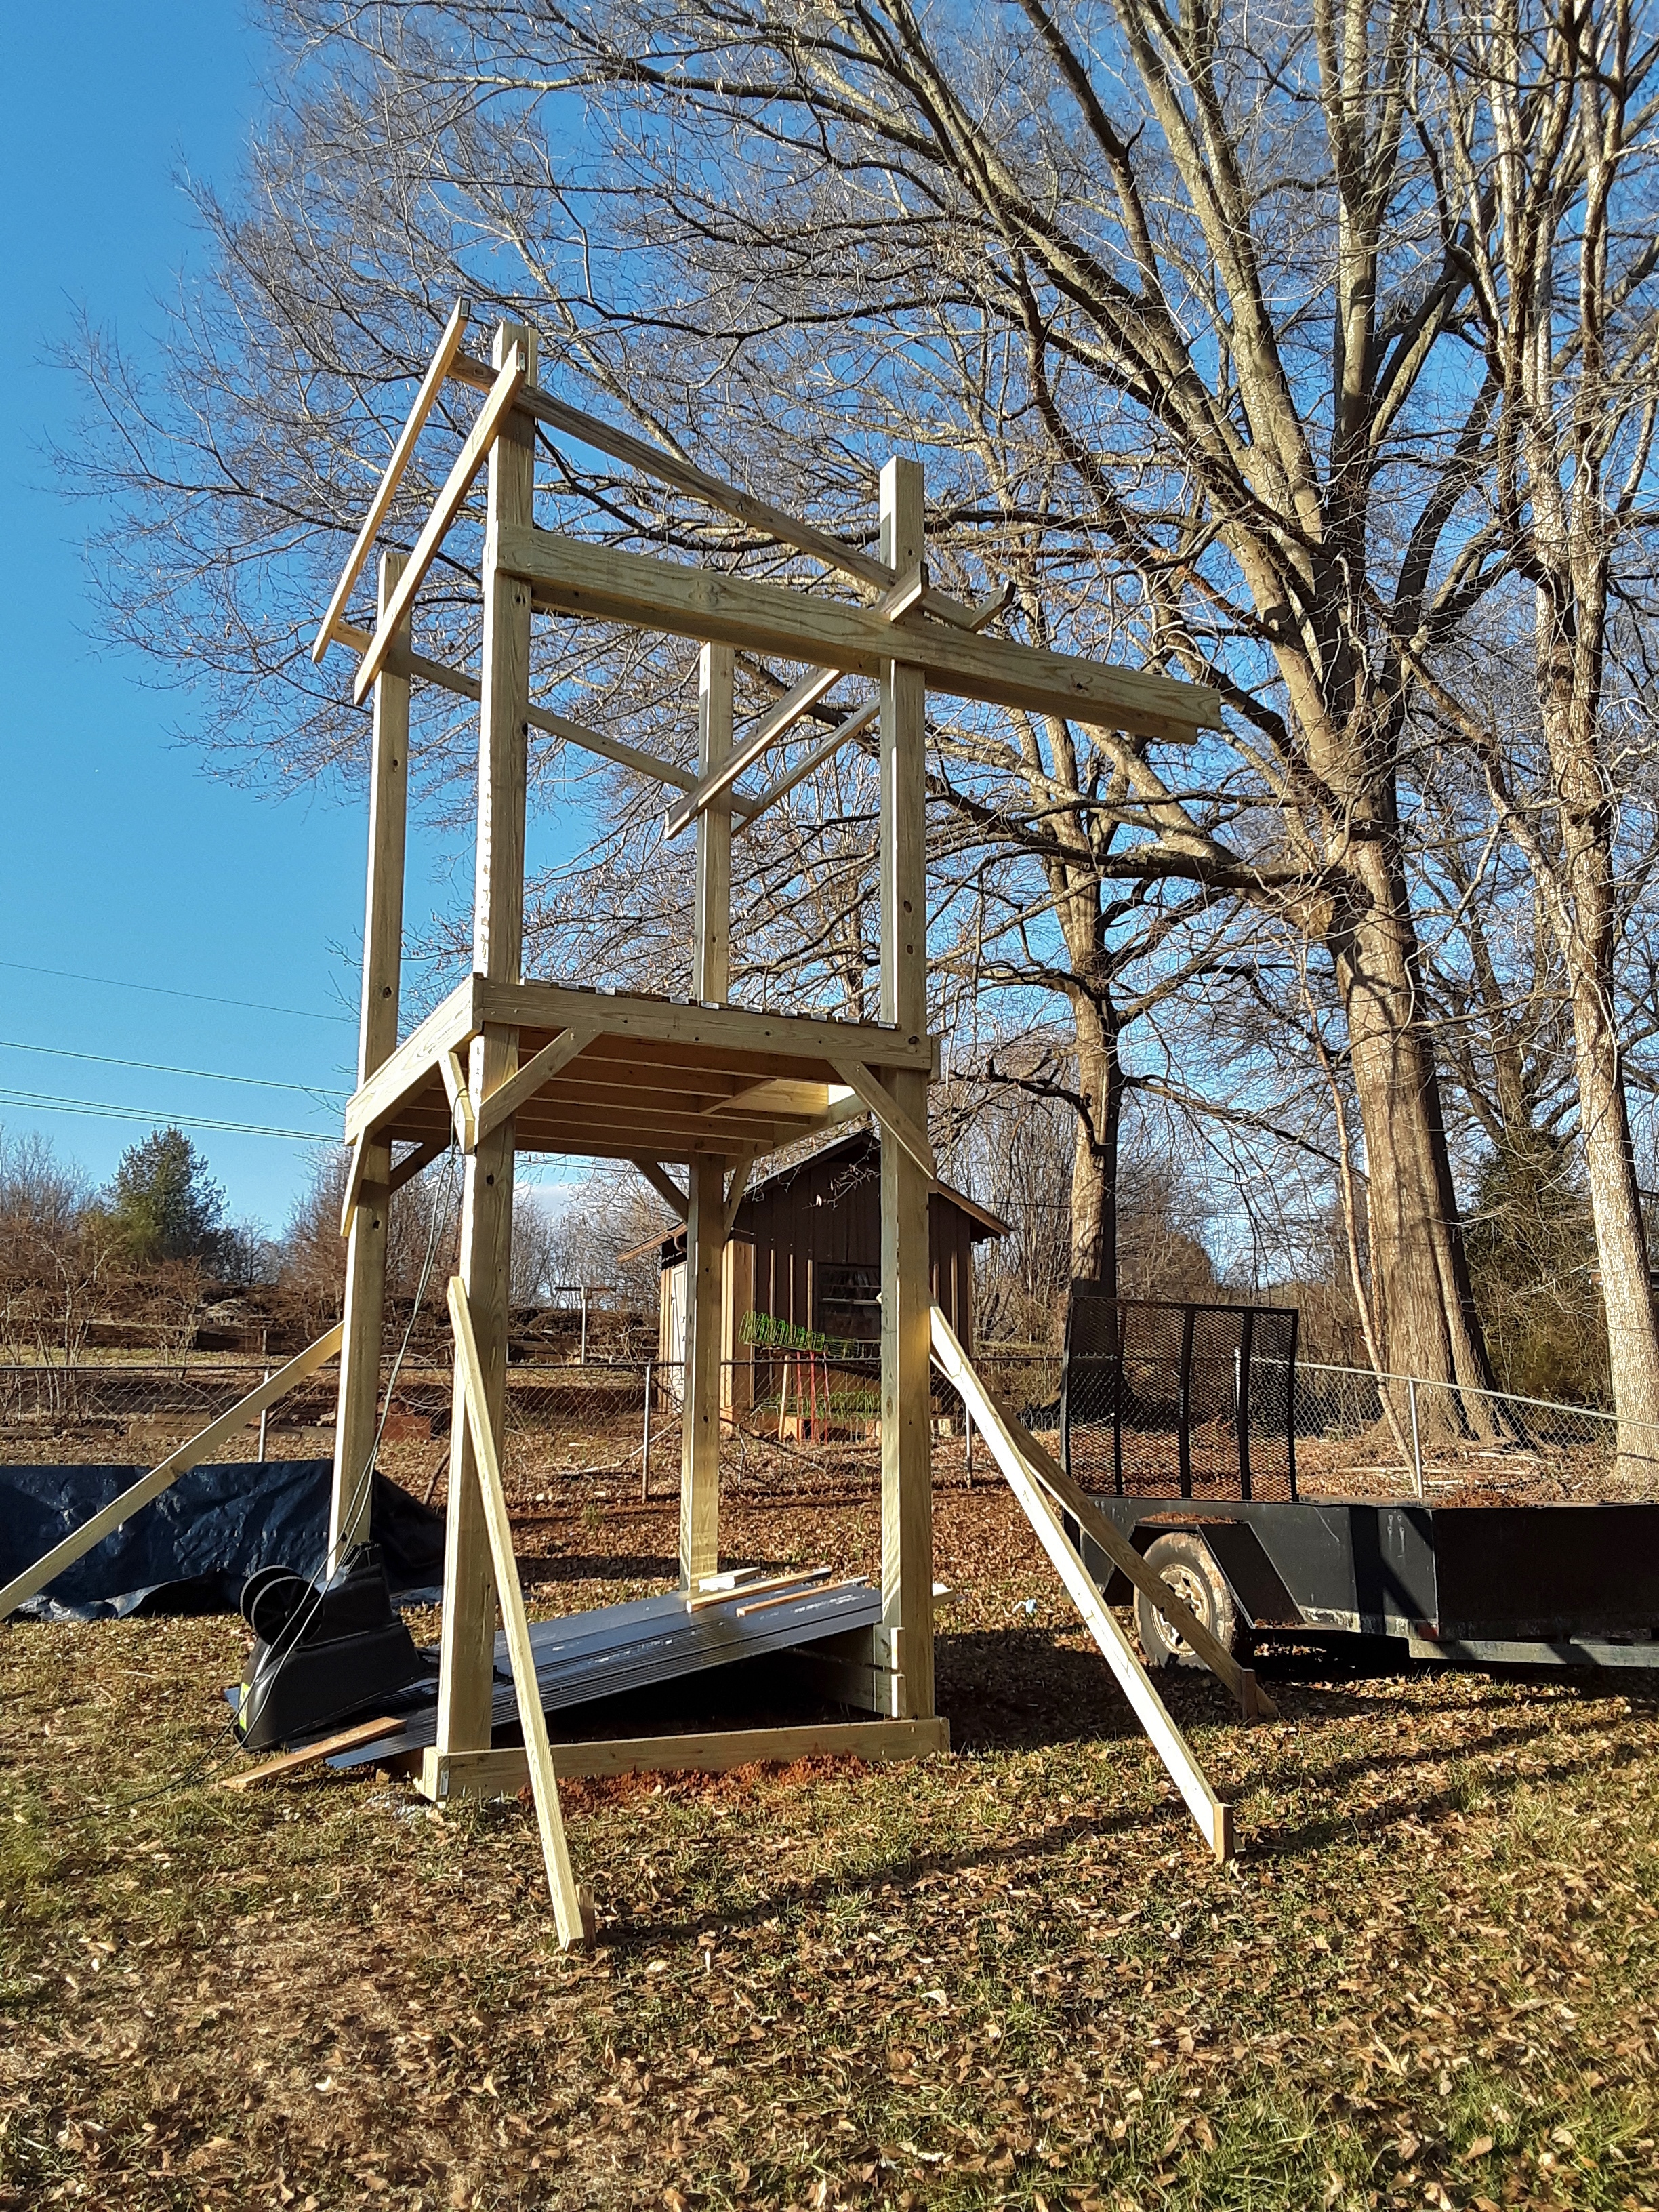
I just finished a large project that took several months. Other responsibilities, weather, special order lumber, and specialty hardware delayed progress but did not prevent completion. It was an intense and satisfying project. Follow me as I show you the progress on S’s new playset.
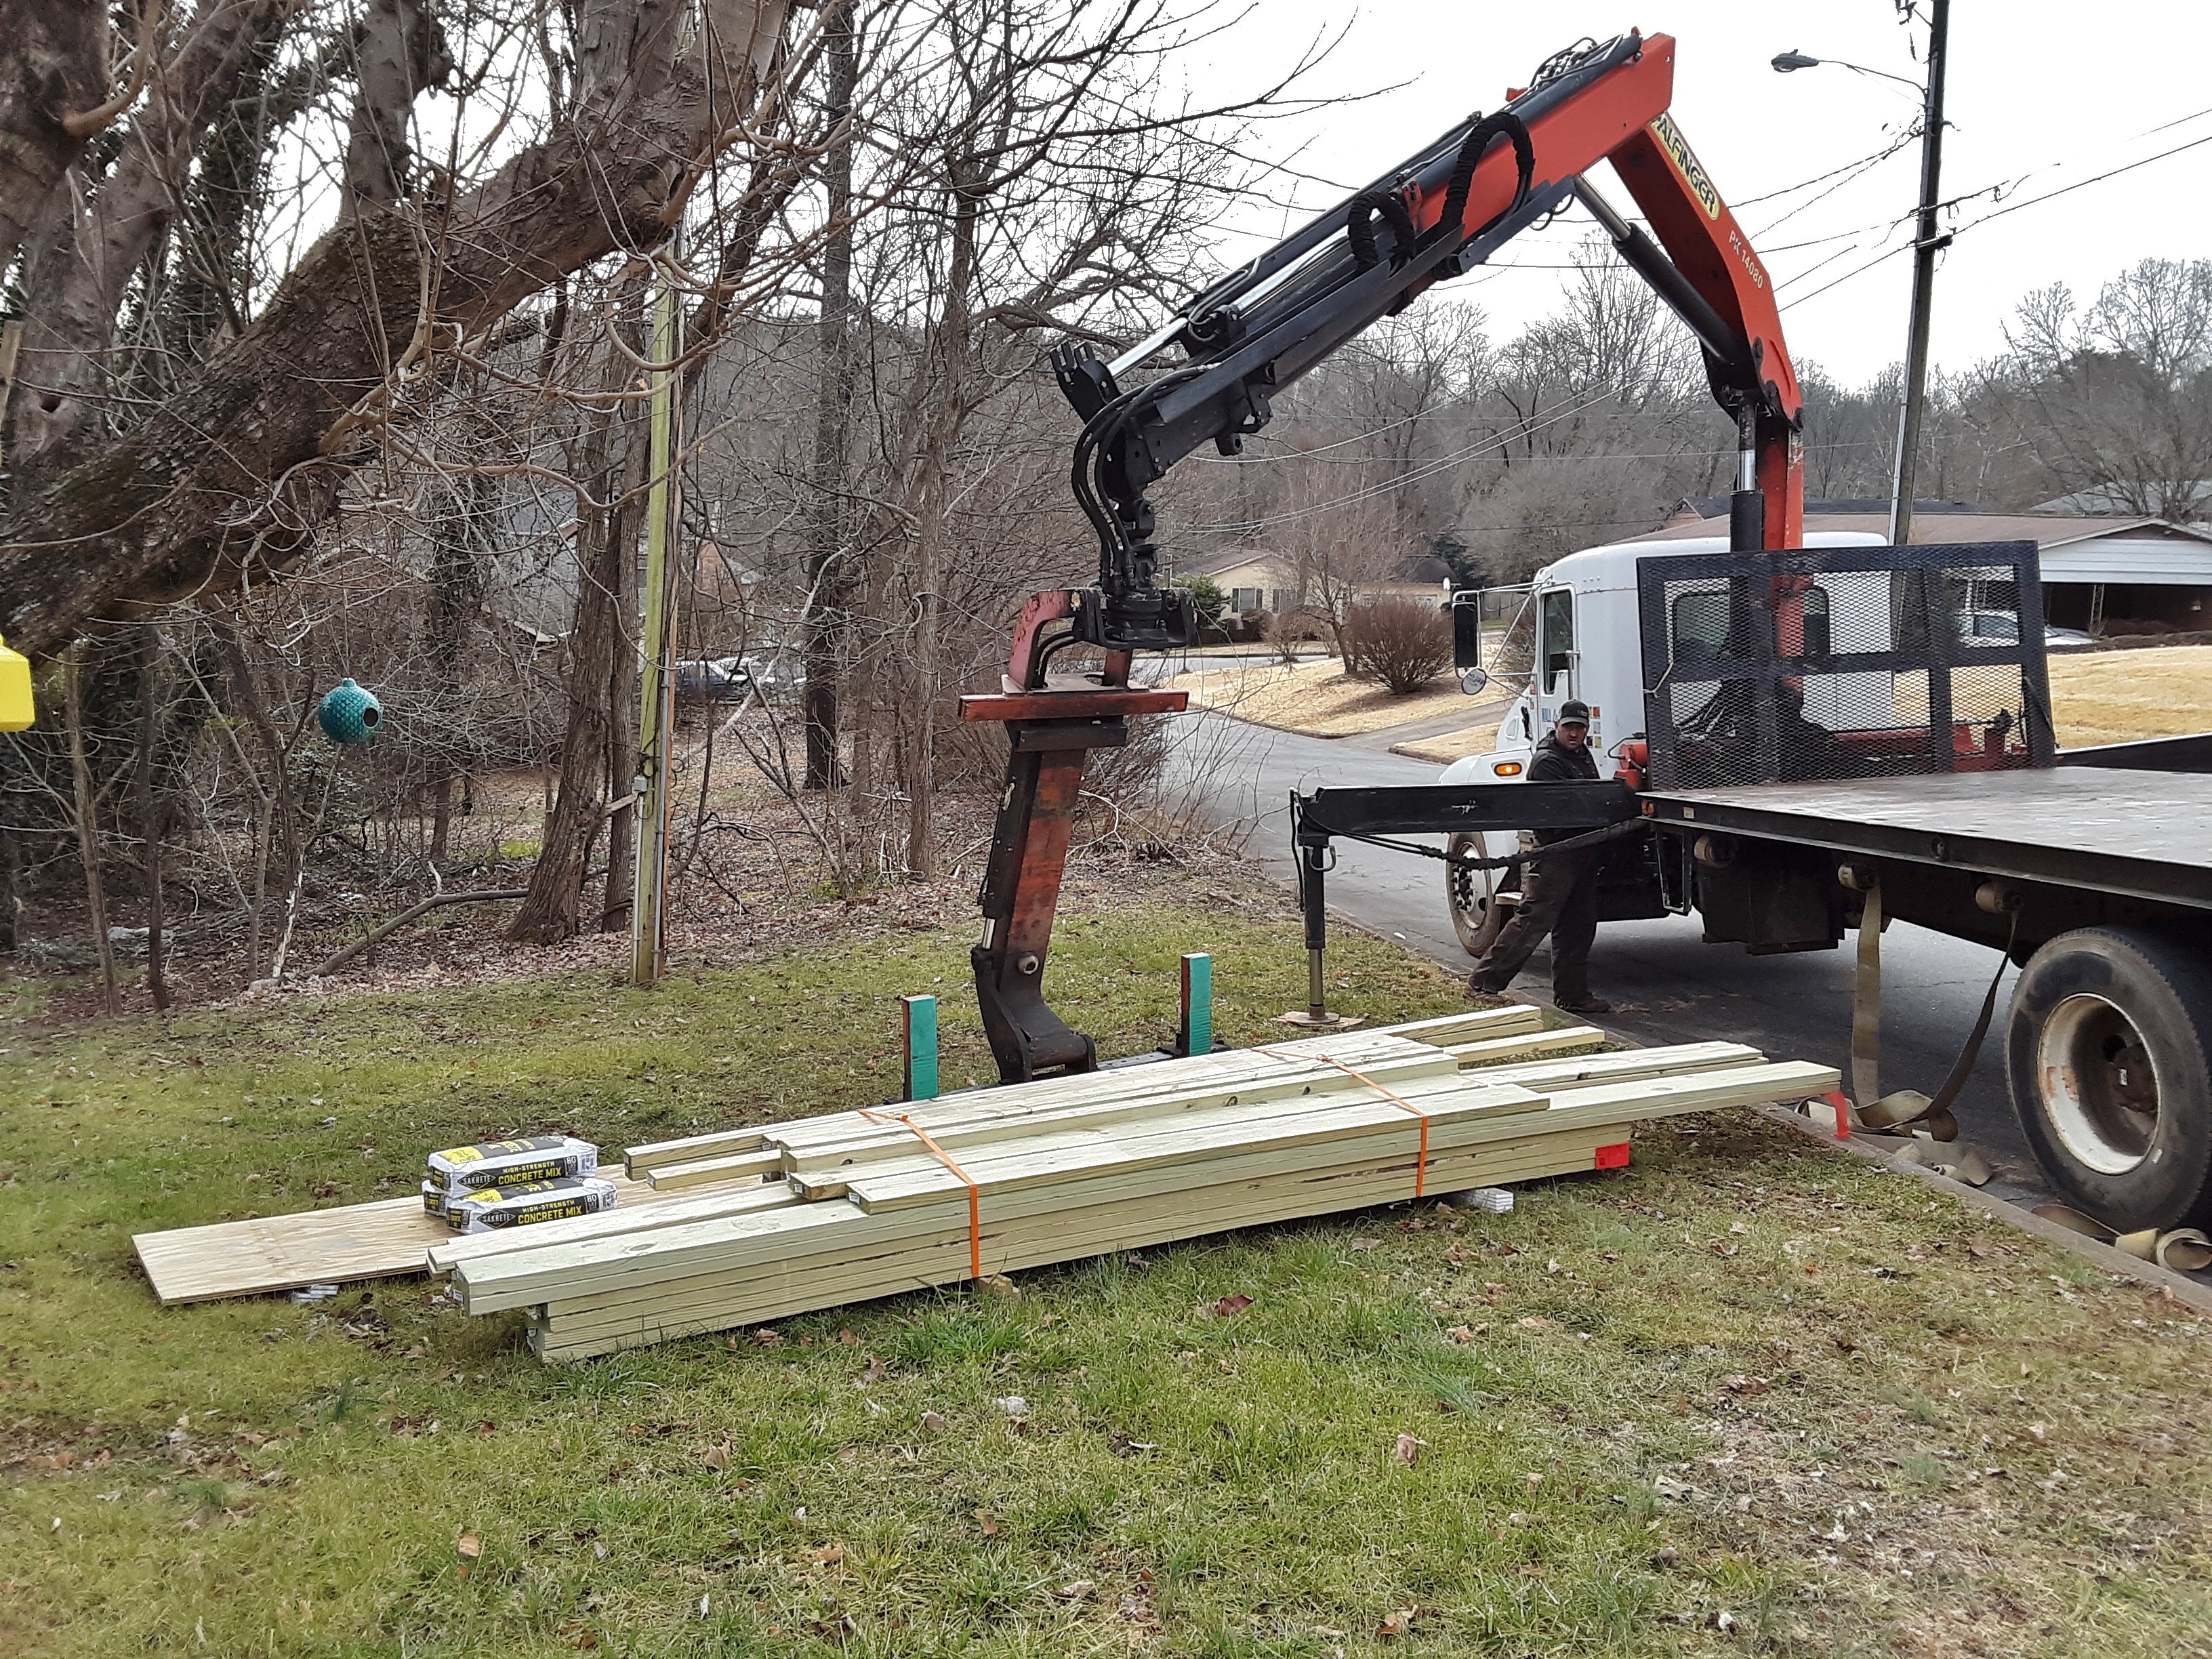
How do you haul and install 6 x 6 x 20 poles? Picking them up saved time in getting them and money for the customer.
I had help getting them in the hand dug 3′ deep holes.
The homeowner was amazed.
Next, the local lumber company delivered the majority of the lumber.
Because the winter was very wet, the truck could not bring it to the backyard, even though there was access. I hauled two or three boards at a time on my shoulders the next day.
Even though this is in the city, a vacant lot behind the worksite conceals a family of 7 deer. There are some very nice trees and thick underbrush to conceal the Whitetails.
Day 2 involved more digging and considerable plumbing (not water, but vertical with the world) and bracing.
My two helpers were always ready and waiting when I arrived, regardless of time of day or weather.
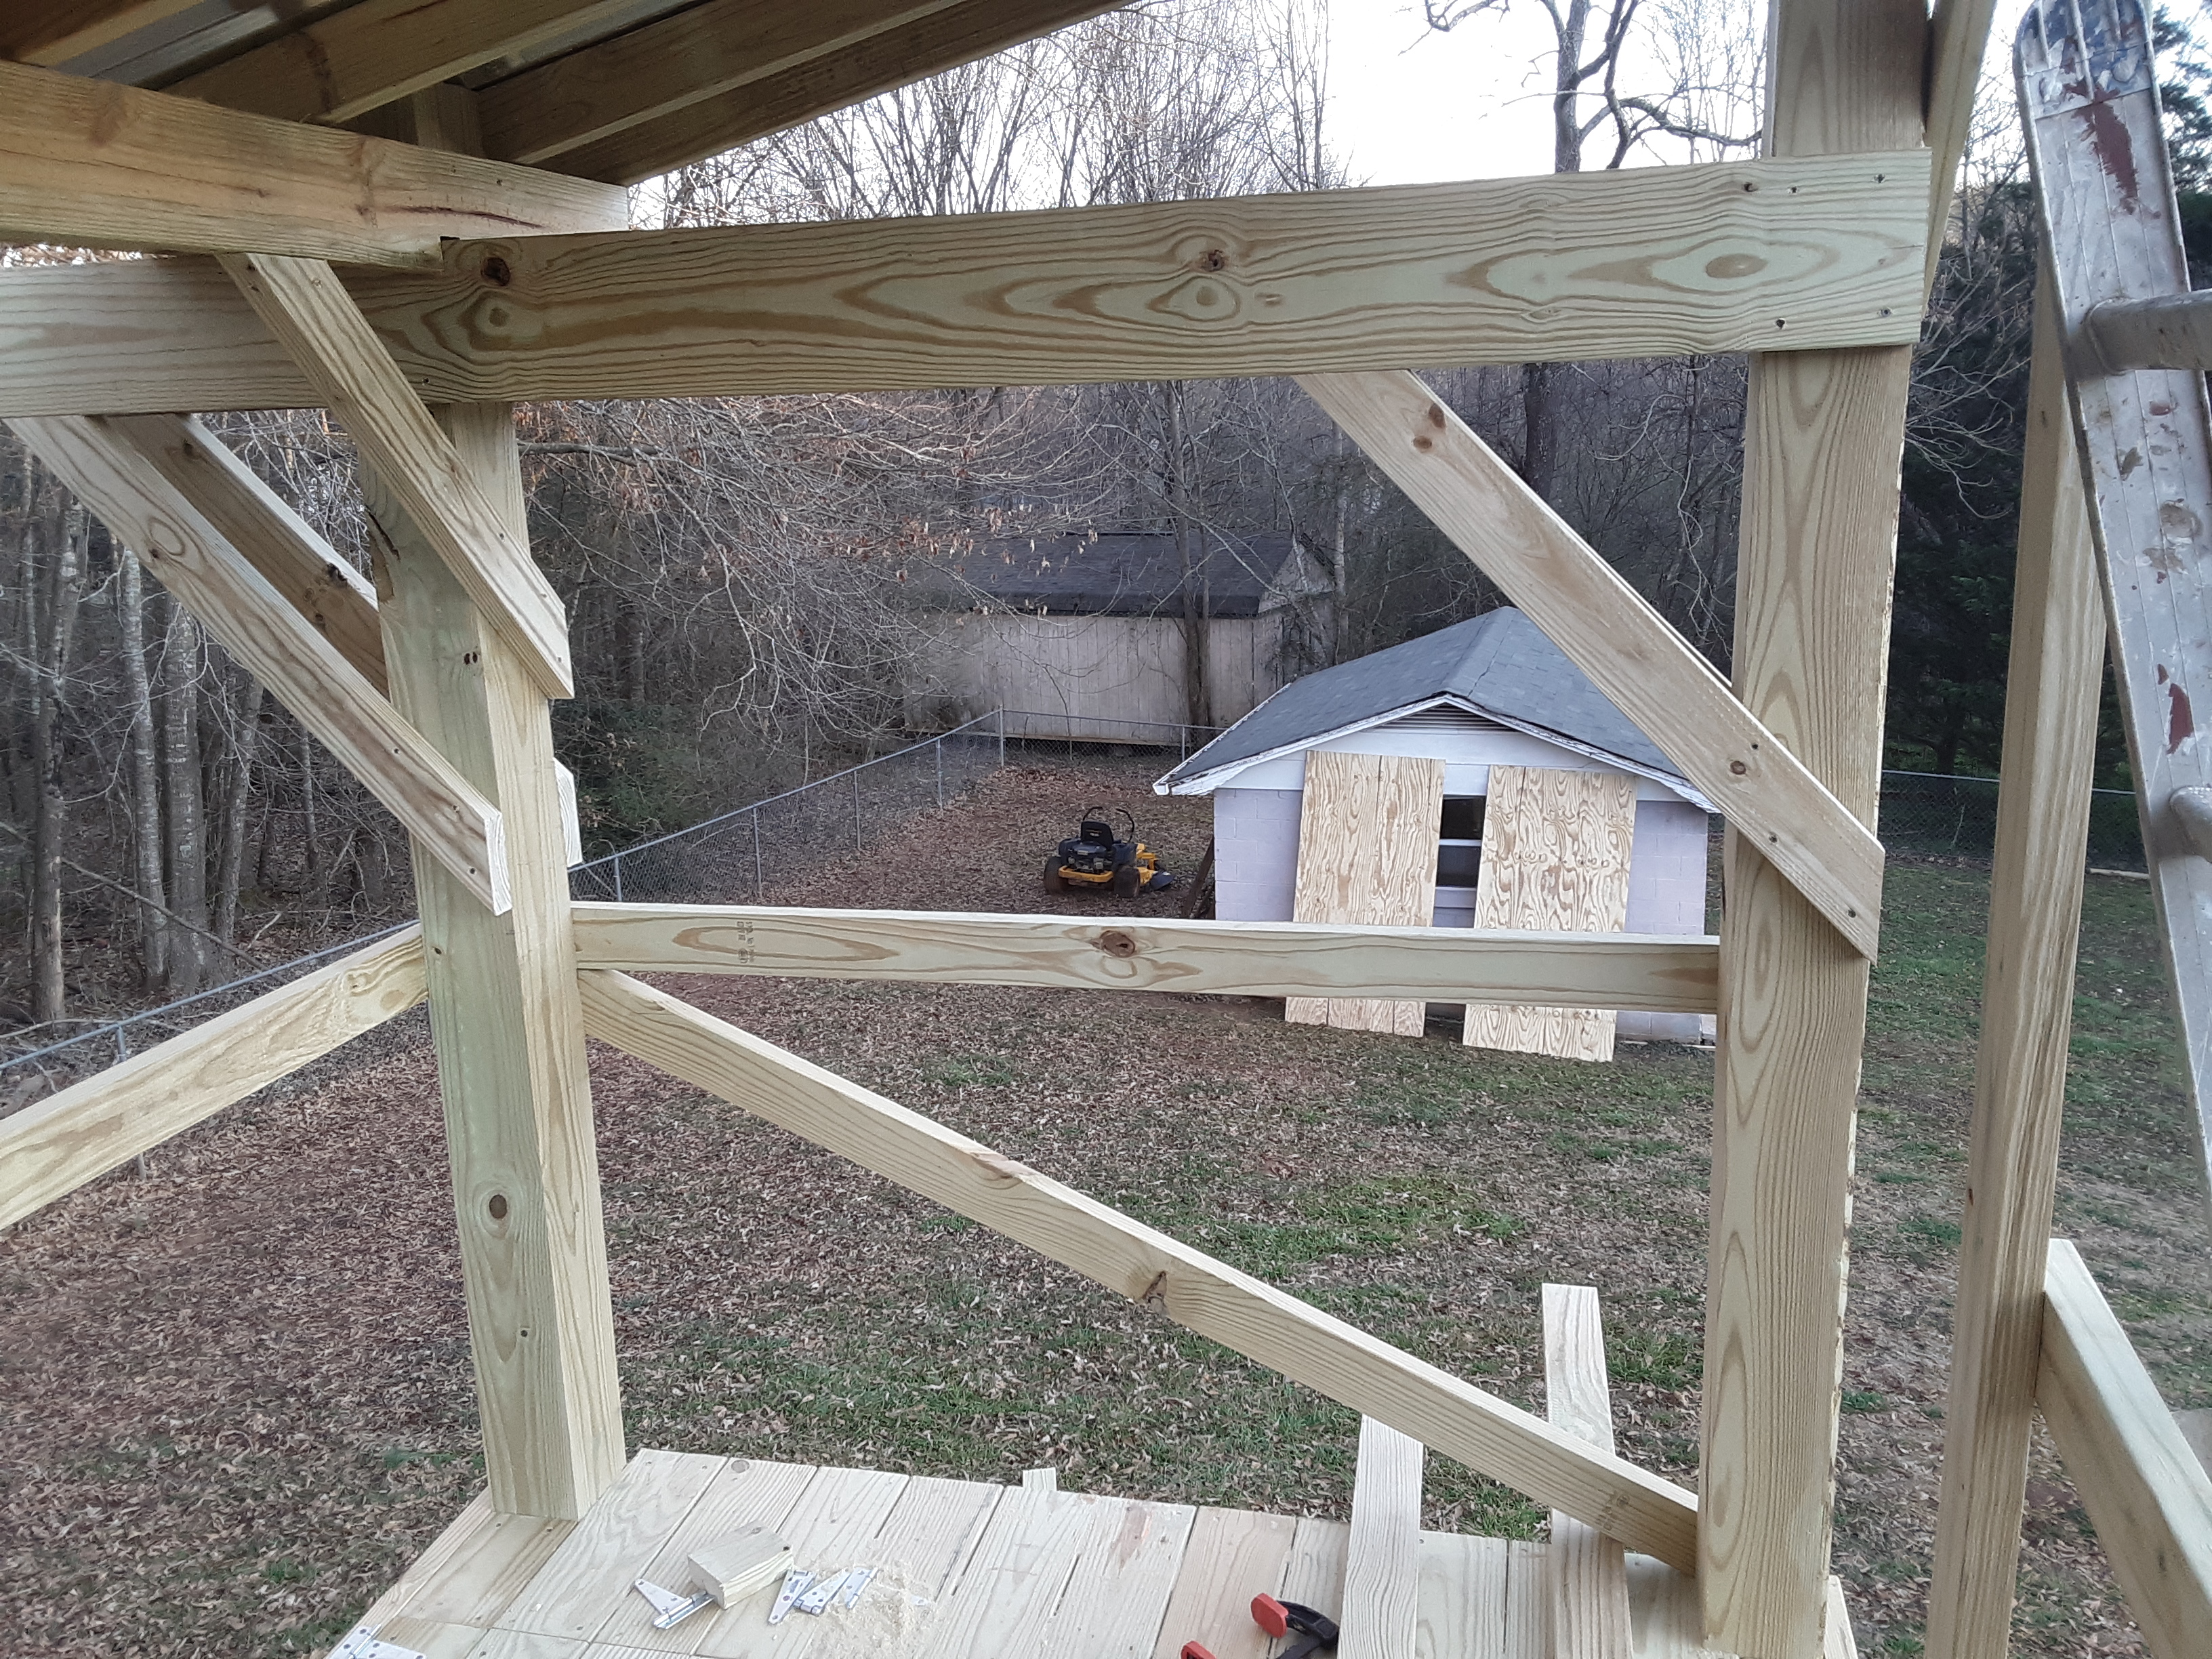
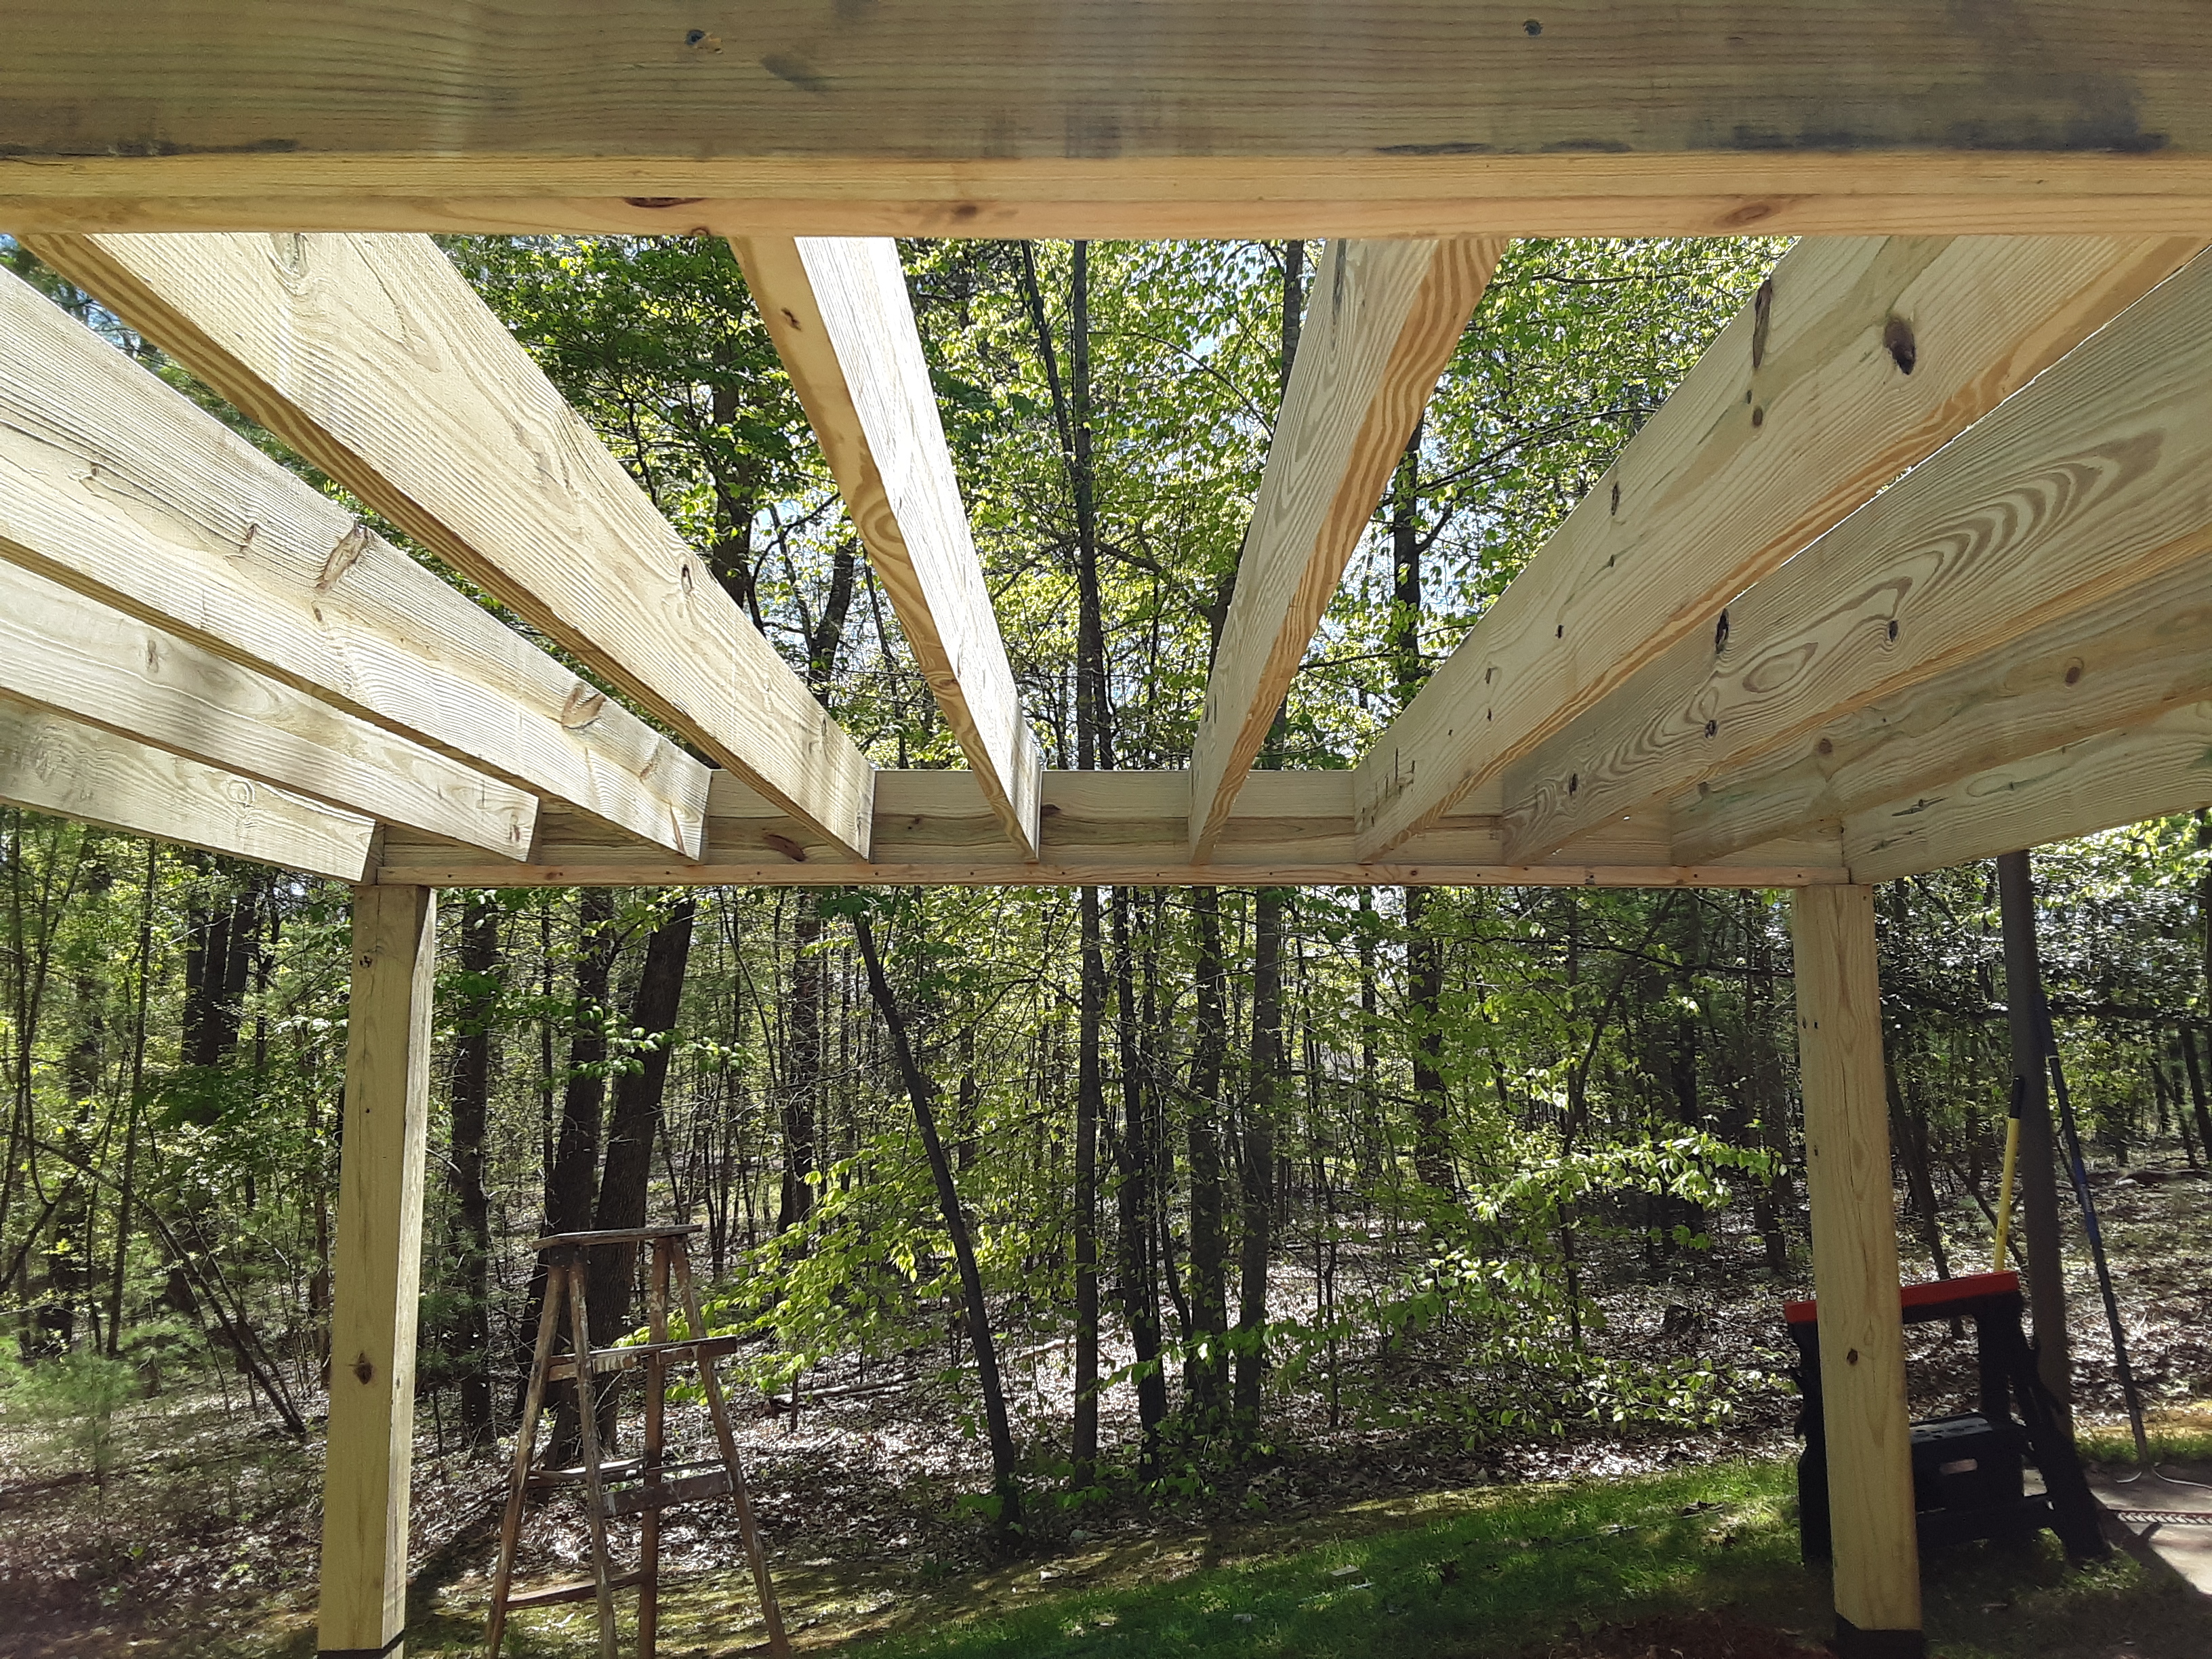
On day 3, I put in joists, the footboard for the climbing wall, and concreted the posts. The reason for the overkill on the posts’ depth, size and concrete was the planned zipline. Take note of the copious diagonals as it comes together. This structure is stiff.
Some days were longer than others and some saw more progress. The floor was satisfying and very useful for further progress. Hanging out on an extension ladder leaned against a single post putting up long boards is difficult for one person.
The double 2 x 8’s hanging 5′ off of the back will support an aerial silk. S, who is the ten year old girl this is being built for, is taking lessons.
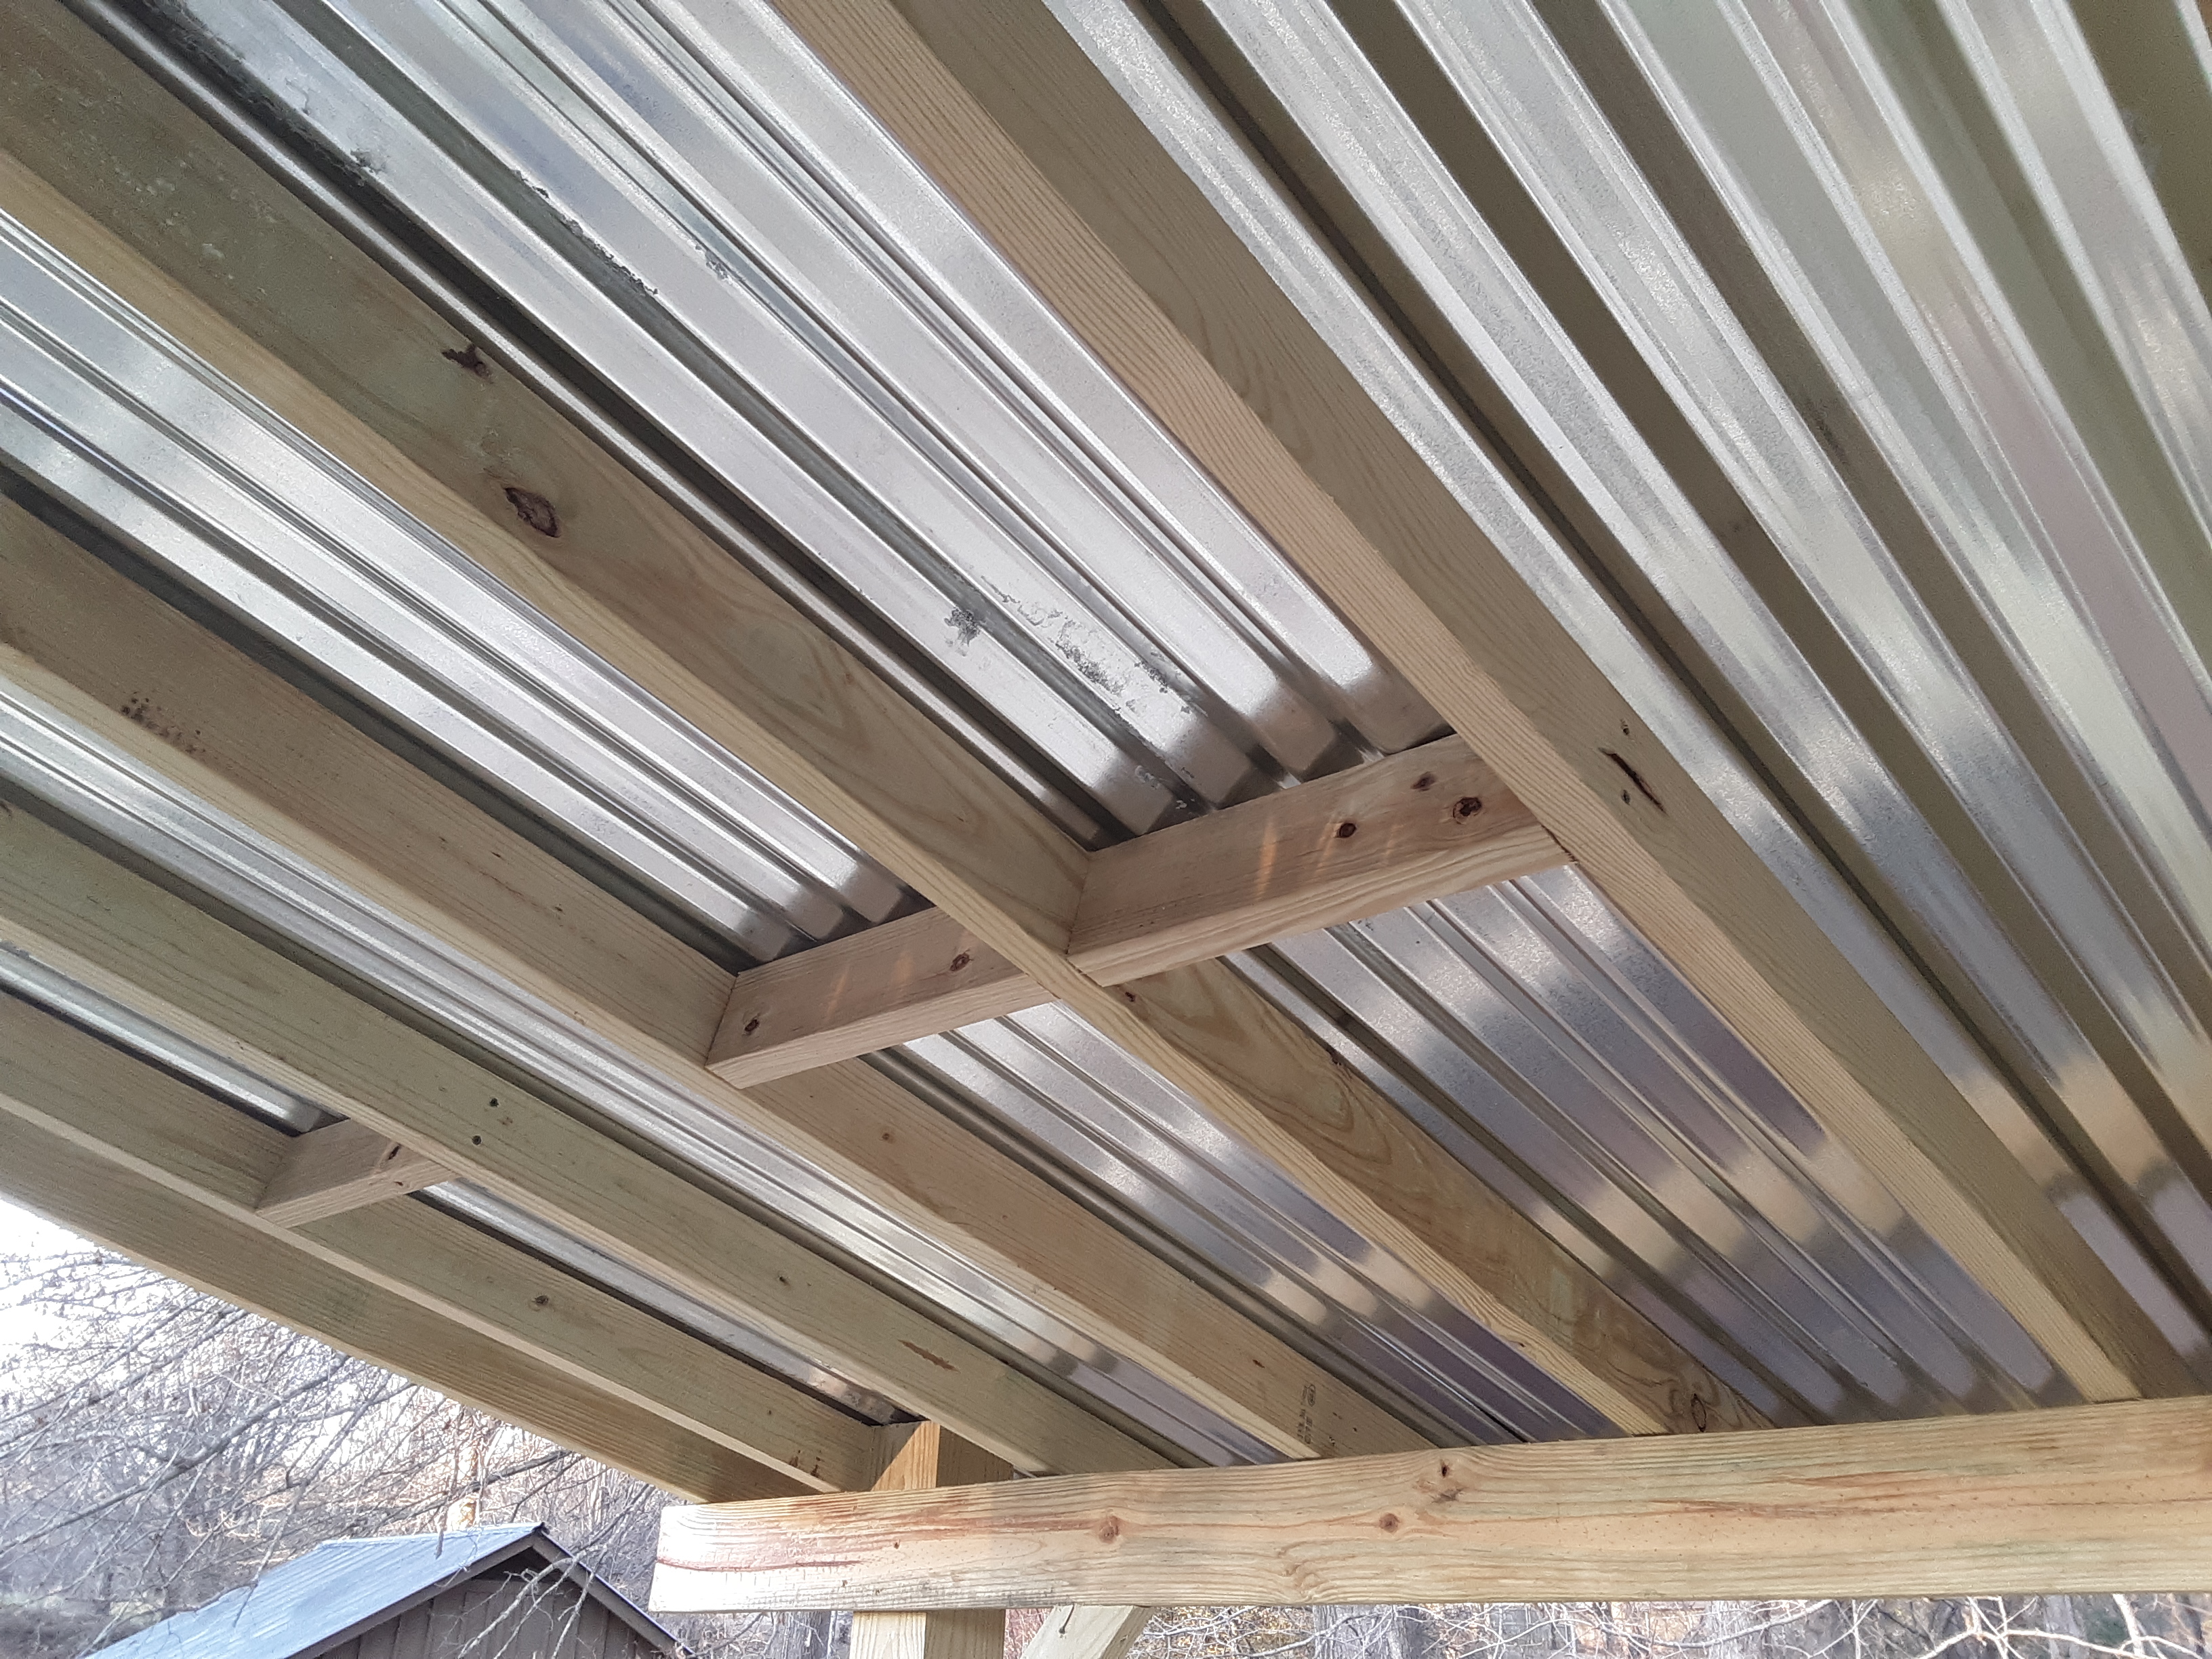
Day 5 saw the roof go on just in time to keep the floor dry from several days of torrent.
At about this point I lost track of what day I was on, since there were doctors’ appointments and multiple days of rain, short days and long days. I had nearly a whole day devoted to installing diagonals. The other part of that day saw the trapdoor go in. (1) I had to think like a kid when I designed this project. The trapdoor is an entrance from the top of the climbing wall. Think fun and adventure.
Can you guess where the zipline will attach? Diagonal City! Leaned against the shed are the 3/4″ treated plywood for the climbing wall.
We are along about day 8 so I will sign off for now. Another day I will show more progress on this cool playhouse. If you are interested in a playset, climbing wall, deck, and any number of other wood projects contact me through my facebook page, ww.facebook.com/decksandsuch
The trapdoor image appears upside down when I load it, even after flipping it in the file. What is that about?
1 to 12 is the maximum steep ratio of rise to run for a handicap ramp, which means that for every 1 inch the ramp needs to rise it must have 12 inches or a foot of run. I needed to build a ramp up onto a porch 29 inches above the gravel driveway. Following is my solution for the limited space available. It is a very little slope that feels almost like walking on the flat.
I had to double the joists at both ends of the eleven foot span. Notice in later pictures that one of the occupants began washing the siding. It looks so much better now. I also had to reroute the downspout and extend it to again reach the drain pipe it had not been draining into recently. The little details matter.
Notice the tar at ground level. Even though treated wood is rated for below grade (underground use), I have noticed numerous times that it does not particularly rot below grade but does at ground level where it mildews and grows algae prolifically. I do all of the posts with a good quality tar, too. I did not run the deck all the way to gravel so that I would run a mound of gravel to redirect water which was washing out near the foundation. Some little details are not so little.
I detest wasting material. The lumber yard didn’t have 10′ decking boards that I wanted so I had to cut off nearly 3′ of board that was not long enough to use on the 4′ wide ramp. I used some of the scrap for erosion control. A little scrap is a big deal- don’t waste!
I was pleased with the result and so was the homeowner. She gets up and down easily now. The little things make it worth doing a good job.
Classic Pine woodgrain that almost looks like plywood. Would you notice such a little thing?
This turn was the most challenging part of the railing, but it sure makes it sturdy. Notice that the siding is cleaner. Turning every board so that the good side shows takes a little extra effort, but it reaps big benefits in appearance.
Based on what I just said about turning the boards, can you imagine how many knots I hid? The little detail that should also be considered when selecting the side up is the crown or dip of the board. Lumber is cut out of a more or less cylindrical trunk. The grain curves in the board. If the crown is down, the board will bow with a dip in the middle across its width. This can hold water on a flat surface and increase deterioration.
The day is nearing an end and I have a little clean up to do before I talk to the homeowner and head for the house. Another project completed for Decks And Such (www.facebook.com/decksandsuch).
God has provided me with projects to do. It is good to remind yourself that “Whatever your hand finds to do, do it with all your might; for there is no activity or planning or knowledge or wisdom in Sheol where you are going.” (Ecclesiastes 9:10) And Colossians 3:24-25: “Whatever you do, do your work heartily, as for the Lord rather than for men,knowing that from the Lord you will receive the reward of the inheritance. It is the Lord Christ whom you serve.” I am thankful for work to do and things to create and supplementing my income. If I can continue to get regular jobs, I won’t have to work constantly since I have retirement income. So, I think that I will take a few days off and rest from my labors. Even before my retirement went into effect, people were thinking I would have time to work for them and began asking me to do projects. In my mind and plans, this is a transition phase to a “second career”, but since it says, “The mind of man plans his way, but the Lord directs his steps” (Proverbs 16:9), I don’t know what is going to happen. Following are two creations of the last month between home chores, climbing, and parties.
Heavy Duty Support
A deck below the deck
The owner plans to build a retaining wall that will be back-filled to level the ground at the base of the stairs and then lay a stepping stone approach to the stairs.
Grand Entryway
The original deck is about ten years old and needed some repair. It is eleven feet off the ground so they wanted a reasonable exit/entry to the back of the house.
repairs
Final Inspection by my wife
The second deck is at a lake house where a Jacuzzi was slid down the steep side yard to put in place on a concrete pad. The also had a new patio poured and then wanted an easy way to get in and out of the Jacuzzi.
The hidden support
adding the beauty
My new design
sturdy, functional, and aesthetic
Entry from the newly poured patio
There were many custom cuts. The patio is slanted in order to drain water, though more than usual. That makes the first step vary in height across the deck. The Jacuzzi is on a level concrete pad so that the water is level in the tub. The floor boards immediately around the Jacuzzi are tightly fit to prevent dropping small items under the deck.
Comfortable lounging
I enjoyed designing the bench so that it only overhung the deck by five inches while being sturdy and fifteen inches wide. The deck is low enough to not require a railing. There are temporary steps off the back since they are considering a stairway up to the master bedroom deck. There is a significant amount of sweat and planning in a deck, but a significant of satisfaction when it comes out right. After my short time off, I start another deck. God is providing and guiding. I must have patience and trust for how He is doing that.


