Permanently or for a while, I don’t know, but certainly for the next few months I will not be building any decks since I have started a new, fulltime job indoors helping people recover their health. It is a major career and direction change for a 62 year-old, but one I have been pursuing for nearly five years now. I agreed to this deck somewhat reluctantly because I knew that it was going to push right up to the time I would be moving. In fact, I did end up pushing very hard to complete it the day before I started packing the truck. The completion of this short phase in my life reminded me of a song on an old 78 RPM record my mother had in the Livingroom Closet. On the very static recording, Gene Autry is crooning, “I’m headed for the last round-up”. In the song, he is actually talking about going to heaven, but as a boy I didn’t catch on to that. Instead, I took it to mean that an old cowboy was riding in his last cattle round-up, meaning he was retiring. I get asked somewhat frequently how I like retirement, having retired from public education after 28 years. I don’t really know. I have built decks for two years and now end that round-up circuit in order to start a new adventure.
There were costs to building decks. I worked long hours on the clear days and not at all on the rainy days. I was totally worn out at times. Making mistakes and having cost overruns was frustrating. I was frequently exposed to chemicals that I have a reaction to. It was difficult to price things to make money without chasing off potential customers. I knew that I could not physically do this work long-term. There were benefits to building decks. I was my own boss and kept my own hours. I met new people and had many profitable conversations. I was physically stronger than I had been previously for many years. I sweated profusely which is good for a body. Solving problems was a good challenge. I had the sense of a job well done and thank you’s for accomplishing it. It paid many bills.
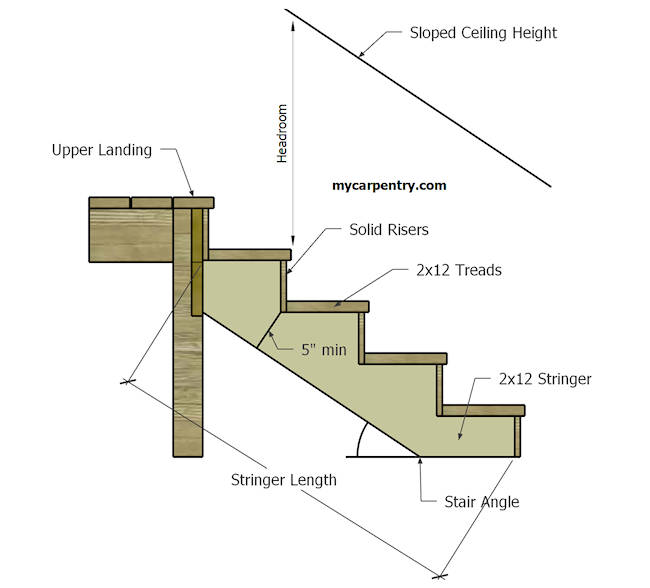
I like the idea of building something unique into a deck, however, I must need to get better at estimating how long it will take to design and build something new and different. Obviously, this statement is somewhat self-contradictory. How can you anticipate and predict the length of an event, and therefore get better at estimating its length, which you have not observed before? The owners wanted clear sight of the swimming pool, so no railing. They wanted something functional but attractive. So, they came up with the idea of beveled steps and I was tasked with executing it. See how I did at Beveled Stairs.
I have been privileged to work on various types of projects since I began Decks And Such (see https://www.facebook.com/decksandsuch). Friends at church asked me to repair the porch on their house that was built in 1875. They built houses differently back then. Likely, the beams and boards were milled on the property. The beams in the porch were treated with tar that smelled like creosote. I can imagine a crew of workers cutting, milling, cooking tar and applying it, building the foundation and floor joists all from materials found close about. Check out the progression of my repair work at This Old Porch
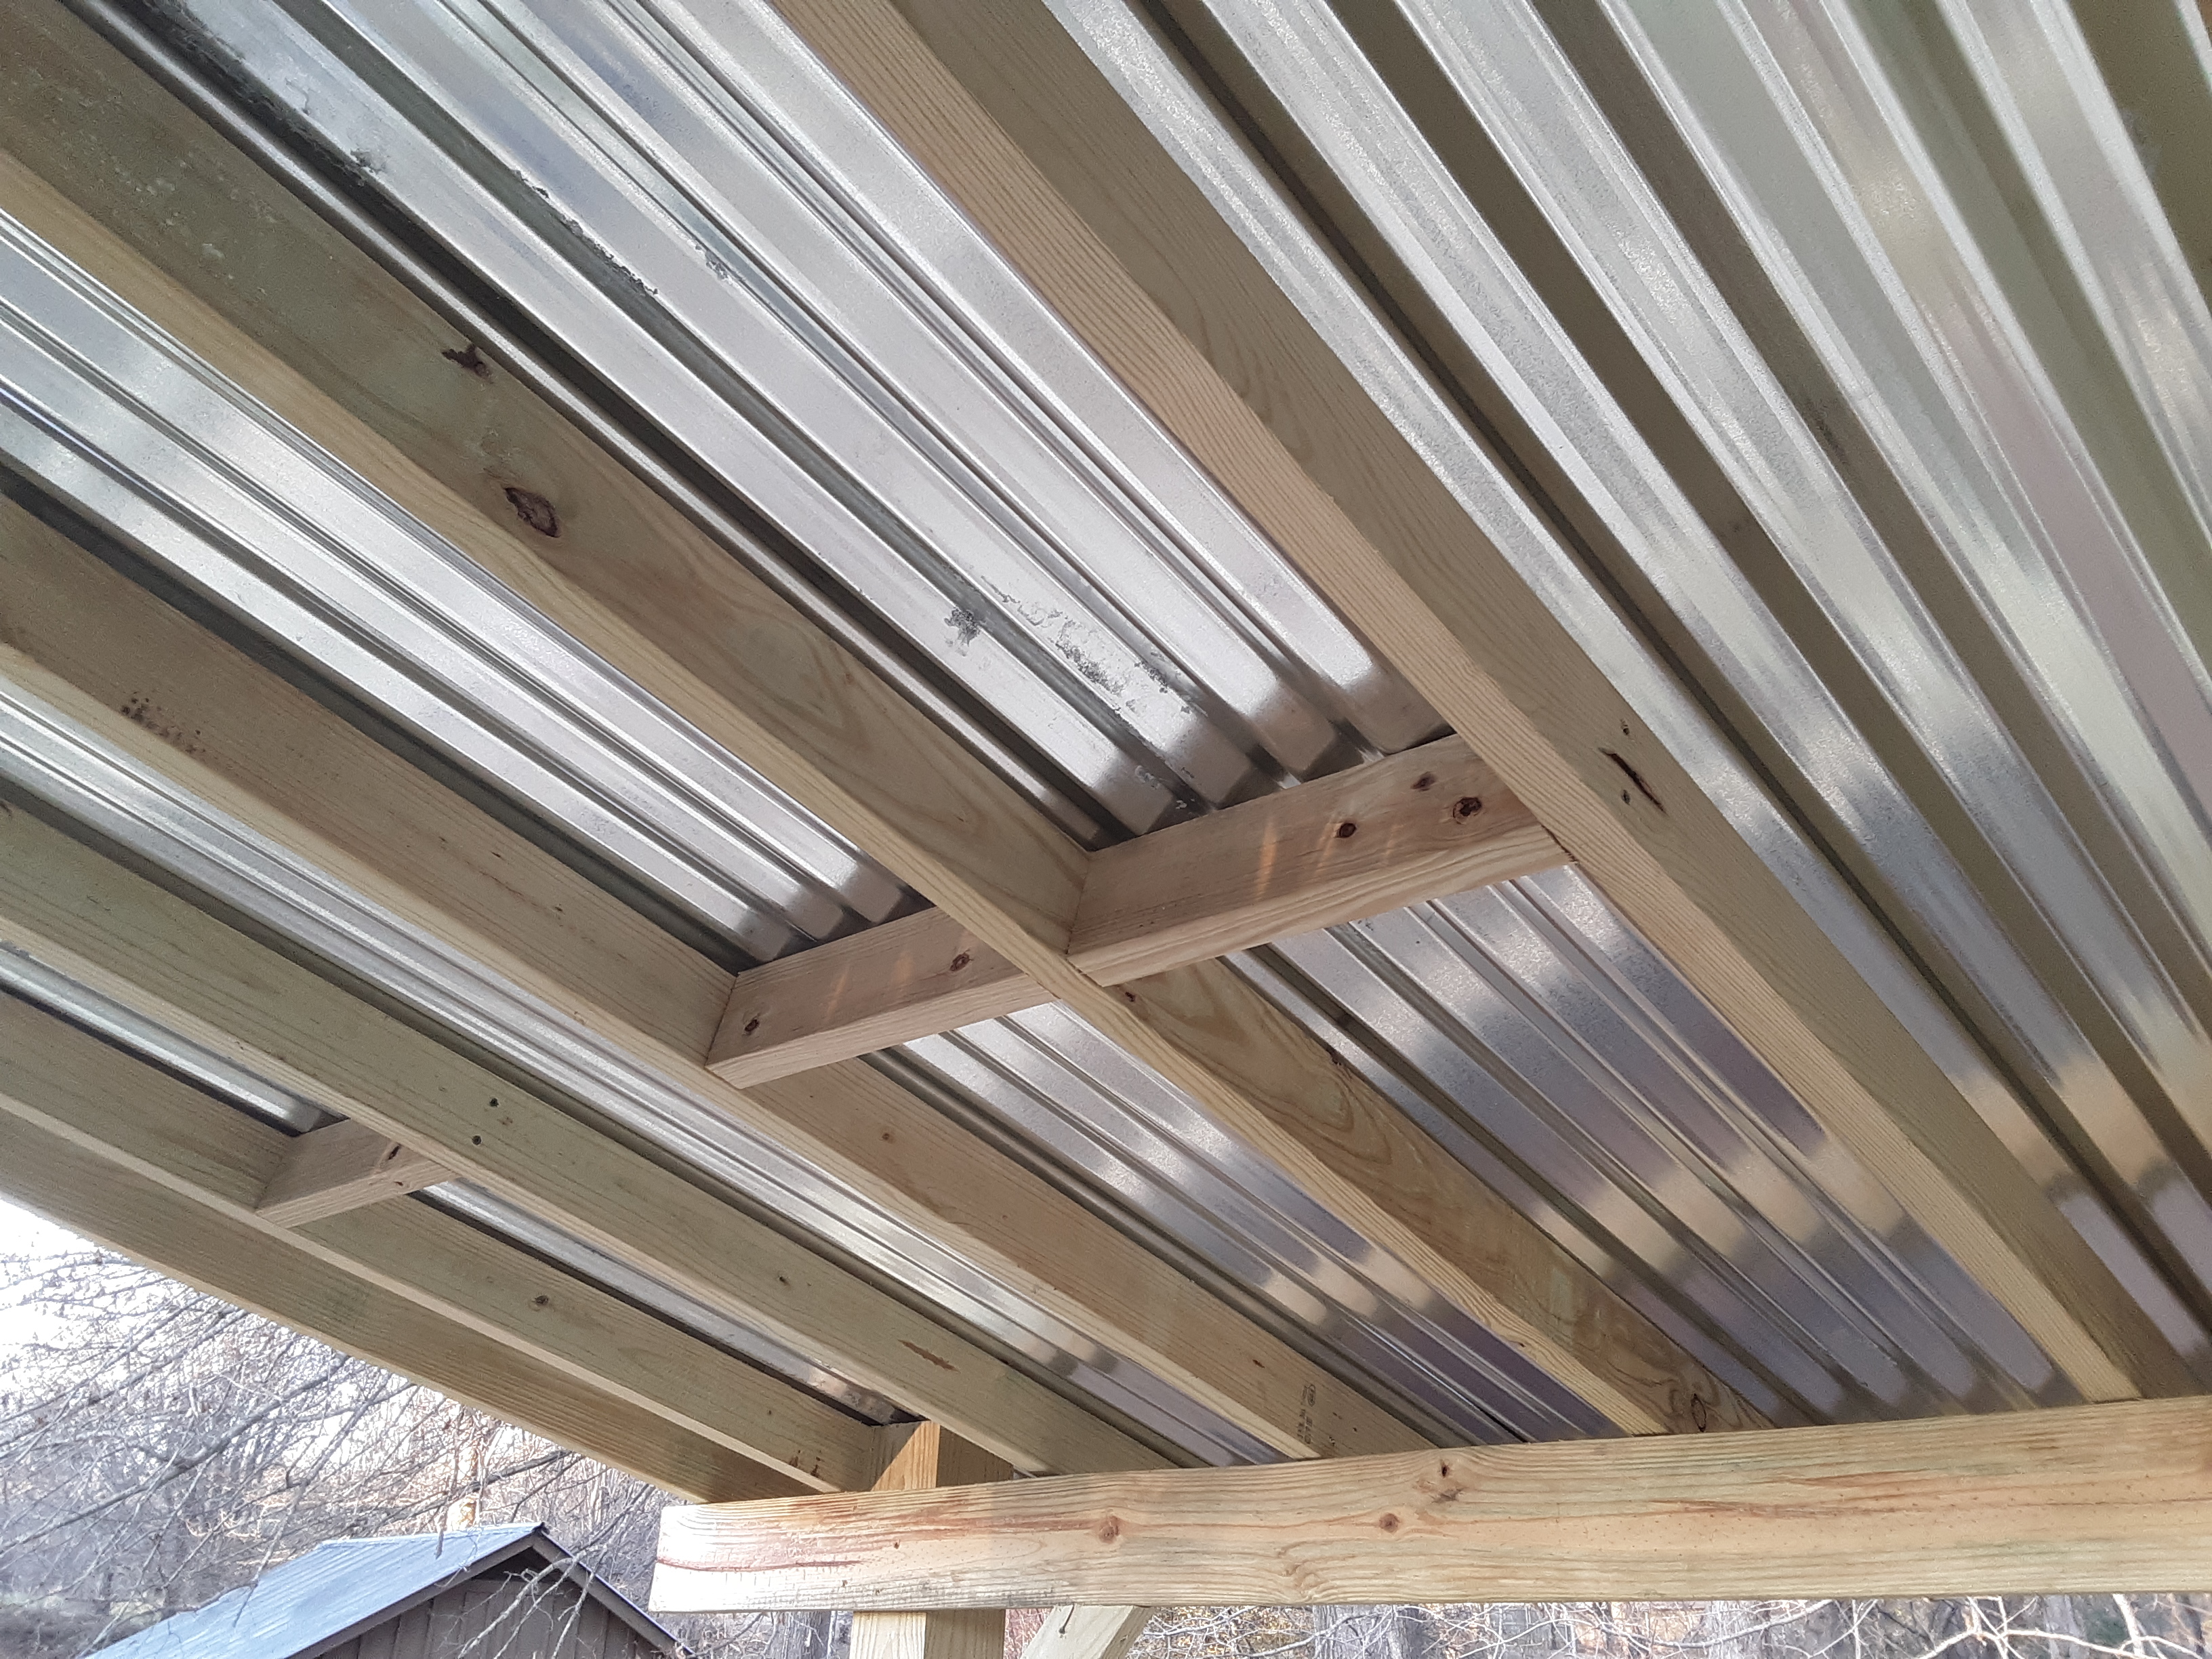
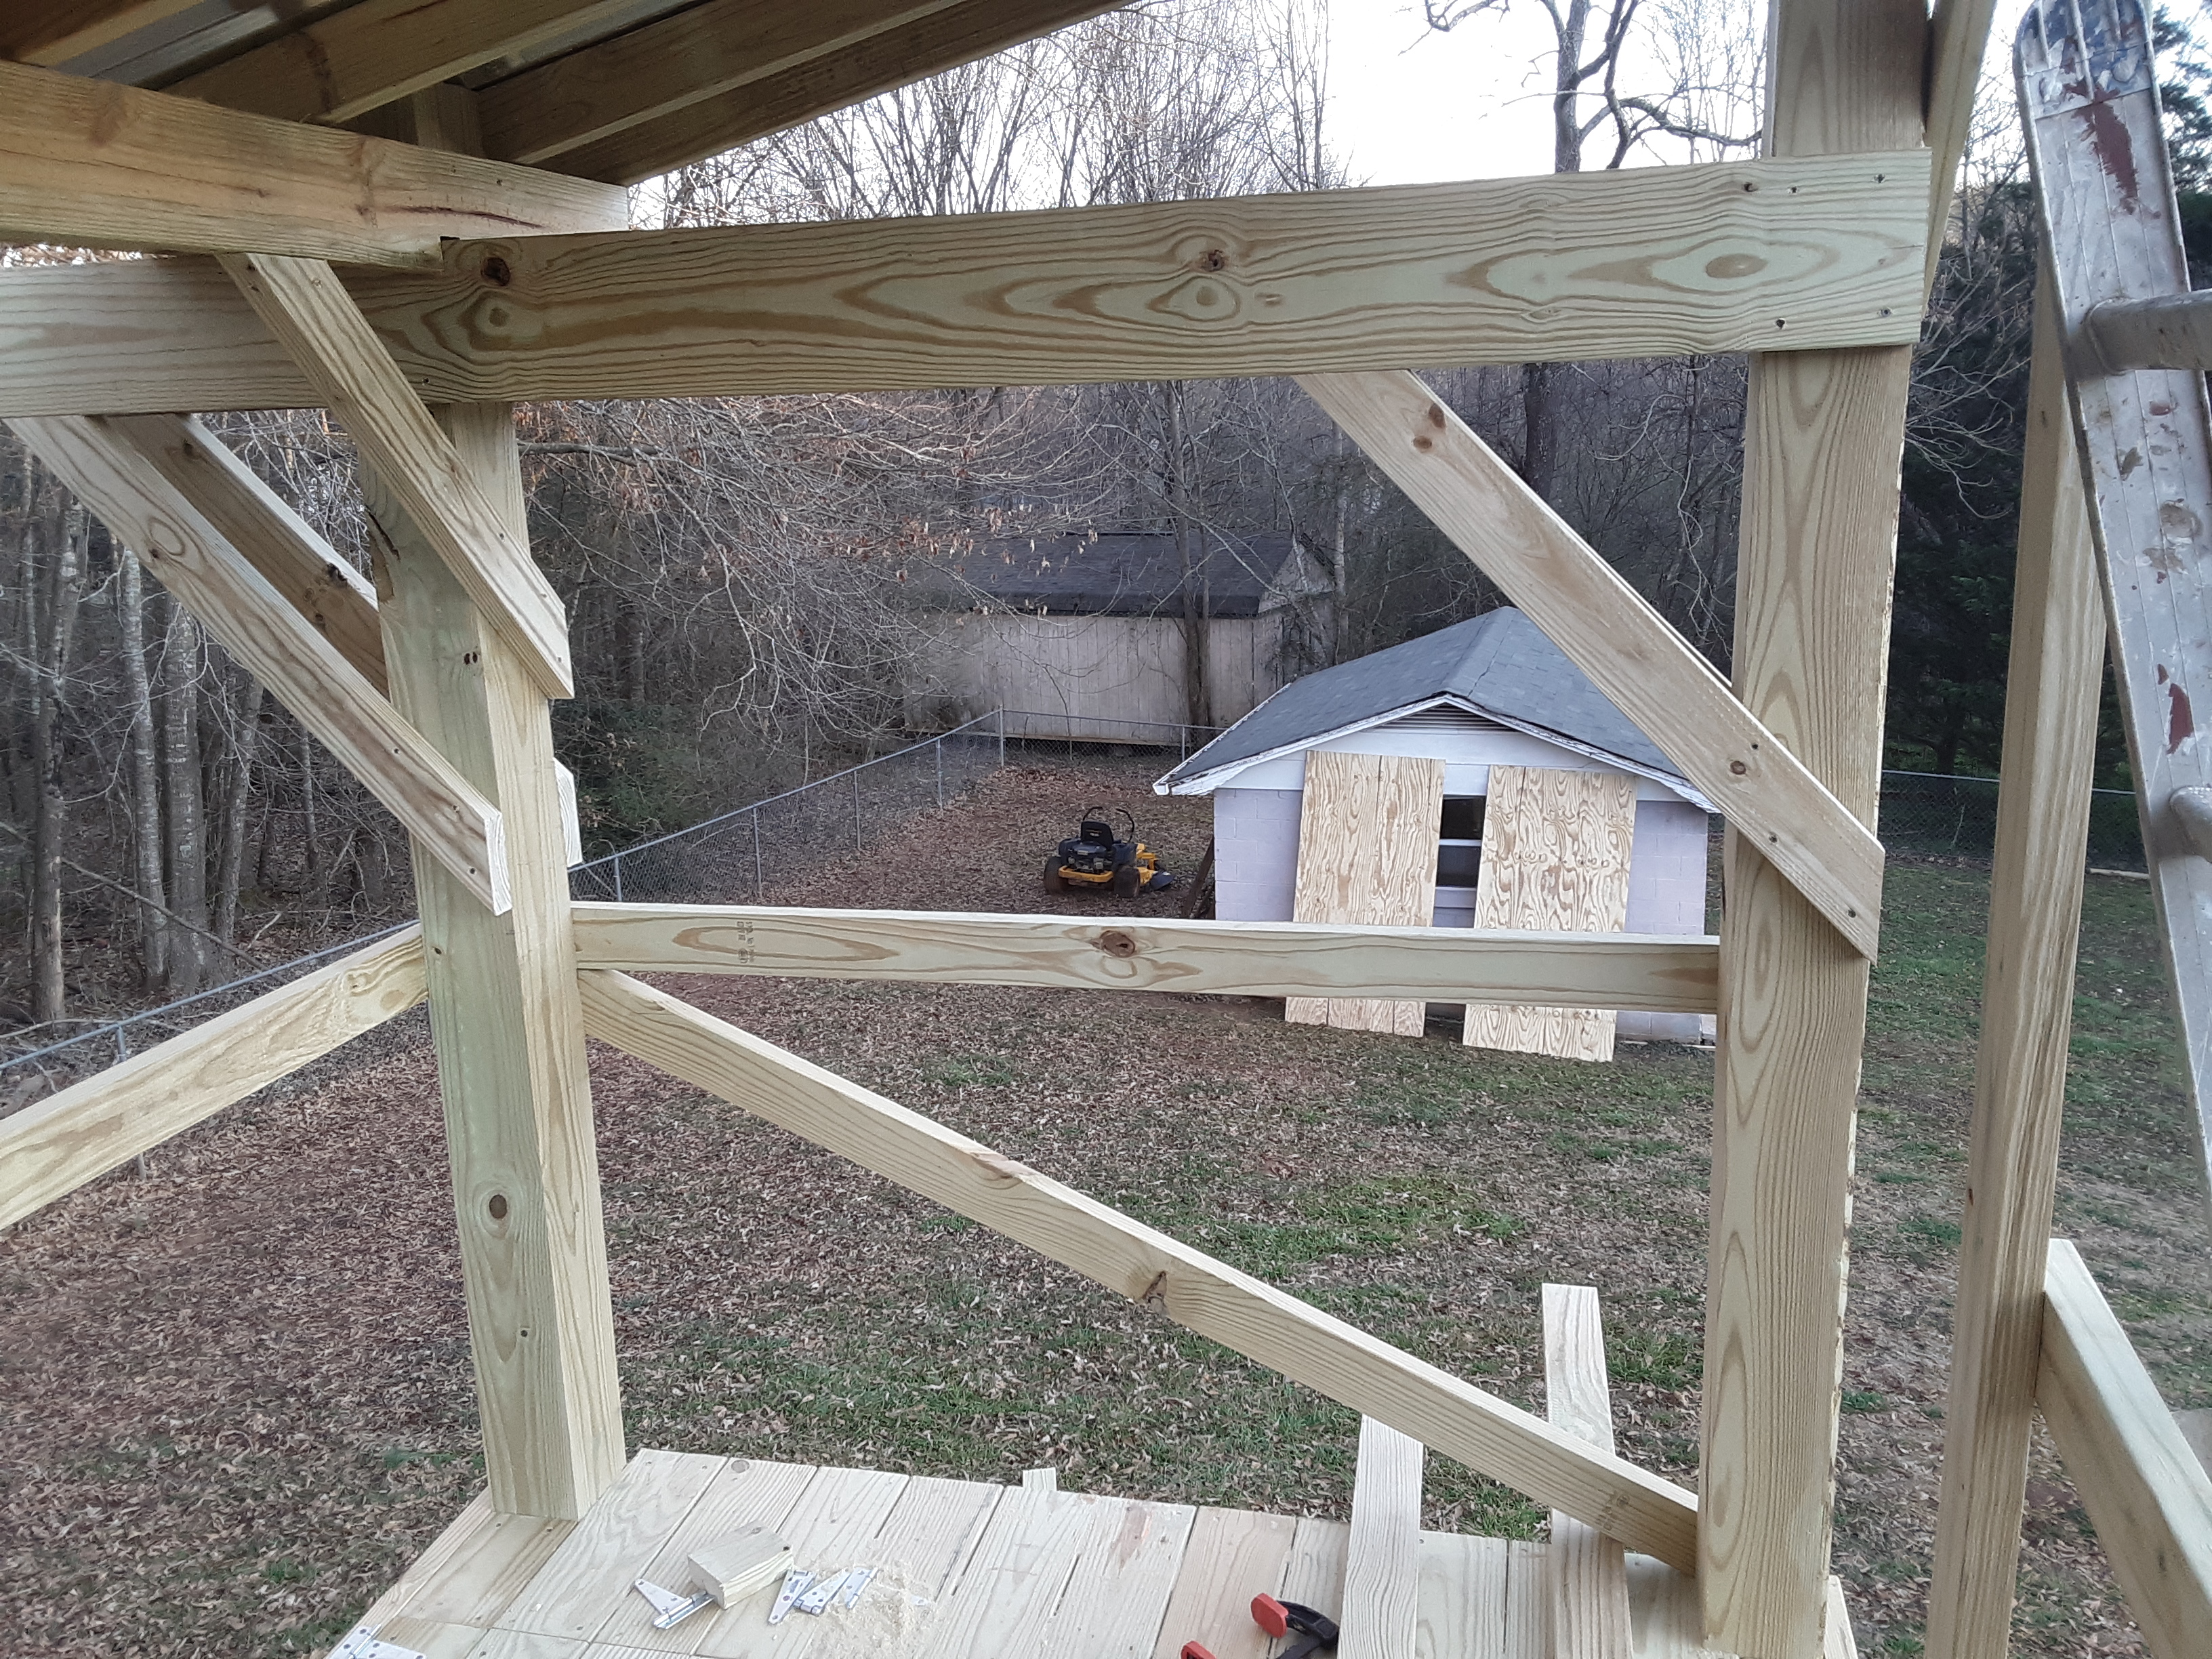
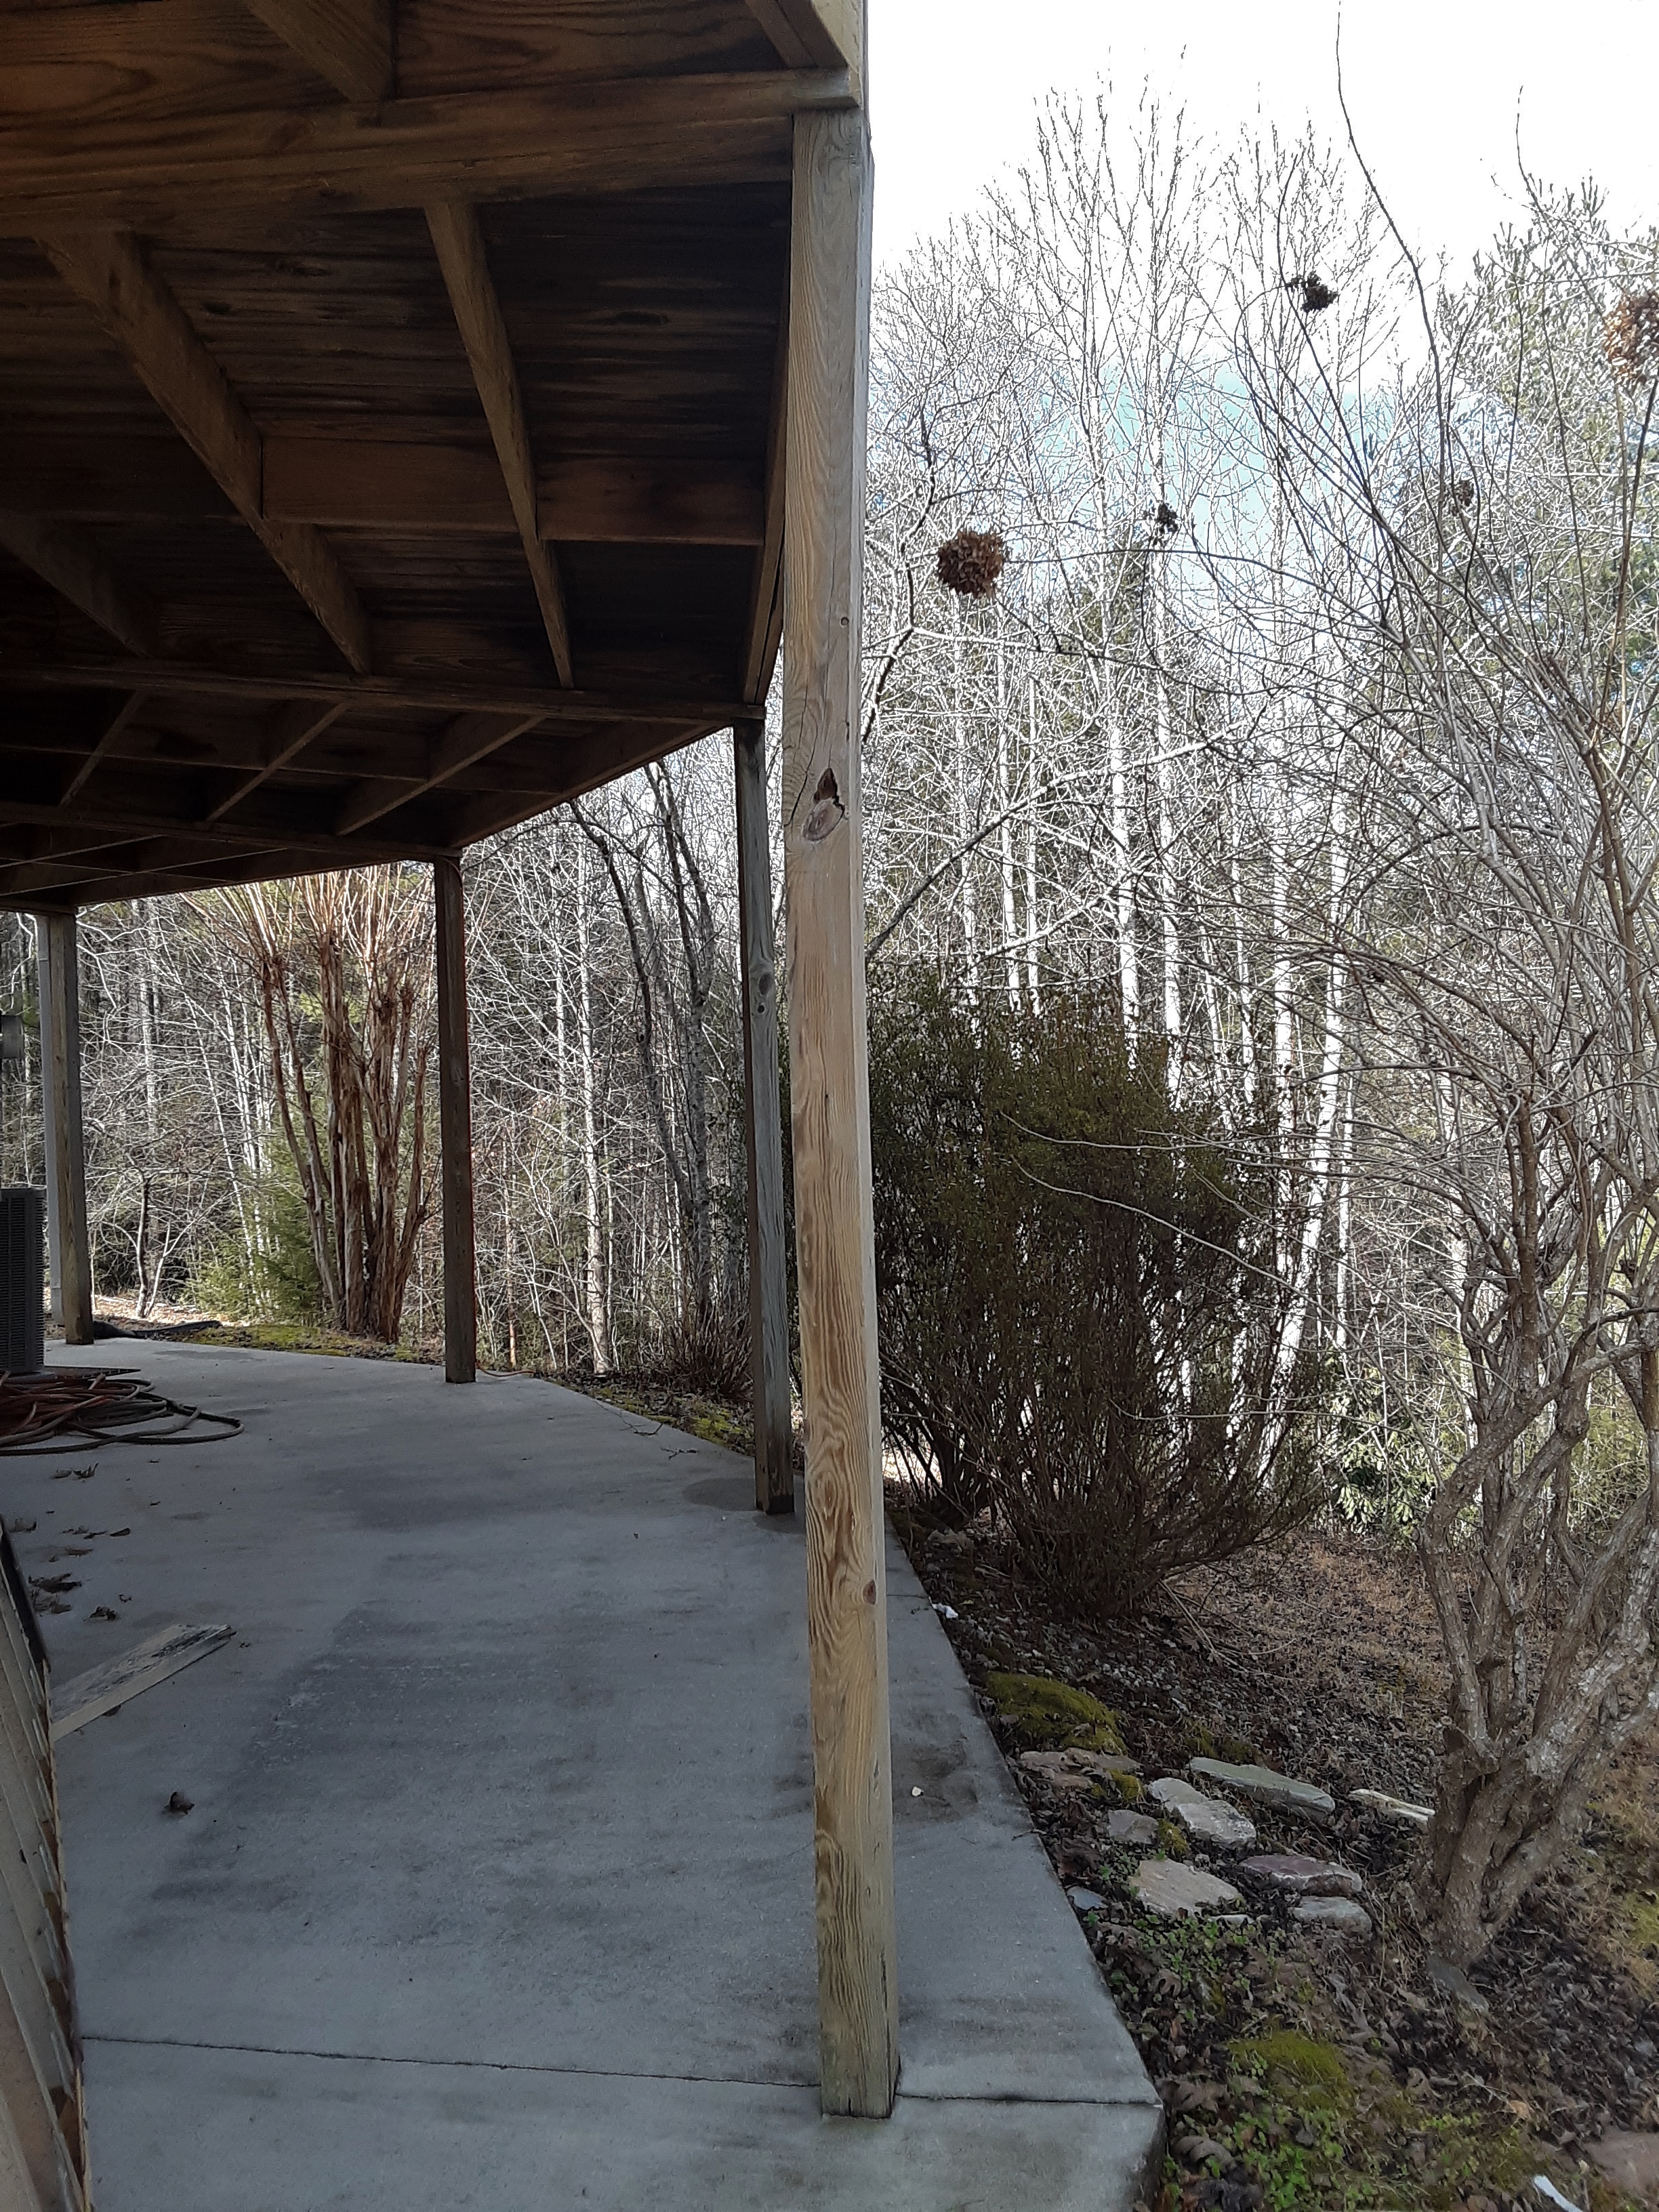
The owner built his own house with many days of sweat equity for him and his wife and subcontractors for various major steps. The house is 98% done inside but needs some work and finishing touches on the exterior. The couple enjoyed their deck so much and love to entertain that they decided to add onto their deck, or outdoor living space as he called it. Being from farther north, they were amazed at the fierceness of the summer sun. So, they decided that they would use a covered deck more. For that reason, the most recent deck that I worked on might better be called a porch, because we put a roof over it. The outdoor living space changed the character of the house, giving it a more homey and inviting look and feel. The owner, with whom I have worked, has appreciated my attention to detail. He says most everyone who sees it comments on the quality. Check out a few of those details at “Outdoor Living Space“.
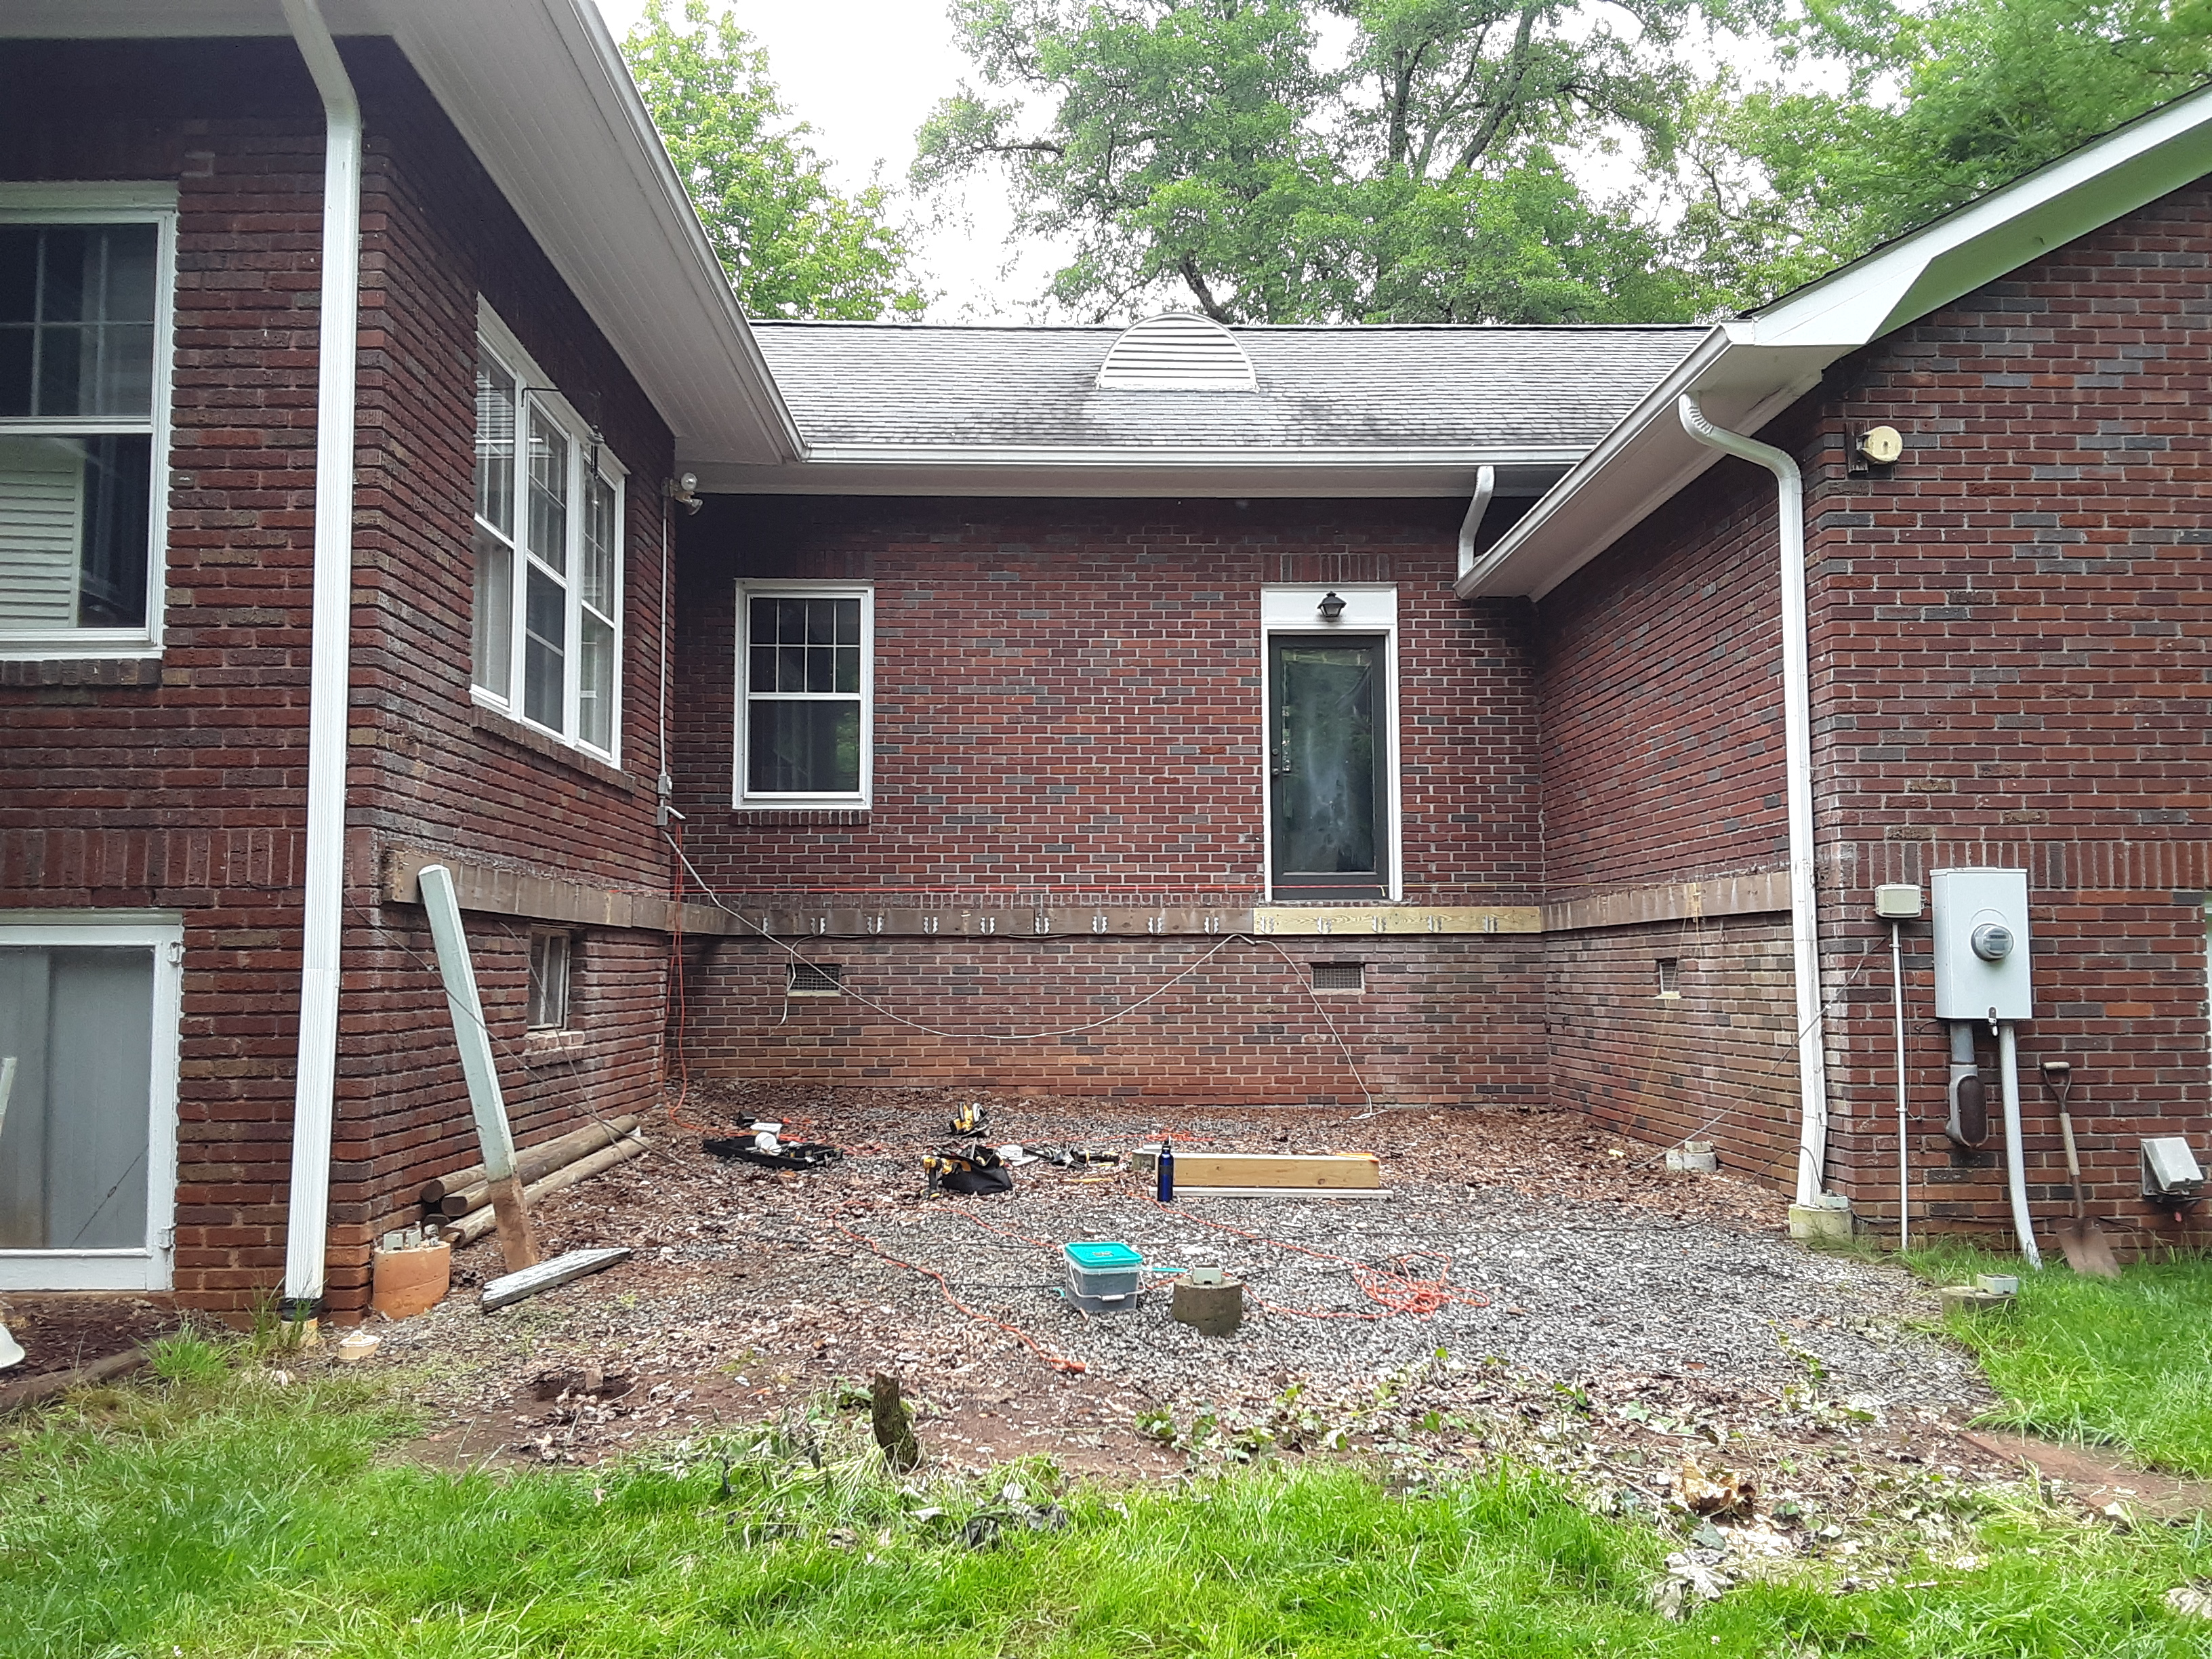
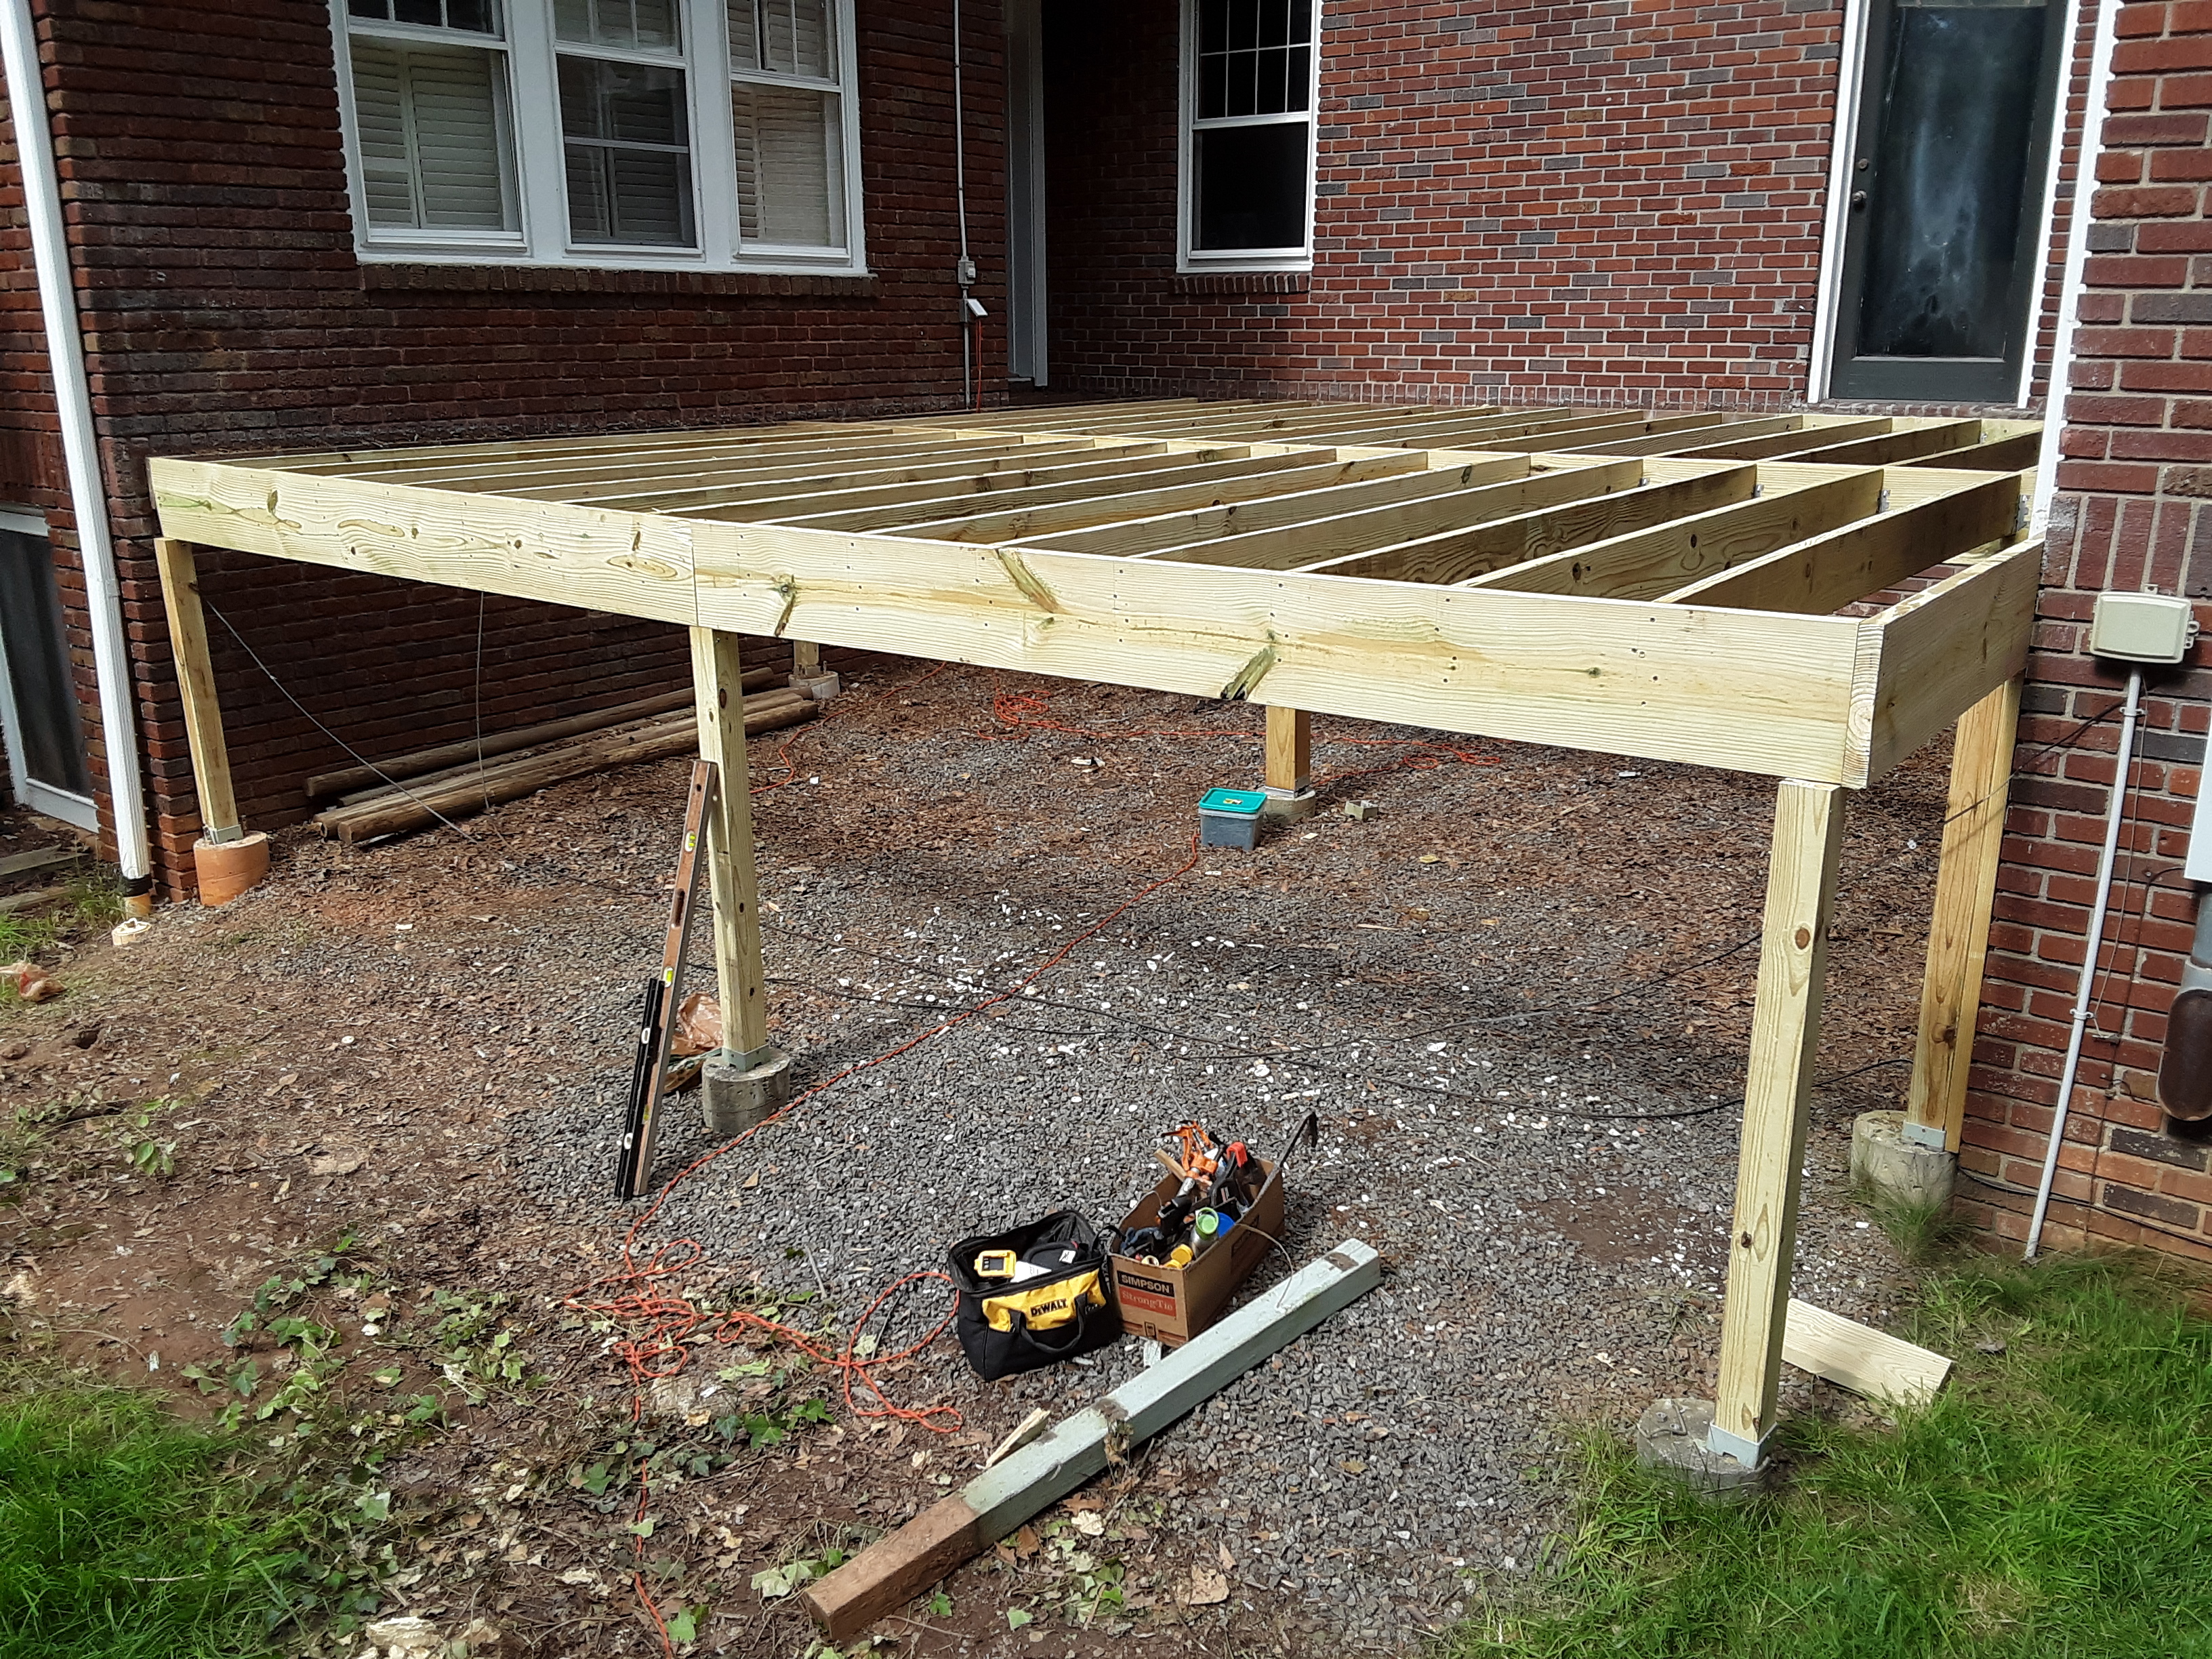
I try to do what the customer asks for. The house is a remodel with new vinyl siding. Attaching the deck to the house would mean putting holes in the new siding and crushing it to the wall. Additionally, he wanted the posts set on concrete footings. I said on, not in. The combination of these two requirements meant a deck with very little lateral stability. To solve this problem I installed twelve diagonal braces with copious numbers of screws. Along with the stairs, the deck ended up quite stable. Check out the pictures at “Table Deck“
I like to build decks, but lately I’ve been the home repair guy. It started with cutting up a tree and felling a massive dead white oak. Then the question came, “Can you fix our rotted second story porch? And we have some doors that won’t shut properly (three to be exact), and can you replace a doorknob? Our kitchen cabinet doors are about to fall off. Can you repair those? Our entryway side walk has drainage problems. I’d say so. It slanted toward the house and there is no where for the water to go. Do you do concrete?
The day the big tree hit the ground a neighbor came out of his basement to see what had happened. He walked out into the street at about the same time I was bringing my chainsaw up to the truck.
“Oh,” says he, “did you just cut down a tree?”
“Yes,” I replied, “It was a big one.”
“It must have be a been,” he chuckled, “because it shook my foundation.”
That introduced me to my next set of jobs: replacing a rotten window sill, repairing rotten corner trim, building and “planting” a mailbox, installing a divider board between kitchen and dining area, replacing an exterior light fixture, repairing a cabinet shelf and door, fixing a lamp, replacing a toilet seat, repairing closet shelving in two closets, repairing a unique (and therefore irreplaceable) and old-school (which means it was made to repair) doorknob, and installing a new skylight in place of a hopelessly fogged and smoked one.
I was told on the final day of installing the skylight that the neighbor is supposed to call me. I wondered if the neighbors had seen me since I was at eye level with their upstairs windows.
Other than my Facebook page, which serves more as a way to show people who are asking what work I’ve done, and occasional business cards that I pass out to people who are curious, I don’t advertise. Word of mouth is keeping me plenty busy.
And I am building a deck now and am supposed to start on another one as soon as this one is done.
If you would like to see a few pictures of the aforementioned odds and ends, then click hereafter.
Rarely do I complete a deck repair in one day, but this job was that small. There were two decks, the main 12 x 12, and smaller 4 1/2 x 10. The larger one had three boards with developing rot, a quick fix. I also replaced three balusters there.
The smaller one had an end rail that was fencing (??), almost an afterthought put up shabbily. Because of the position the back post and the proximity of the tree, I had to put the balusters on the inside.
The lower deck was also made with 2 x 6 joists. I would not use those on anything more than four foot spans. So, I installed a post in the middle to strengthen the span.
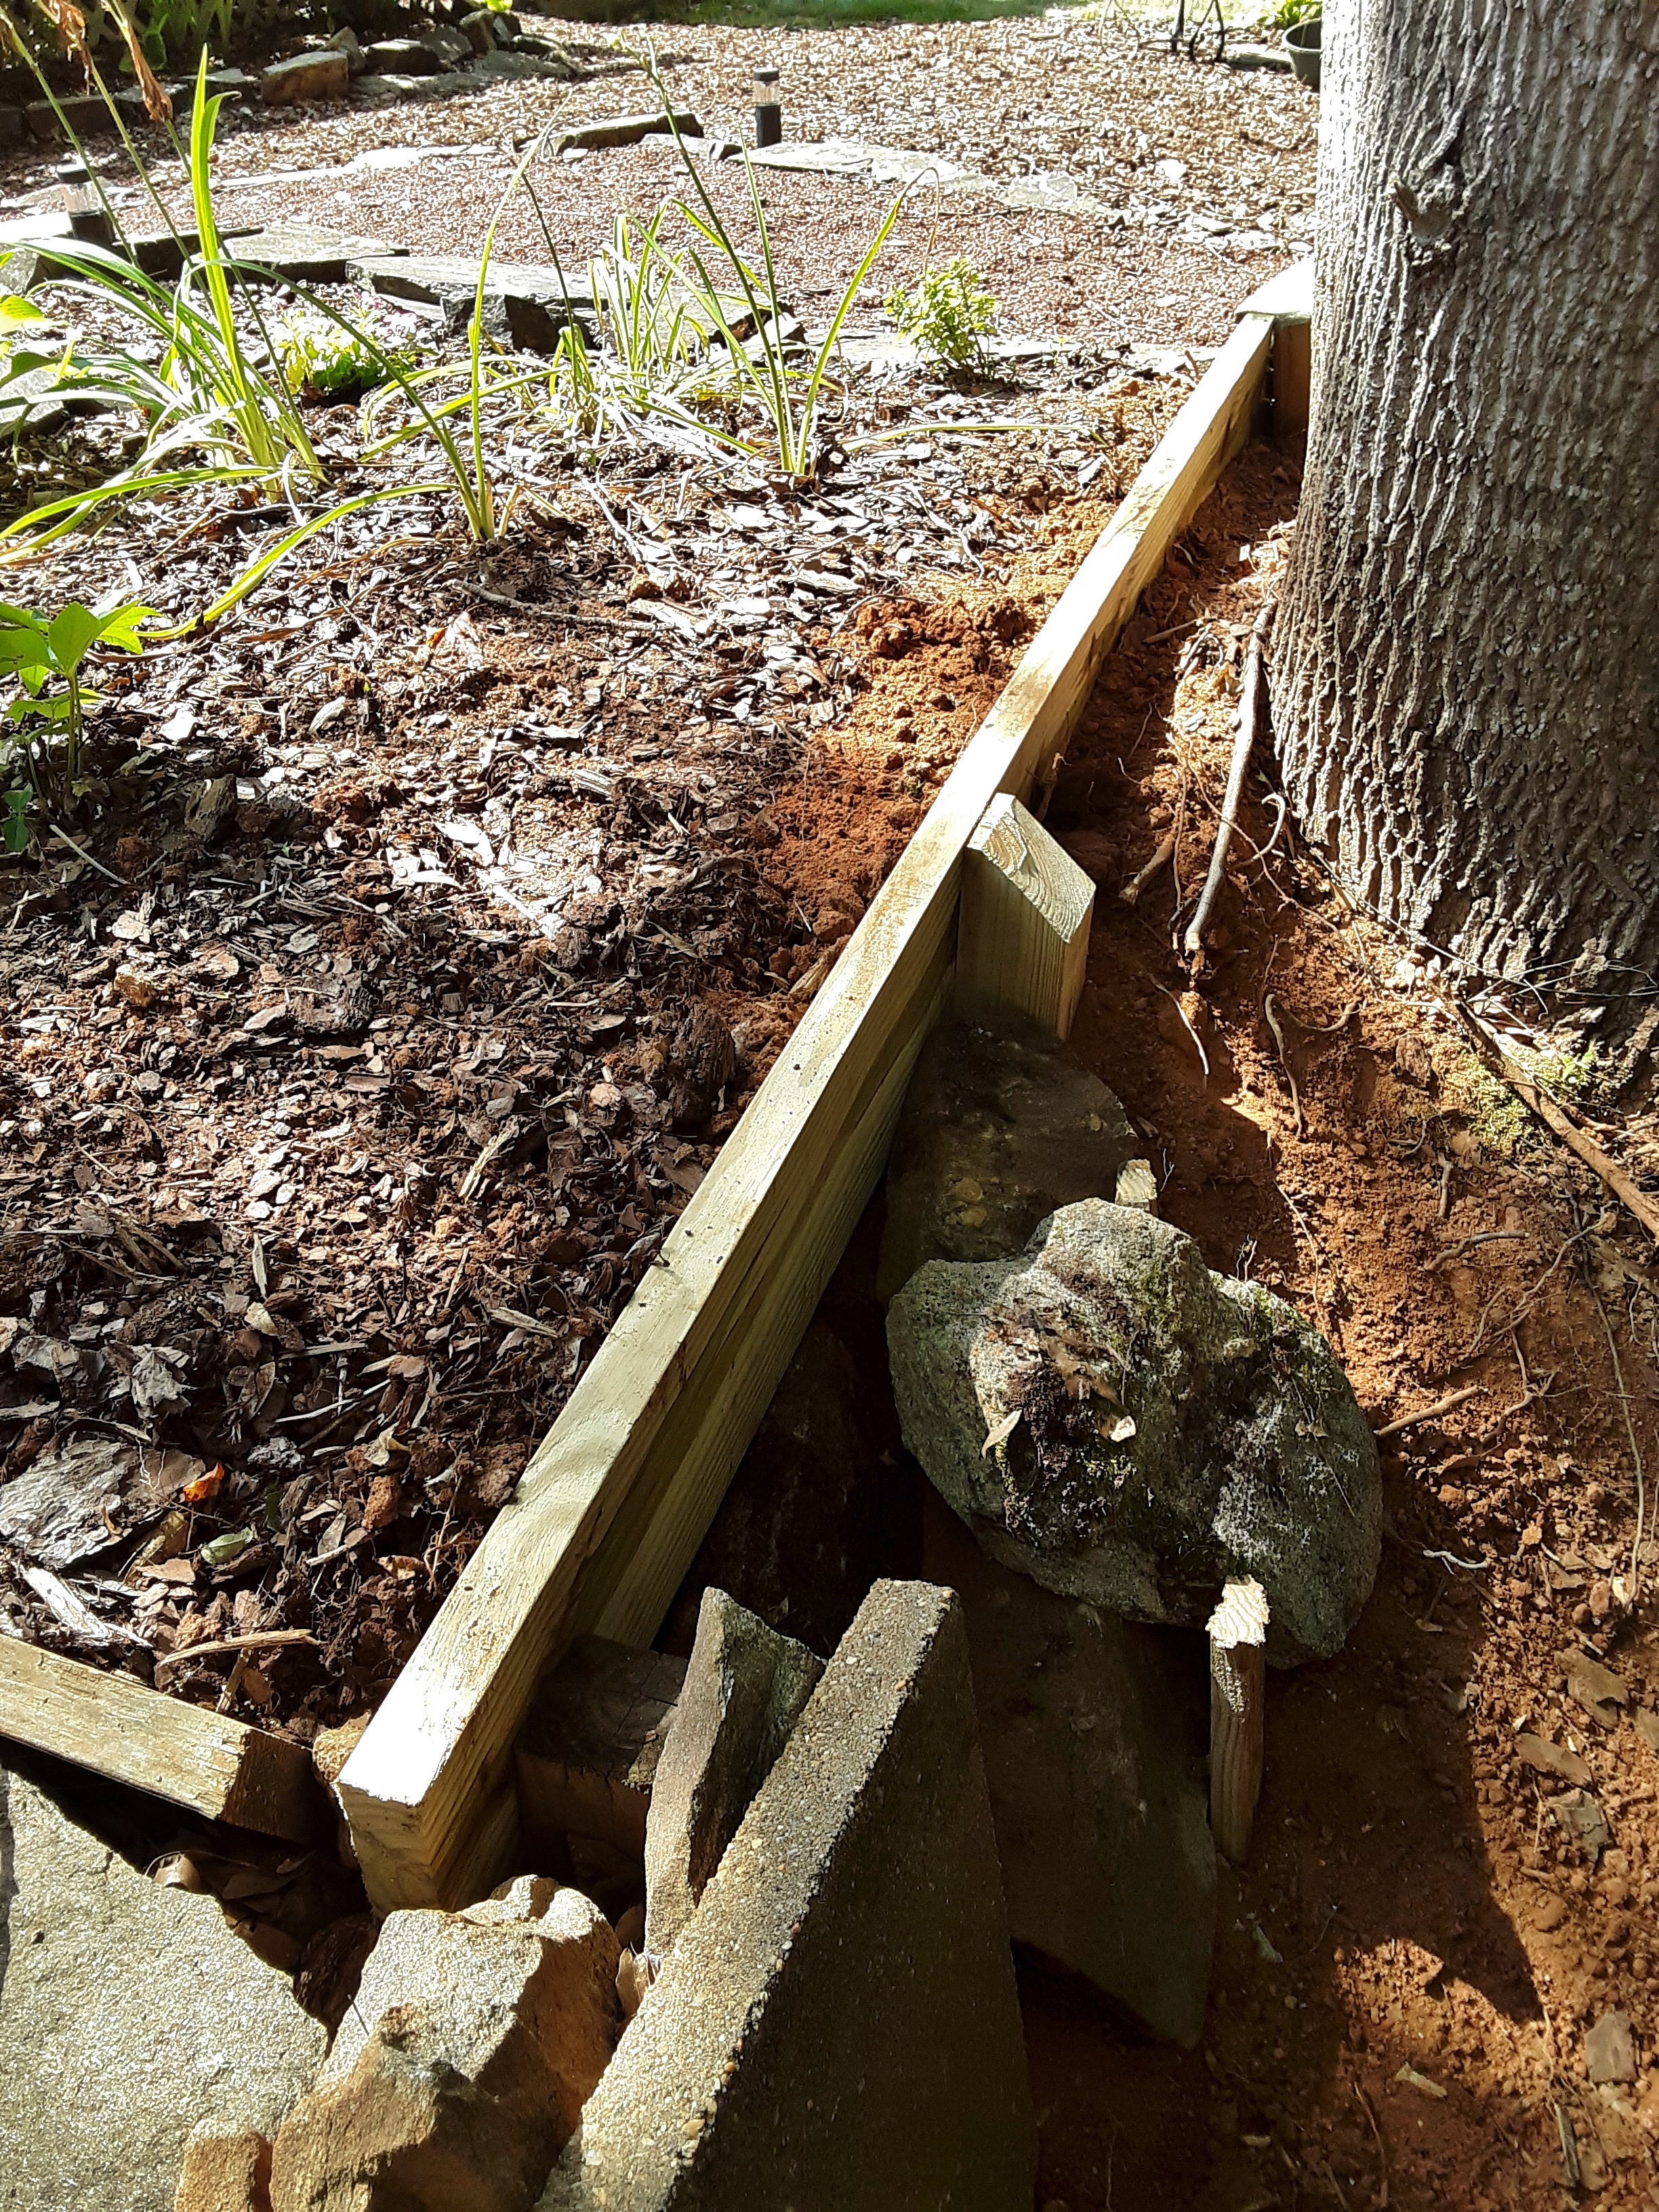
Off to one side of the smaller deck was an eroding flower garden. I installed a little barrier and back filled it to preserve the level space.
Small jobs are good. I get the satisfaction of quick completion. Also, most companies won’t mess with a job this small, but a day’s work is a day’s work. God has continued to provide work right along to pay our accelerated bills. I am constantly reminded that I can and should trust Him and must continue to do so, and that this demonstration of His faithfulness and provision means that I can trust in other areas as well. My faith has moments of faltering, but I have not seen Him unable or unwilling to provide as I am diligent to ask and walk into the opportunities which He provides.
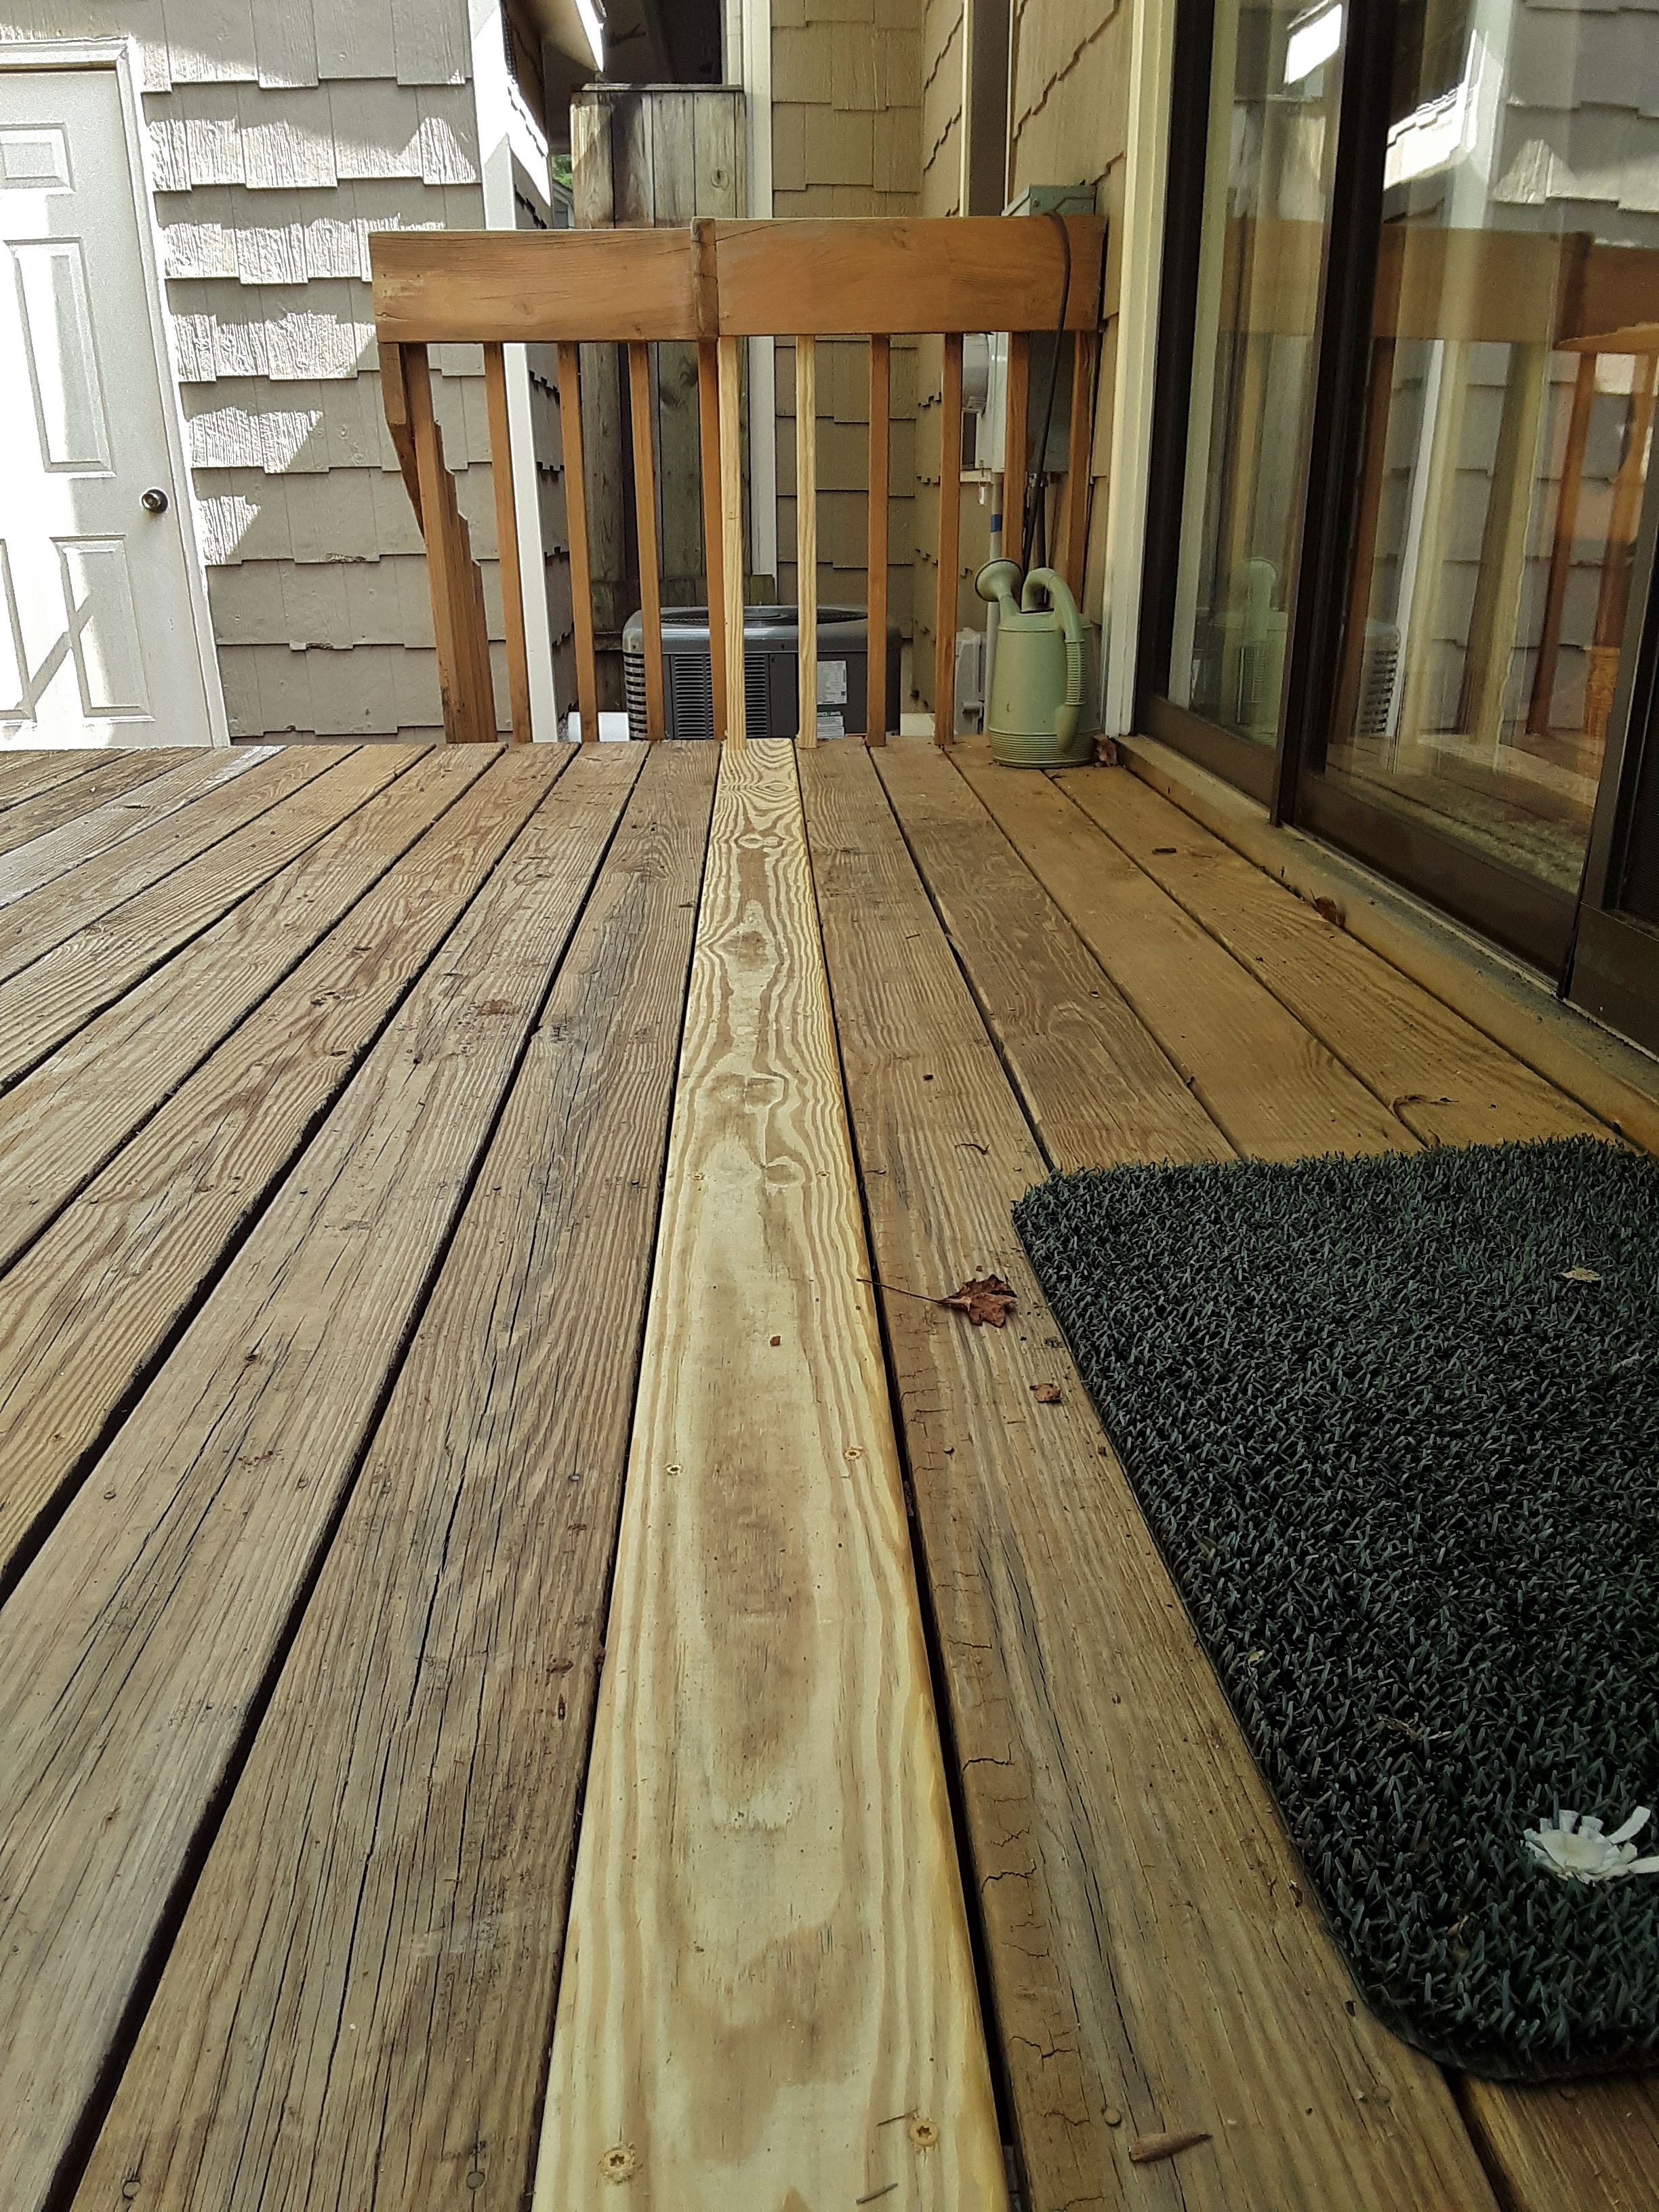
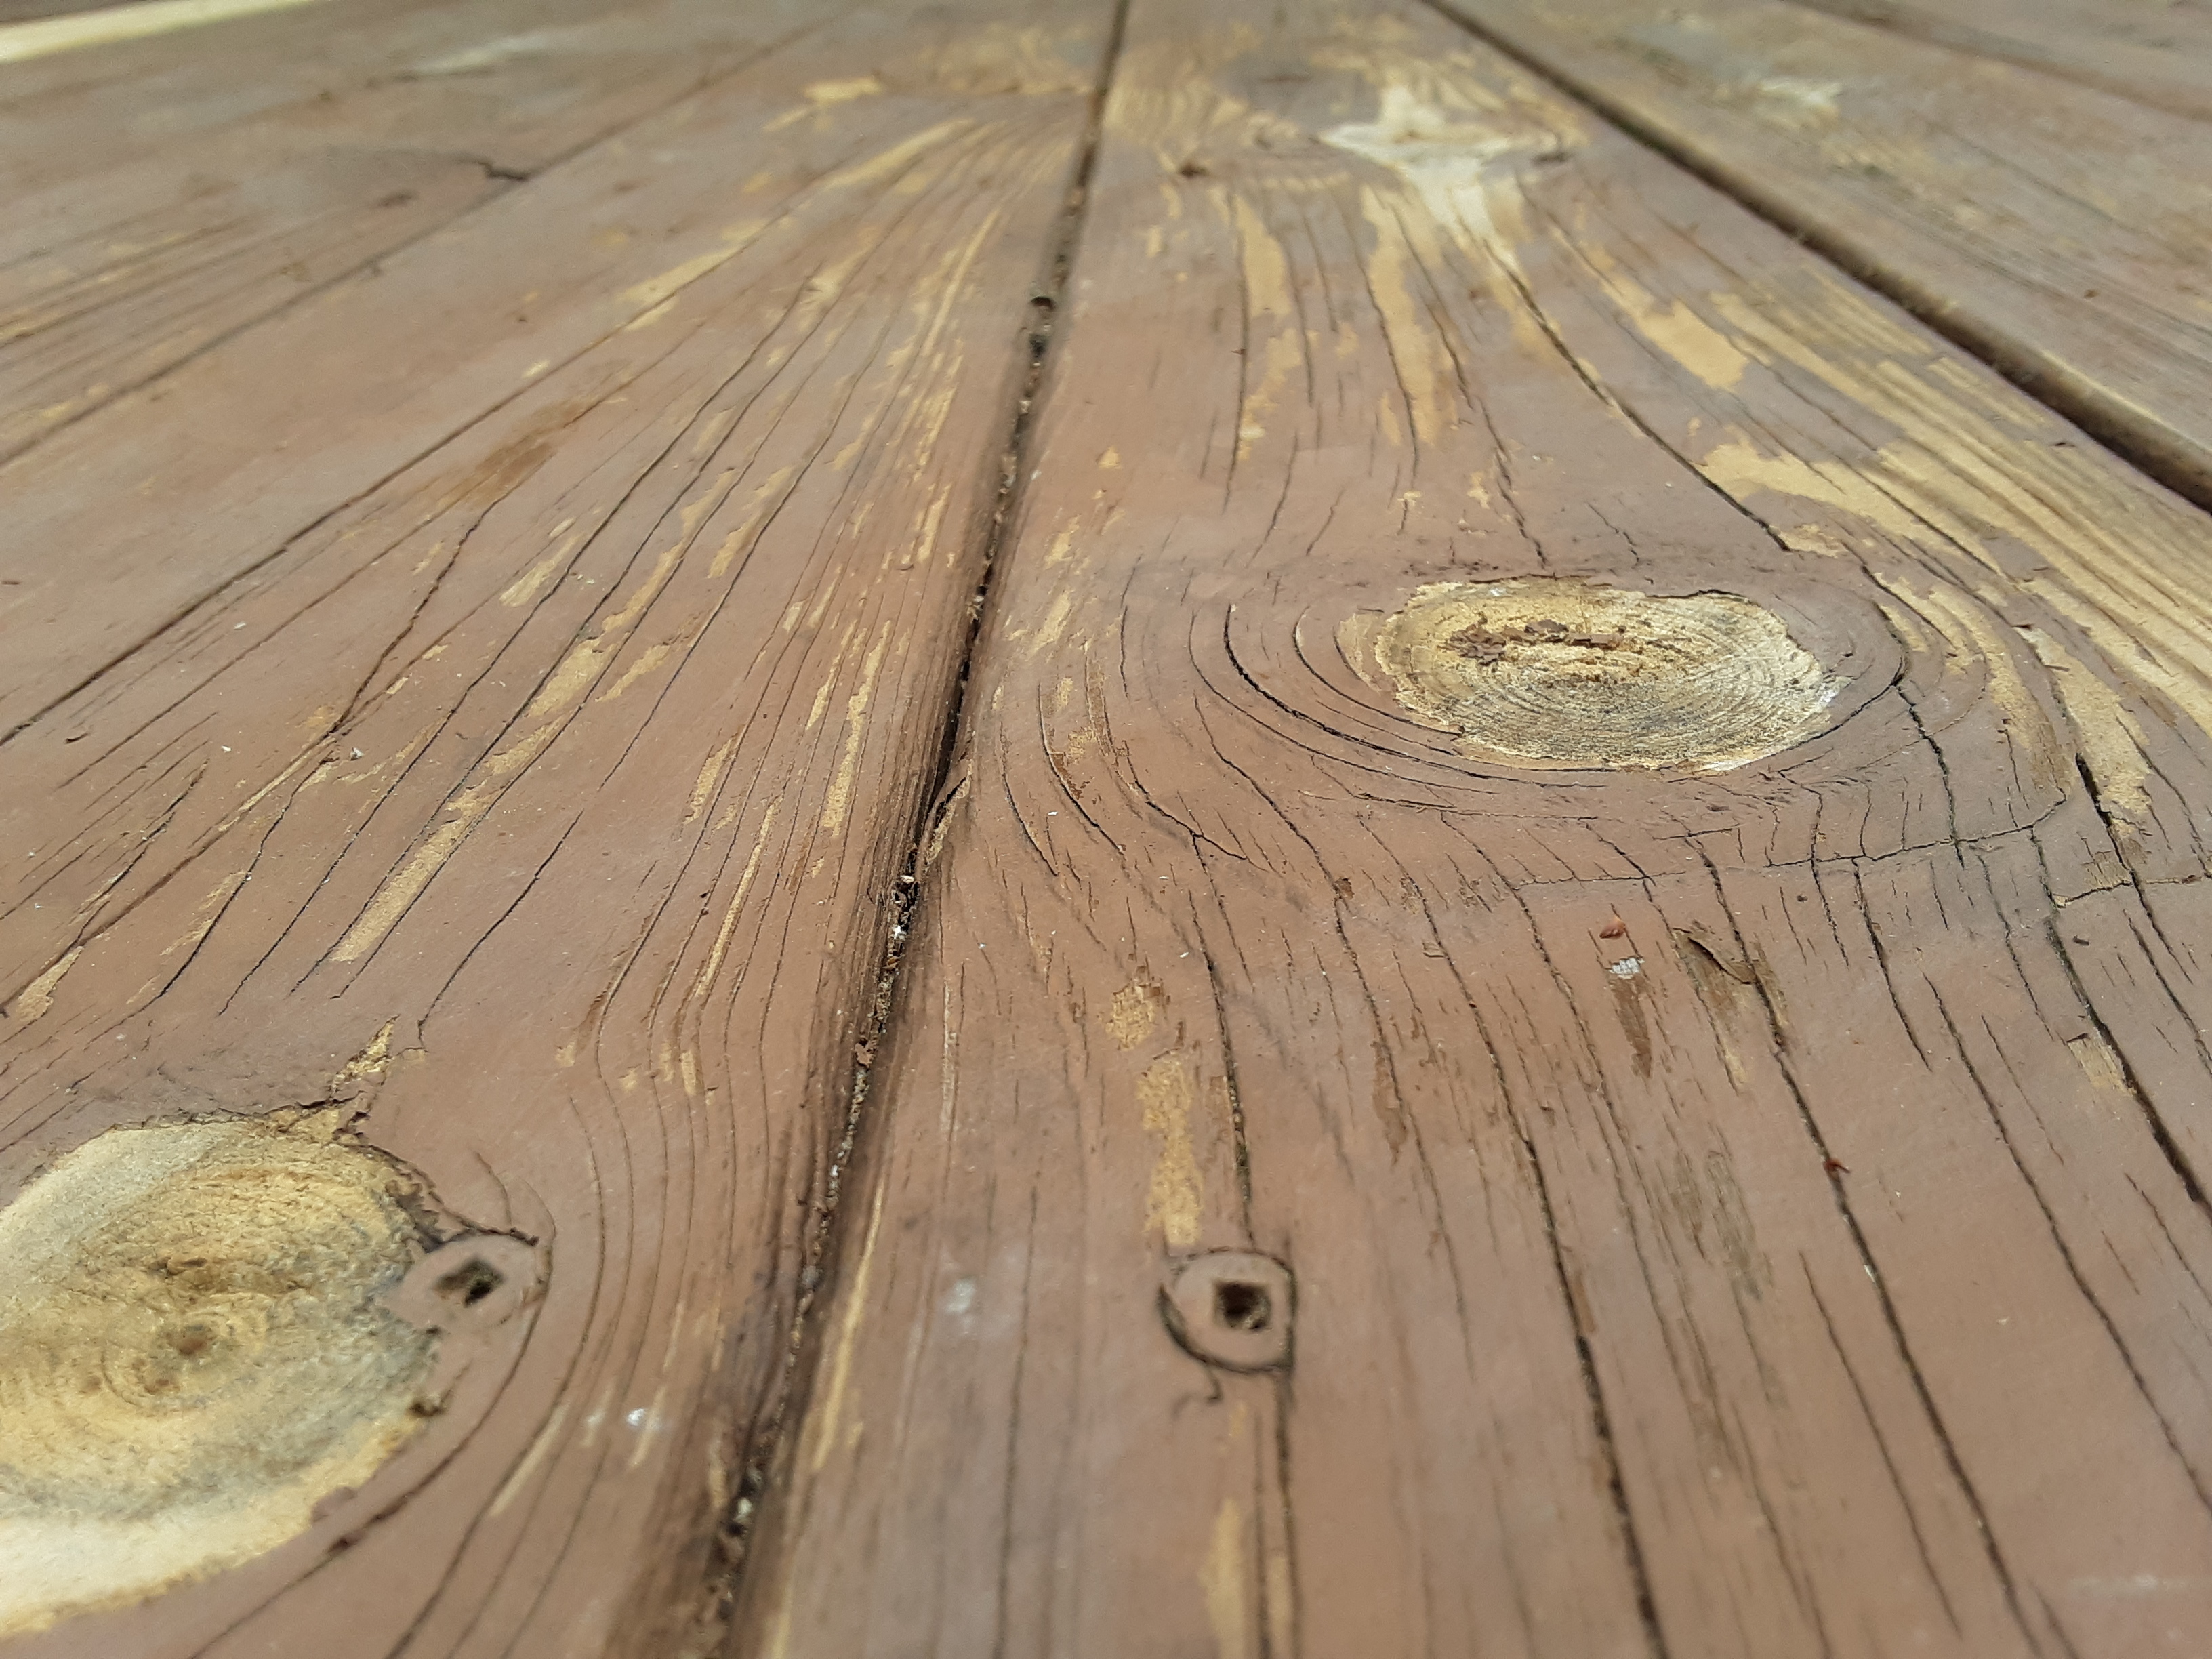
At first the owner just wanted the decking replaced, but I noticed that the center of the deck was several inches higher than around it. I went to look underneath and discovered the problem. As I began removing decking boards, I paused to record the deterioration that caused the owner to contact me.
The old stain reminded me of weather worn whitewash on a New England coastal style house.
The pattern of boards was interesting but probably contributed to the deterioration and would certainly take more wood and more cost to replace.
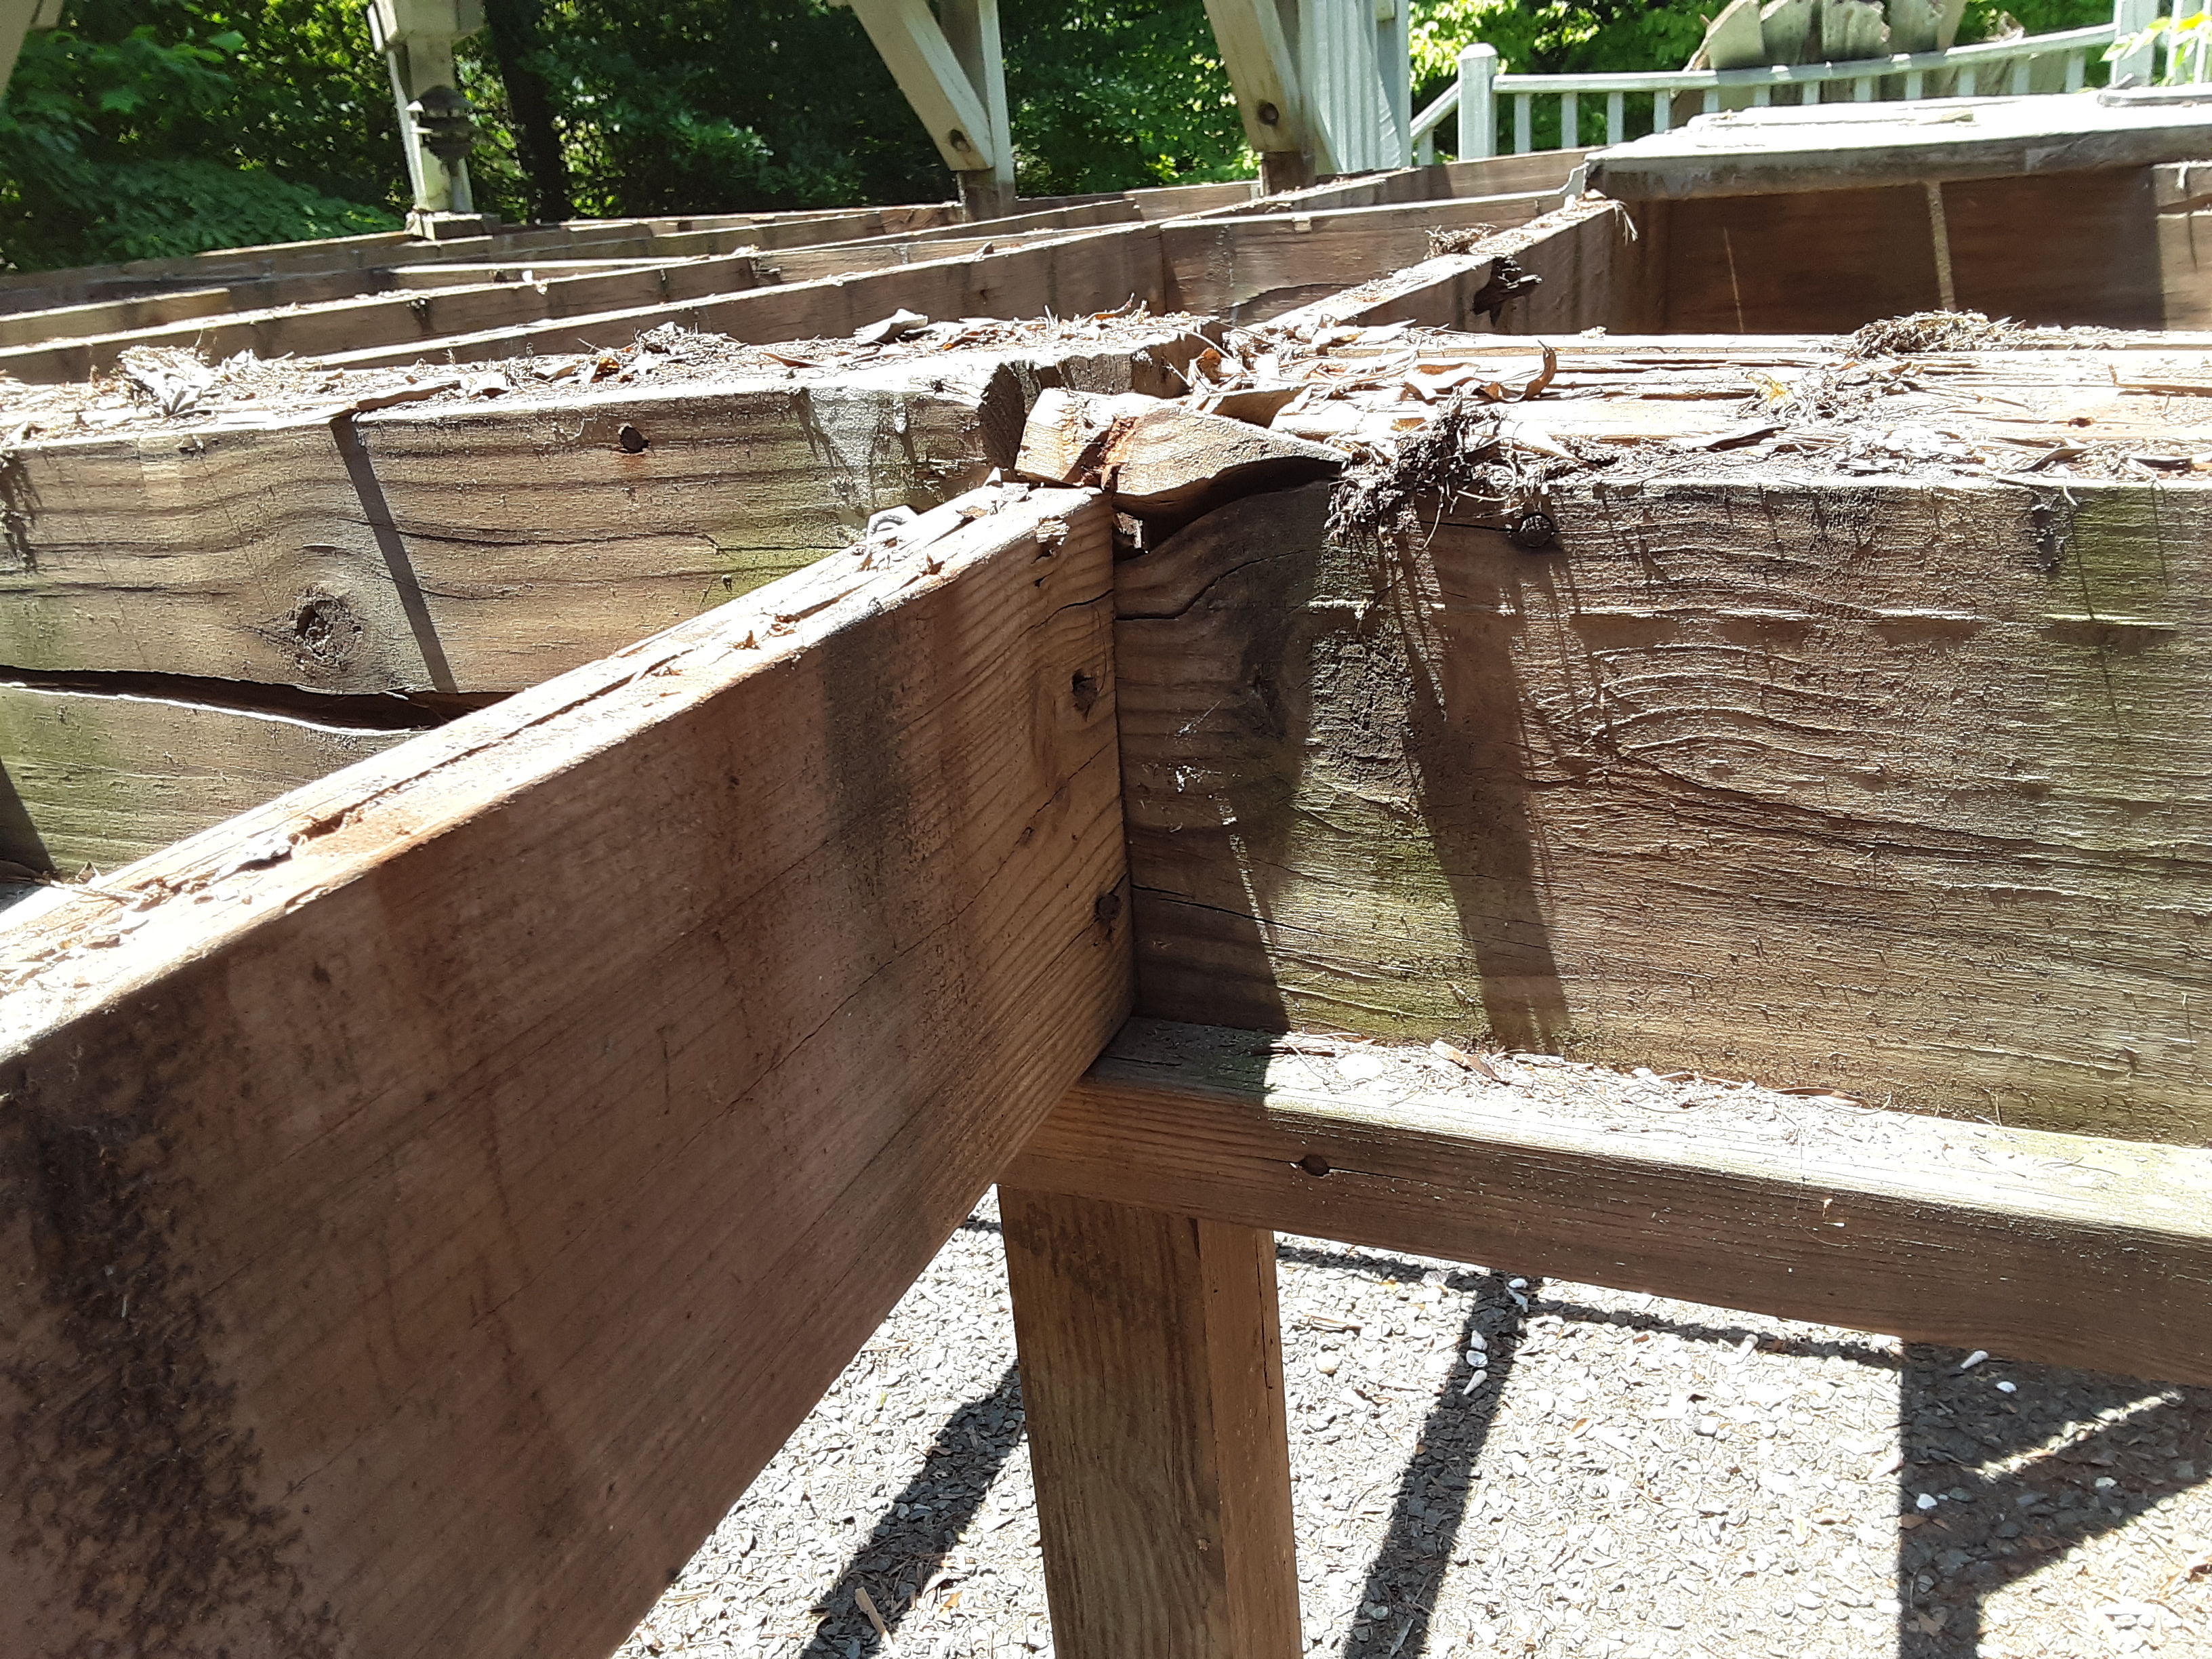
Here was the real problem with the deck, a hidden hazard that I declared, “If you had had a party with 30 people on this deck, there may have been many of them in the hospital.” You see, the cracked 2 x 12 is bolted to the side of the post and expected to hold the weight of eight 2 x 8 joists. The 1/2 carriage bolts held, but the board did not. Notice the 2 x 8 at the right has dropped down with the settling 2 x 12. This is where the rise occurred on the decking boards, which must have been taking much of the weight as well.
The different perspective of the problem reveals more of the near failure of the joists.
I cleaned it all out except for the facing boards attached to the walls that had been under the overhangs with no deterioration.
The center post of the deck held a larger percentage of the total weight, so I increased the post from 4 x 4 to 6 x 6.
I did have to replace one facing board that was not holding well to the wall. I used numerous concrete screws and increased strength of the joist ends with joist hangers.
Take note that the joists now sit on top of the post, a much stronger configuration.
The part of the deck that you don’t normally see is the most important part that supports the weight, the part that takes the most energy to construct and get right, and the part many casually observers think shows little progress when being constructed.
In order to reduce leaf litter and deterioration, I caulked between brick and face plate.
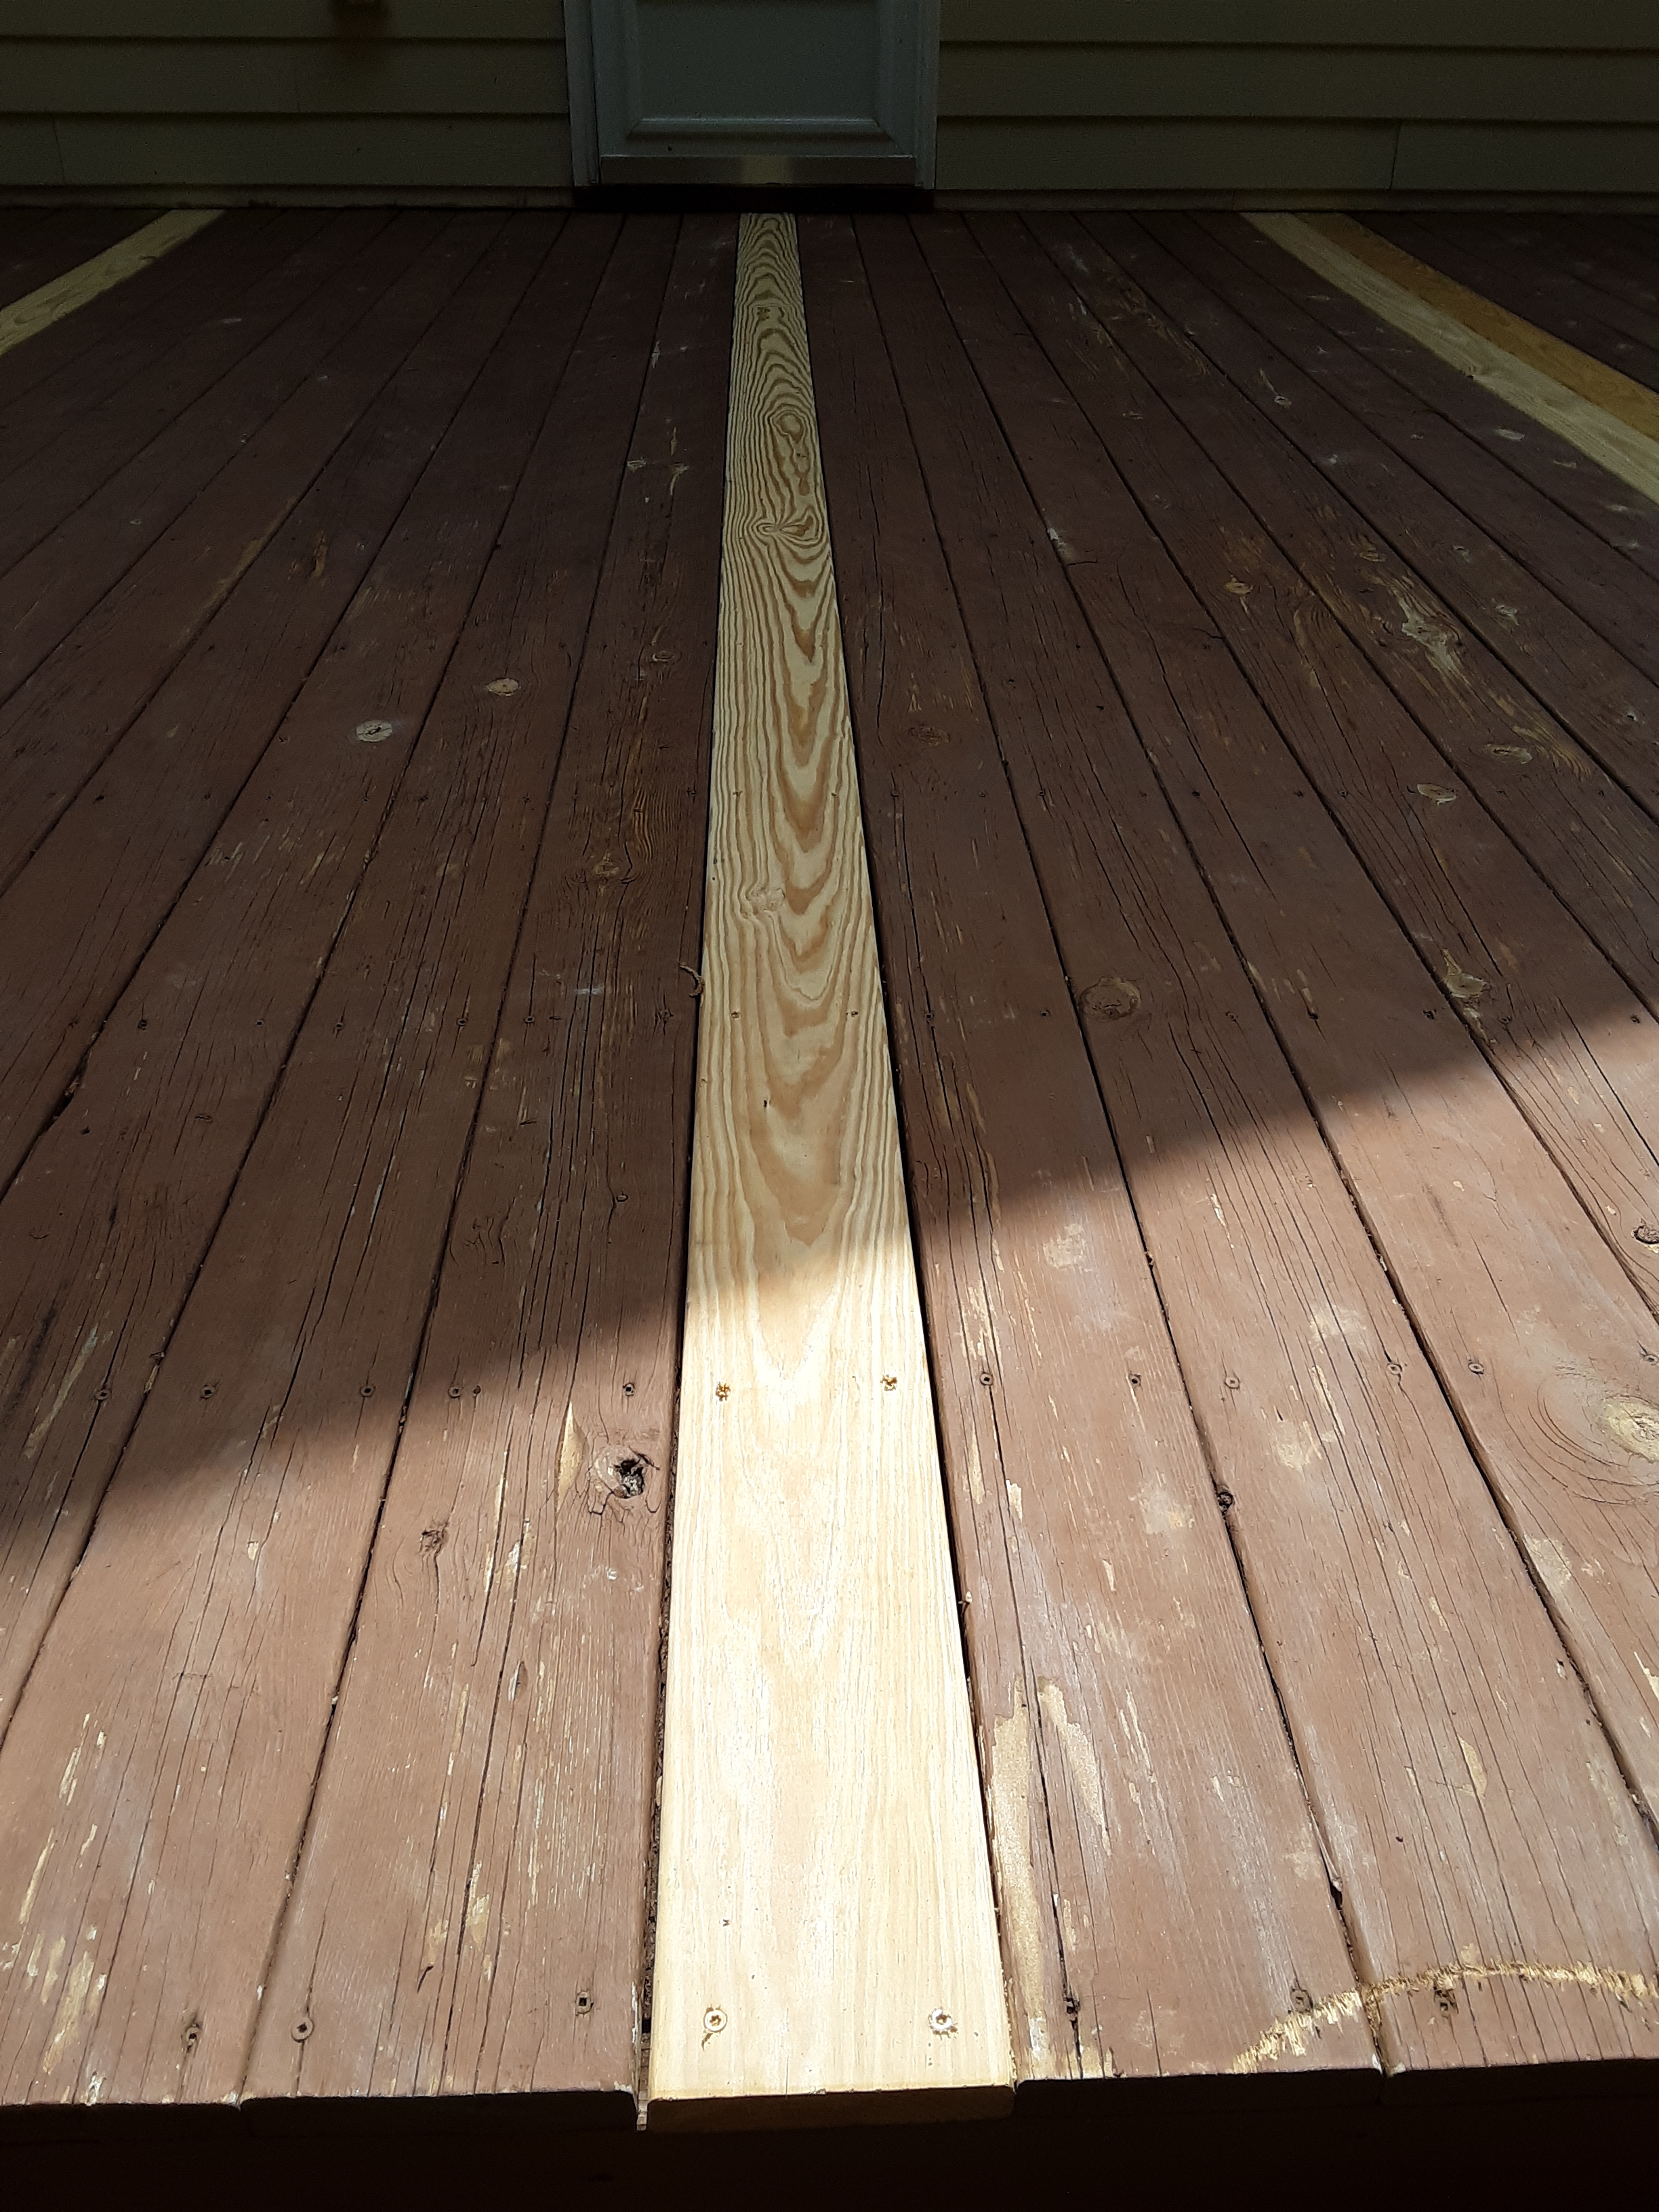
And the decking begins!
The joints are not obvious and the area has a clean and spacious look.
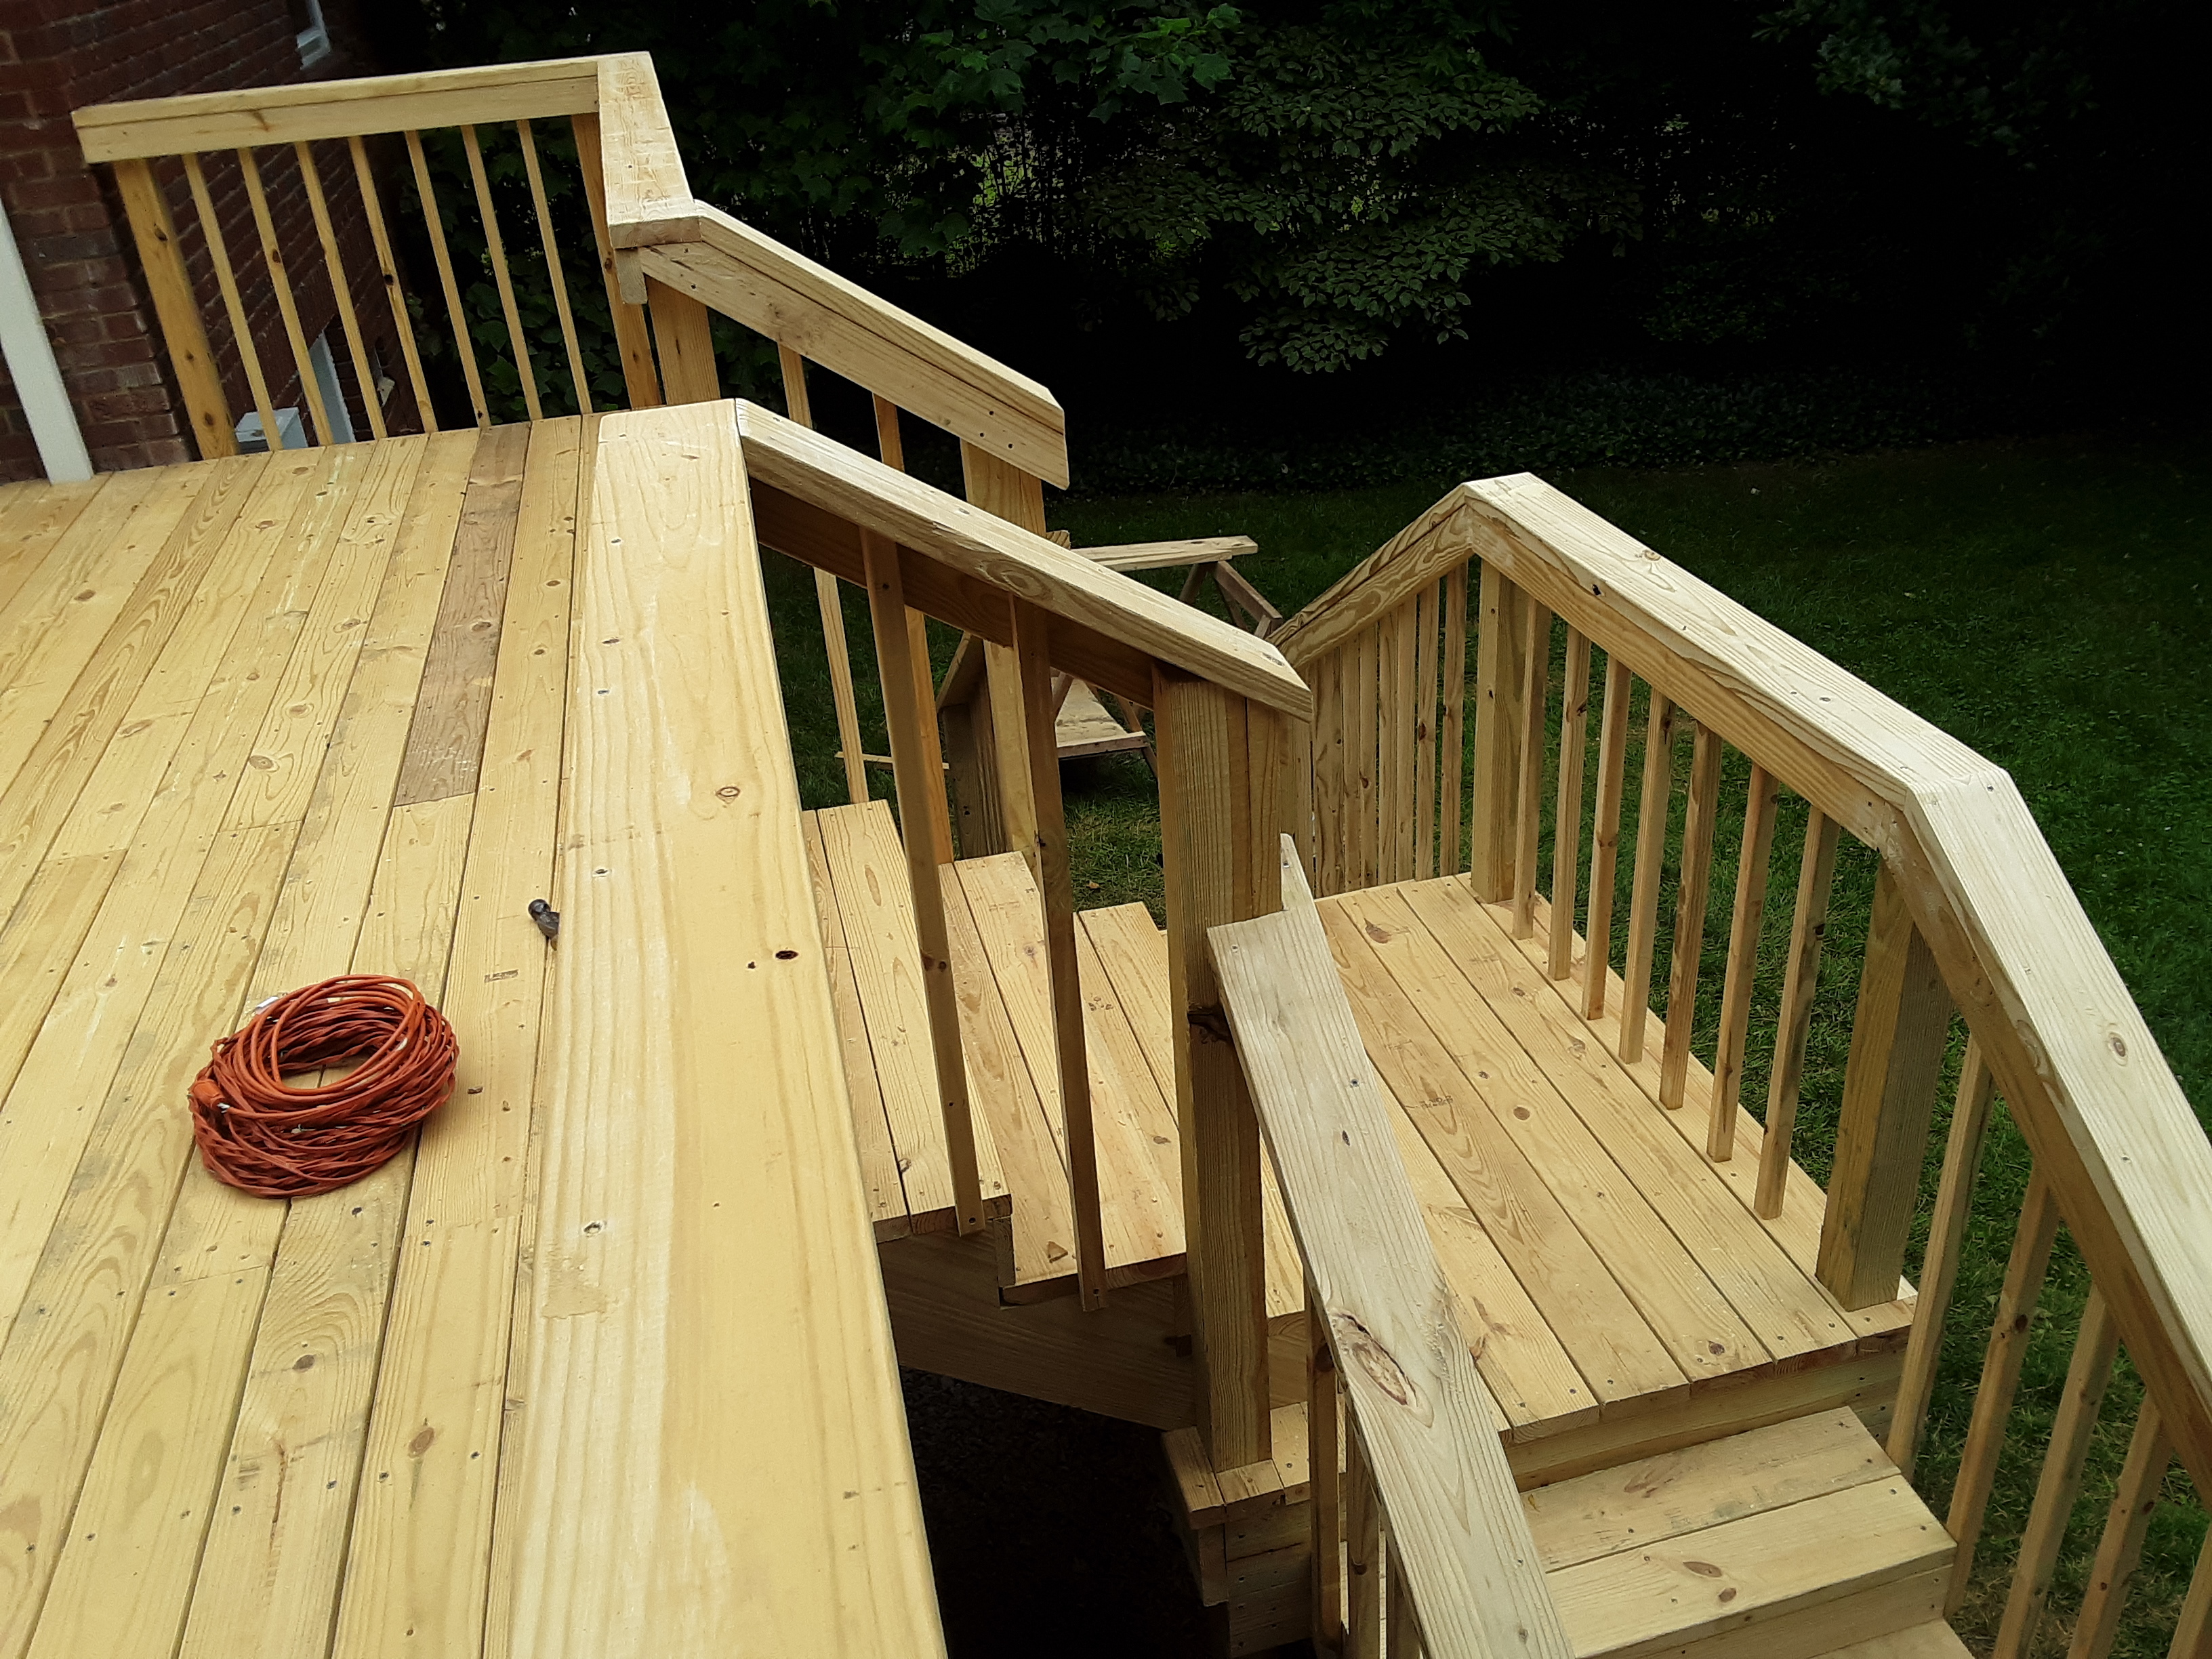
The requested steps, near copies of the old ones were complex. I quit early this day for rain.
Getting standard stringers to fit the rise and run of available space is a significant challenge.
The lady of the house wanted the deck to have symmetry, so the landing and stairs running two ways.
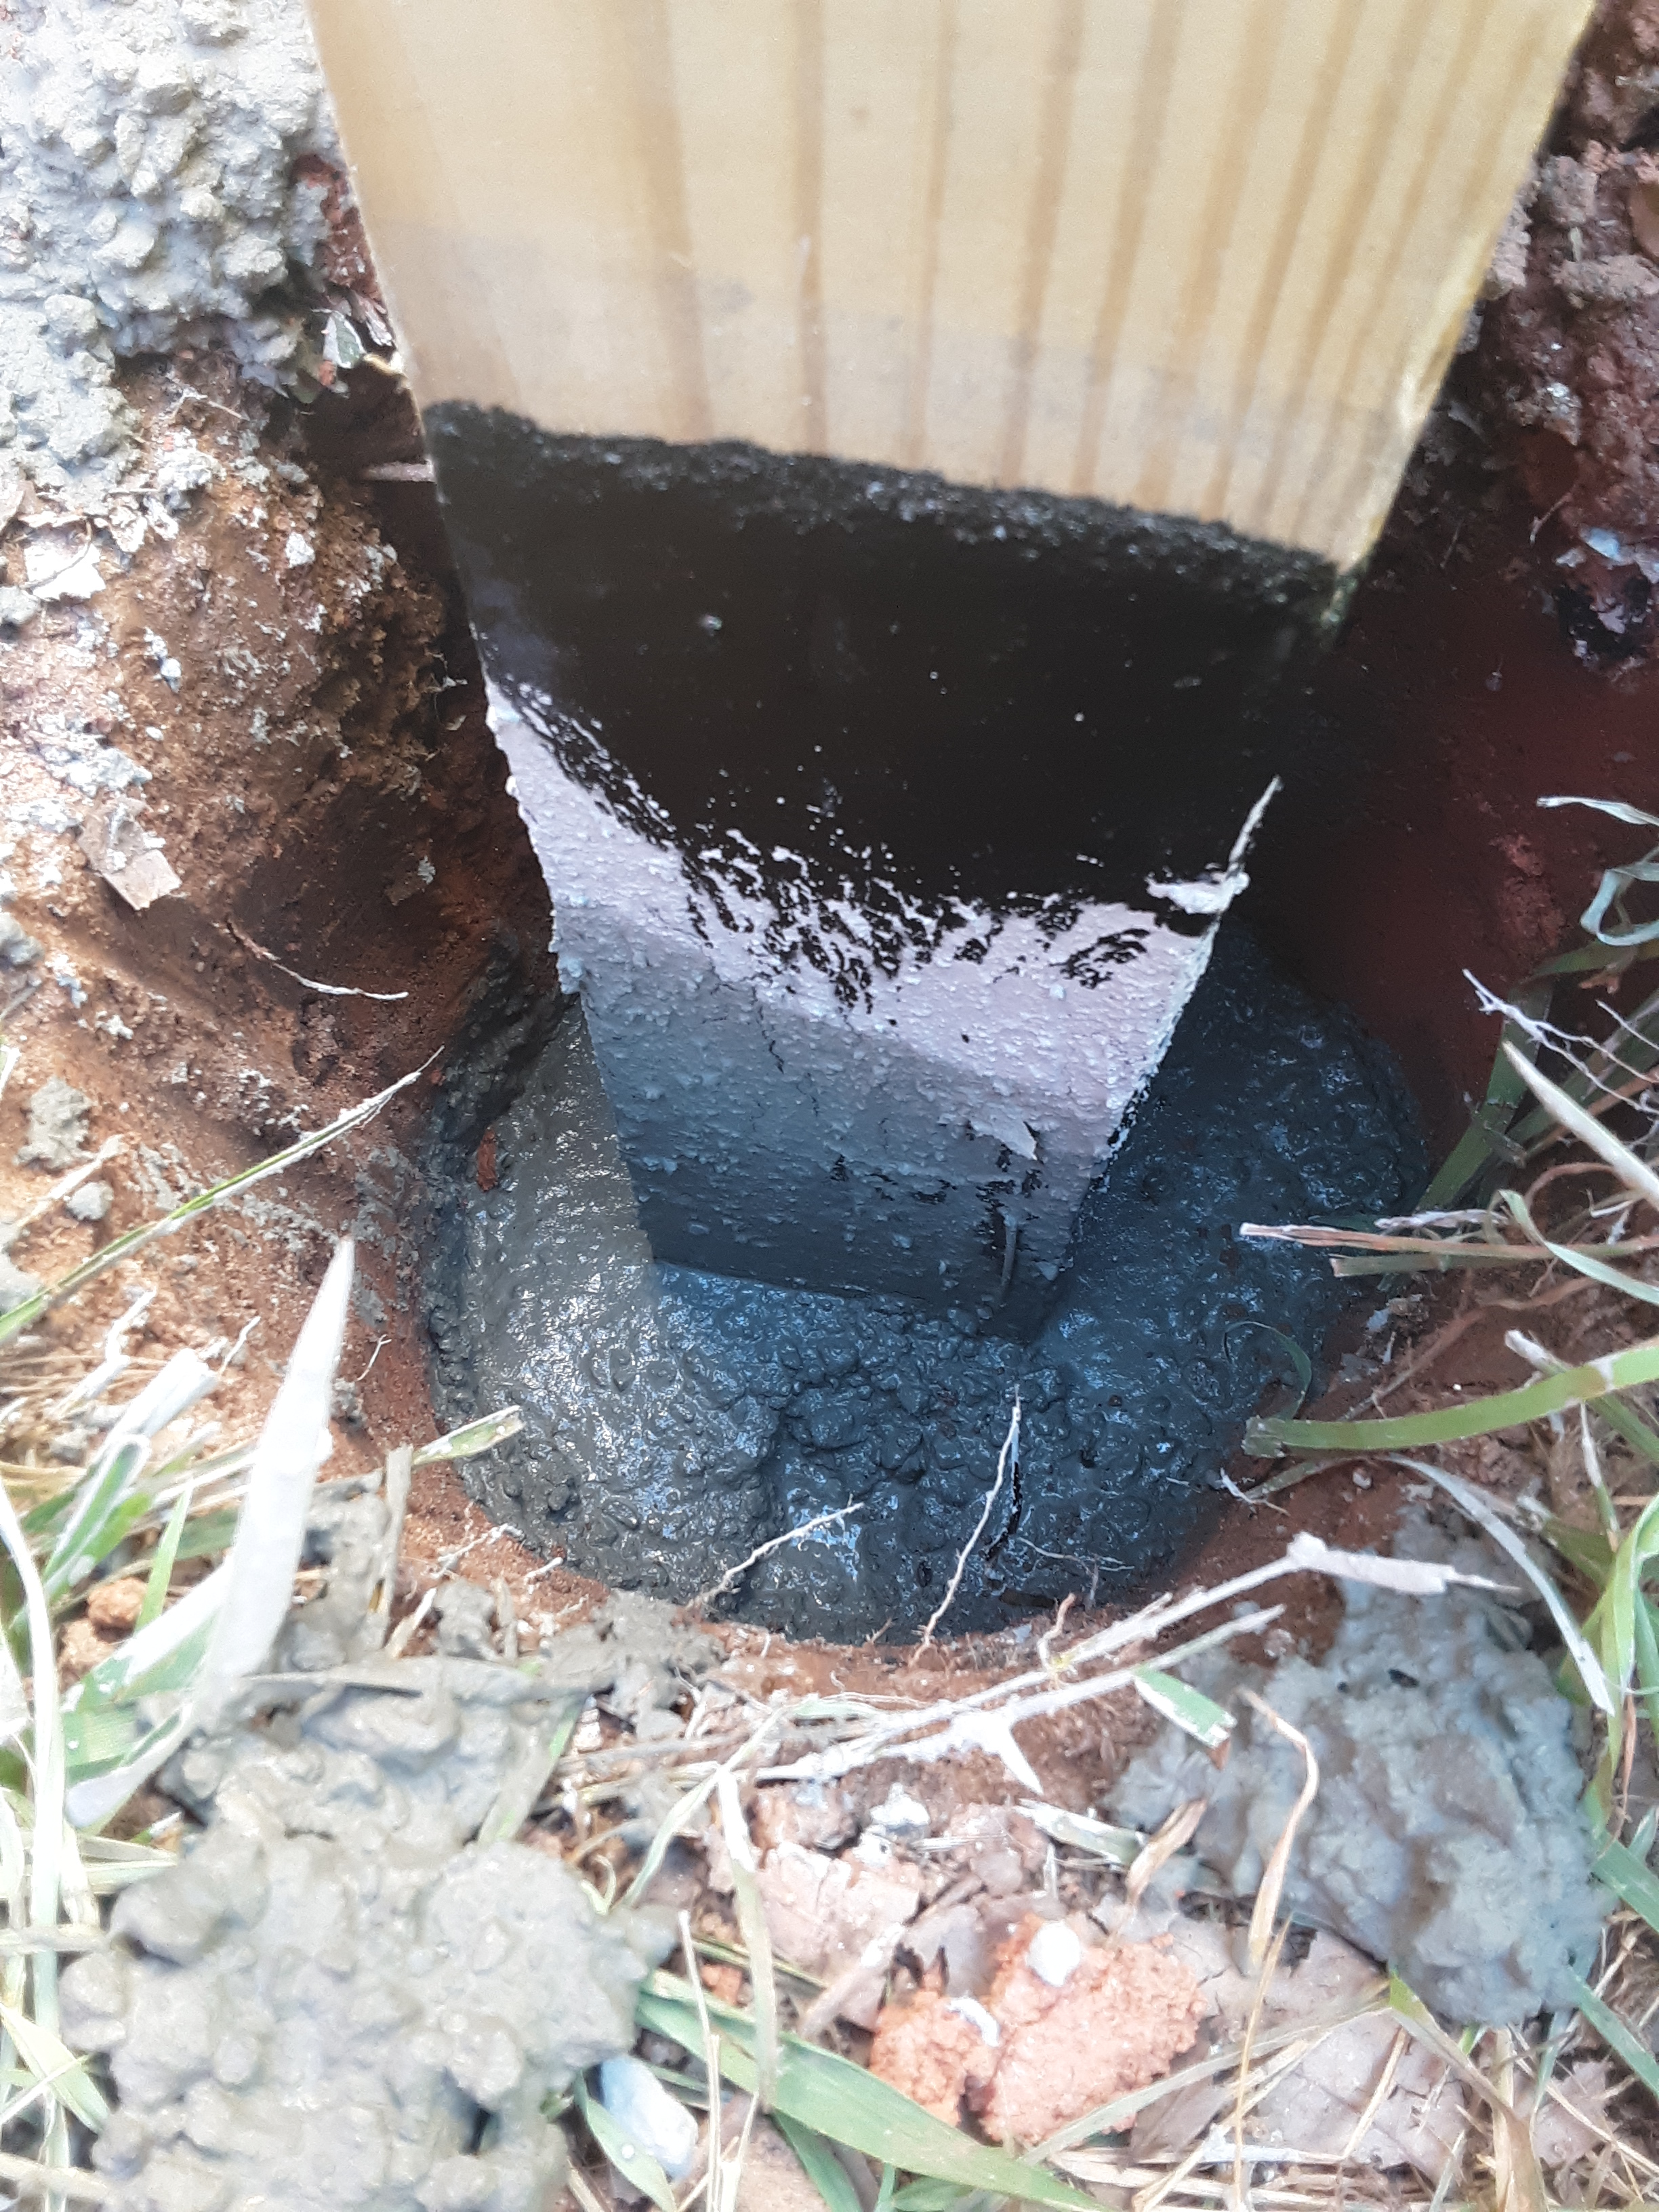
Concrete for some reason that I don’t understand causes quicker deterioration of treated wood than straight clay. So I have taken to putting tar on posts to lengthen the their life.
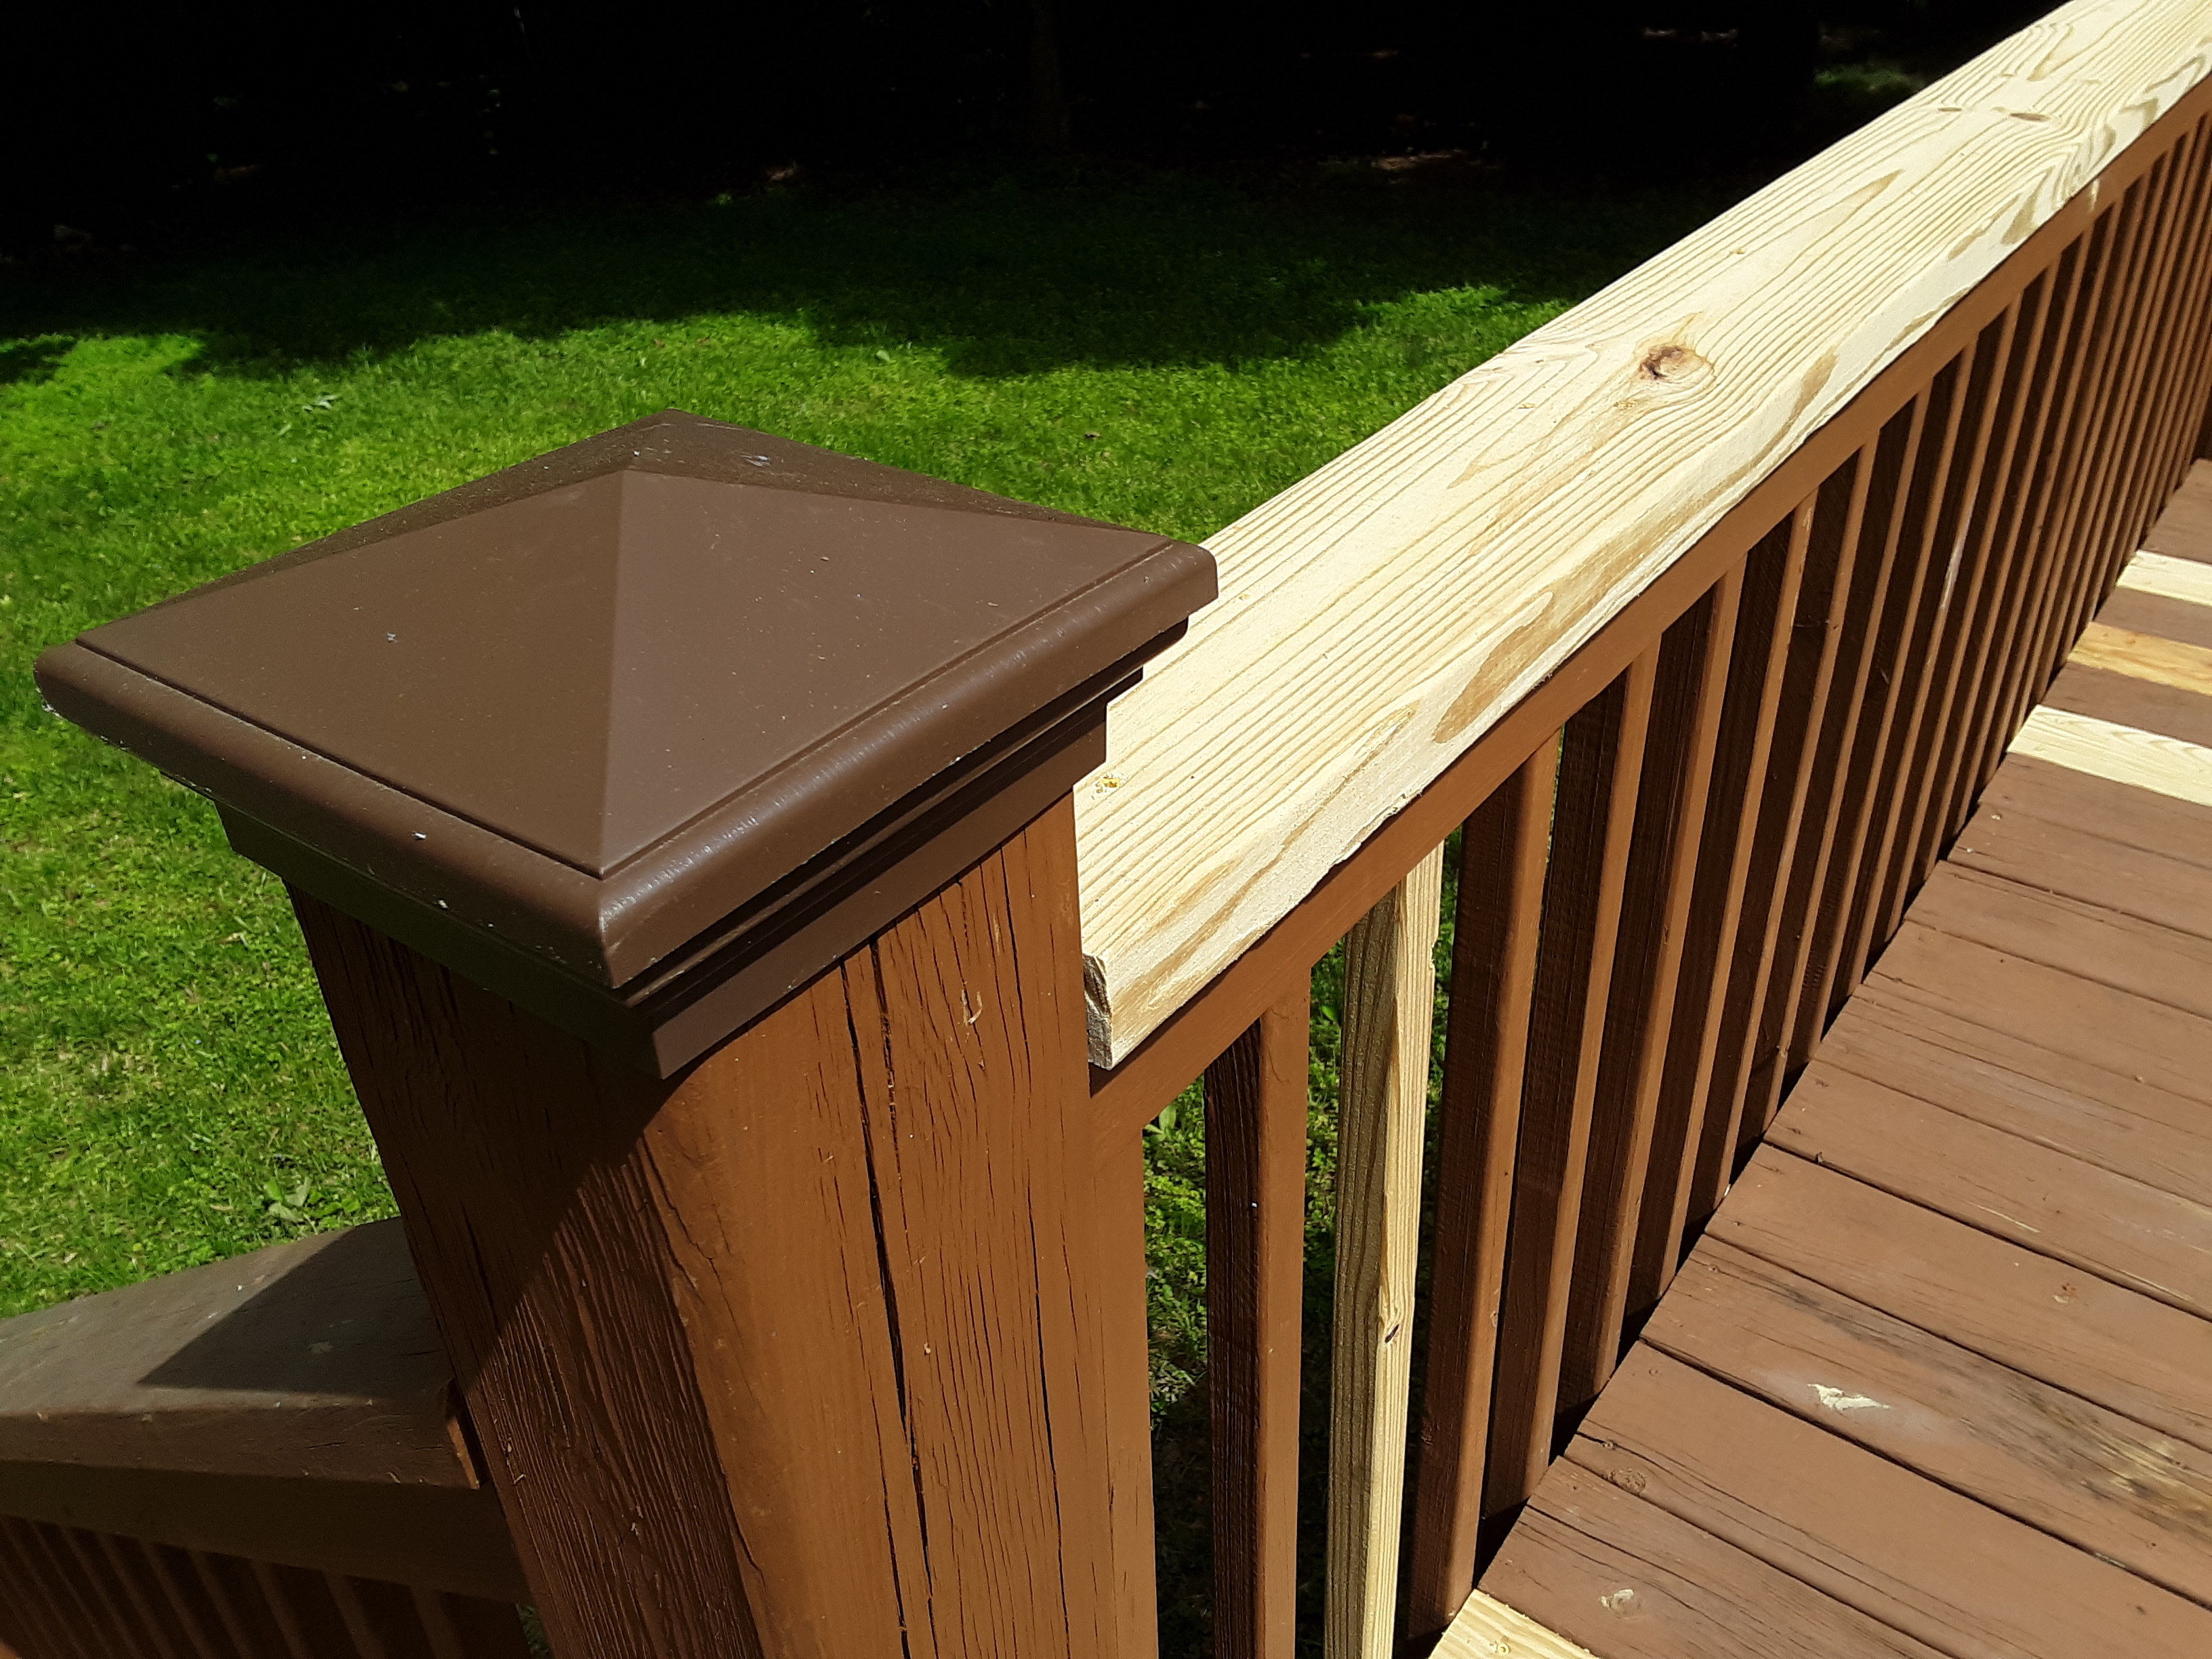
Wow! It’s finished. All that I need to do is stain it. I finish it off with a belt sander on the railing especially and any other place that looks rough.
And there it is in its light gray stain, all matching the brick and trim and gray, wicker deck furniture and white, metal furniture that we moved onto the deck a few days later. Another good challenge for Decks and Such completed.
I have been building decks as work arises for just over a year now, but before that when I was full time teacher, I would do projects in the summer and sometimes on weekends. The following deck was built in the summer of 2013 and turns 8 years old this month. Unlike another one that I built that had no maintenance in the ensuing years, this one has been taken good care of. I cannot find pictures of building the deck though I remember taking some. My two youngest sons helped me with the project which included replacing the front steps, installing a thermostatically controlled vent in the front porch shed roof, trimming two trees overhanging the house, reshaping the the contour of the ground above the house to direct water away from the house, and building the deck which replaced a similar one that had not been maintenanced properly. Besides being re-stained regularly since it was new, there have been improvements like the skirt underneath and the concrete pads at the base of the steps and underneath. The wall below the deck was there but has been landscaped along with other areas around the steps. Decks are certainly not permanent structures, but when taken care of properly may last and look good for more than 30 years.
Though you may take care of your deck and it may rot anyway because of circumstances of the wood quality or environment of the deck*, it is much more likely to last in good shape when you do some maintenance.
This idea of maintenance applies to all things that you own, but also applies to your body and relationships. Make time for taking care of yourself. Make time to get to know better those you love and those with whom you are acquainted. You will be happy with the result and the benefits will be long term.
*Things very detrimental to decks include intense solar radiation (south facing or reflection off of glass or radiation from brick or asphalt), residing under trees where there is much litter accumulated and constant moisture that promotes algae and mold growth.
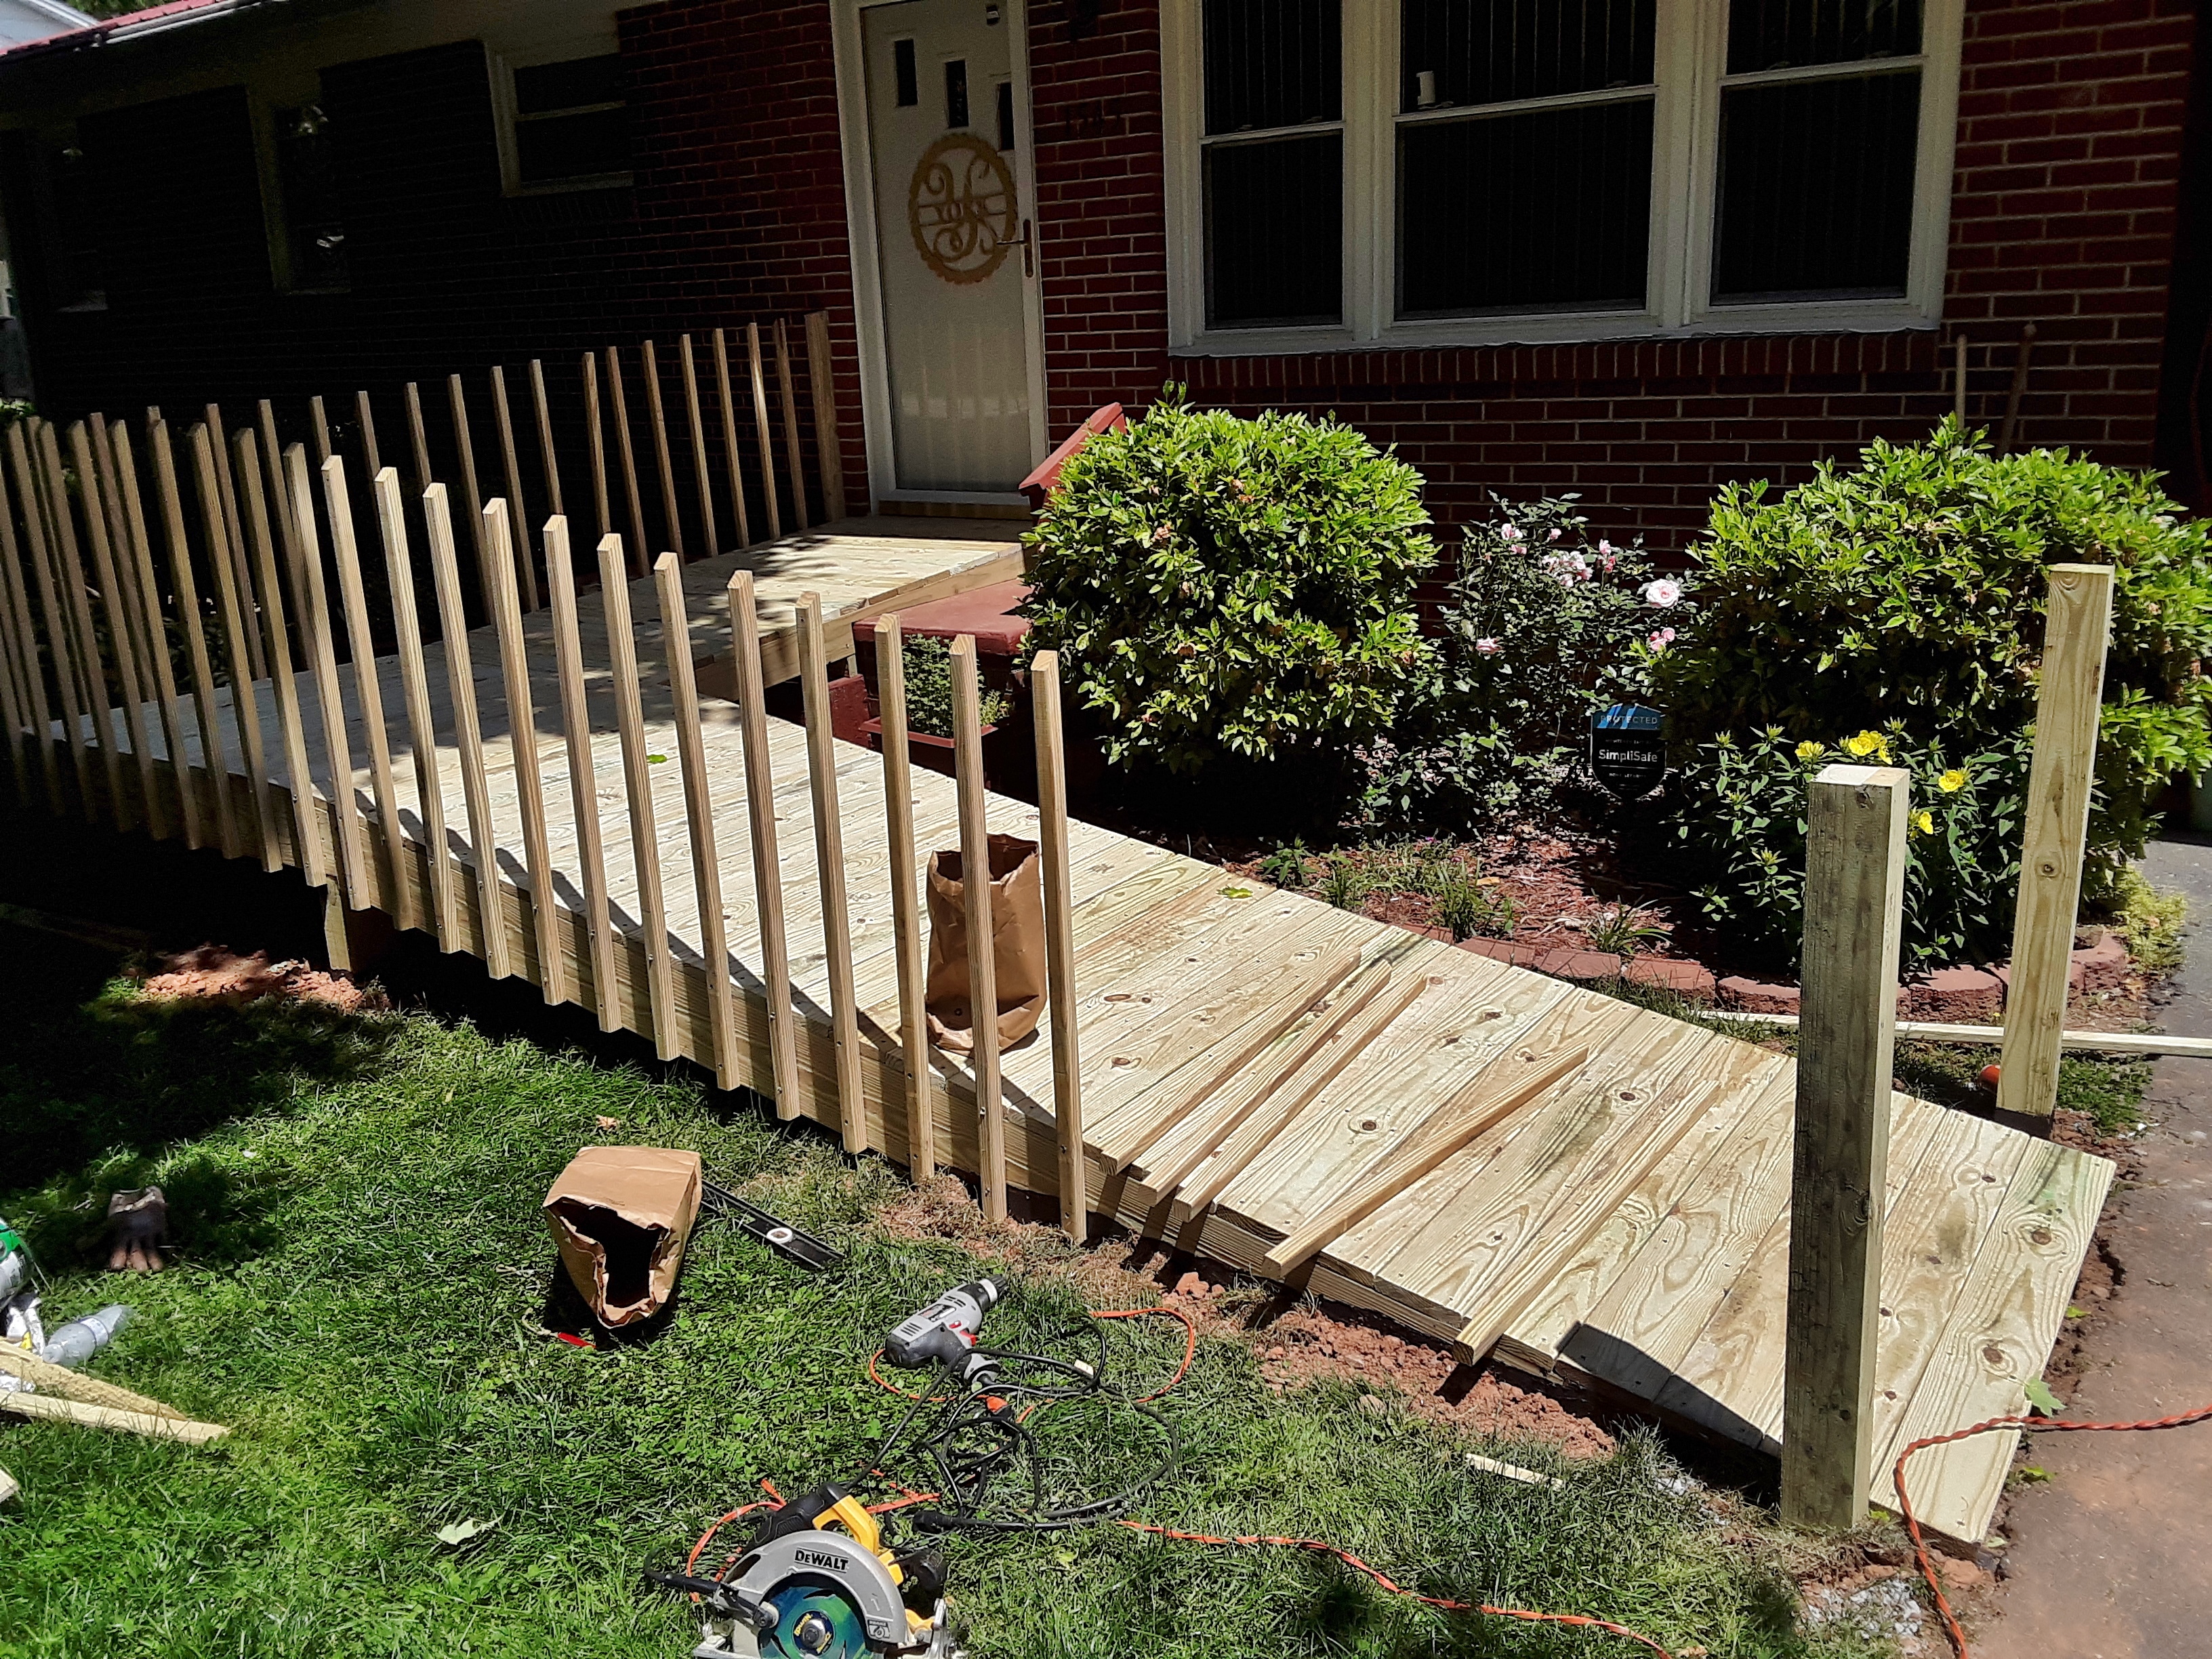
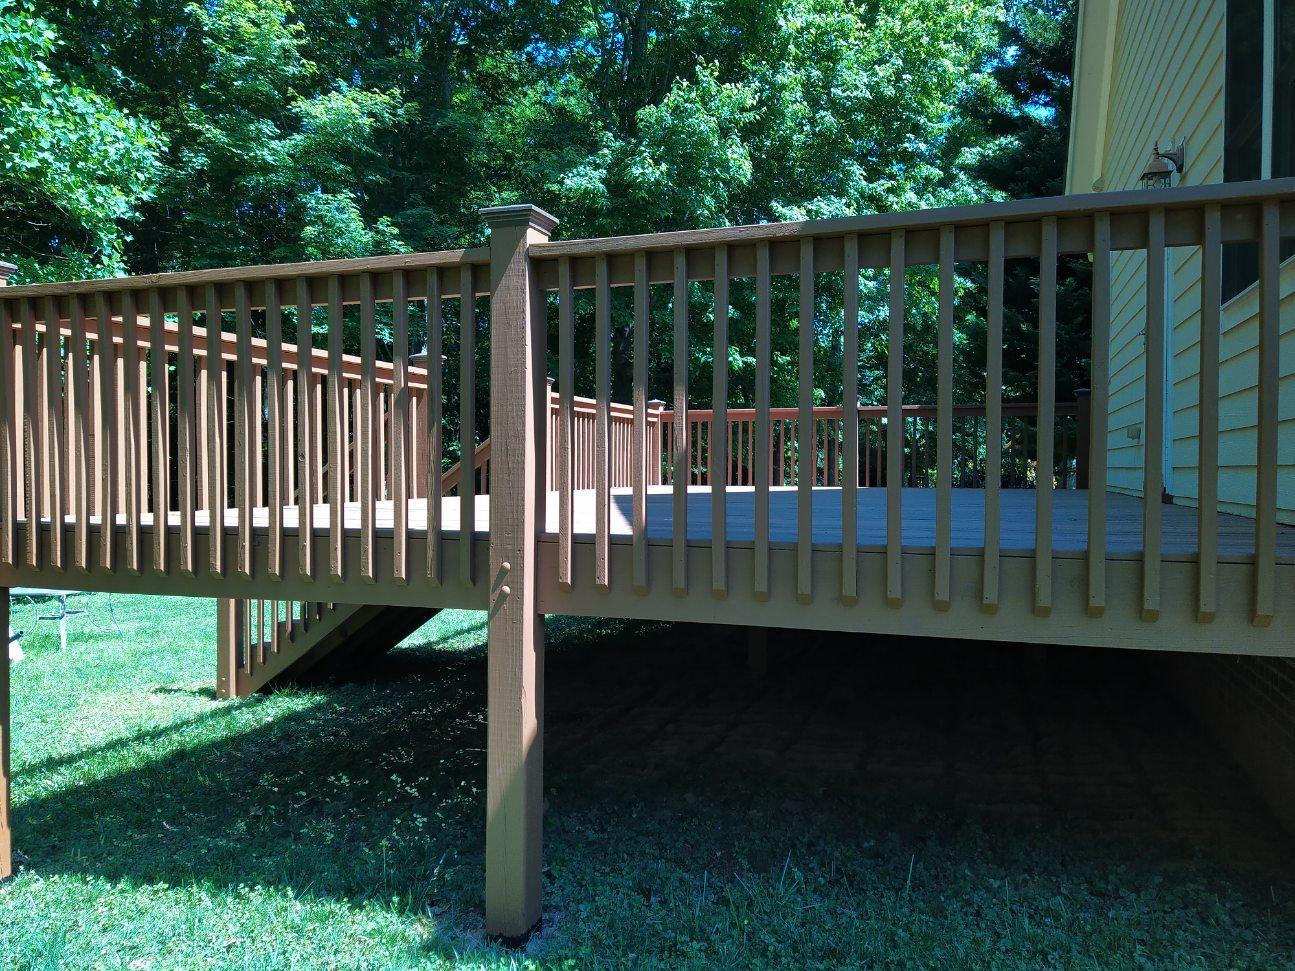
I built my second handicap ramp this year (see 1:12). It was bright and sunny and when the afternoon came a shade tree covered the spot, cooling the worksite. I would have liked to start with a landing at the door but the practical use of space necessitated dropping immediately out the door to fit the space and stay within the maximum 1:12 pitch of a handicap ramp.
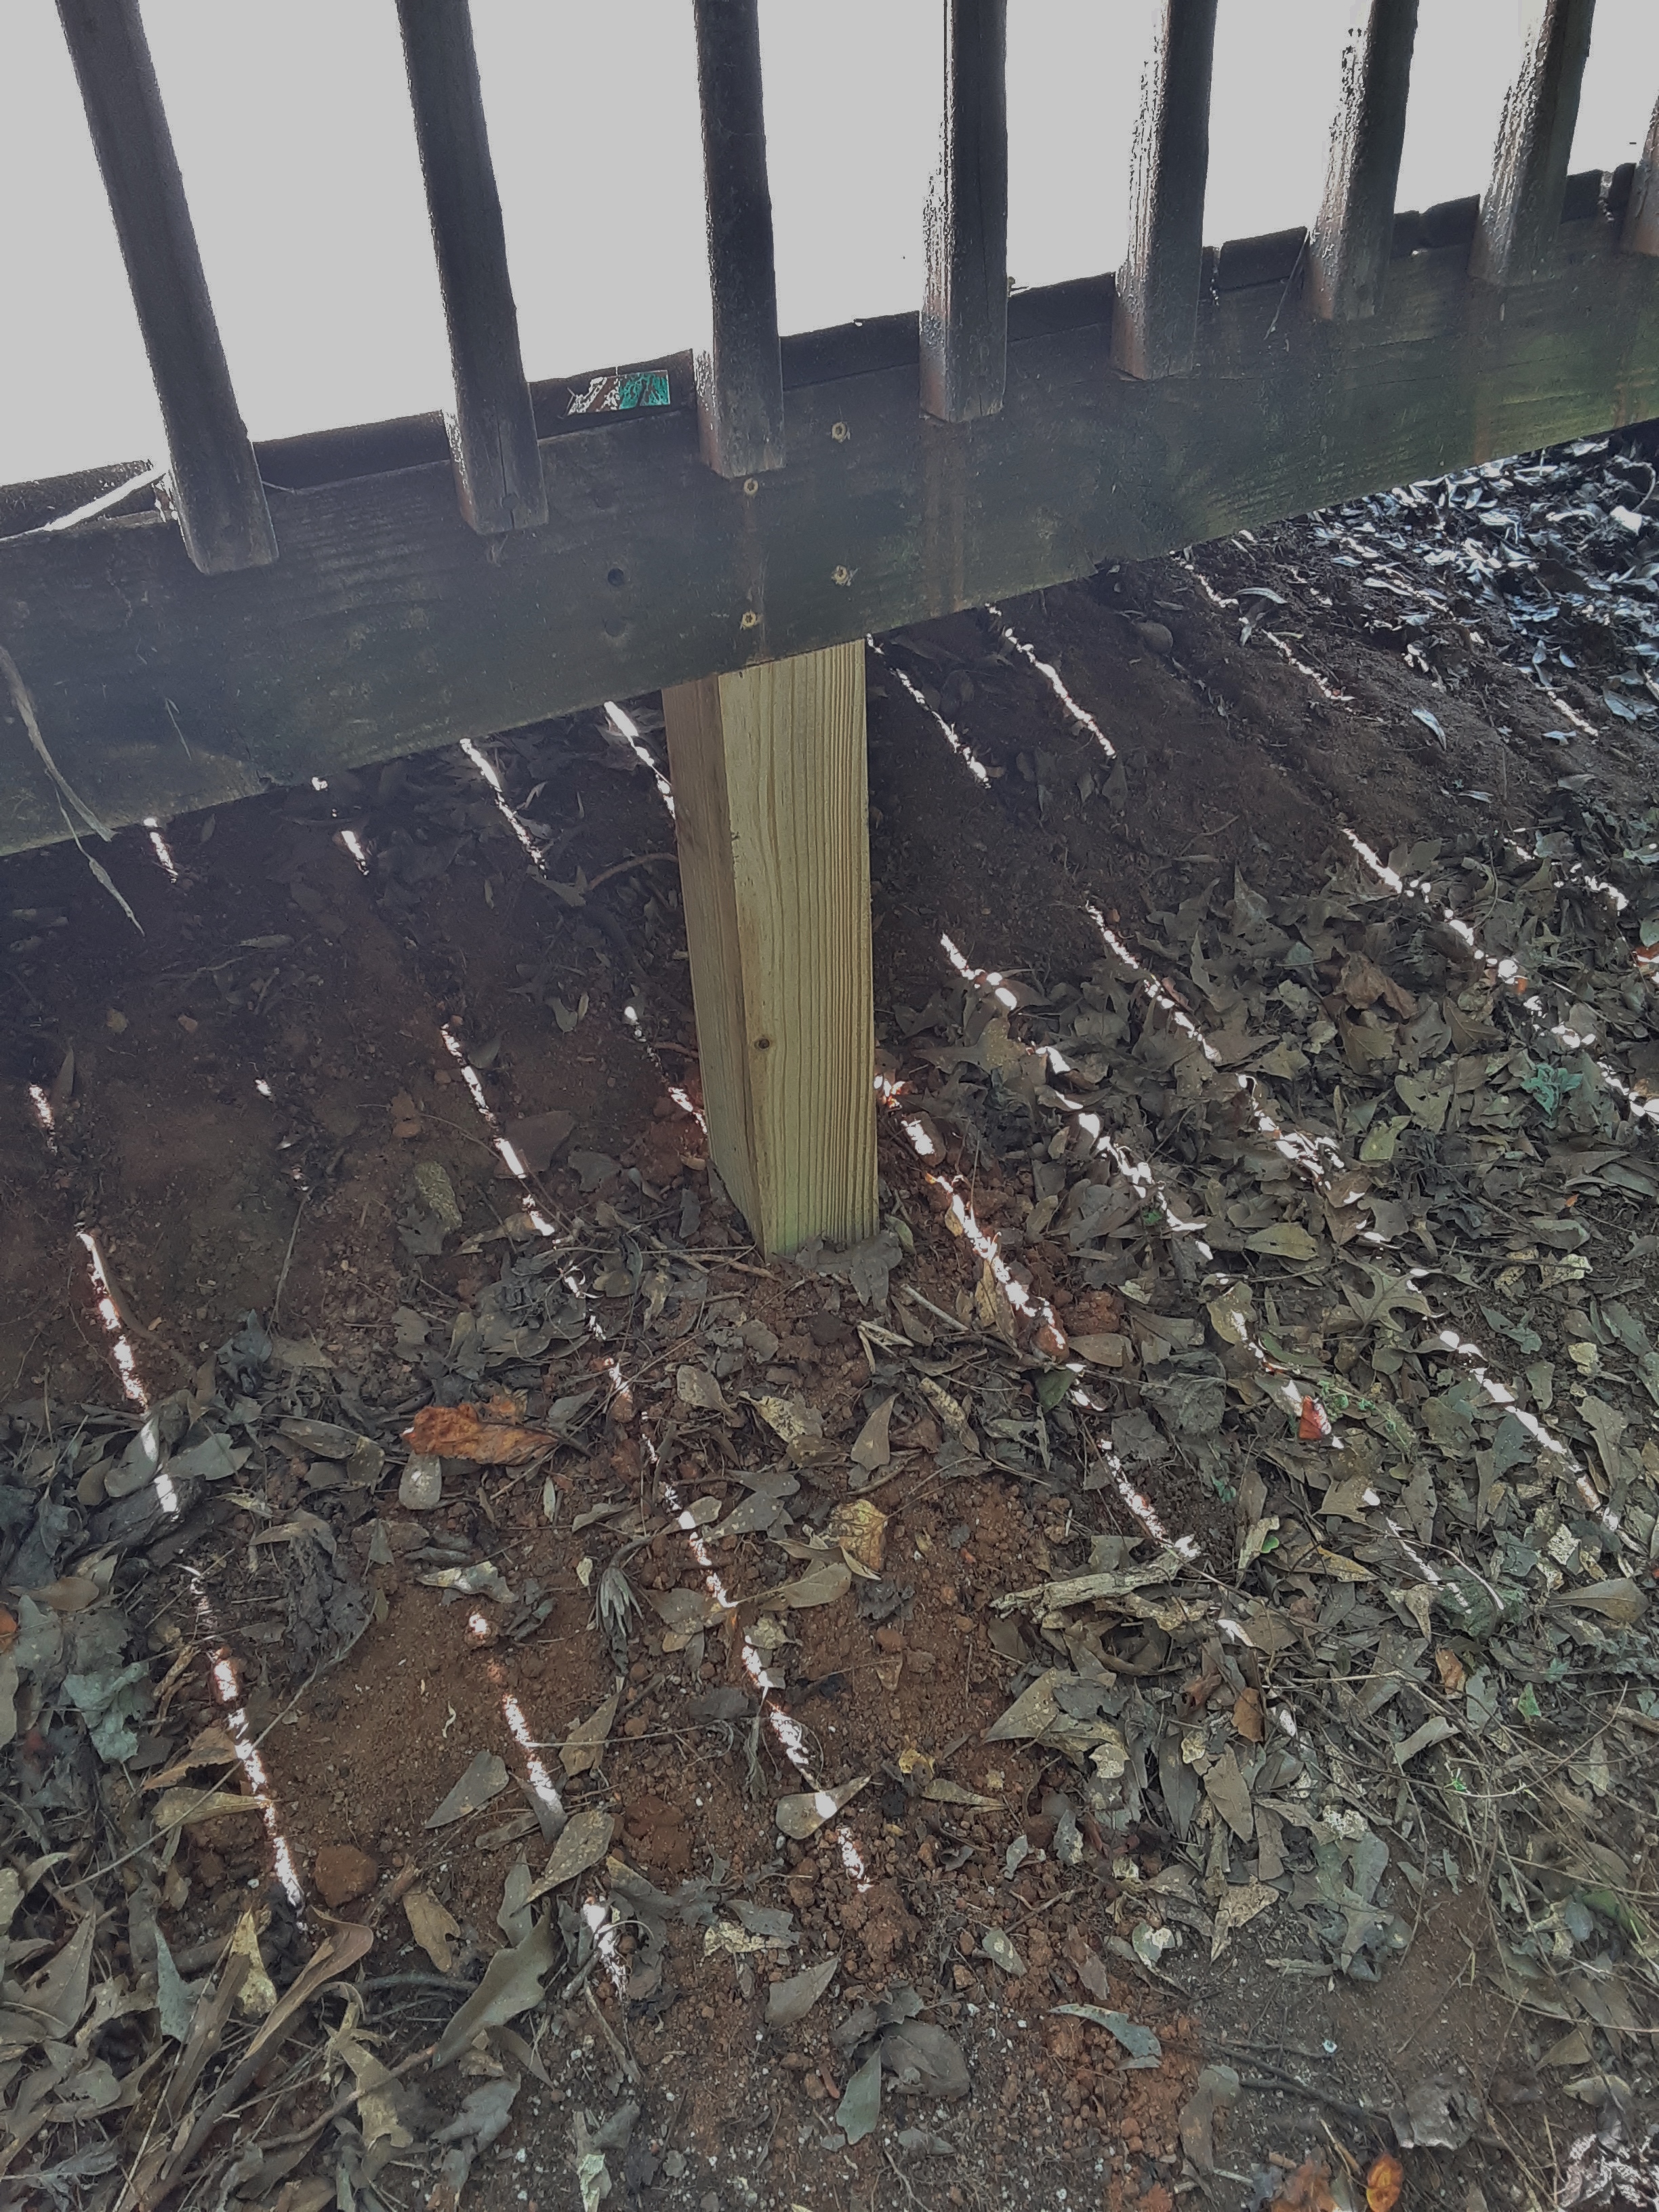
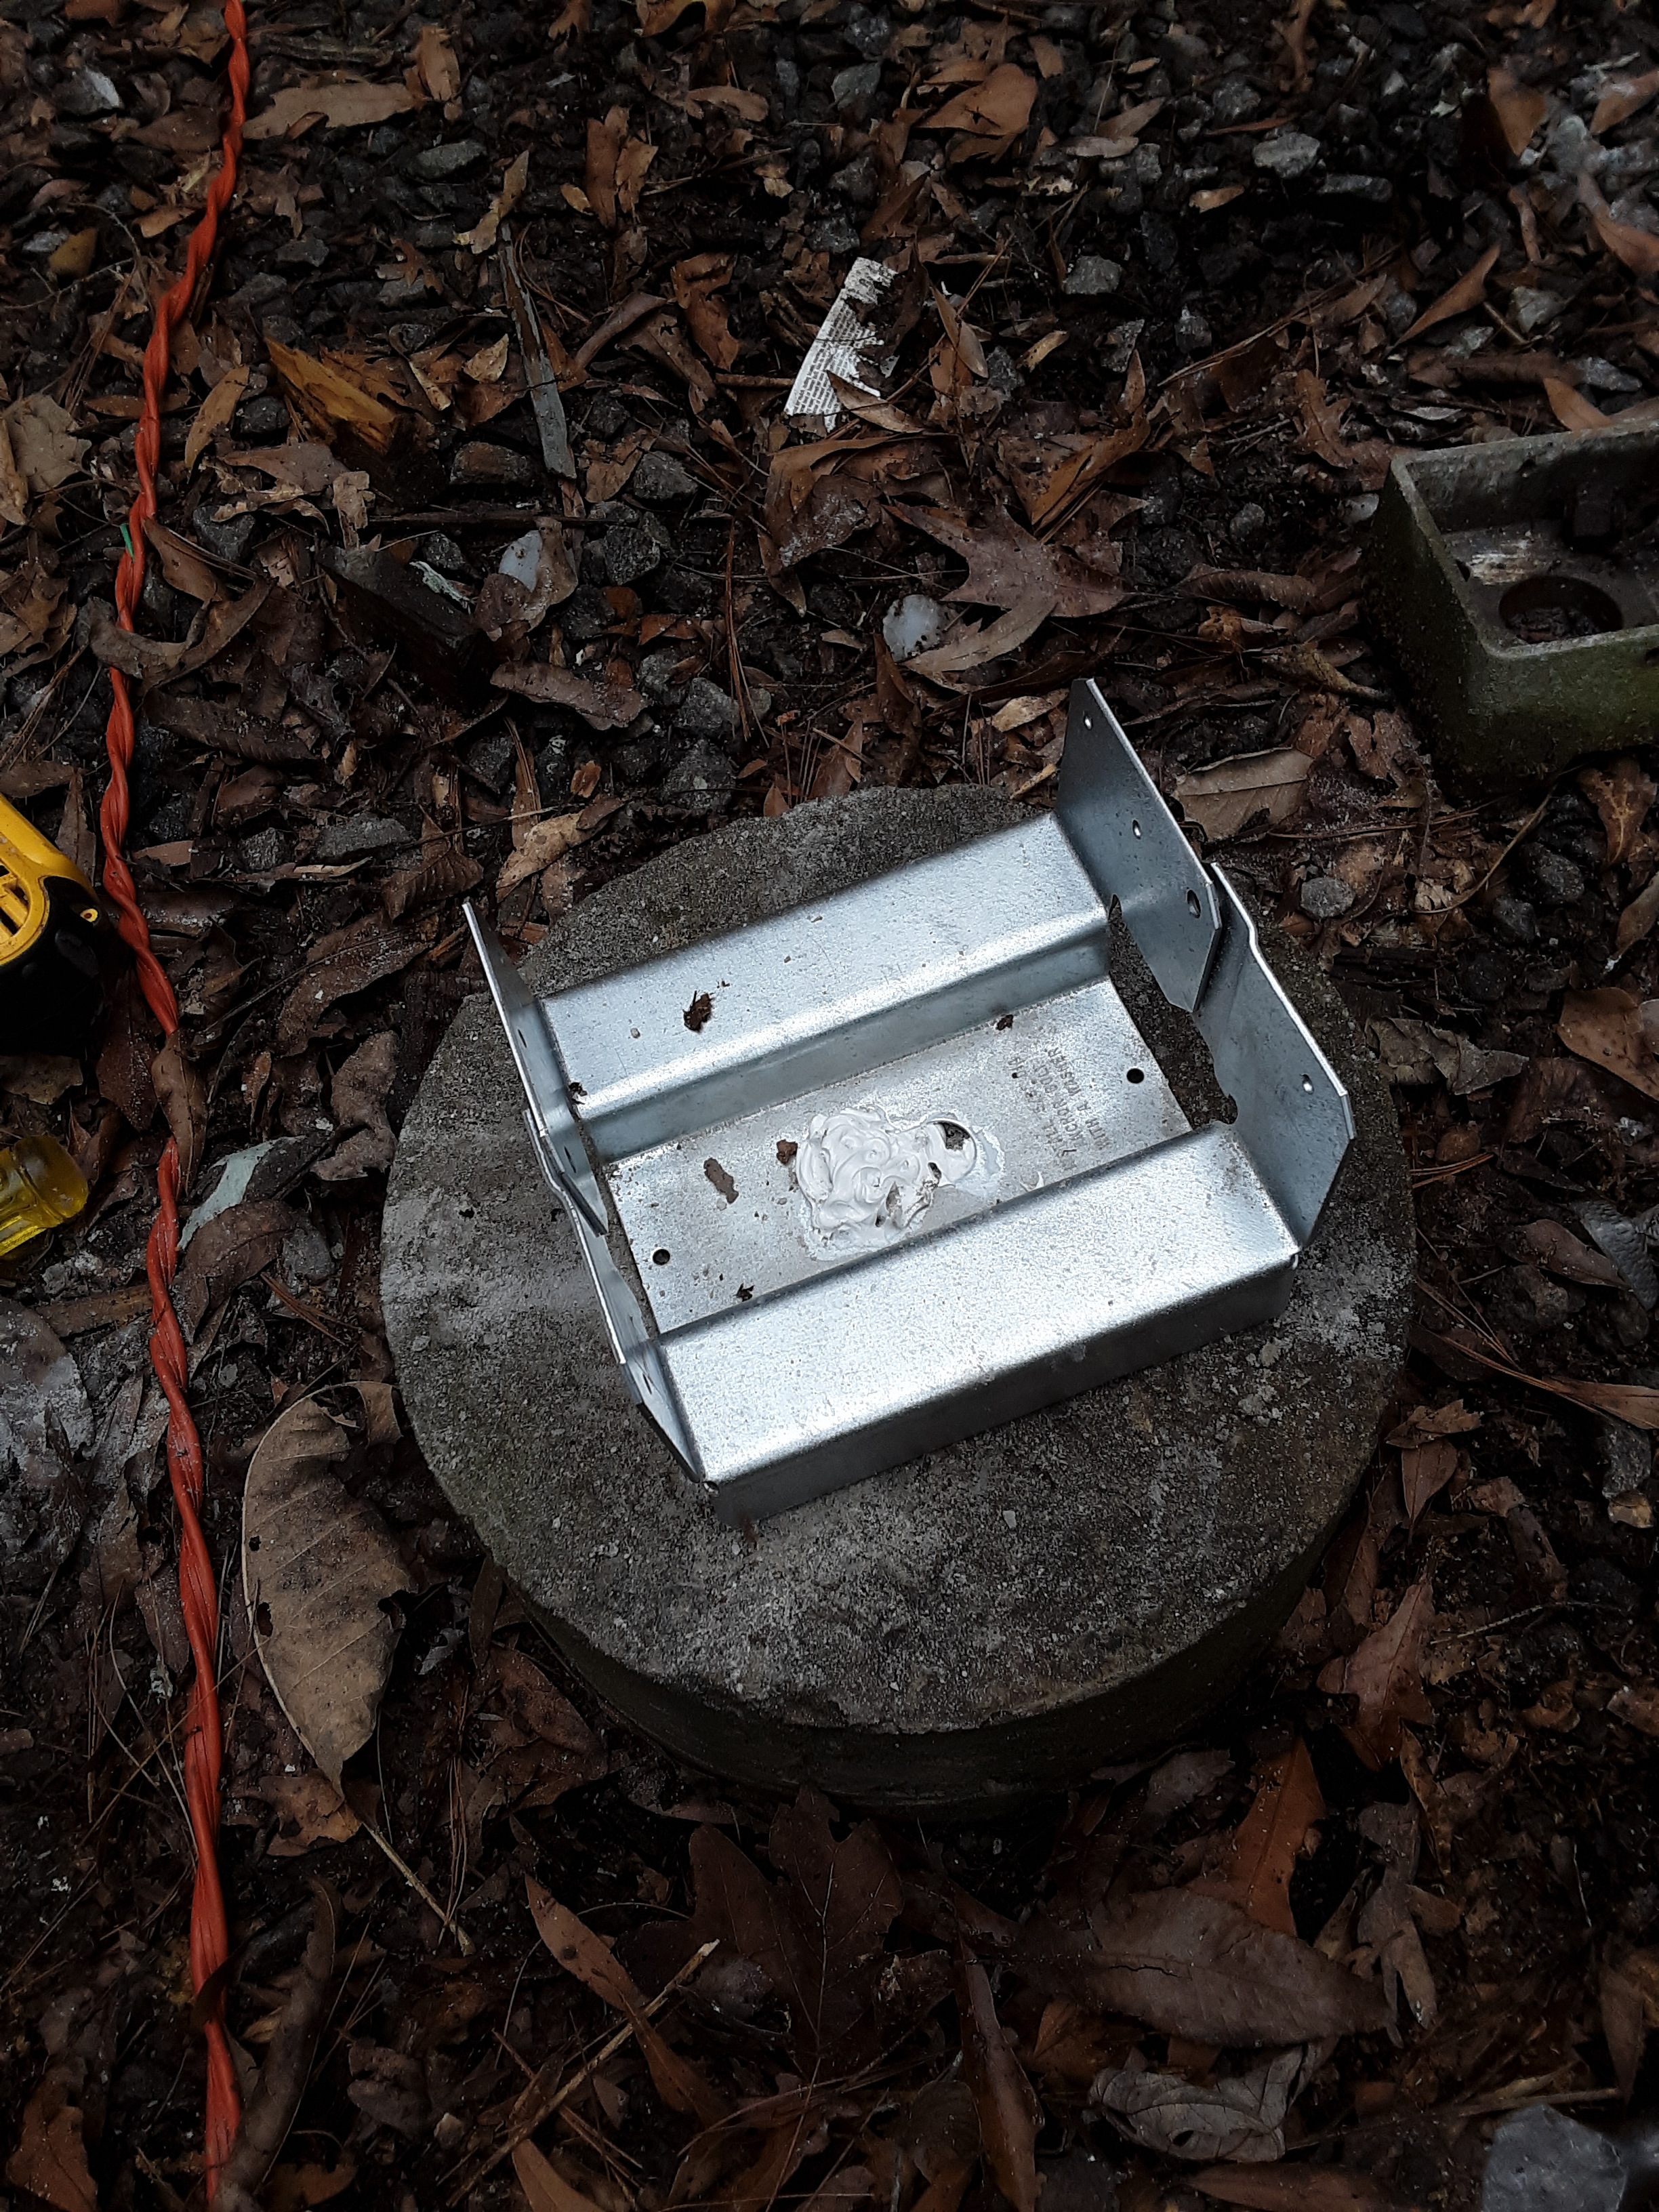
I have taken to tarring the posts in the ground to lengthen the effective lifespan of my structures. A project coming soon will reveal why I set the joists on top of the posts rather than bolt them to the side.
There was some custom cutting and fitting to run the sloping ramp over the existing stoop. I felt that the thinness of the joist at this point compromised its strength sufficiently to need support, so I added a support on the step below.
I like the baluster shadows in this next picture. One should be able to tell time by them. Let’s see, Daylight Savings Time? I probably took this picture just before I left for lunch at around 12:30.
I usually put a toprail on ramps and decks, but we were keeping the cost down as much as possible. That is, of course, hard to do when lumber prices are out the roof.
The evening glow and shadows say that it is time to head for the house, another job complete. Notice the scrap boards under the landing. The two children who frequent great-grandmother’s house had already been playing under the deck.
It was fascinating to see the four generations of this family interacting and coming and going as I worked. What a blessing is a godly heritage, children to keep the elders young at heart and elders to impart wisdom and a sense of belonging and origin. I pray that I might be able to see some of my great-grandchildren and impart some wisdom for life and salvation to them.
I renewed another deck near ruin. I had been asked to come and cut off the deteriorating beveled tops of the 6 x 6 posts so that a friend of the owner could install caps to protect the posts. Caps or top rails are a good idea because water and fungi will root a post from the top down. The owner asked me about the longevity of the deck. Upon quick inspection I saw that it had 8 to 10 16′ decking boards with rotten spots and some at ground level post deterioration and some top rail warping and rotting. Following is my effort to renew the deck.
The owner requested that I pressure wash the deck before repair and restaining and provided a pressure washer borrowed from a friend at church. The deck had not been stained in five years, a time well within the stain can’s recommendations and “guarantees”, but the elements know no such time scales. This deck is close enough to trees, though not overhung by them, to get their leaf litter, catkins in Spring, and Yellow Poplar samaras. These get down between the decking boards and collect moisture, fungi, and bacteria (read “rot”). Particularly on this deck the gap between boards was not sufficient to allow this detritus to fall through, so it collected. You can see from the picture that the stain acted more like paint, clinging only to the surface and peeling when pressure washed. That is not good and may have been a large part of the deterioration. I would not have thought much of which deck treatment to use before I started repairing them, but I have some strong opinions now.
So, time consuming and tedious as it was, I got down with my knee pads and wire brushed and whisk broomed the boards.
This deck had been put together with screws, square drive heads, so there was no warping in the decking.
I ended up replacing ten decking boards and was pleased with the ones I was able to pick out.
The caps are plastic and functional and I had to replace only two top rails and two balusters.
I feel like the end result looks like new and will last another good many years. I suggested to the owner that she treat the top surfaces yearly to prevent the deterioration that was happening. With a roller and stain the decking and top rails would take no more than 1 1/2 hours to treat. The look and longevity will be satisfying.
If you look closely, you can see the tar that I put around the base of the posts. In my experience, the interface of post to ground, an inch or two above and below grade is where the most intense deterioration occurs. Though the treated lumber is rated for below grade, and actually does fair quite well in the ground, it does not do so well at the interface. I guess the conditions of moisture, air, and temperature are conducive to rotting bacterial and fungal varieties.
By the time it weathers and she treats the decking boards again in a year, you won’t even be able to tell the new boards from the old as in this picture.
I am reminded of the preacher in Ecclesiastes who is reciting a polemic on the vanity of life. Several times he softens the blow of the discouraging speech with a commendation similar to the following: “There is nothing better for a man than to eat and drink and tell himself that his labor is good. This also I have seen that it is from the hand of God.” (Ecclesiastes 2:24) At a later time He even calls this enjoyment of life “the gift from God” (Eccl 3:13). So I end with thanksgiving to God for giving me strength to work, money for bills from my labor, and satisfaction that I have renewed a product to increased usefulness and slowed the deterioration in this fallen world for the benefit of a fellow being (in fact, fellow saint in this case). It is a gift from God that I can pass along to someone.
In this day of record high lumber prices, many people are opting for deck restoration rather than replacement. It is still not cheap since there may be nearly as much labor in restoring a deck as in building a new one. Following is an example of restoration and addition.
But how many boards do you replace? Is structural integrity the only criteria? Where does longevity or appearance or smoothness come into play and to what extent? Beyond structural integrity, the owner has preference and say that should be considered. For instance, this owner specified that the surface be smooth enough of children’s bare feet. But that still doesn’t answer how many boards should be replaced and how many should be sanded or screwed down better. How many boards would you replace in the following picture?
Notice also in the preceding picture that the deck was constructed with nails, and that via nail gun. The young girls of the family regularly pounded the nails down. Expansion and contraction and warping can work the nails out where they can snag a shoe sole or strip off some foot skin. For this reason, I prefer building decks with screws. I get it. A crew is supposed to put up a deck in a day and half and move on, but the result is not the best long-term. Screws cost more and definitely take longer to install, but the result is superior. The best new deck screws have star heads, called torx screws and the most common is T-25. They are so much easier to install than Philip’s Head screws because you don’t have to hold the tool perfectly perpendicular to the screw head and press down so hard. I added some additional screws to the deck and instructed the father to have the girls extract the nails as they come up so that he could replace them with screws that I left behind for that purpose.
The railing was particularly rough. In fact, all top surfaces are typically hard hit by the combination of UV radiation, heat, , heating-cooling cycles, moisture in terms of amount, wetting and drying, frost, and freeze-thaw cycles. For this reason I advise people to treat the top surfaces once a year to increase longevity of their deck. Railing balusters and undercarriage take by far the most time to stain and amount of stain, but the railing needs to be done initially for appearance and probably not more than once every 5-8 years afterwards depending on radiation and moisture exposure. Quick visual inspection will reveal if it needs to be done. Notice that I did not say anything about the undercarriage or joists. I’ve seen 20 year old decks that were not treated and are still sound with only the slightest deterioration between the decking boards. A deck that gets considerable leaf and litter fall is in more danger of joist deterioration, but that depends on how well the decking boards are maintenanced and if the gap between those boards is sufficient for litter to fall through. Boards placed to close together gather organic trash.
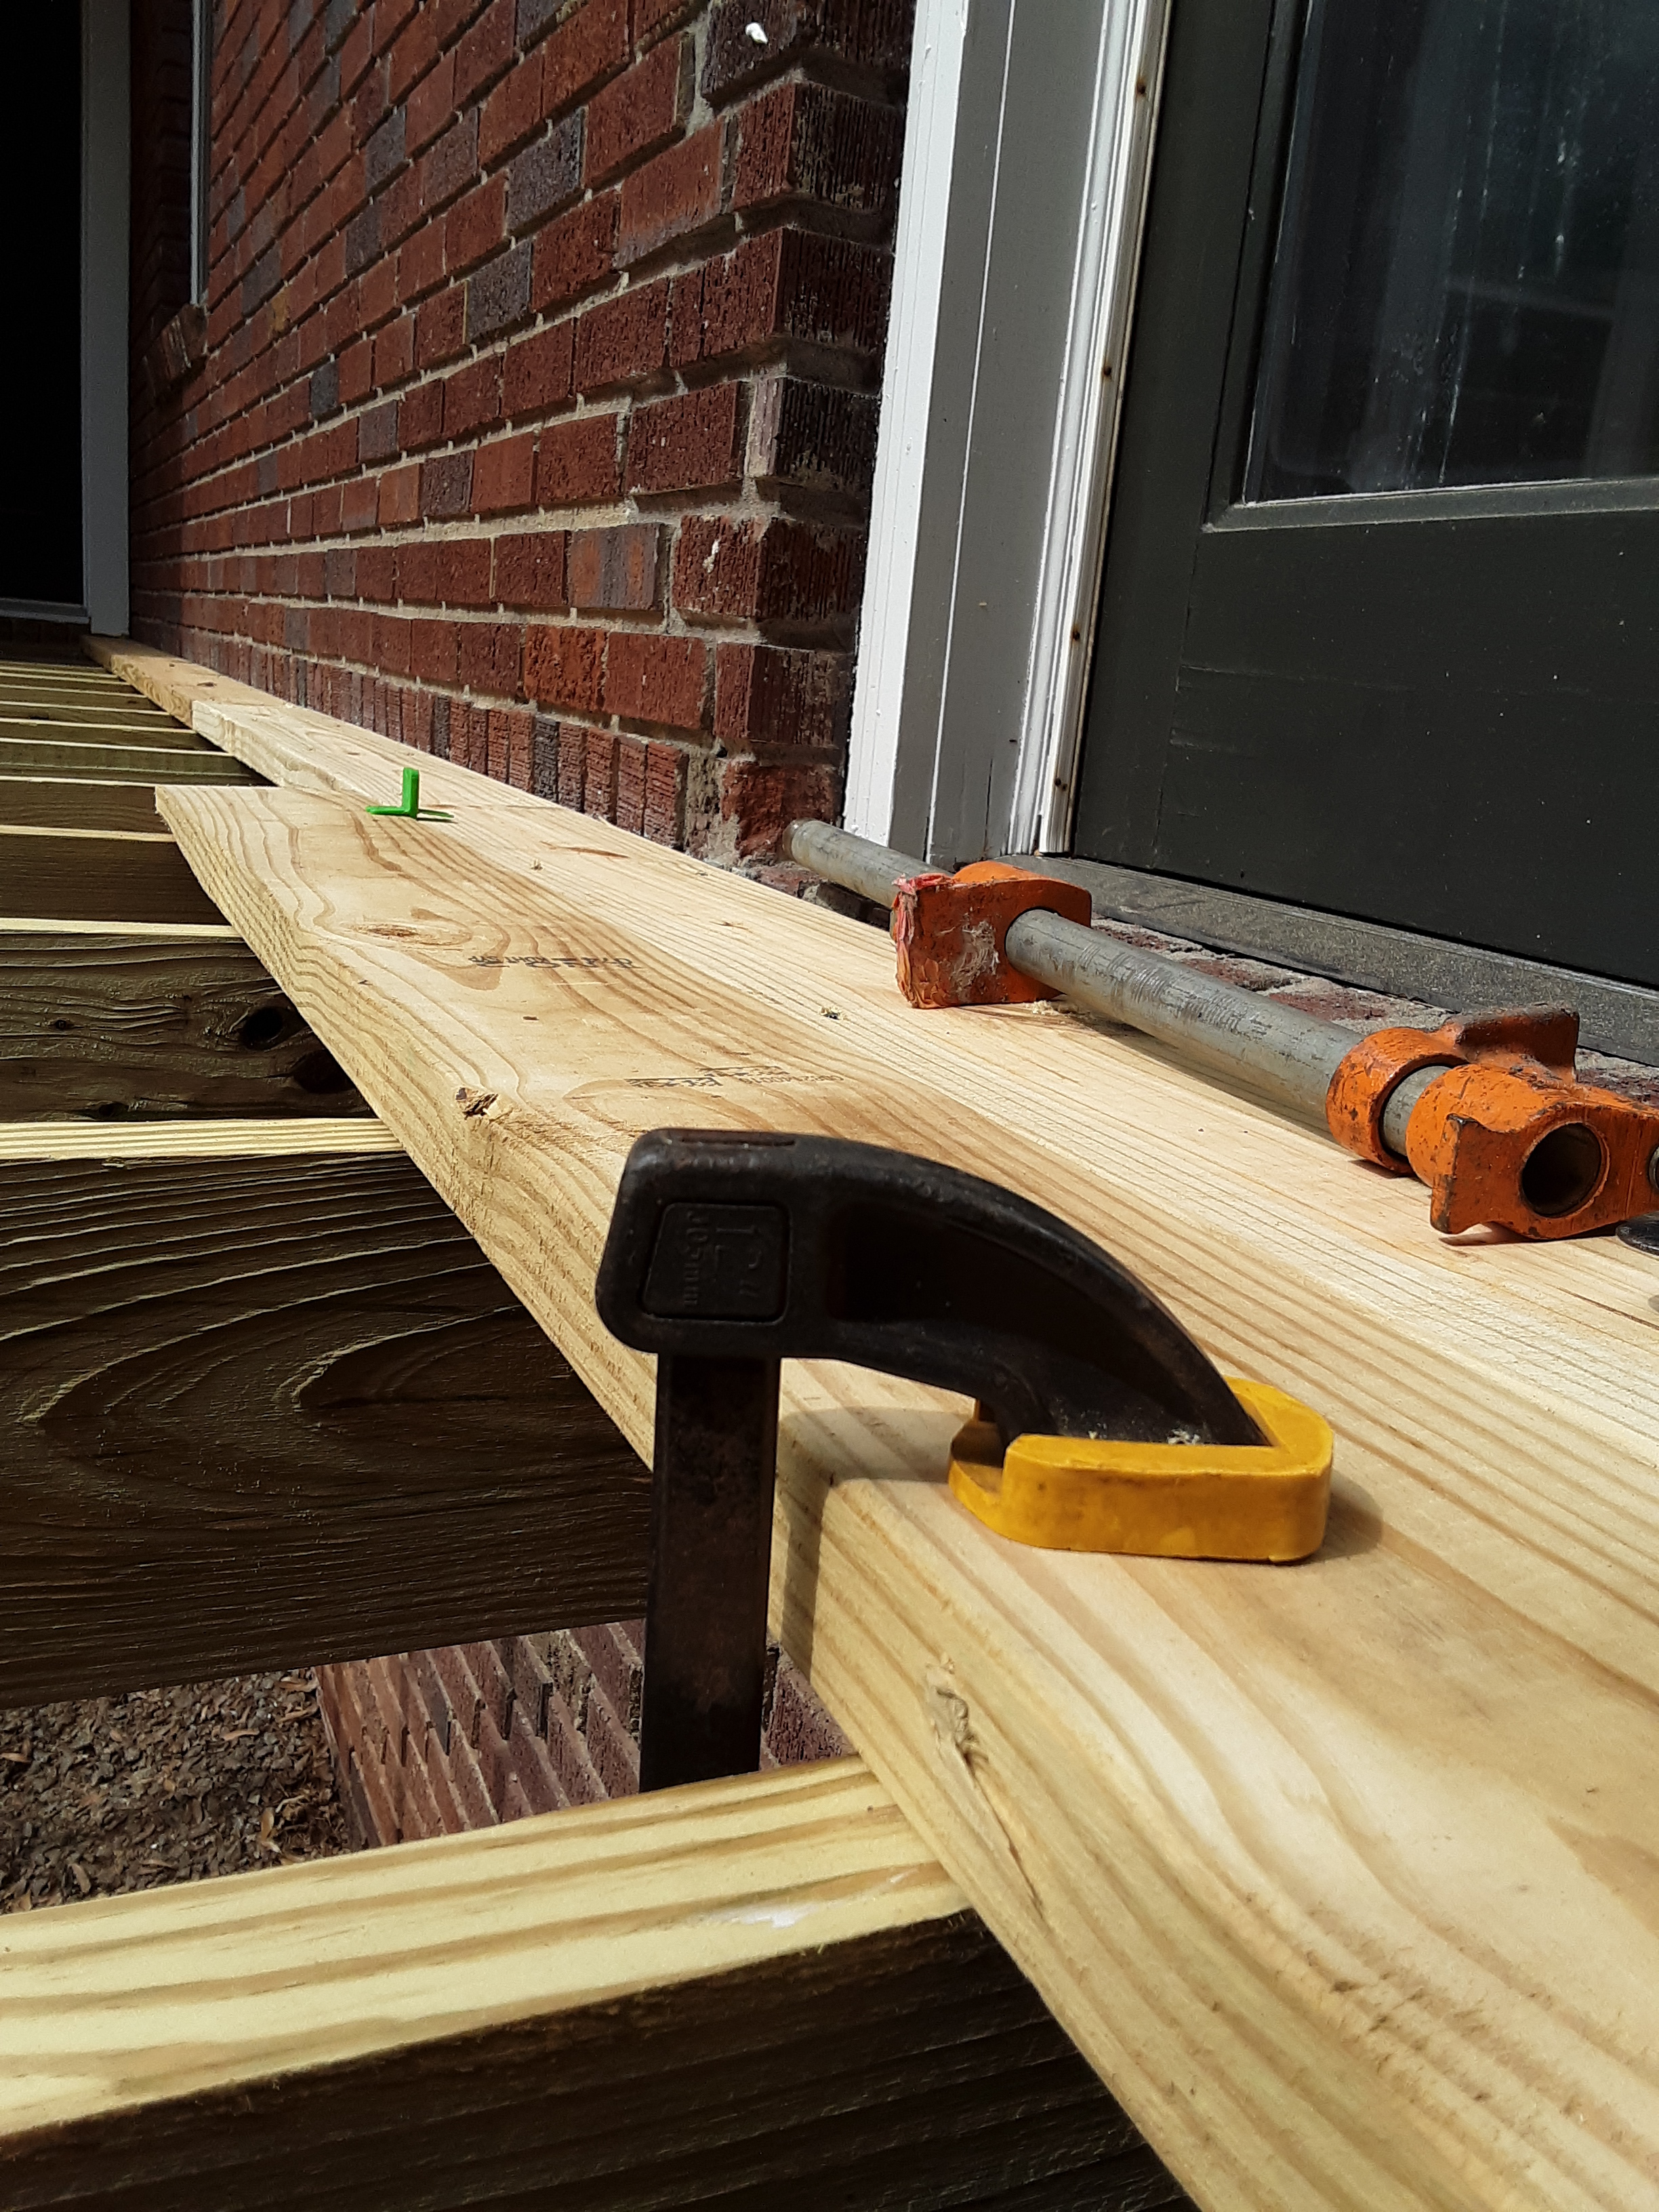
The cracks in the following post are not the biggest concern. The post was merely nailed on, and over time worked loose from people using it to steady their ascent and descent and temperature variations. For this reason I bolt railing posts on with a 3/8″ galvanized carriage bolt and screws. My father used to say, “Nothing holds like a nut and lockwasher.” Nails certainly do not. The staircase railing was shaky and that made the steps shaky. I ended up completely rebuilding the stair railing and more firmly attaching the stair stringers to the deck. (1)
I thought that it was quite creative to but a planter pot in the hole and under a table until the hole could be fixed.
The new railing looks nice, is smooth, and is well attached. It bothers me that people who stain decks are so sloppy. There are products that will clean stain off of vinyl siding without damaging it.
The new stair railing bottom posts are planted two feet in the ground, painted with tar, and concreted in. The railing is solid. The old balusters were fine and reusable, which saved more cost in re-cutting than materials.
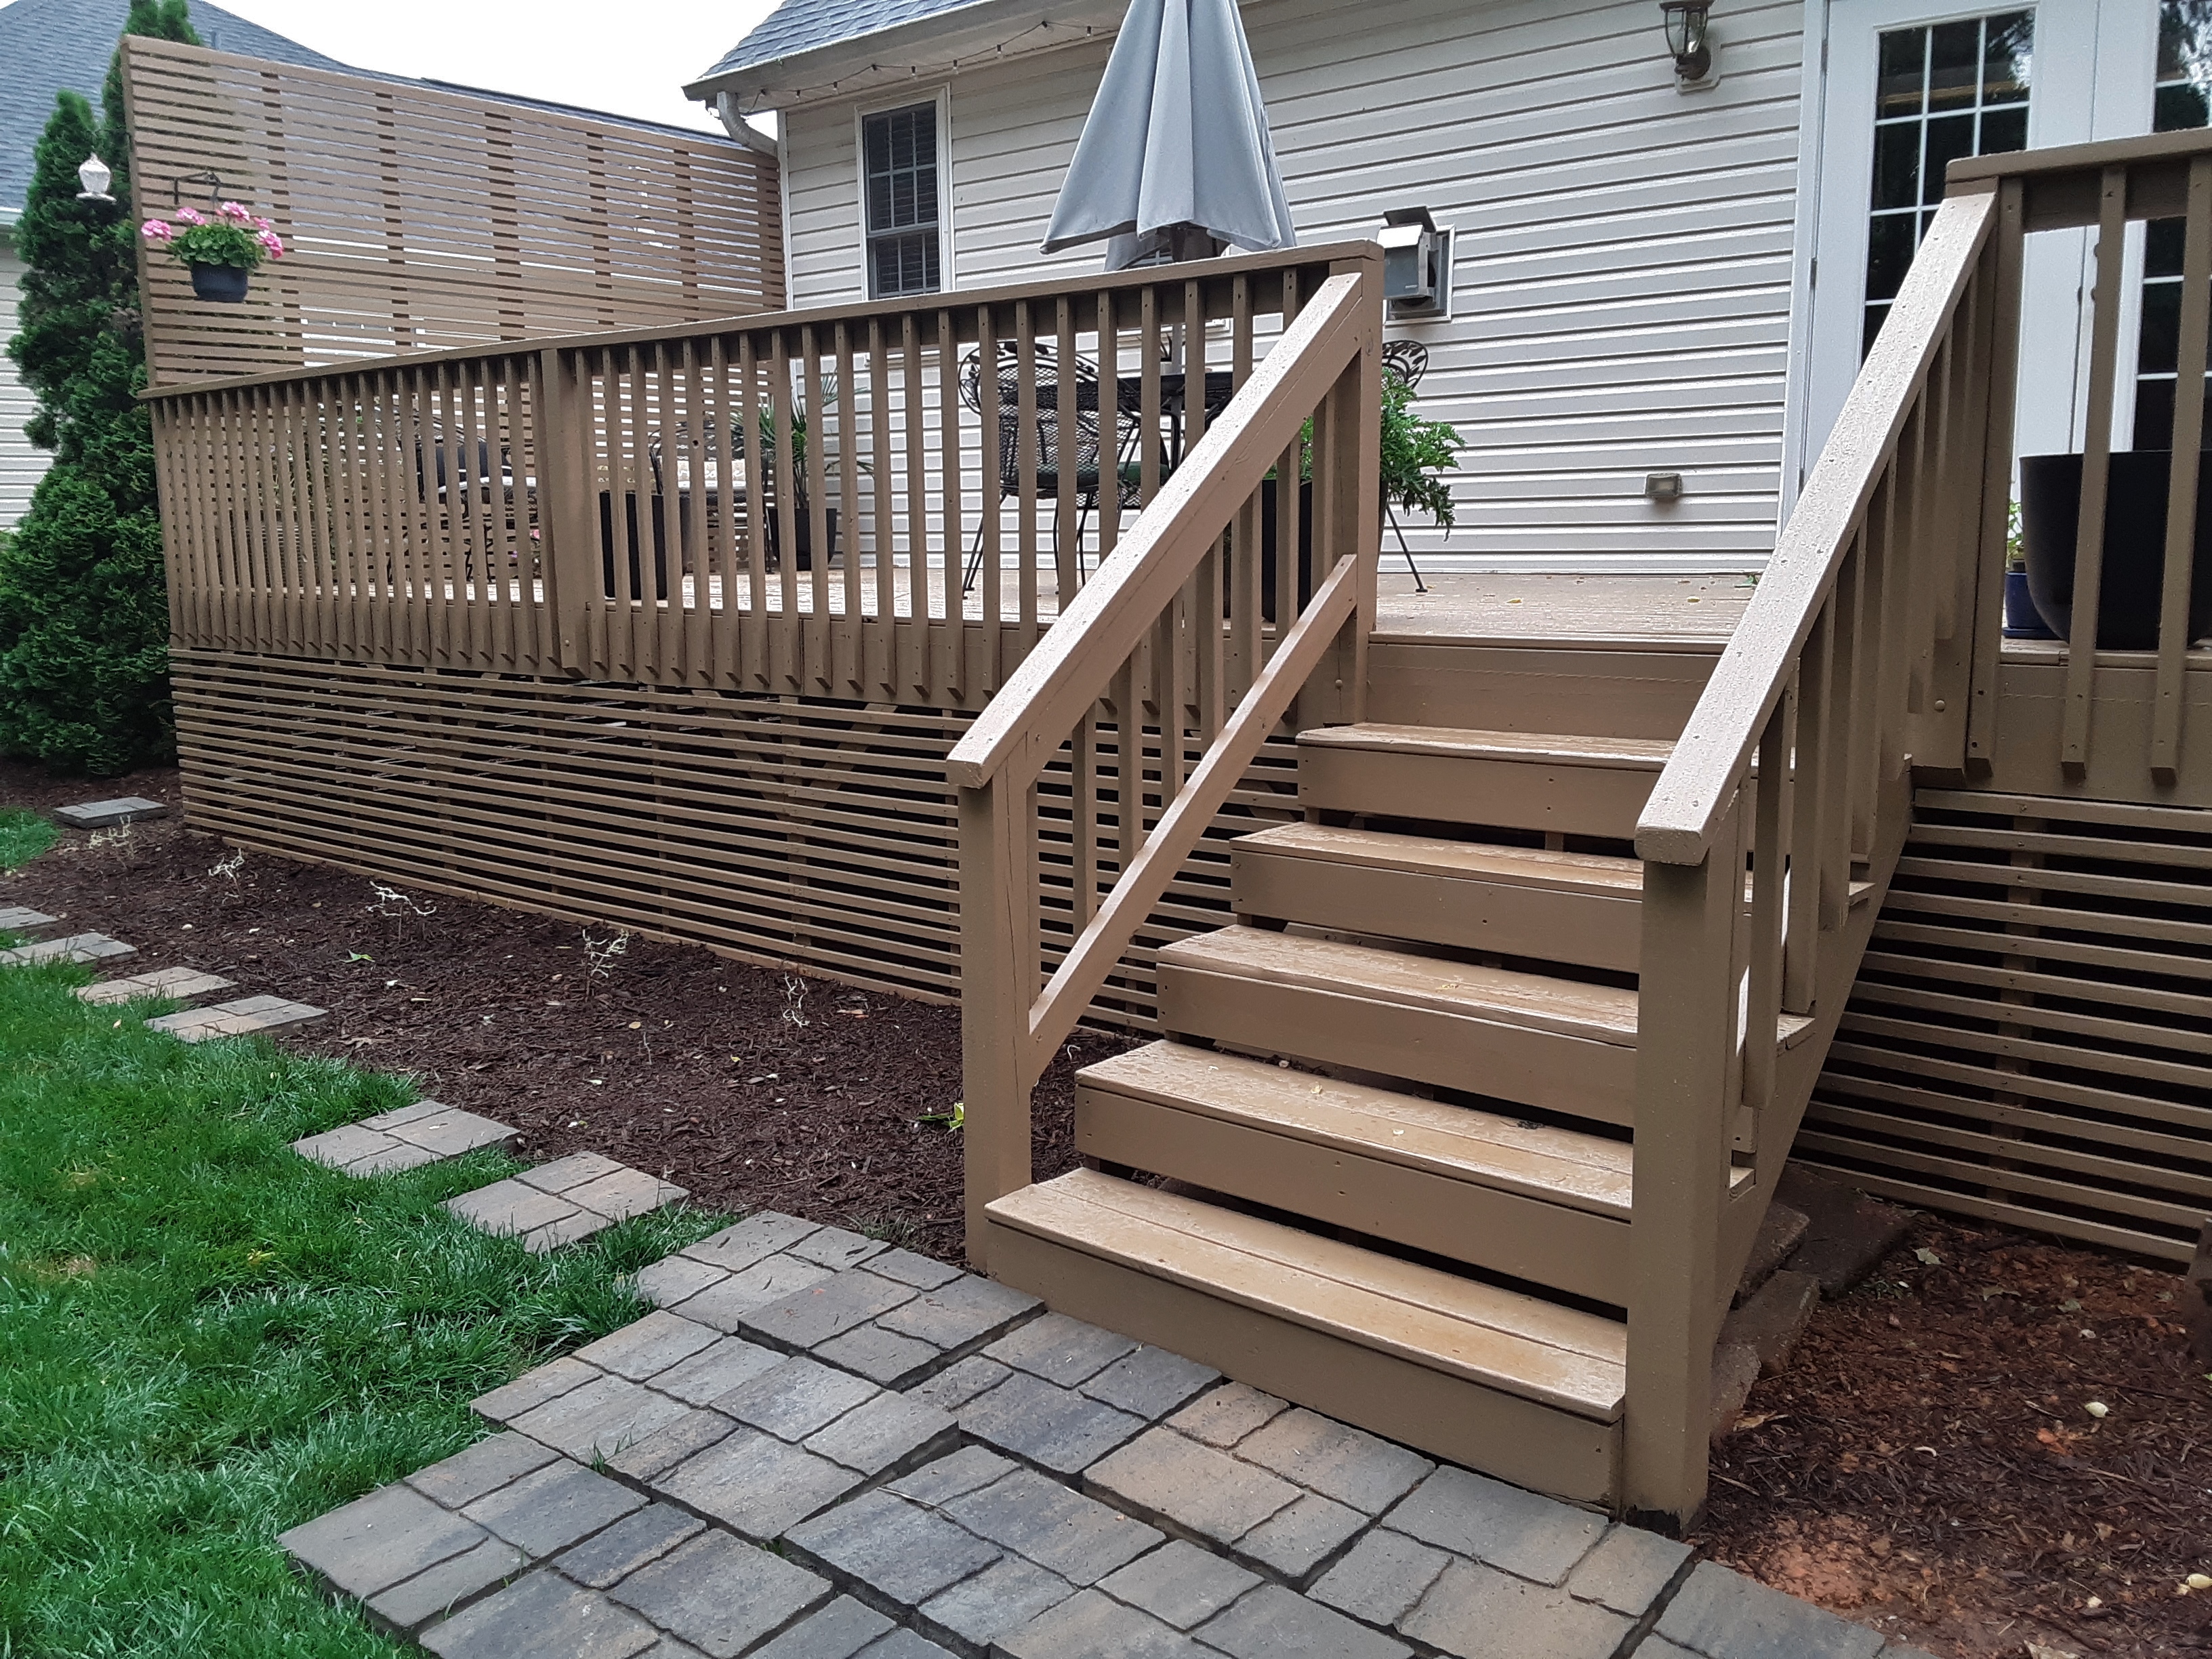
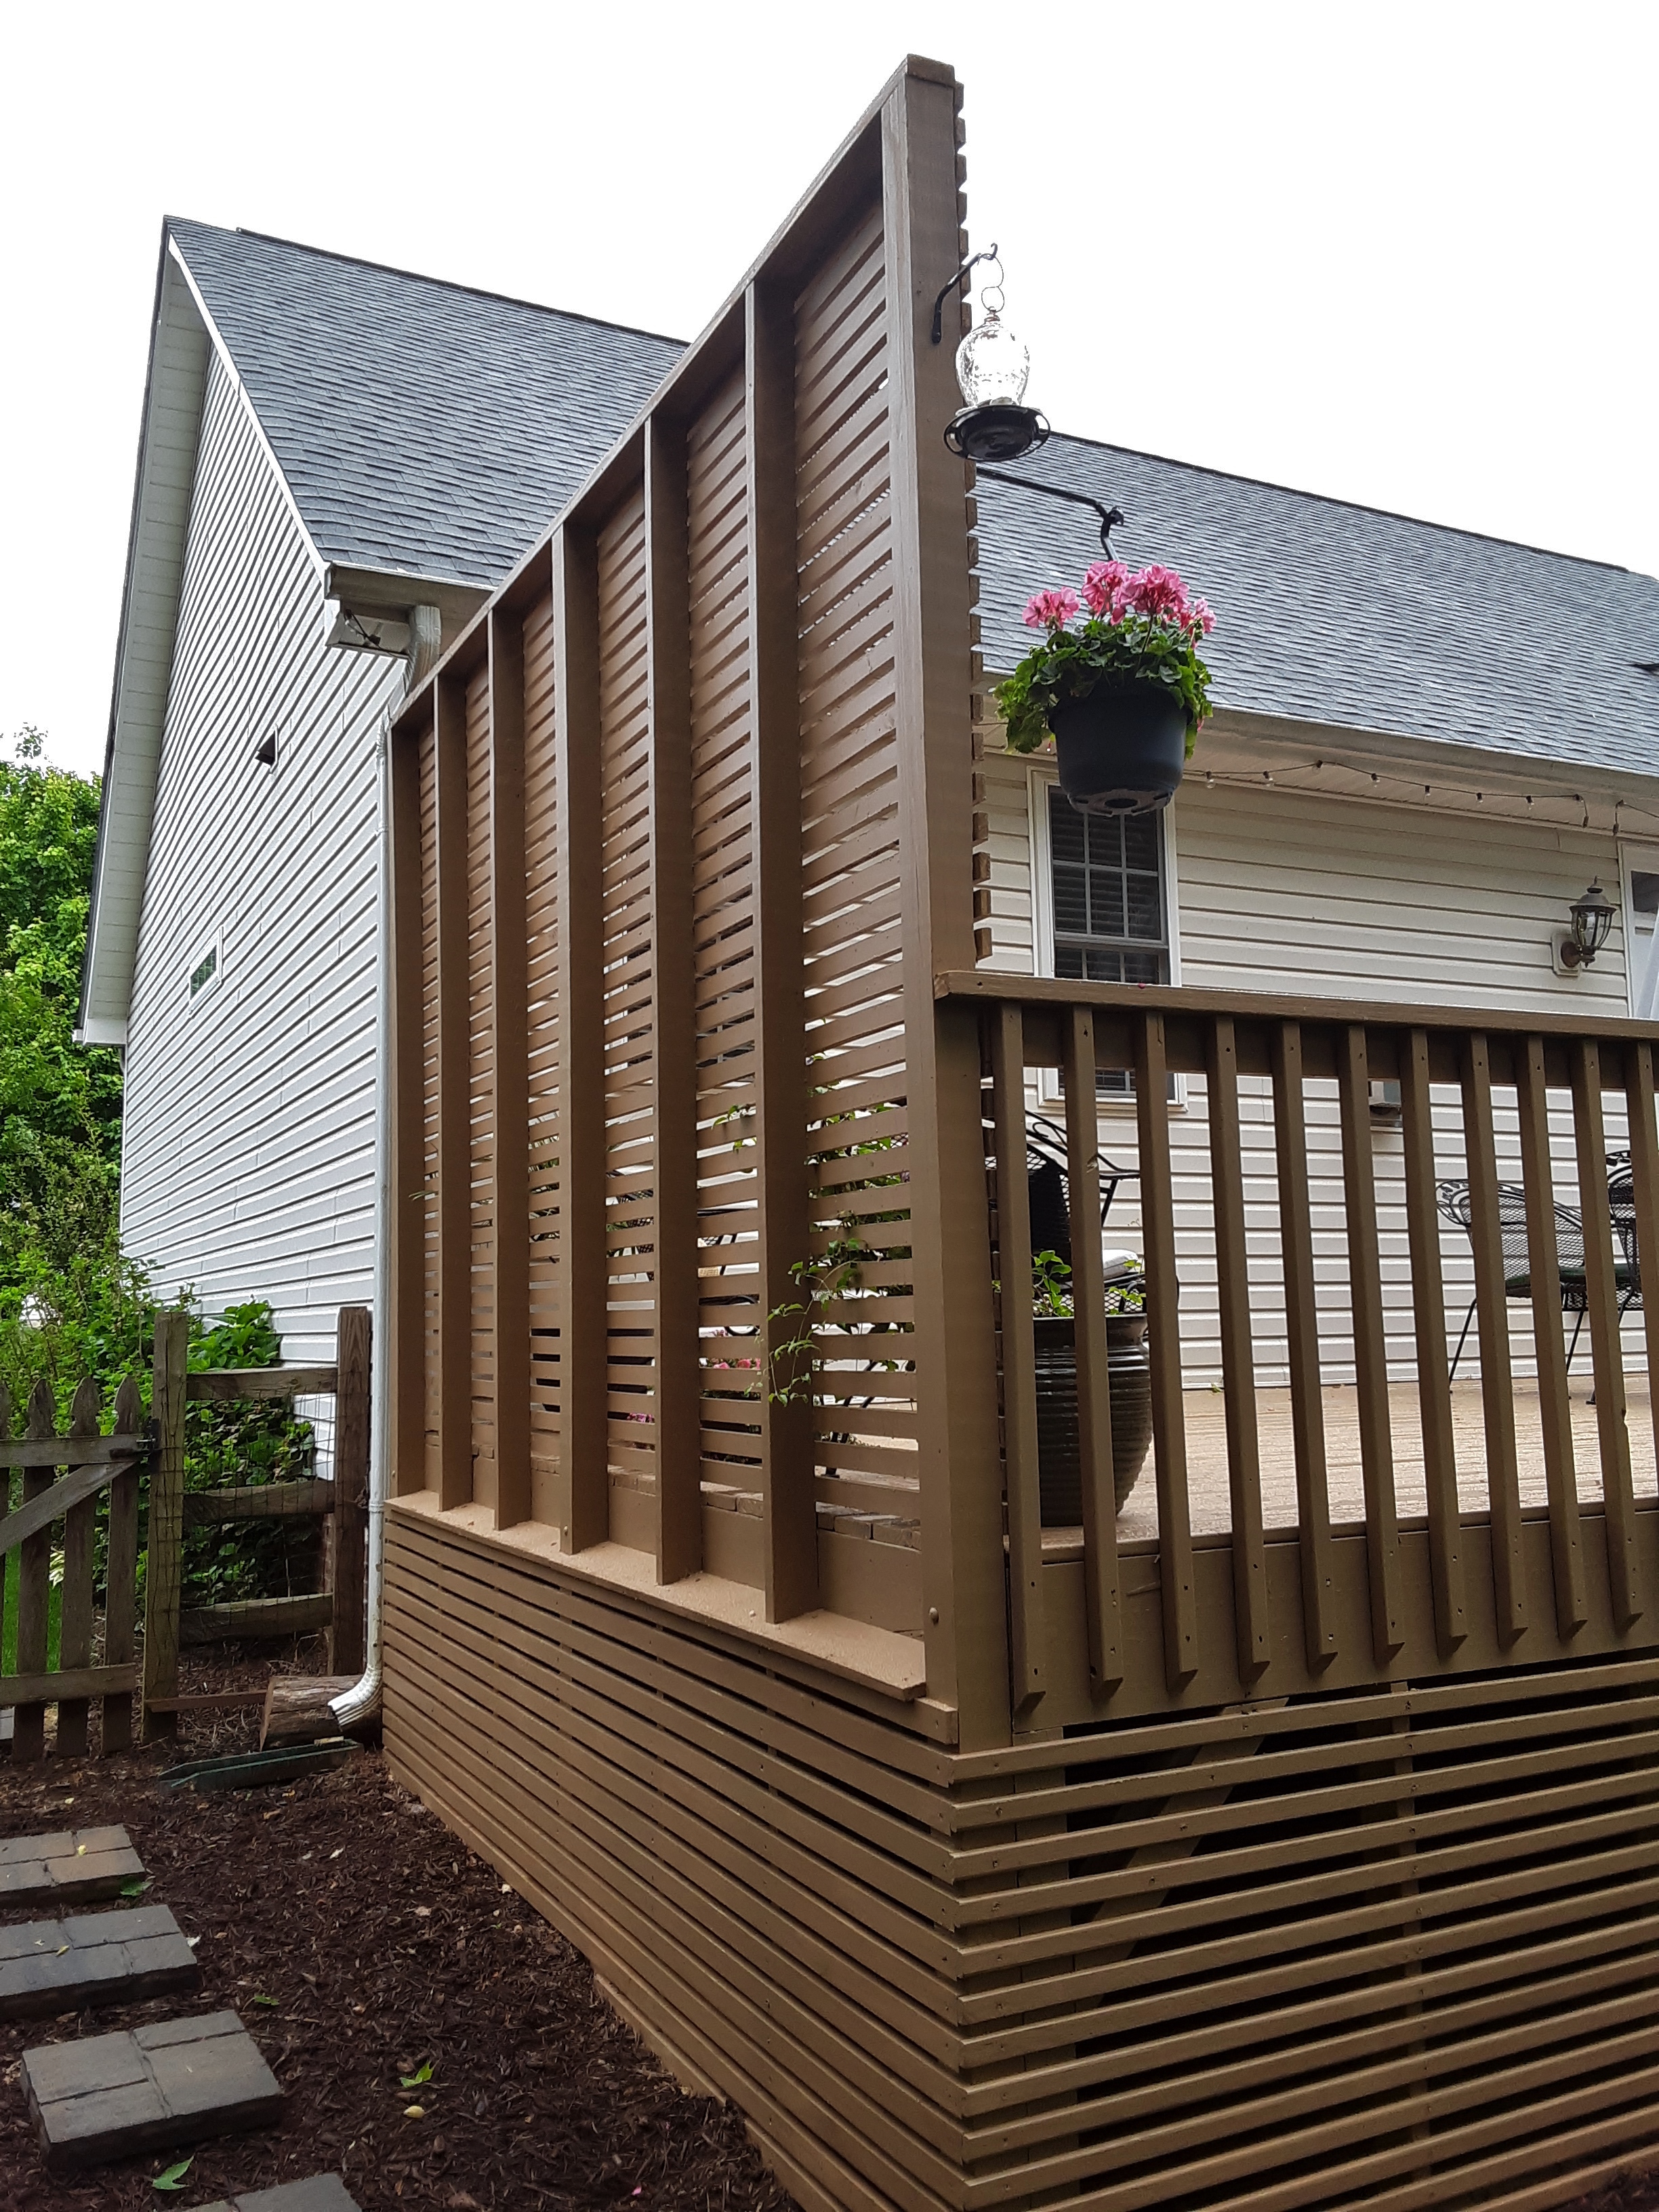
The owners also wanted a privacy fence and specified the height. I set three 4 x 4’s in concrete and bolted them to the deck. The slat boards were 1 x 4’s ripped on a table saw, meaning they were 1 11/16″ wide. (2) I might have built with wider boards but the owner had a certain aesthetic in mind. Notice additionally that I have begun the framing for the skirt to keep the dog and other critters out.
Yes, there is a 2 x 4 missing in the privacy fence. I had to take a second run to the lumber yard for a few missing boards. It is nearly impossible to go just once, especially on a repair job where new realizations of deterioration become evident. I put it in later, but didn’t want to stop work late in the day for a run to the lumber yard when I was making good progress. Also, this is the only picture where you can glance the result of the floor sander I rented.
Following are the results of the repair. Given time restraints I did not stain the balusters or skirt. The owners did. I like their taste in decor and stain color. To save the lawn and prevent wet or muddy feet, they also added stepping stones.
In two respects I had to be creative concerning the skirting. One was the transition from privacy fence to skirt. I opted for a water shedding wood ‘shingle’ that encased the uprights. The other is not pictured, a screwed in access ‘gate’ at the other end of the deck. If I hadn’t told you, you would never know it is there from looking. You never know when someone might throw or drop any number of things that go through the slats and need to be retrieved or some maintenance needed on the house that requires access under the deck.
Some of these old boards were installed incorrectly, crown down, so that water gathers on the deck. This is major reason to re-stain the deck yearly.
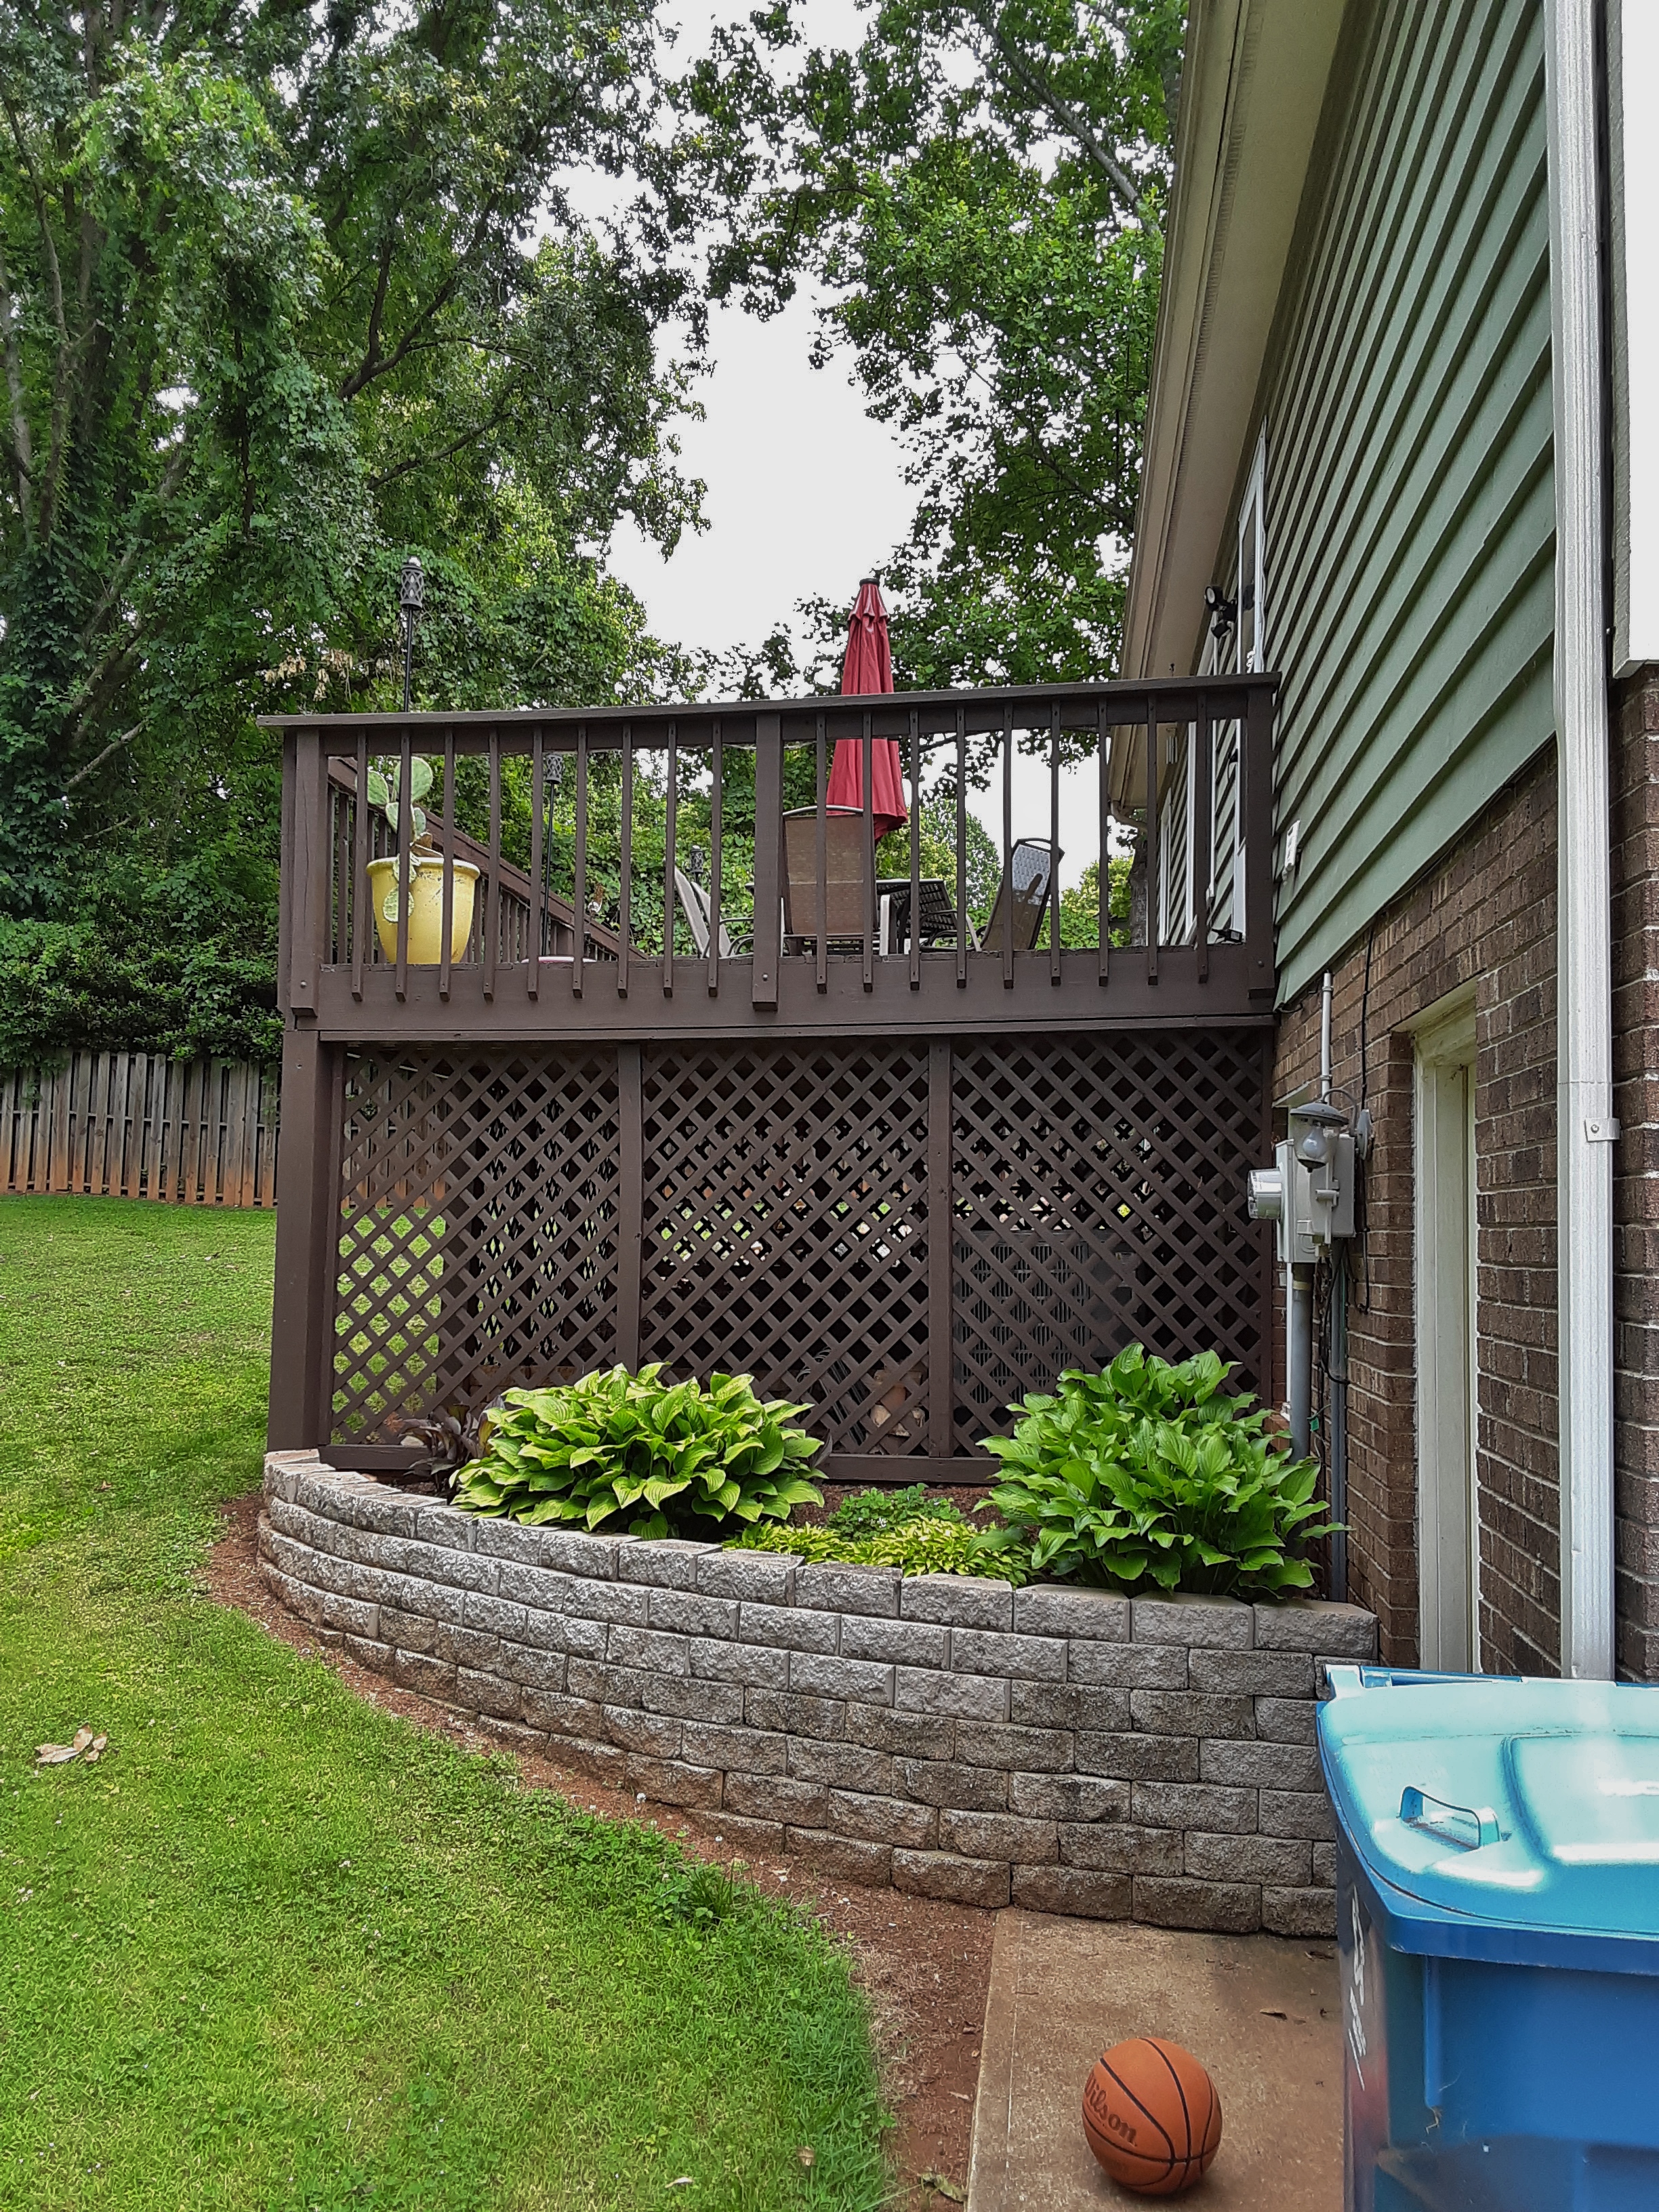
This flowering bush unknown to me is a great way to decorate in front of a garbage can fence. Functionality is great, but appearance is inviting. Extend this idea to God’s Creation. Ecologically self-replicating and self-cleaning and simultaneously visually inspiring and health-giving only begins to describe the depth of God’s gift to us of functionality and beauty in nature for which we should regularly give thanks and praise. Decks and such are only a vague reflection of that creativity.
A 1 x 4 is actually 3 1/2″ wide (dressed lumber). If you subtract the 1/8″ of sawdust made by the blade width and divide by 2, you get 1 11/16″. The lumber yard did not have the 1 x 2 inch stock and ripping produces straighter boards anyway. Being from out of town on this job, I asked the owner if a friend had a table saw that I could borrow. A brother in Christ was glad to assist.
The owner installed the chain to hang the net swing temporarily, then asked me to move the swing. An outdoor aerial silk is supposed to reside here one day.
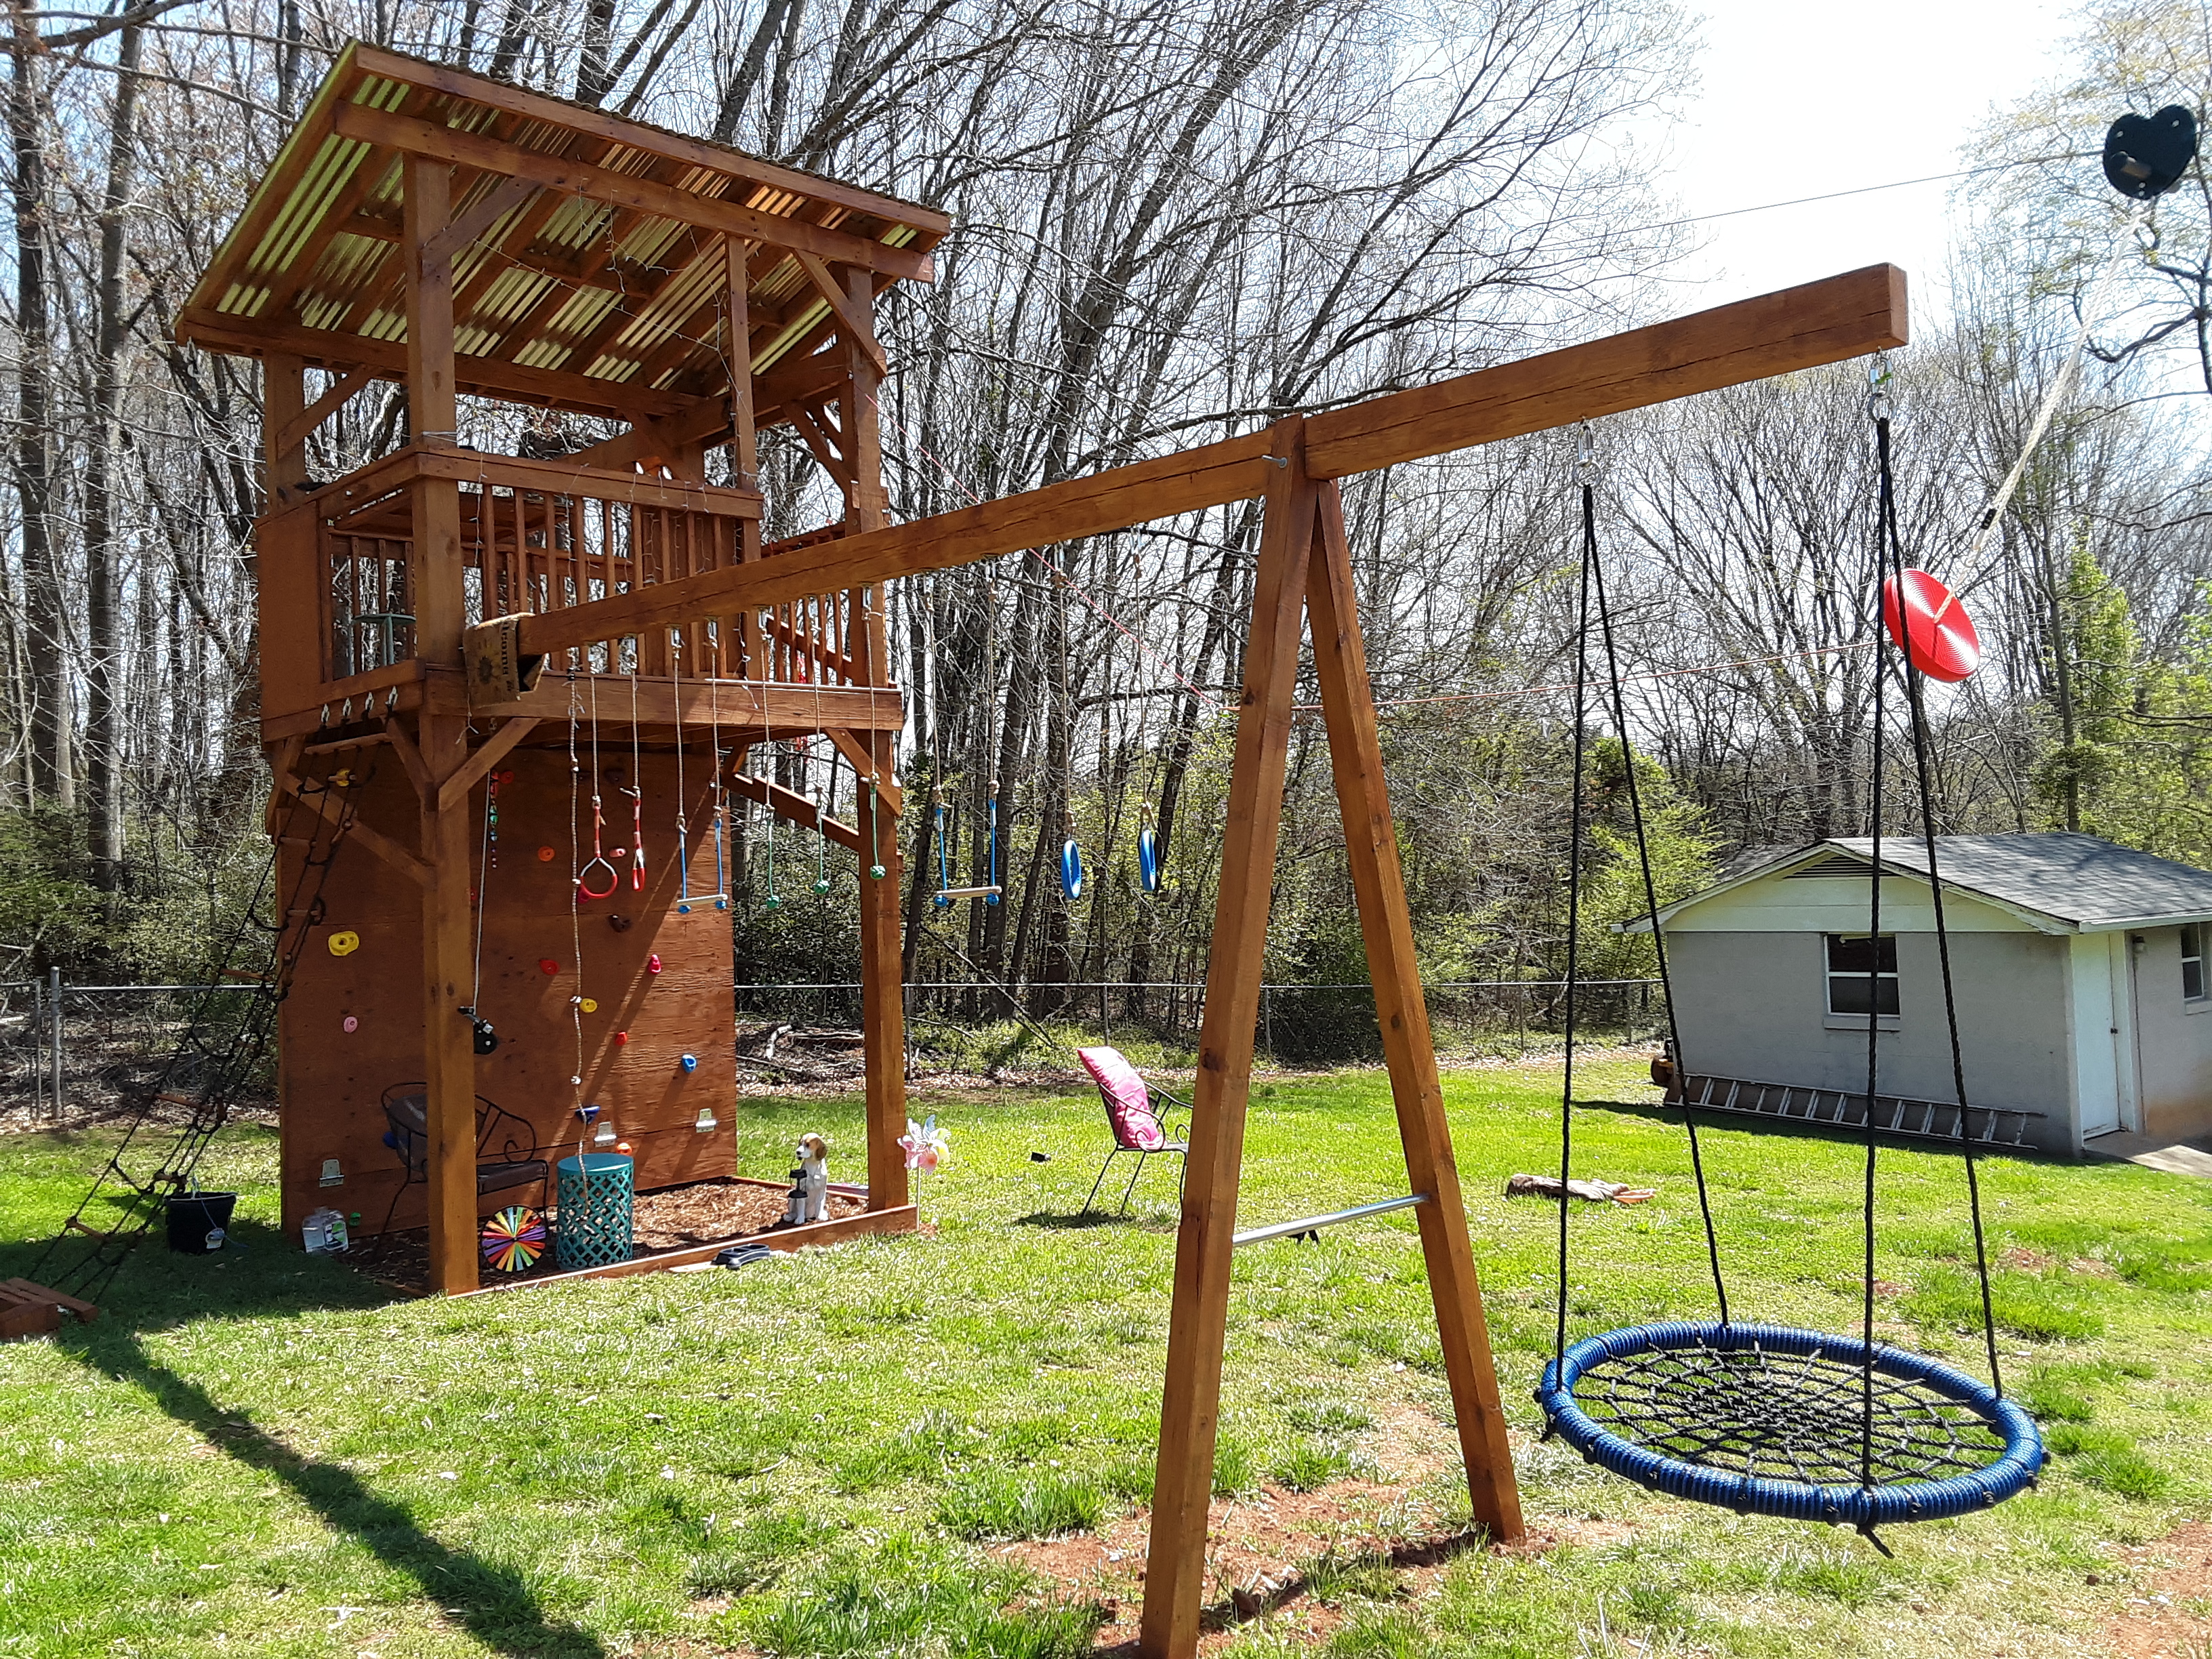
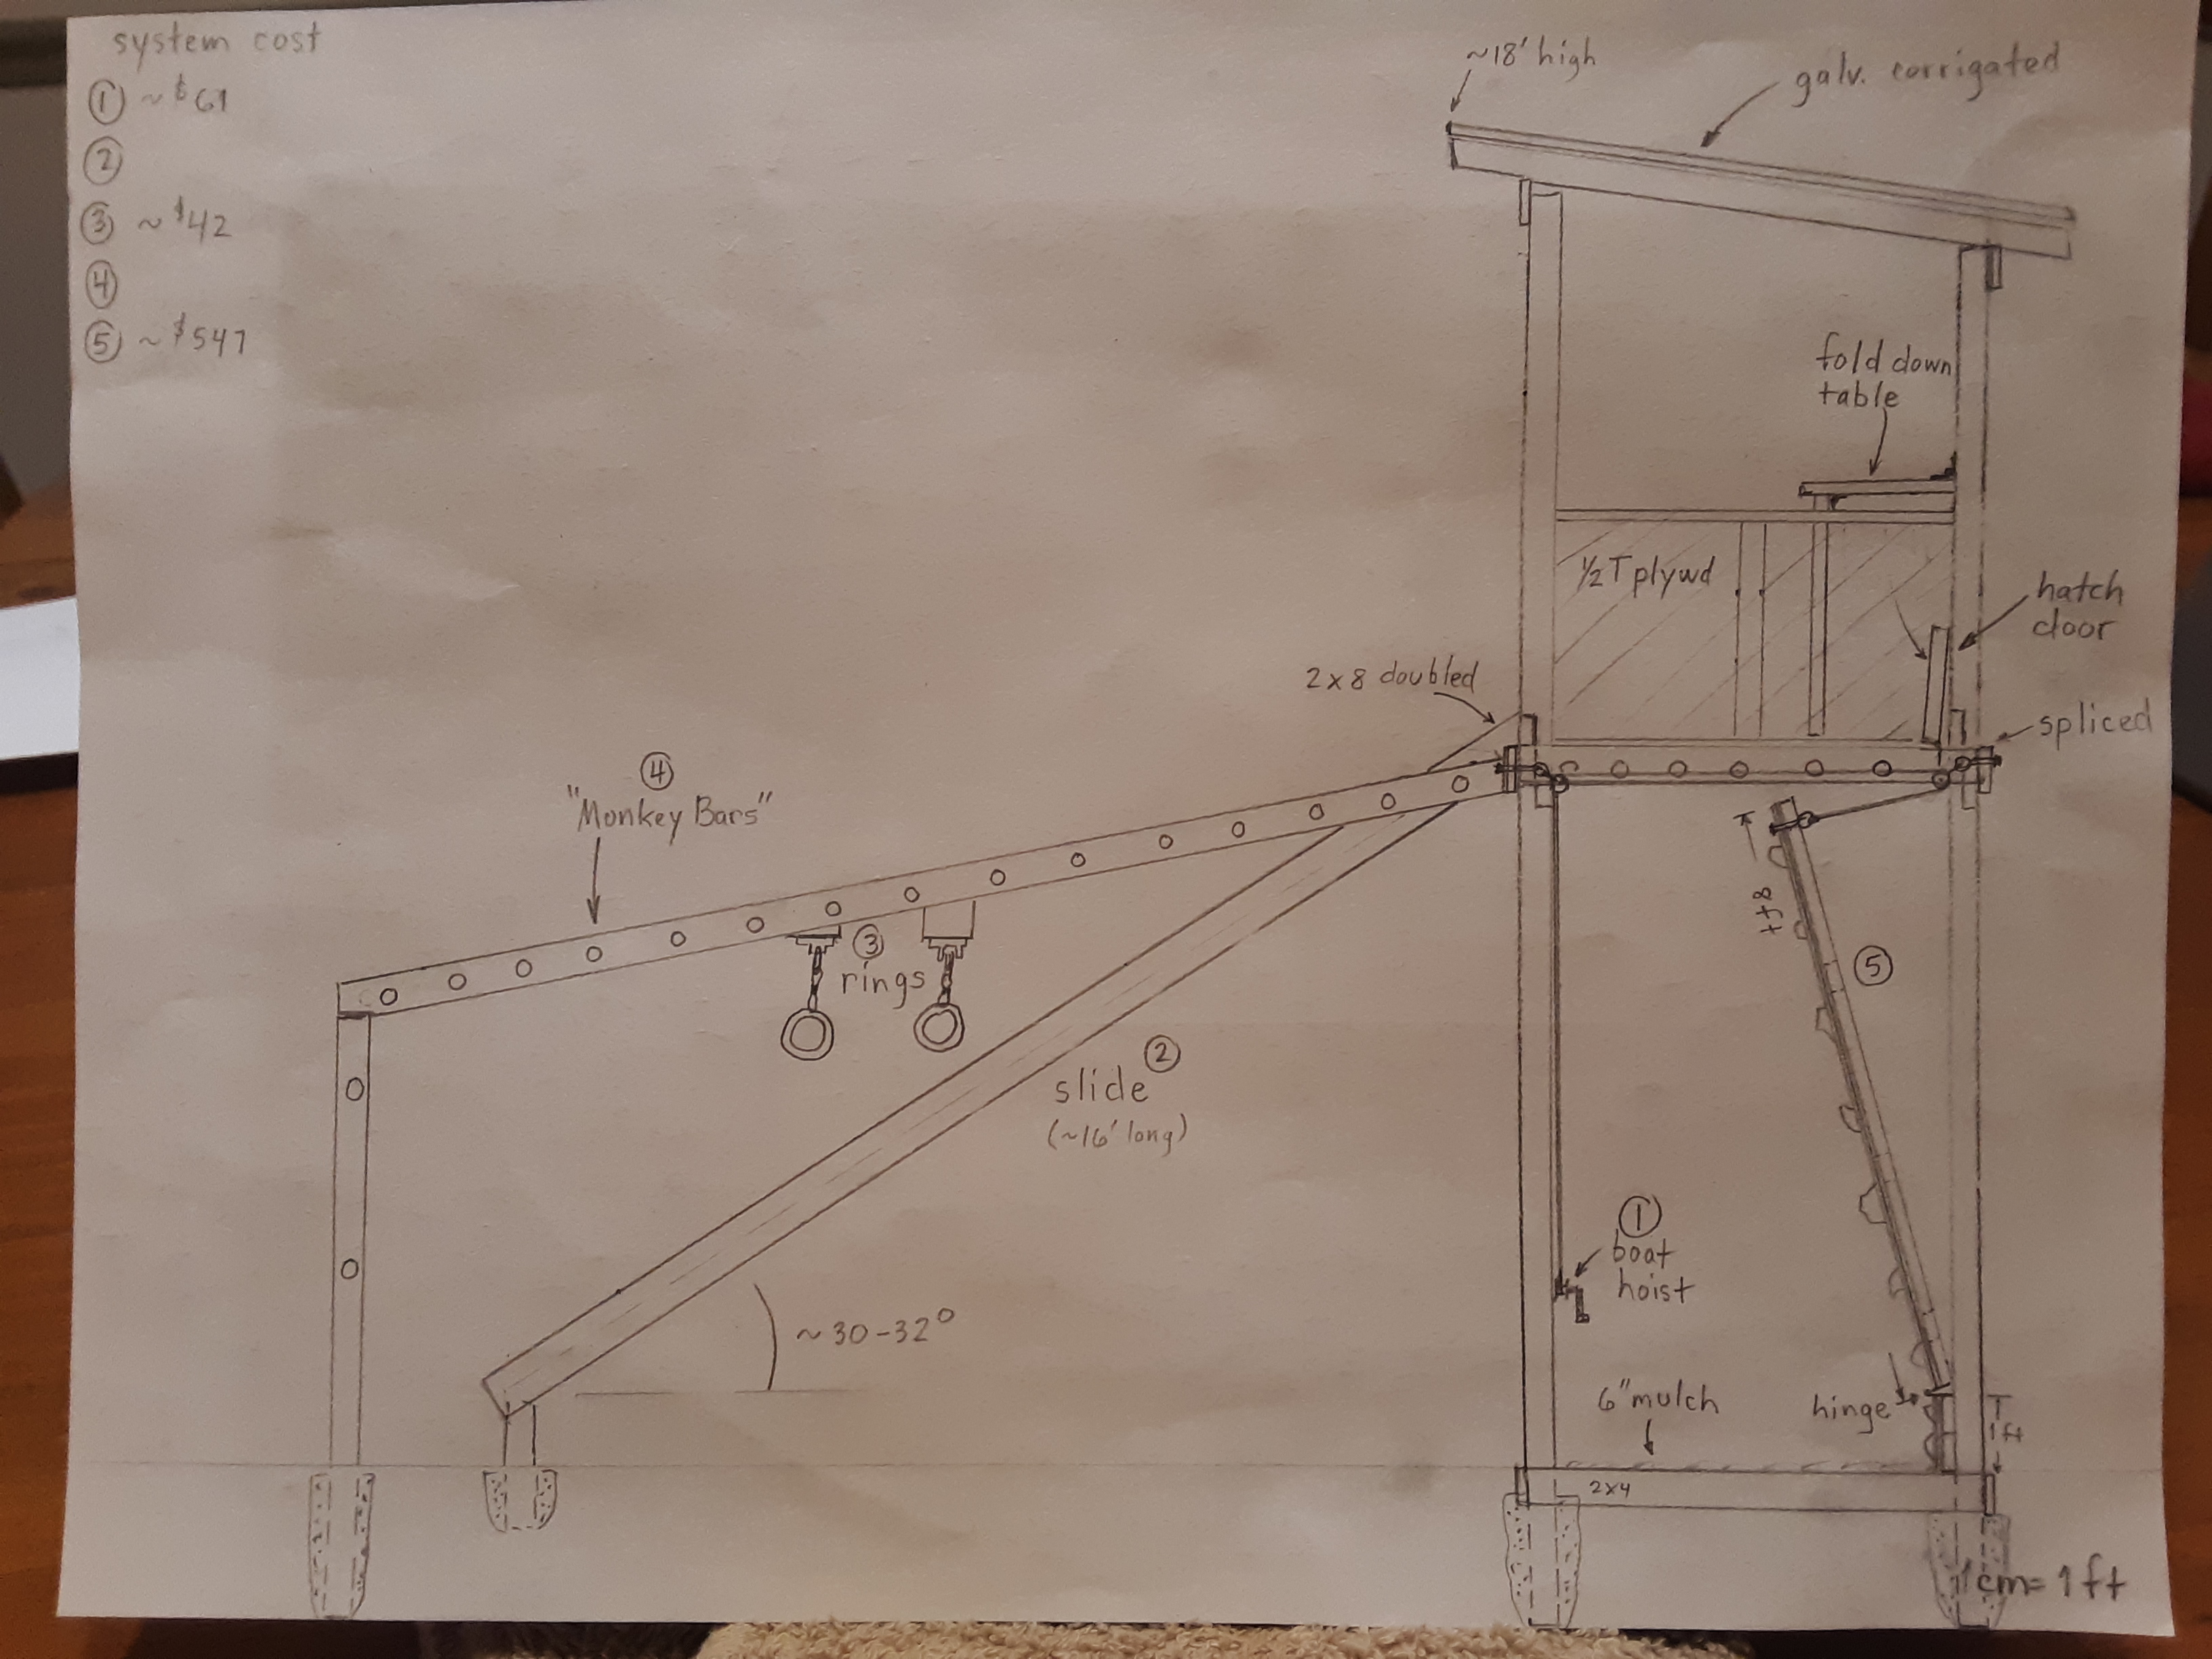
Check out the plans. The basic concept is there, but the homeowner wanted the addition of a climbing net, a zipline, a beam for the aerial silk, and a good place to mount the net swing. For cost reasons that eliminated the slide and monkey bars. The fold down table became a doorway for the climbing net. The climbing wall got lowered from 9′ to 8′ and 7′ wide to 8′ wide. The zipline resulted in changing from 4 x 4 posts to 6 x 6 posts and adding all of those diagonals.
The zipline, due to height of the playhouse and surrounding topography is steeper than suggested. So we began to look for a way to slow the ending. I added a spring and a friend added a magnetic break. They work on the same principle as dropping a magnet down a copper pipe. Copper does not magnetize but it does conduct electric current well. Therefore, when the magnet is moving down the pipe a current is induced which has a magnet field which just happens to be counter to the magnet’s field. The magnet is slowed by this counter-EMF. So is the magnet surrounding the zipline cable. The black bungee brings the magnet back to the point for the next braking action. So, the zipline is fast but has a controlled stop.
In the last blog entry, “Something New“, I began revealing my designed big playset coming together. Now we begin to get past mere structure and on to how it will be used.
There are three doors into the playhouse level. These are for entrance and exit but also to act as railing should S and her friends want to spend the night aloft.
The climbing net will go here. The gate doubles as a table in the playhouse.
On a rainy, cold day I worked in the block shed you see in the pictures. I drilled holes and mounted T-nuts, installed 2 x 4 supports and mounted hinges on the treated plywood on my saw horses. A few days later I mounted the wall onto the footboard. The railing was a whole day job, too.
T-nuts allow moving the climbing holds around for new climbs and no boredom.
I designed the climbing wall to meet the owner’s requirement that the playhouse “grow with her.” I told her that meant that I needed to build a serious climbing wall. To wit I installed a winch in order to lower for overhanging climbs out to 40 degrees above horizontal.
Since the winch cable is only one mounting point, I installed to latches, one on each side to stabilize and strengthen the wall when slanted.
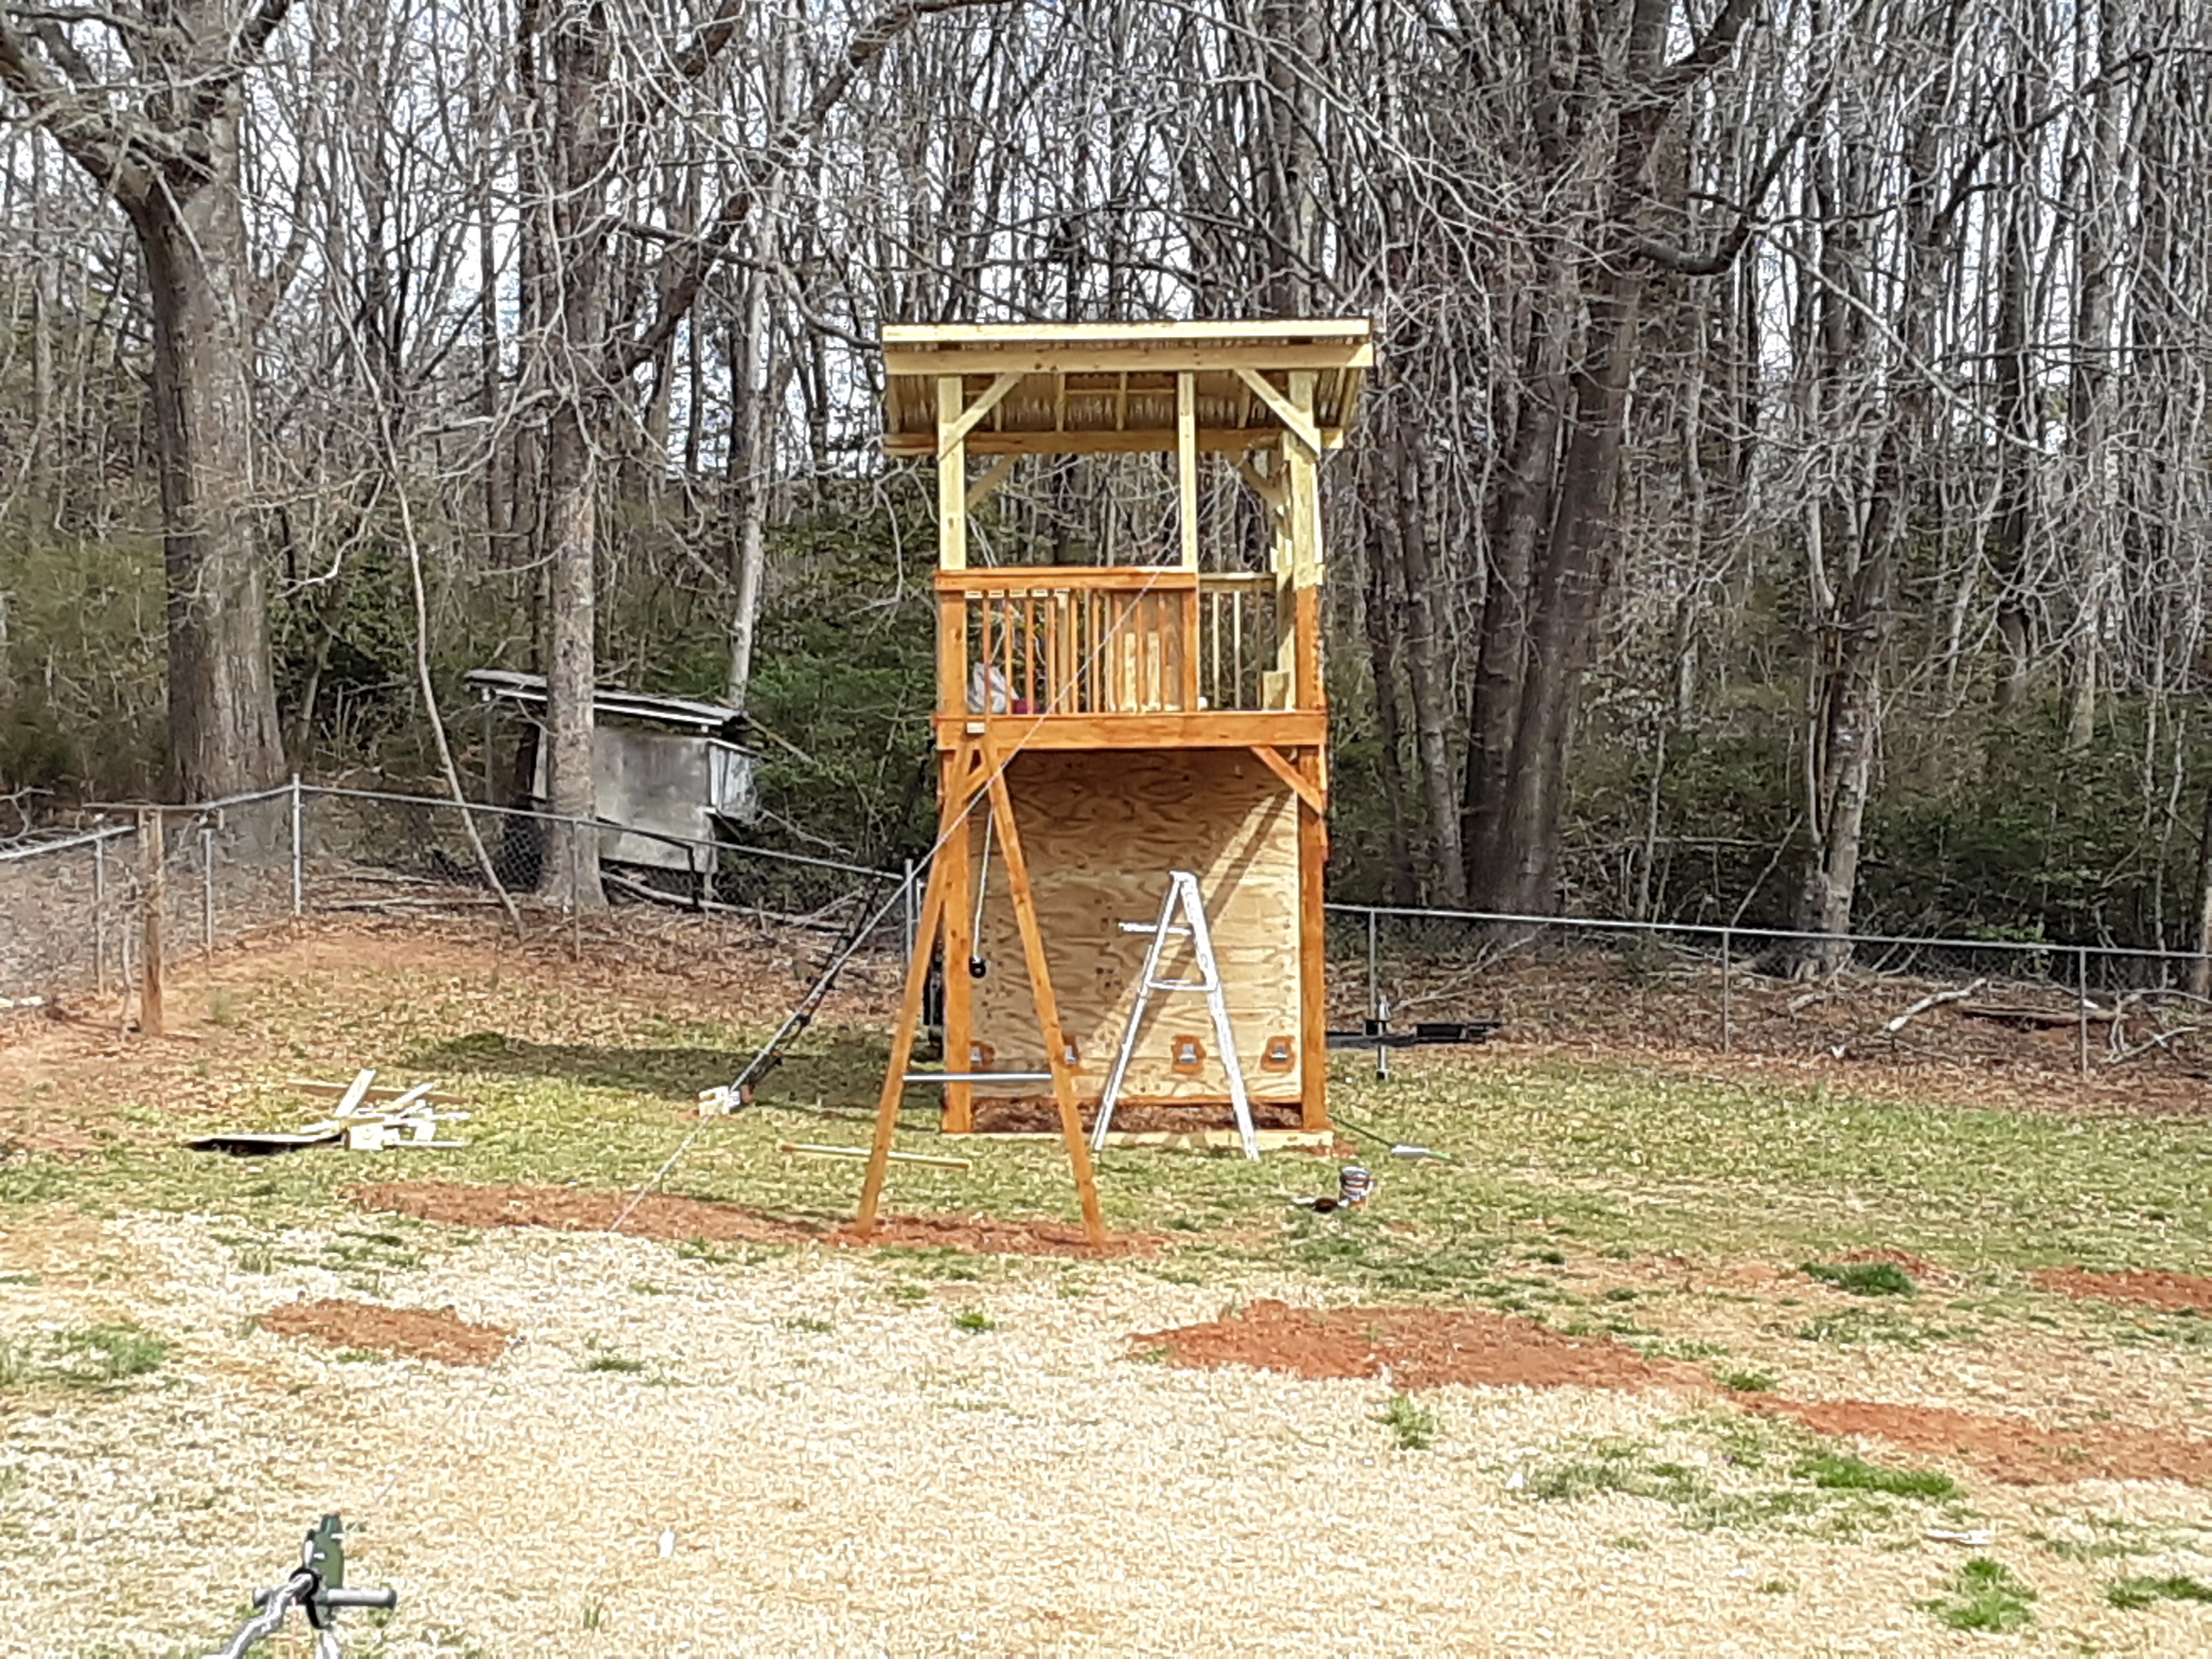
You can see the zipline is up and staining has begun. There are so many surfaces and angles that the staining took about 2 1/2 days. The A-frame for the rings and swings is in place as well.
The 4 x 6 x 20 treated beam was special order and took one month to arrive. It came straight from the sawmill they said. Notice the smooth bar in the A-frame. It is for spinning around on.
Picking out and ordering the climbing holds proved a challenge for the owner, so those came finally.
Soon I will reveal the finished product and the plans and how they changed throughout the project and why. It was slow with various delays, but it came together nicely.
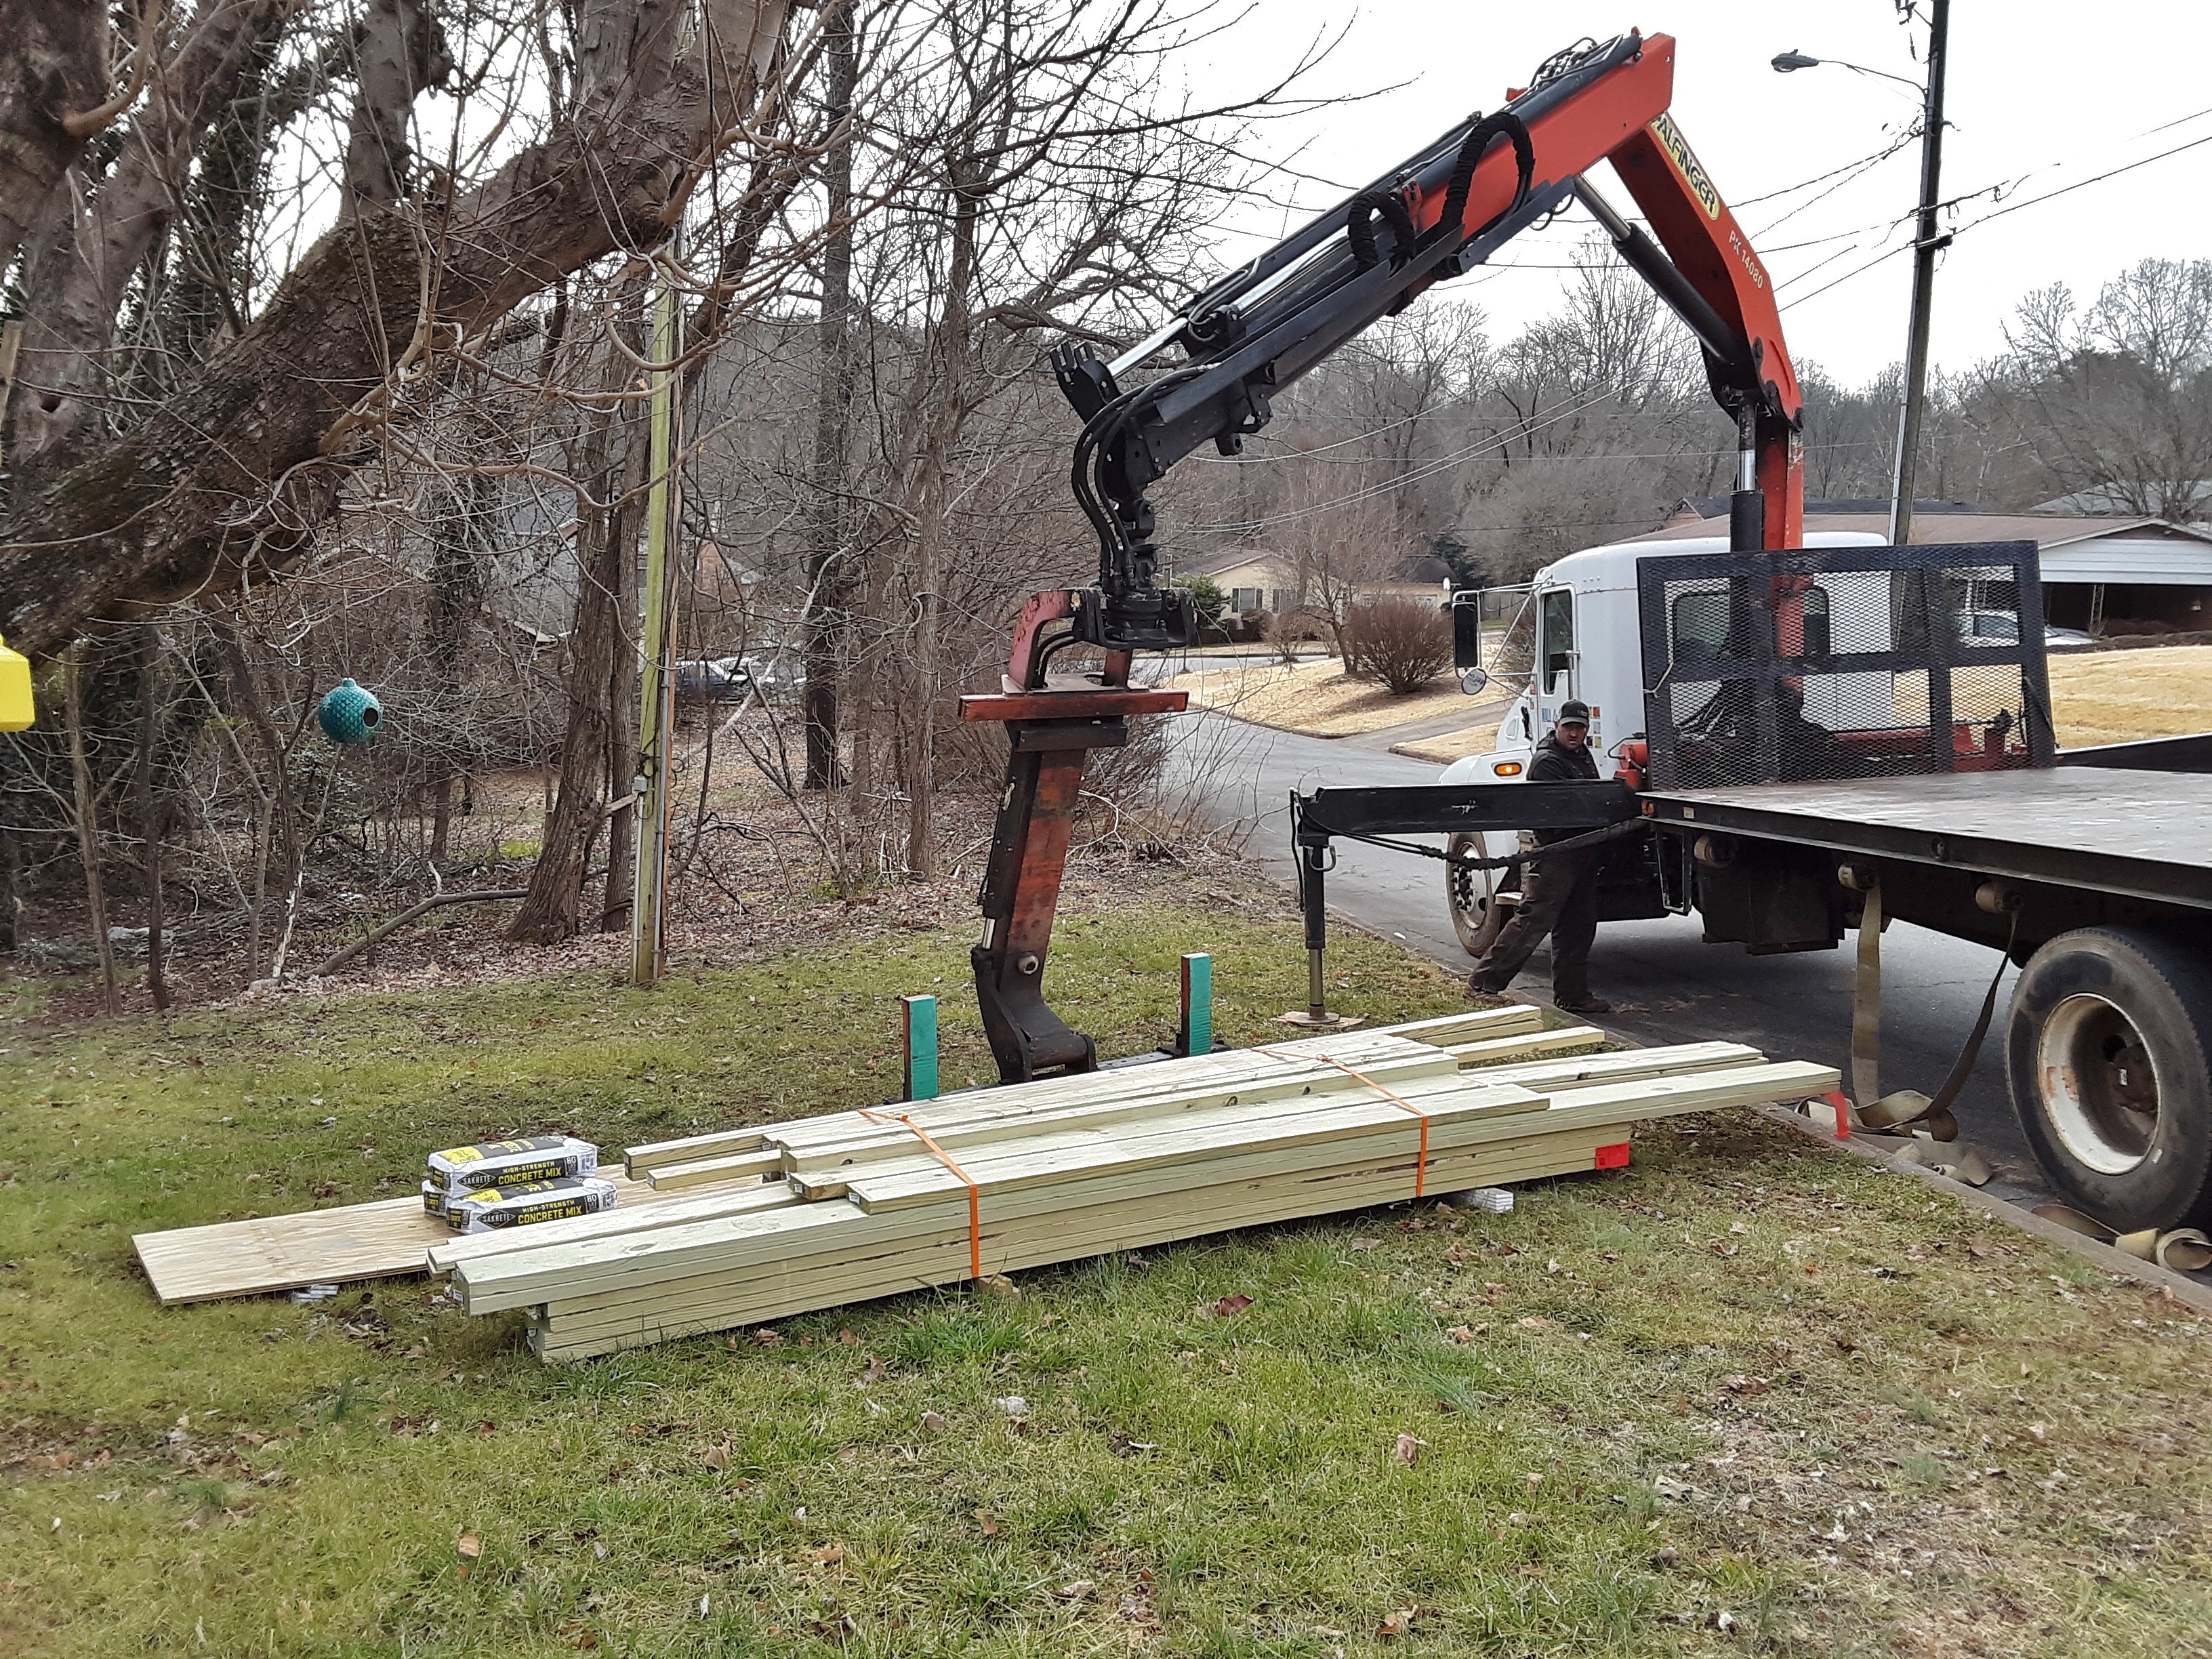
I just finished a large project that took several months. Other responsibilities, weather, special order lumber, and specialty hardware delayed progress but did not prevent completion. It was an intense and satisfying project. Follow me as I show you the progress on S’s new playset.
How do you haul and install 6 x 6 x 20 poles? Picking them up saved time in getting them and money for the customer.
I had help getting them in the hand dug 3′ deep holes.
The homeowner was amazed.
Next, the local lumber company delivered the majority of the lumber.
Because the winter was very wet, the truck could not bring it to the backyard, even though there was access. I hauled two or three boards at a time on my shoulders the next day.
Even though this is in the city, a vacant lot behind the worksite conceals a family of 7 deer. There are some very nice trees and thick underbrush to conceal the Whitetails.
Day 2 involved more digging and considerable plumbing (not water, but vertical with the world) and bracing.
My two helpers were always ready and waiting when I arrived, regardless of time of day or weather.
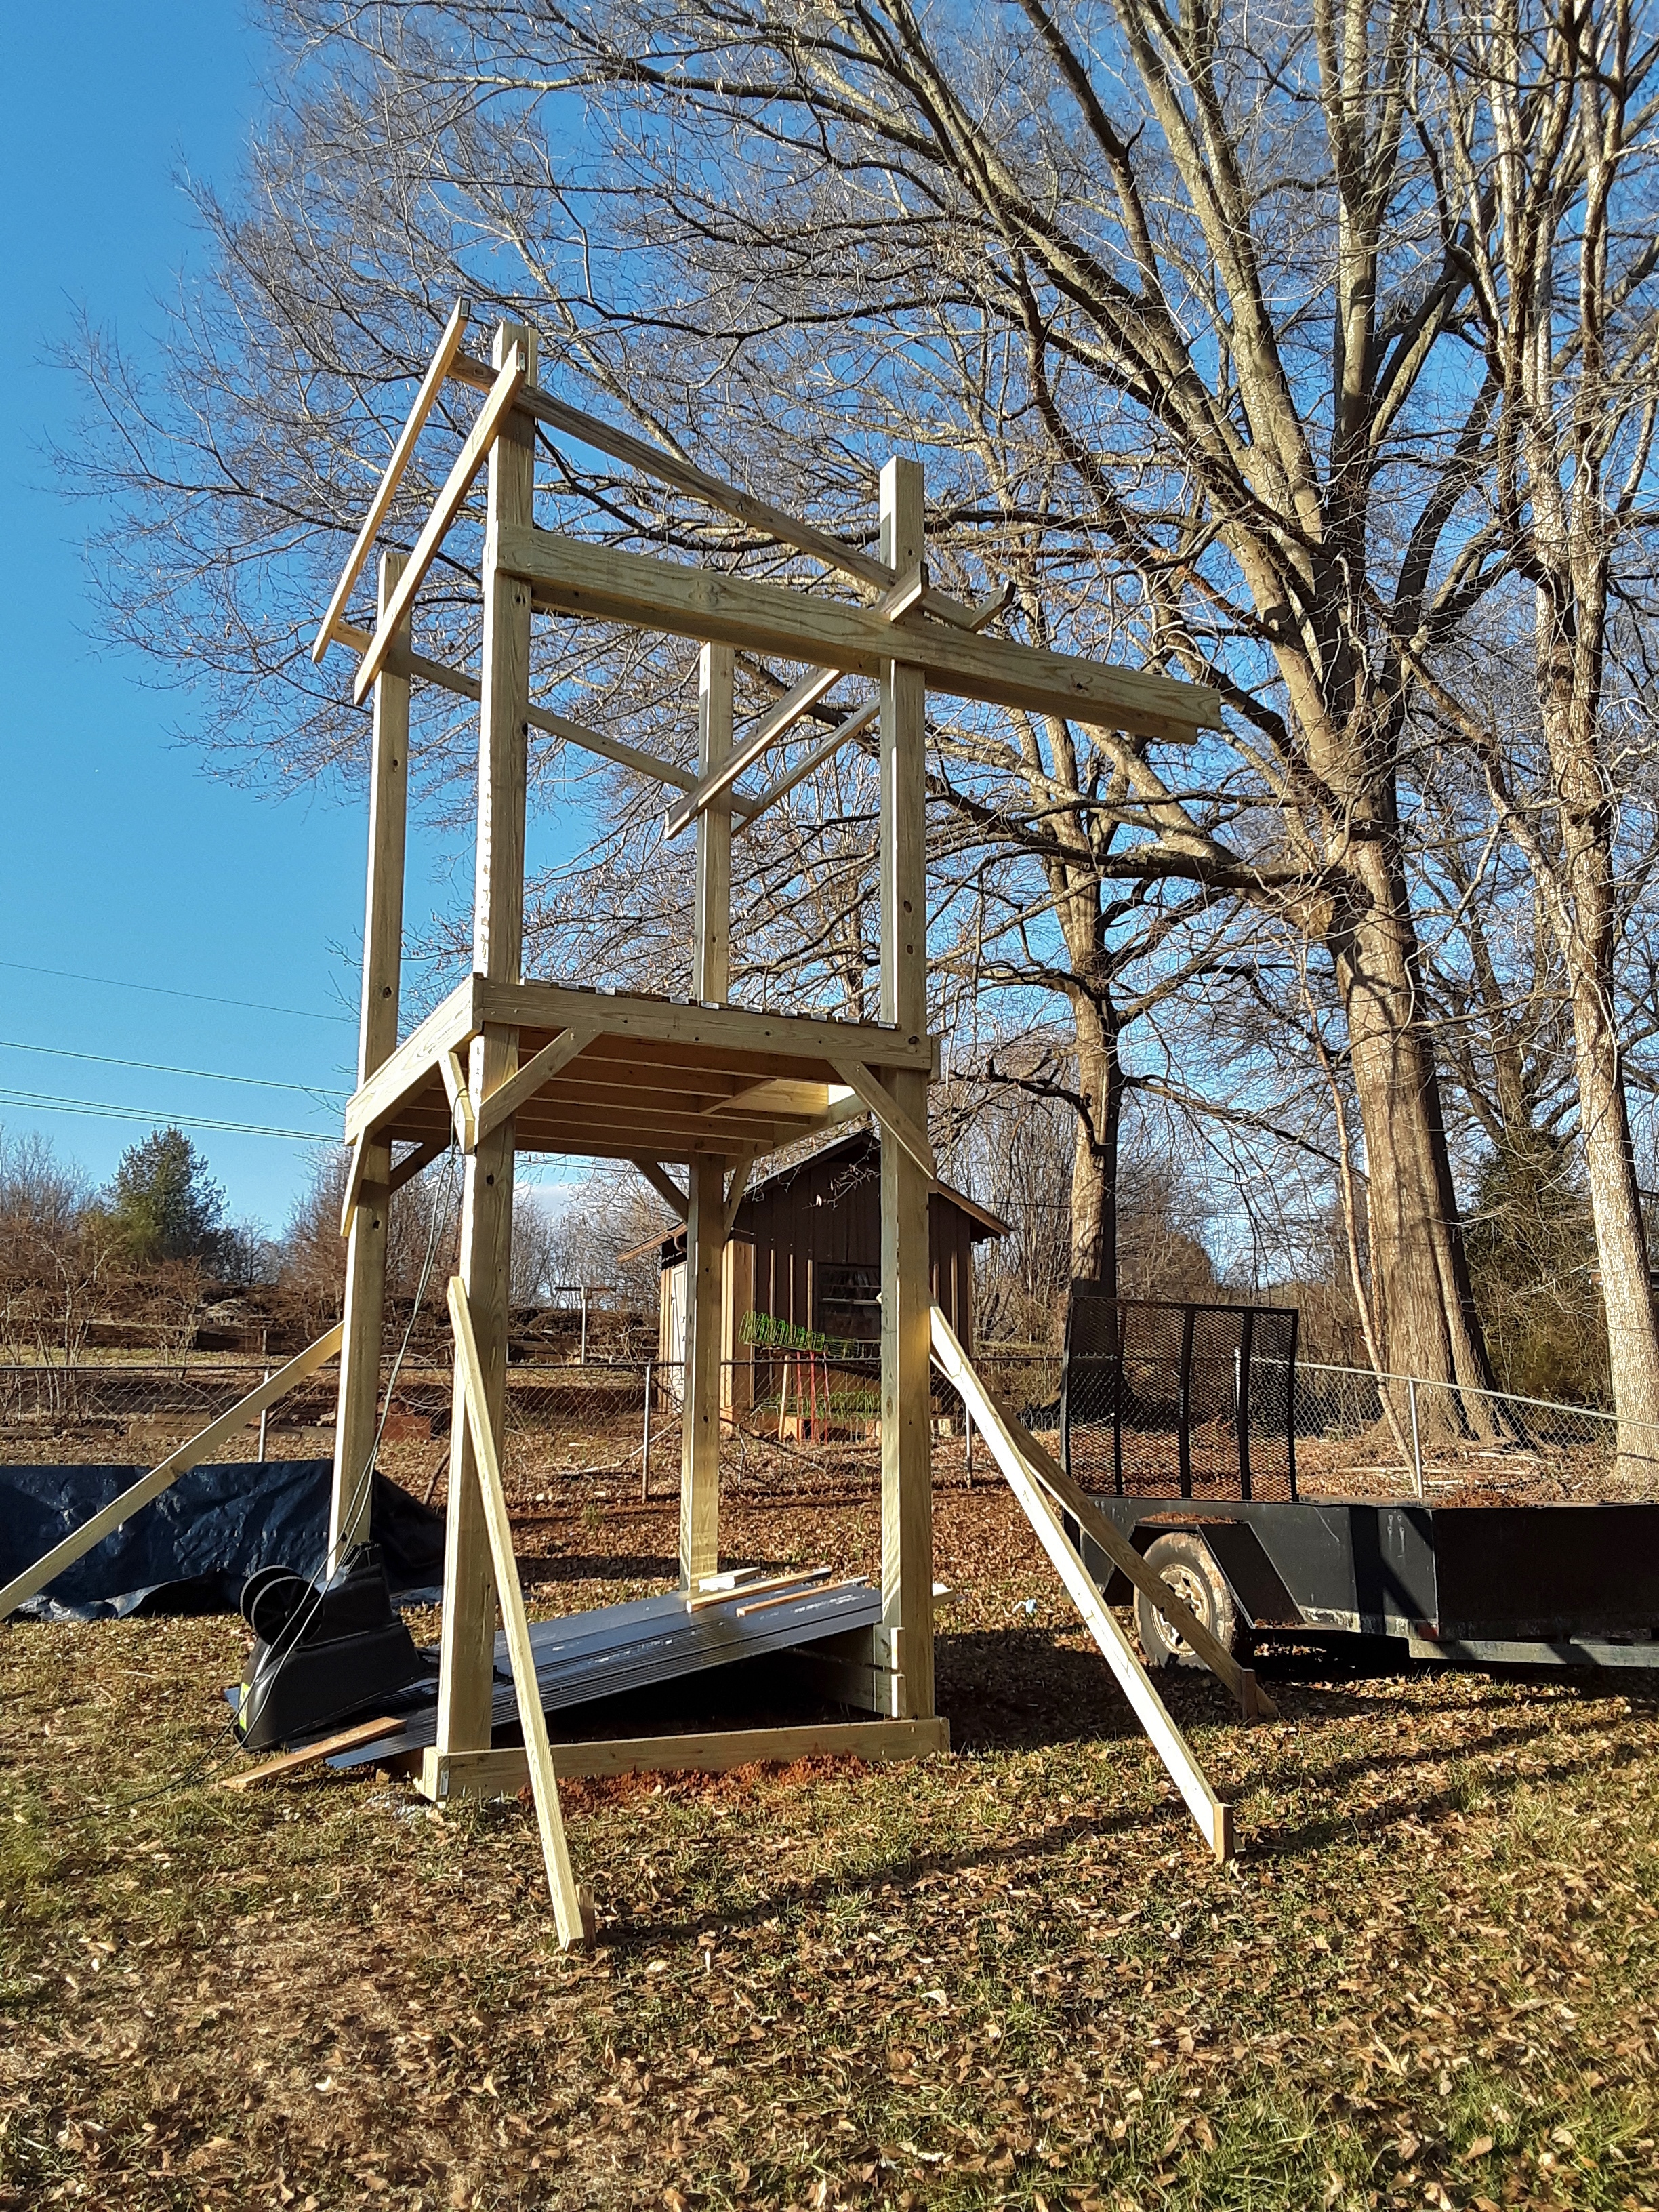
On day 3, I put in joists, the footboard for the climbing wall, and concreted the posts. The reason for the overkill on the posts’ depth, size and concrete was the planned zipline. Take note of the copious diagonals as it comes together. This structure is stiff.
Some days were longer than others and some saw more progress. The floor was satisfying and very useful for further progress. Hanging out on an extension ladder leaned against a single post putting up long boards is difficult for one person.
The double 2 x 8’s hanging 5′ off of the back will support an aerial silk. S, who is the ten year old girl this is being built for, is taking lessons.
Day 5 saw the roof go on just in time to keep the floor dry from several days of torrent.
At about this point I lost track of what day I was on, since there were doctors’ appointments and multiple days of rain, short days and long days. I had nearly a whole day devoted to installing diagonals. The other part of that day saw the trapdoor go in. (1) I had to think like a kid when I designed this project. The trapdoor is an entrance from the top of the climbing wall. Think fun and adventure.
Can you guess where the zipline will attach? Diagonal City! Leaned against the shed are the 3/4″ treated plywood for the climbing wall.
We are along about day 8 so I will sign off for now. Another day I will show more progress on this cool playhouse. If you are interested in a playset, climbing wall, deck, and any number of other wood projects contact me through my facebook page, ww.facebook.com/decksandsuch
The trapdoor image appears upside down when I load it, even after flipping it in the file. What is that about?
I could be talking about the underpinnings of society, but that seems to be going no where at the moment. So, I’ll just talk about a recent deck repair that I did.
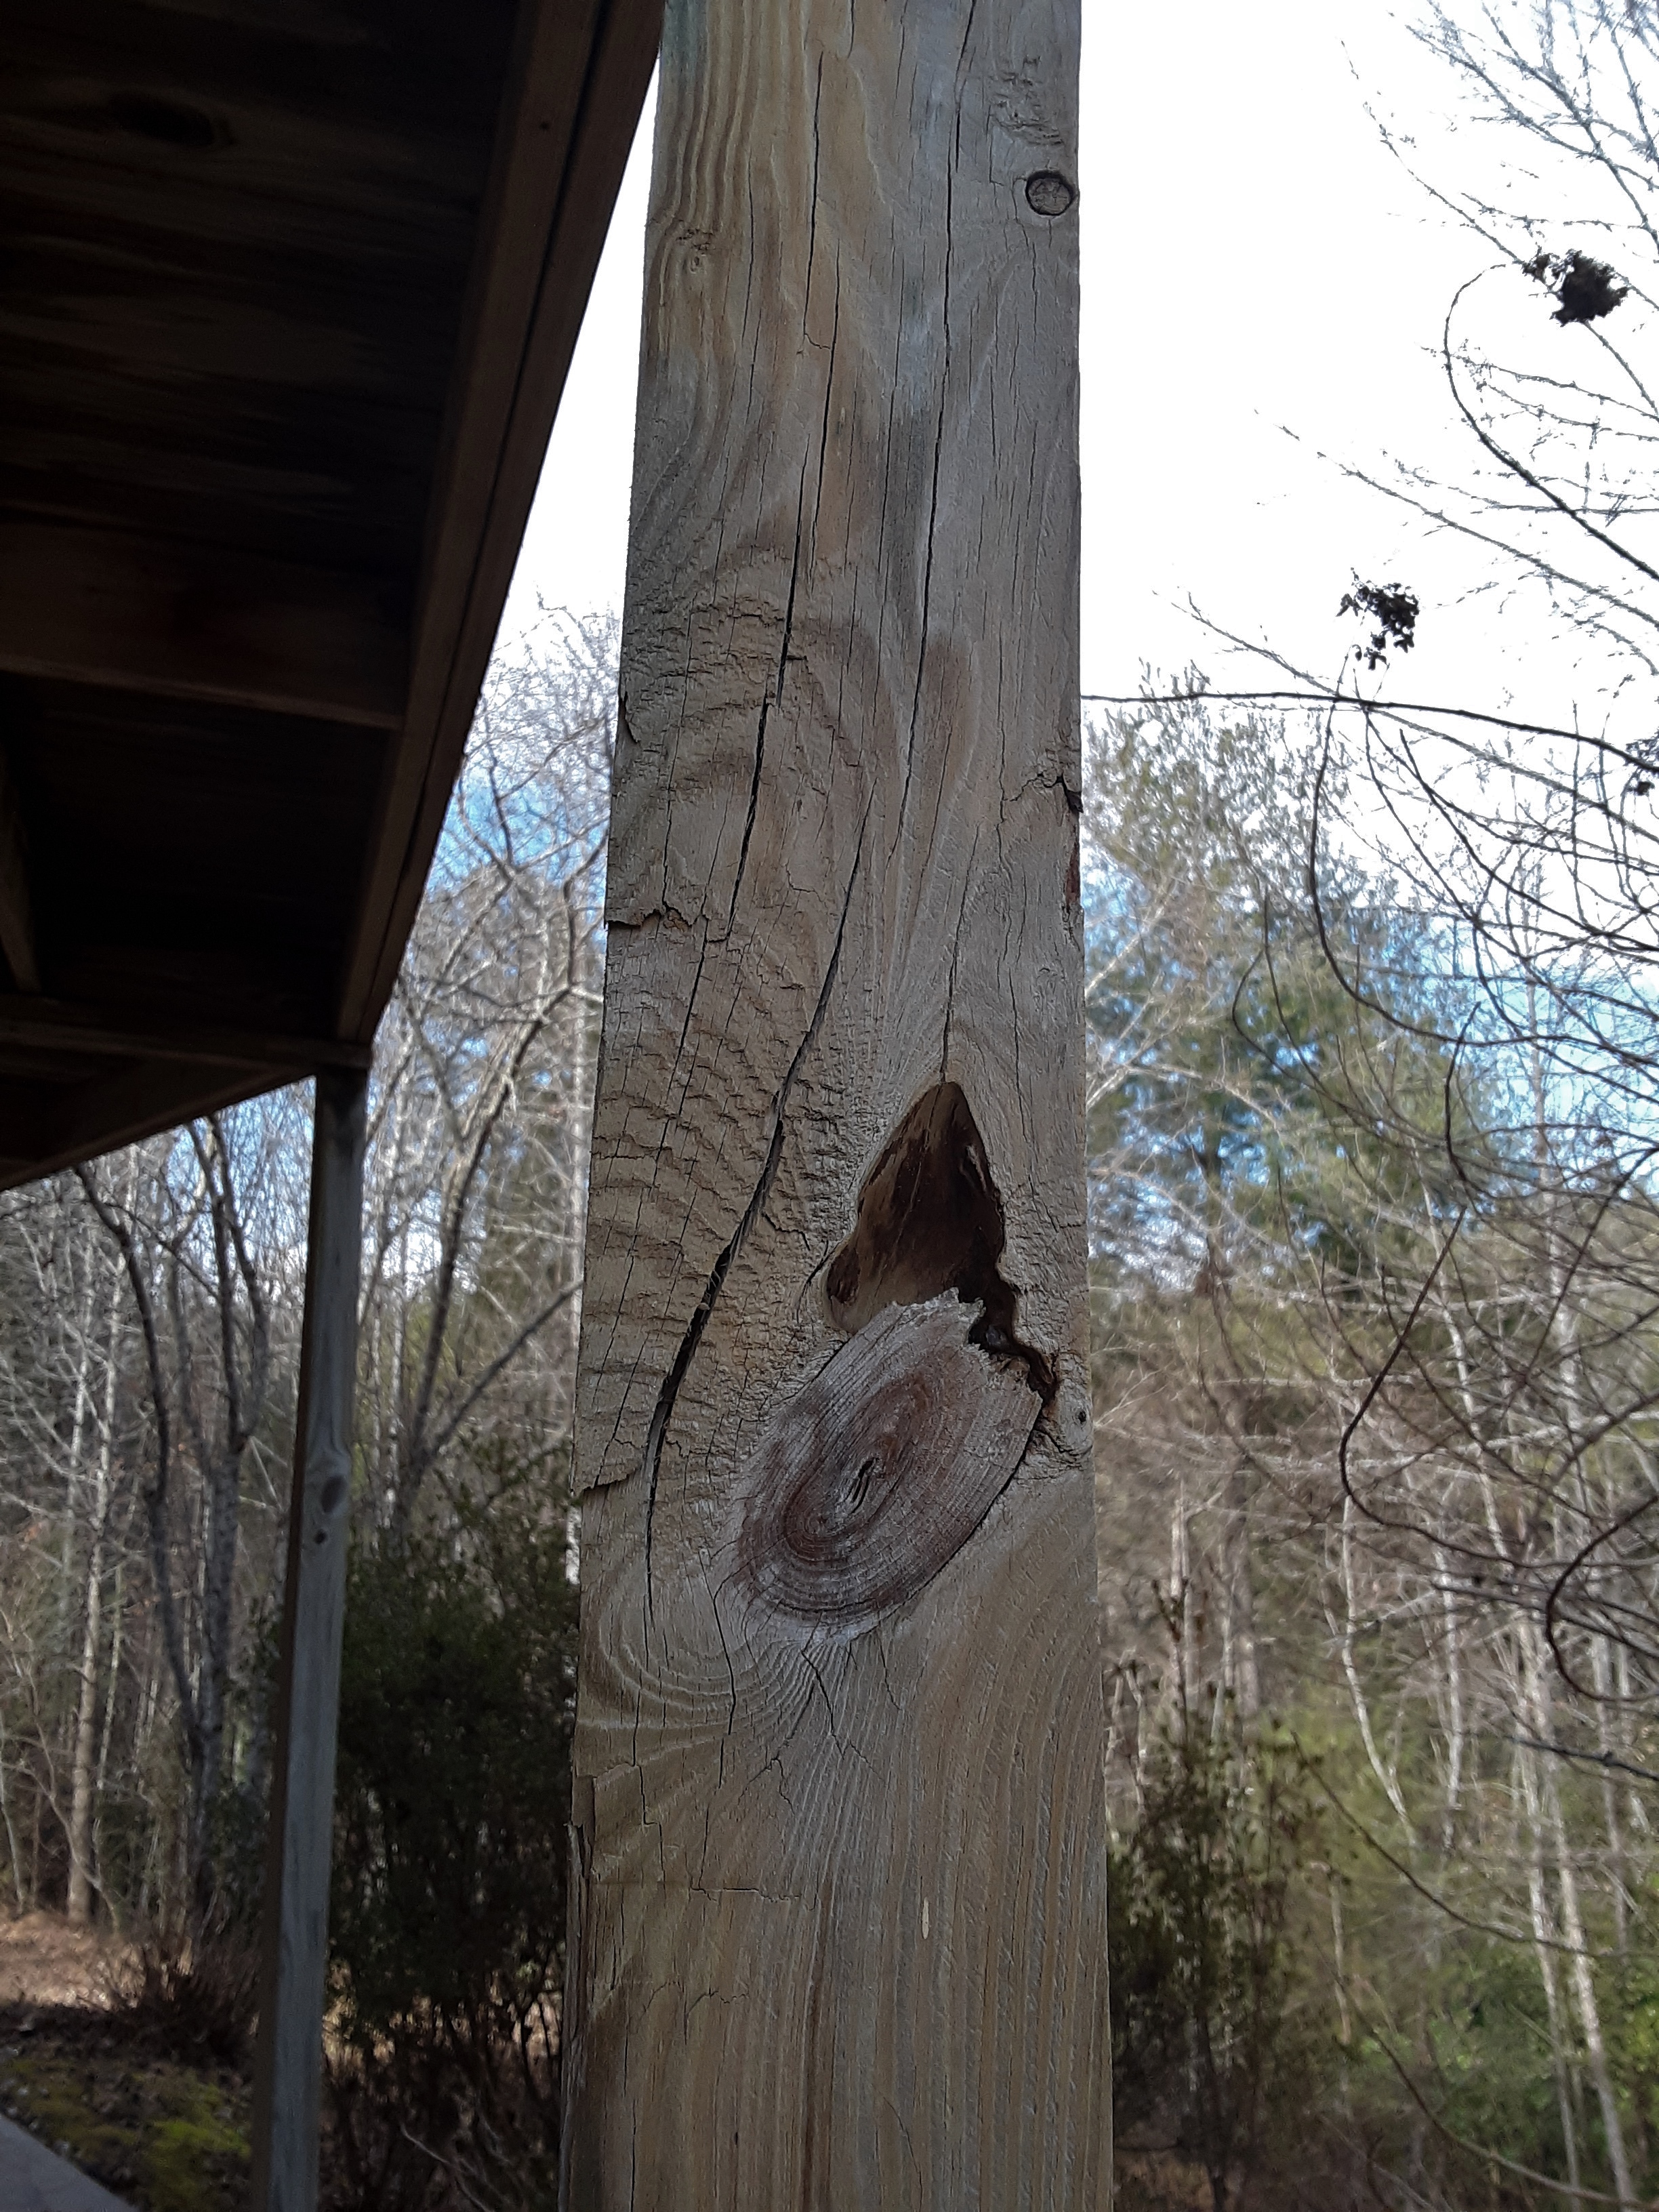
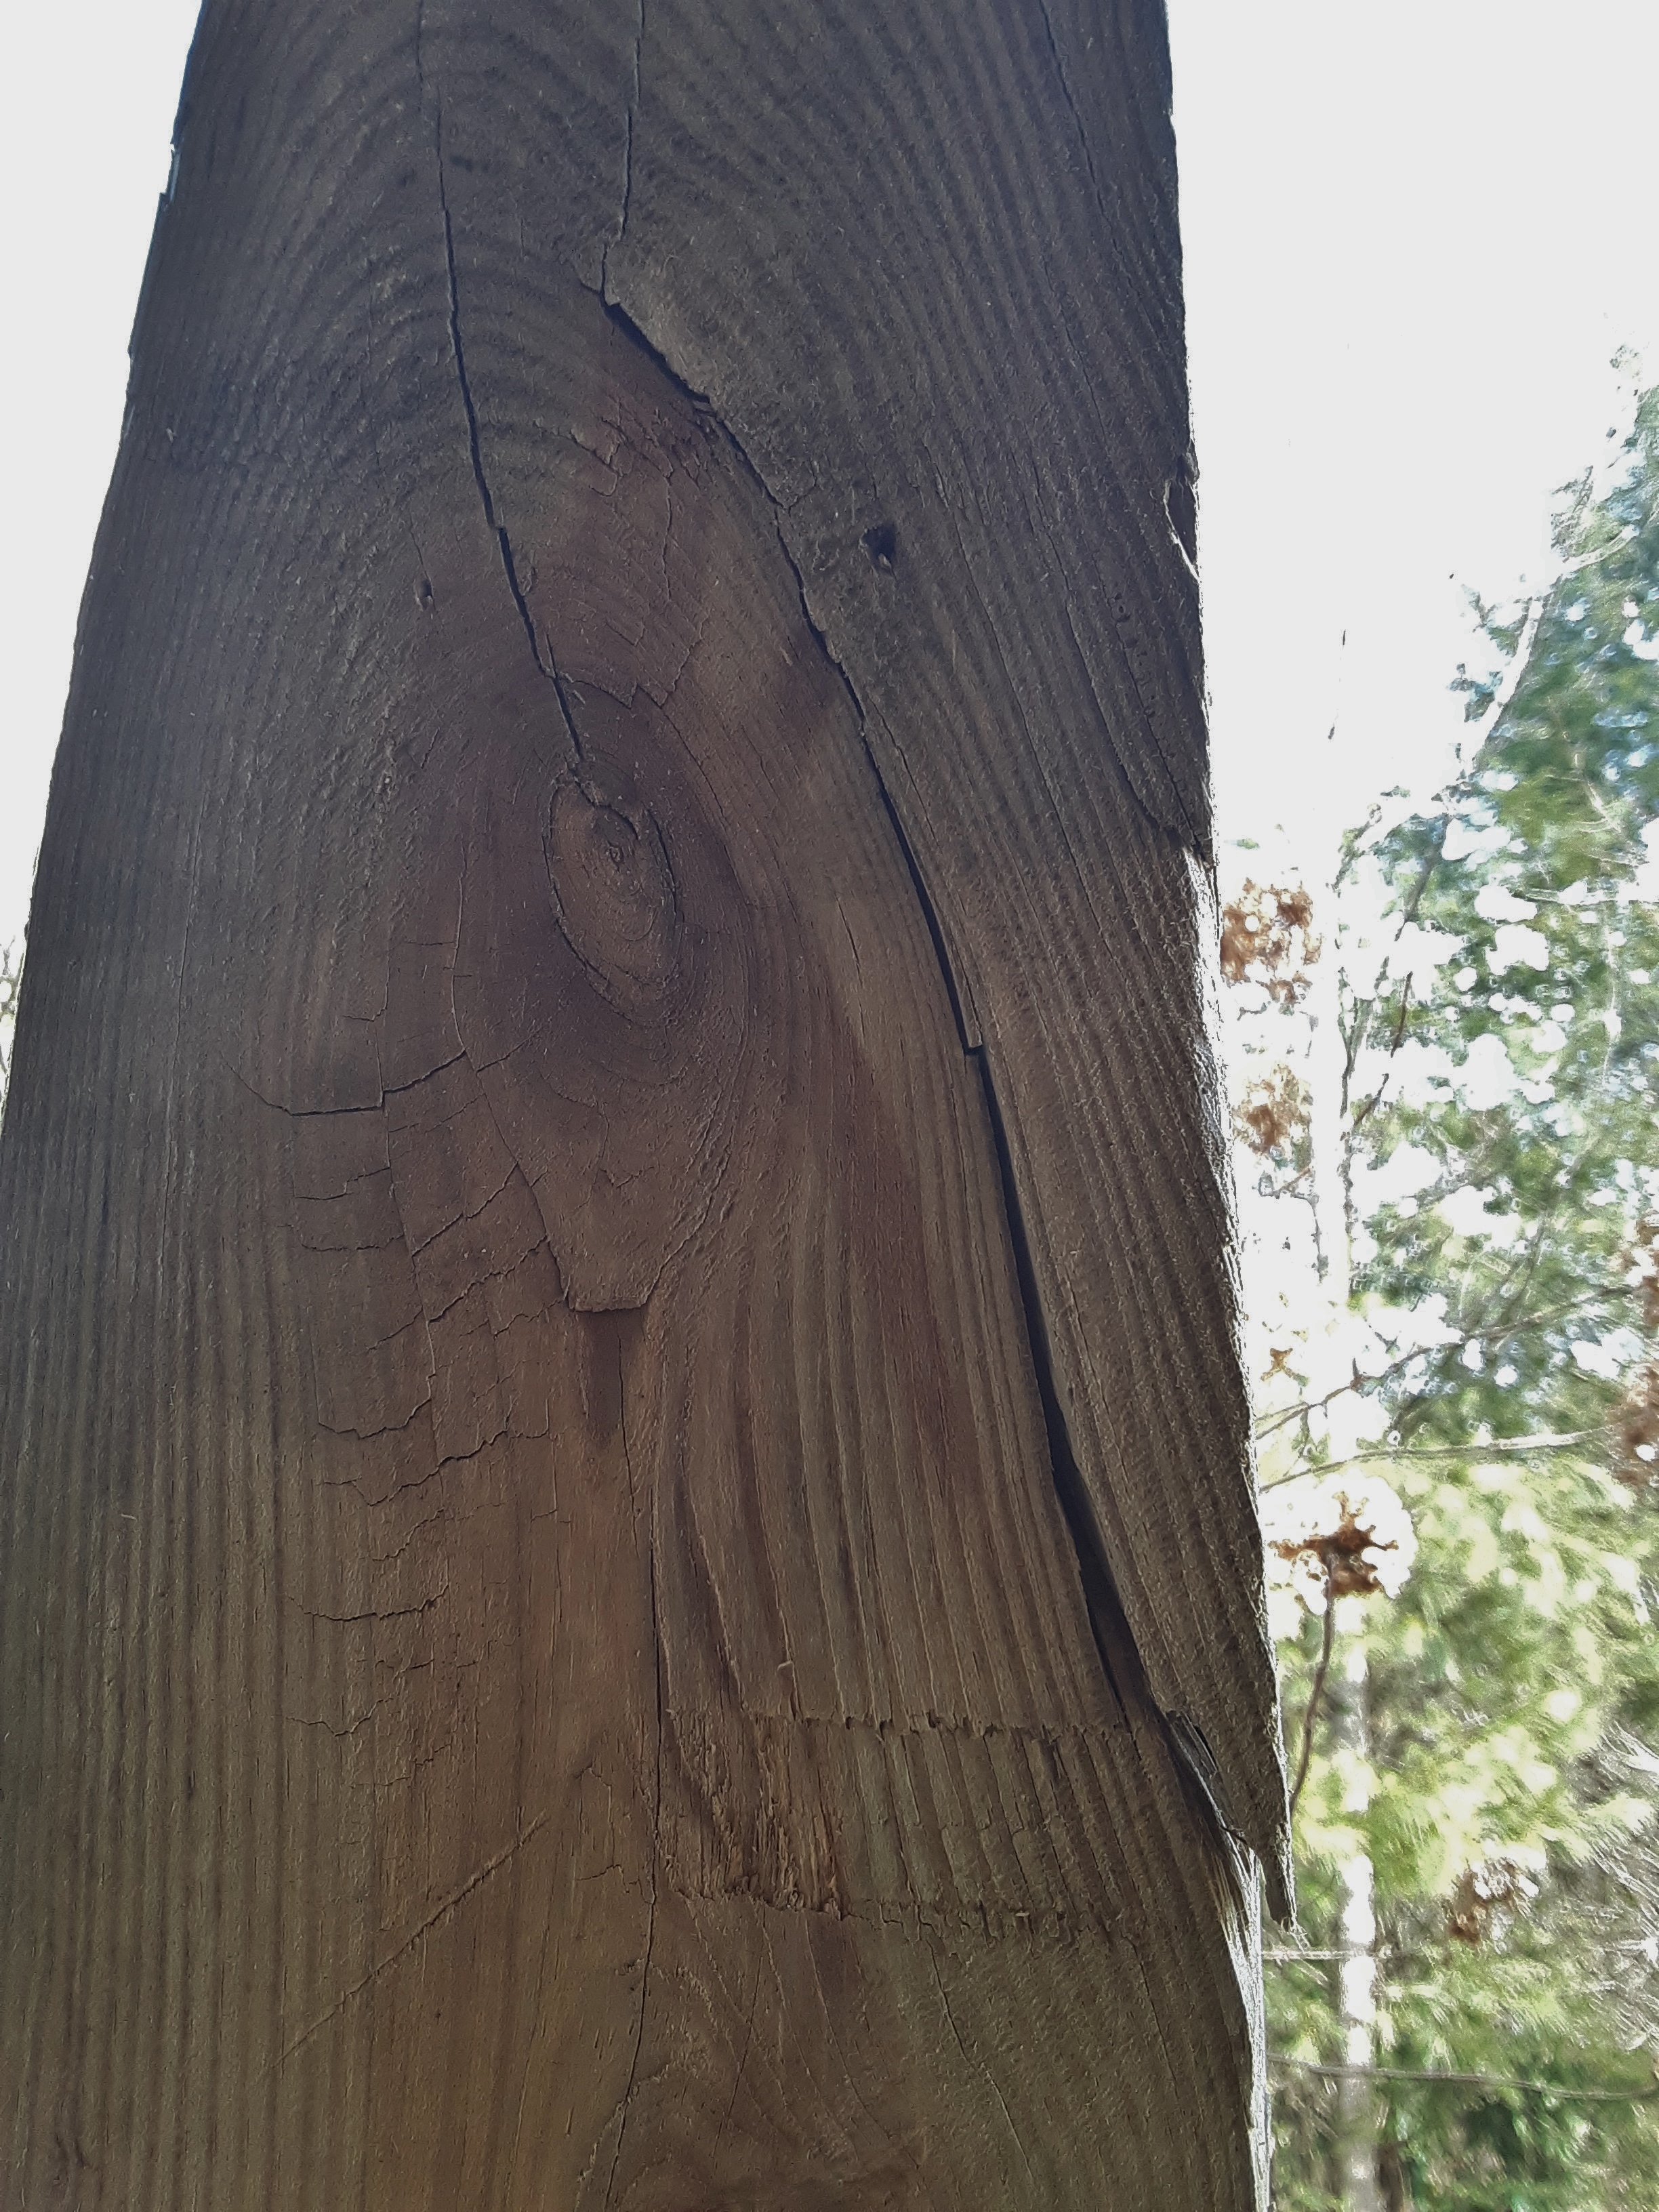
Two of the posts had significant bows due to warping at a knot or knots. The first one pictured is the worst since a crack goes almost all the way through the two knots on either side. Gravity is persistent and will overcome any imbalance eventually. For that reason I hand pick all lumber when I am building a deck and take back boards that are not looking like they will go the distance. Nothing is permanent and decks can be expected to last 20 to 30 years depending on how often you stain it, the quality of the original boards, maintenance, and how it was designed.
Here is it close up. I should have shown the other side so you could see how serious the problem was to the structure of the post.
The other one looked as follows. If the grain at the top of the knot split to combine the two cracks, the post would not be far from gone.
The first step was to install a temporary support. A few posts from a previous job and my trusty persuasional tool (sledgehammer) served the purpose well. I hammered the temporary up to plumb, allowing you to see just how bowed the post was.
The next step was cutting the post off and rigging a way to pulled it out of the concrete slab. The slab was added after the house and deck were built, so they poured it around the posts. My car and truck jacks worked slowly but surely.
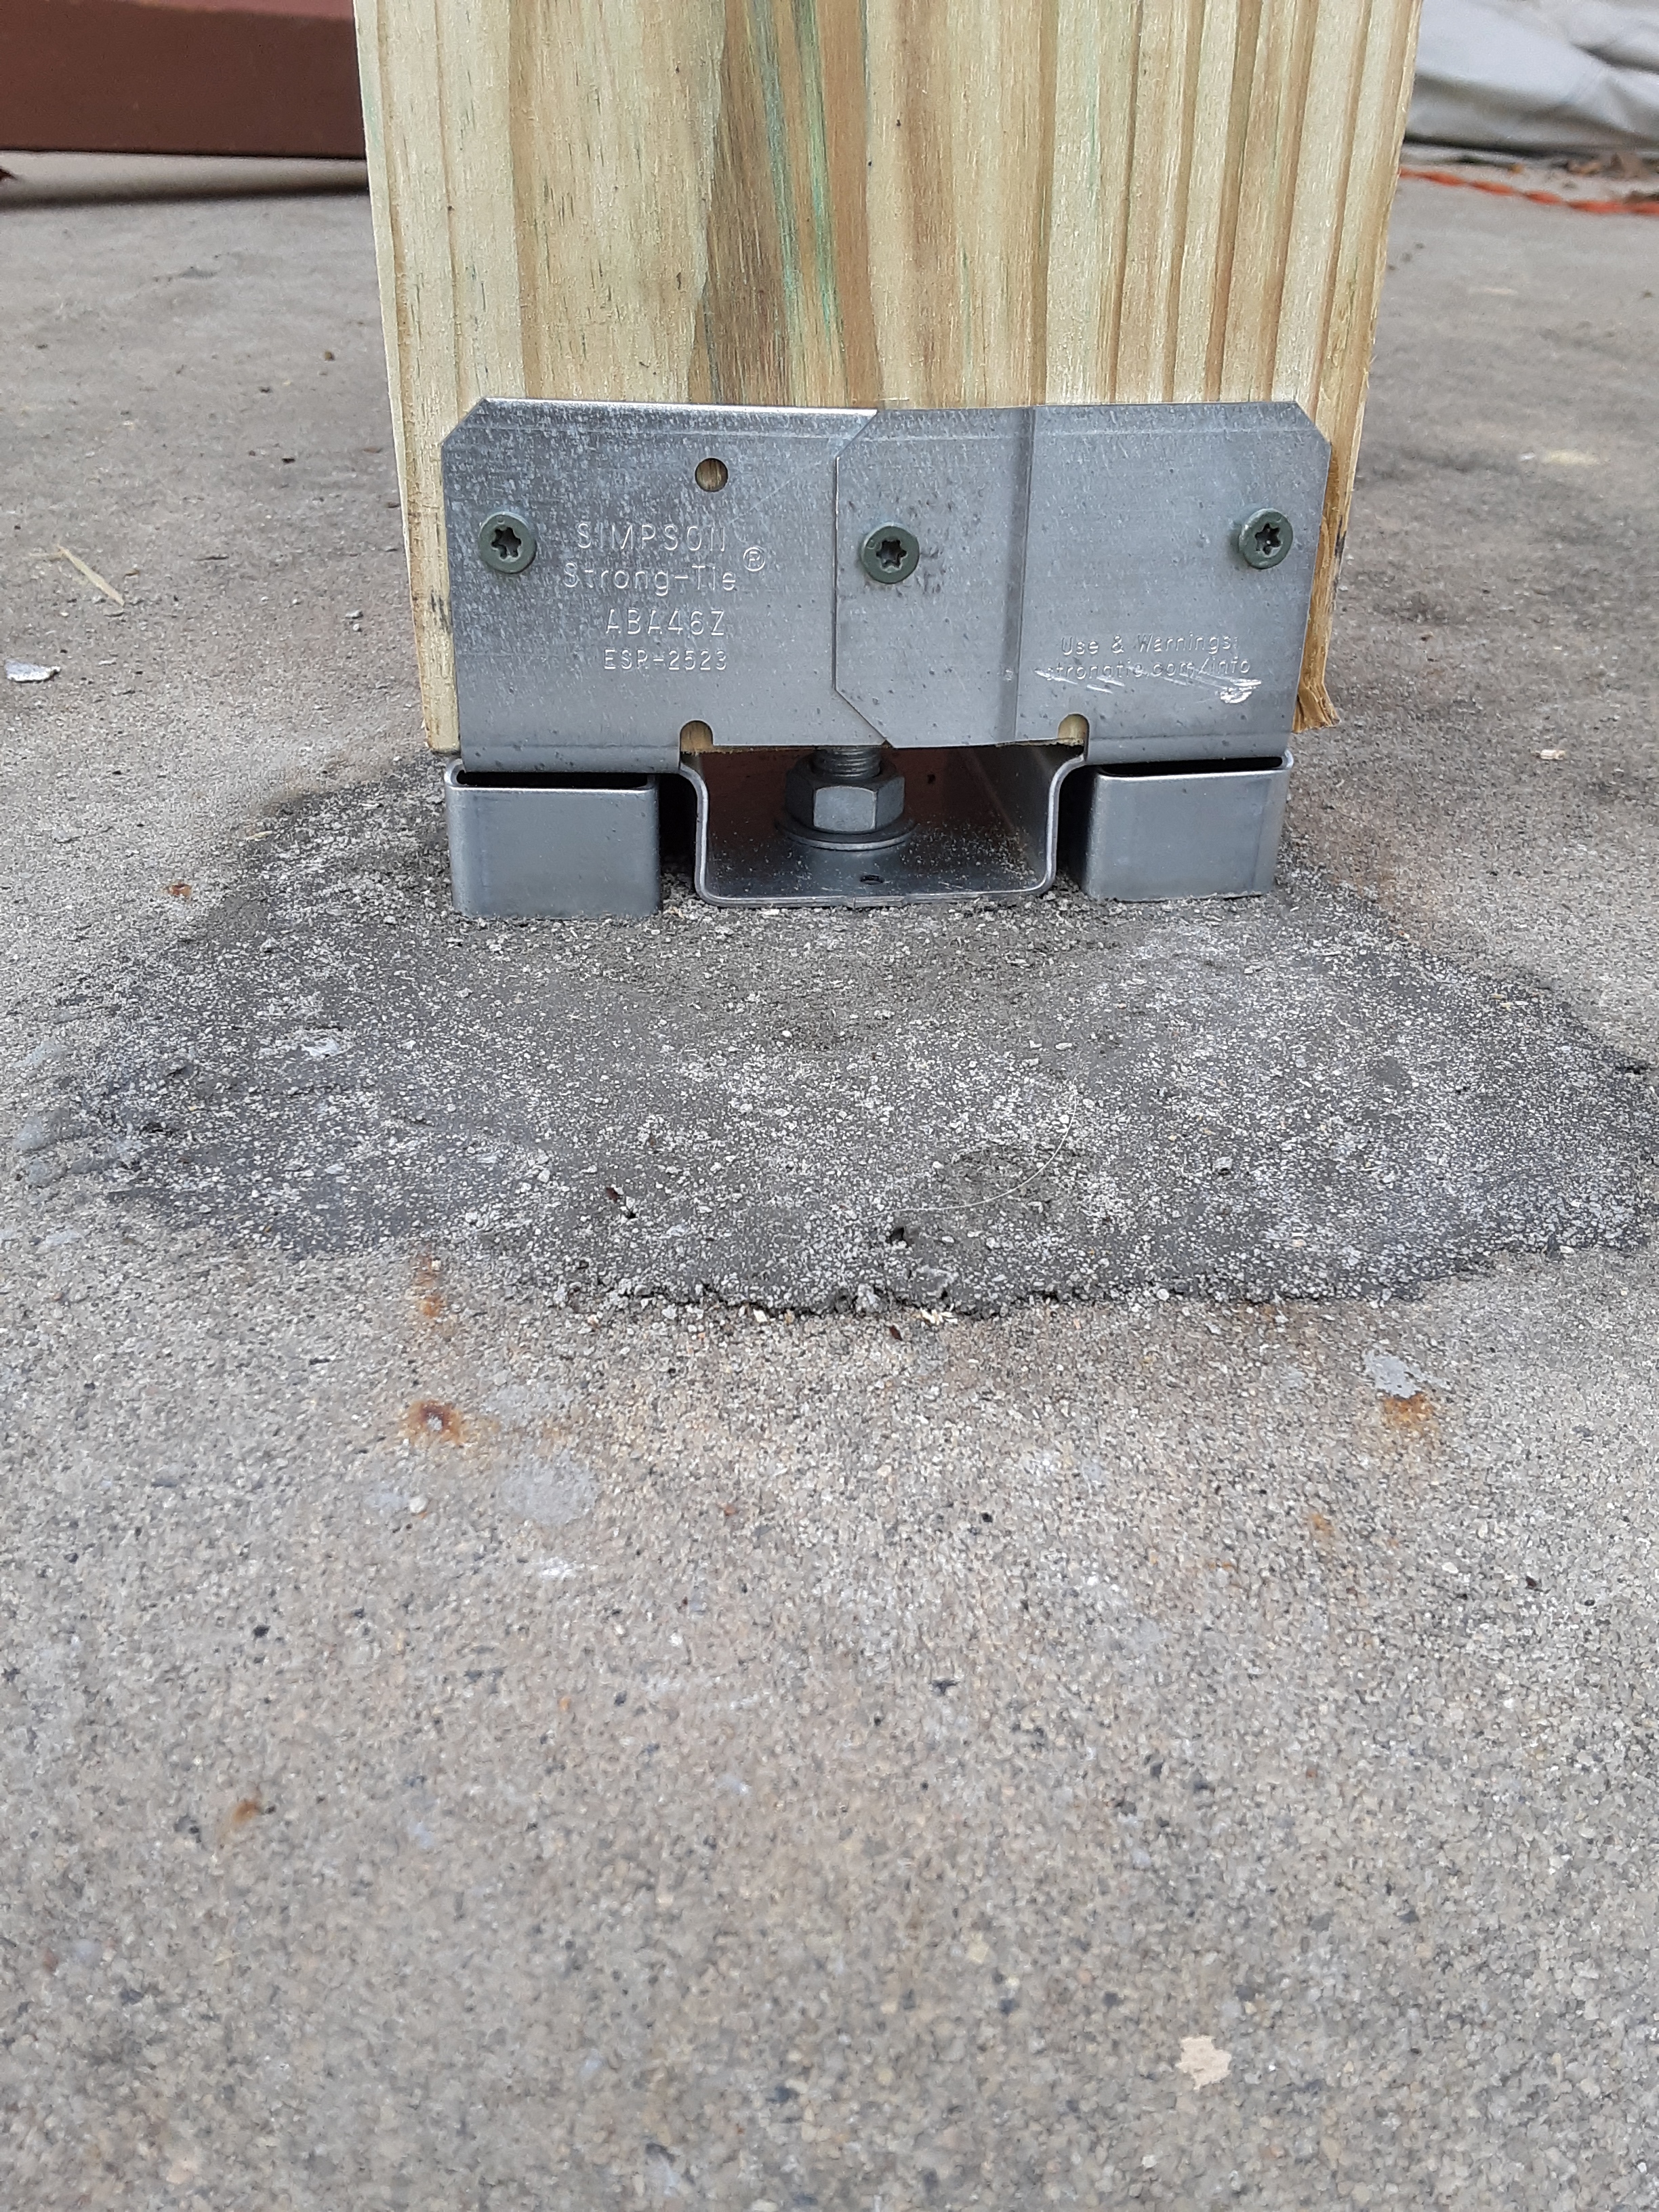
I was surprised how shallow the post was set. The aluminum plate, badly corroded, was sitting on gravel in the hole whereas these plates were usually used to set posts on concrete. There was not too much cracking of the concrete.
I filled the hole with concrete and inserted a “J” bolt that would later secure the bottom plate.
Two days later I installed the new posts. You can see in the background that I had not yet installed the second post.
A post whose bottom can dry out will last much longer.
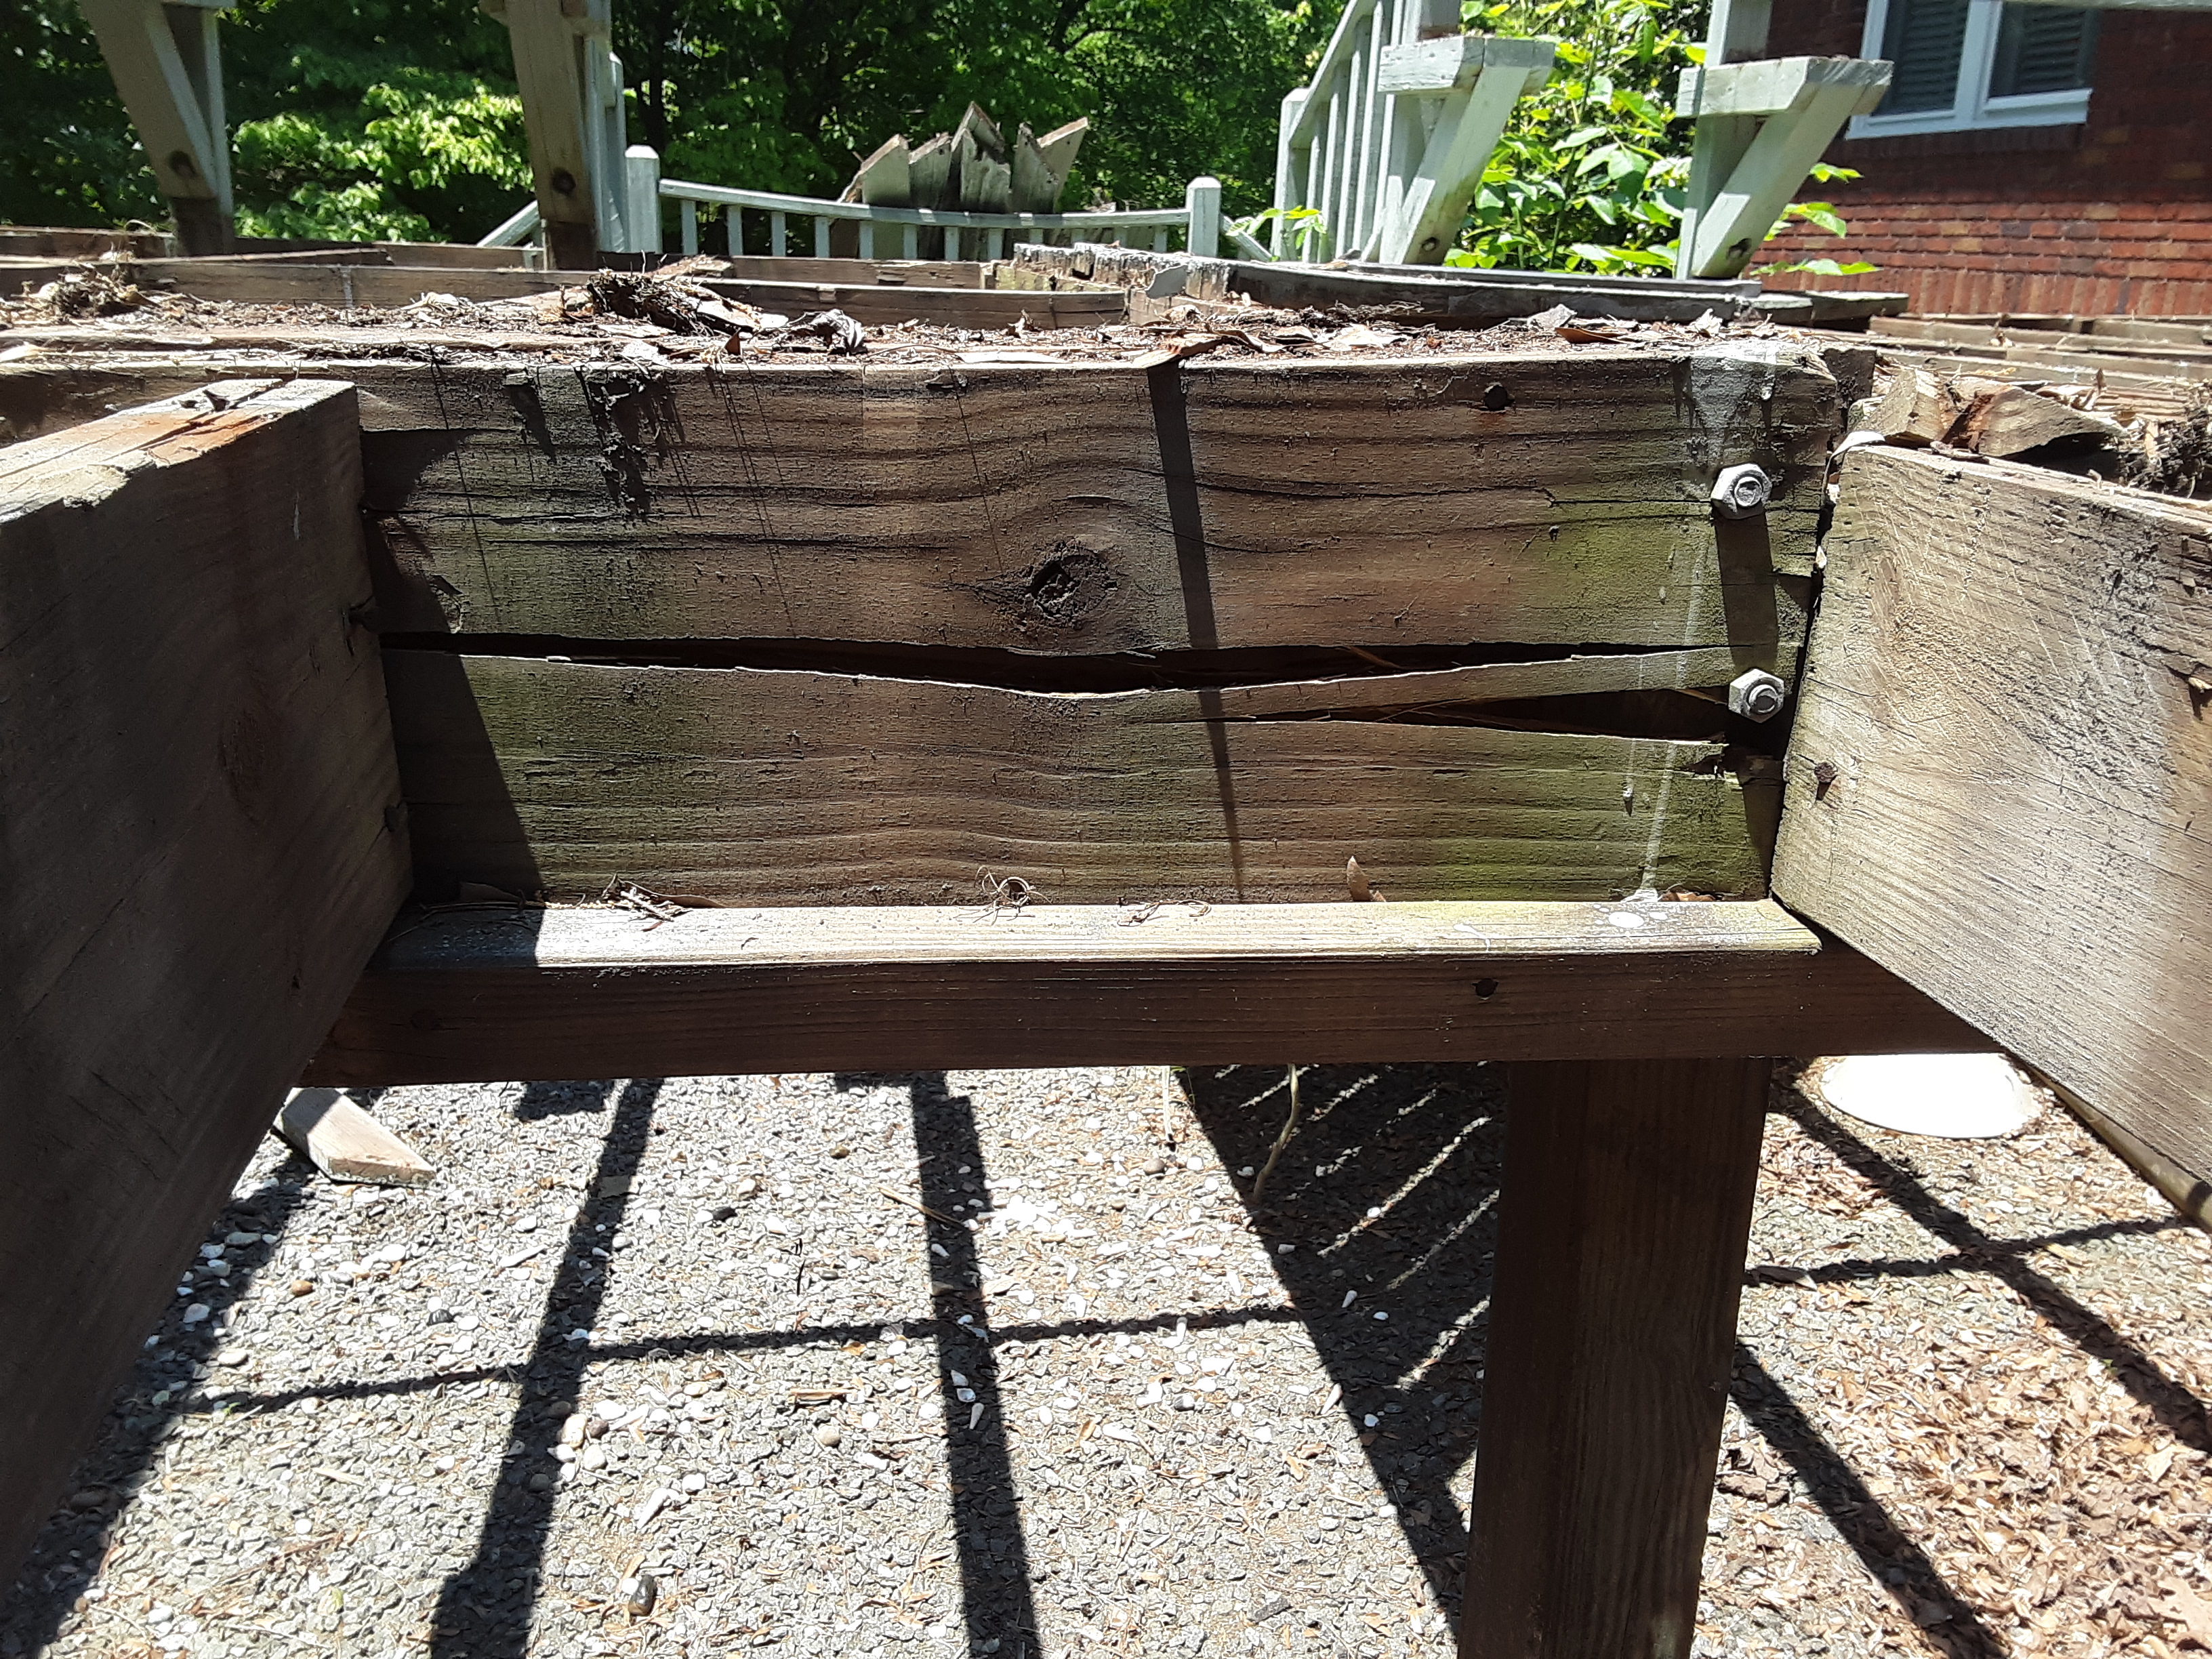
Next I went around and clamped together joists which had warped and separated and screwed or bolted them together as needed. Some just looked ugly and others presented possible structural problems.
That does not look good from a structural standpoint. I had to jack up the left joist a bit to clamp and screw it together.
This one looks bad but is well supported so I don’t believe it caused a real problem.
However, real or perceived, I was tasked with fixing it.
My father would always say that there was nothing better than a nut and lock washer. I have a son and son-in-law, who are Materials Joining Engineers, who would likely differ. At any rate, I must not have quite learned the lesson. However, in my defense, I find that a flat washer crushed slightly into wood works quite well.
Decks And Such (https://facebook/decksandsuch), be the job small or large, fixes the prob lem (prob-><-lem -> problem) and gets the results.
I am pleased to thank God for the strength and experience to work in this way and the flow of work that has begun in 2021. When work slacked up in December, I became concerned, but it was all part of the plan. I had back problems soon afterwards that prevented me from working. As soon as that subsided, the work started coming again. We can depend on God to provide; we need to trust Him even when things get lean.
1 to 12 is the maximum steep ratio of rise to run for a handicap ramp, which means that for every 1 inch the ramp needs to rise it must have 12 inches or a foot of run. I needed to build a ramp up onto a porch 29 inches above the gravel driveway. Following is my solution for the limited space available. It is a very little slope that feels almost like walking on the flat.
I had to double the joists at both ends of the eleven foot span. Notice in later pictures that one of the occupants began washing the siding. It looks so much better now. I also had to reroute the downspout and extend it to again reach the drain pipe it had not been draining into recently. The little details matter.
Notice the tar at ground level. Even though treated wood is rated for below grade (underground use), I have noticed numerous times that it does not particularly rot below grade but does at ground level where it mildews and grows algae prolifically. I do all of the posts with a good quality tar, too. I did not run the deck all the way to gravel so that I would run a mound of gravel to redirect water which was washing out near the foundation. Some little details are not so little.
I detest wasting material. The lumber yard didn’t have 10′ decking boards that I wanted so I had to cut off nearly 3′ of board that was not long enough to use on the 4′ wide ramp. I used some of the scrap for erosion control. A little scrap is a big deal- don’t waste!
I was pleased with the result and so was the homeowner. She gets up and down easily now. The little things make it worth doing a good job.
Classic Pine woodgrain that almost looks like plywood. Would you notice such a little thing?
This turn was the most challenging part of the railing, but it sure makes it sturdy. Notice that the siding is cleaner. Turning every board so that the good side shows takes a little extra effort, but it reaps big benefits in appearance.
Based on what I just said about turning the boards, can you imagine how many knots I hid? The little detail that should also be considered when selecting the side up is the crown or dip of the board. Lumber is cut out of a more or less cylindrical trunk. The grain curves in the board. If the crown is down, the board will bow with a dip in the middle across its width. This can hold water on a flat surface and increase deterioration.
The day is nearing an end and I have a little clean up to do before I talk to the homeowner and head for the house. Another project completed for Decks And Such (www.facebook.com/decksandsuch).
…that is, Kerplunk number 2, not Karakoram Mountain #2, the second highest peak in the world above sea level. After the first tree fell without warning, being a seemingly healthy tree and not on a particularly windy day, my friends began to suspect another White Oak tree in their front yard. Was it similarly diseased and fated for freefall? They had a company drop the tree and then called on me to cut it up. I observed that the outer dozen or more rings were indeed darker as if diseased, which you can see in the first picture. It took me over six hours to cut up the branches and part of the trunk. It would have been longer but the local ironworks/woodworker agreed to get the main trunk. Because the tree felling company did not report grounding until late morning, I did not start cutting until 11:30. My friend, the homeowner, came home from work early to clear away brush and firewood. I was cutting pretty much non-stop for 6 hours. My forearms were very weak and achy the next morning.
My stance indicates to me that I was cutting upward to prevent pinching of my saw by the weight on the branch.
Because I knew the iron/woodwork was coming, I cleared the branches off of the main trunk first. I left outriggers to keep the trunk off of the ground and prevent it from rolling over. Then I began to clear the driveway.
I spend a considerable amount of time working outside for which I am thankful. I have however, began wearing light, long-sleeved SPF-50 shirts and hat to protect me from the Sun. My forearms indicate that I spent far too many years baking in sunlight.
There were many forks up the tree because it had been severely topped some time long ago. Don’t trim more than a little from a tree, especially oak trees. It uglifies them and shortens their life.
The ironworker/woodworker has all of the toys. Below he is clearing the smaller pieces in order to drag the trunk down to the driveway. The front and rear wheels of the forklift steer. It is not quite “zero-turn” but close.
I thought that my Husqvarna Rancher 460 with the 2′ bar was quite a lot of saw, but the Stihl was far more powerful and appears to have a 30″ bar.
He cut two logs, a ten foot one and a twelve foot one and loaded them in 30 minutes. I estimated the larger of the two logs to be 3500-4000 lbs based on size and typical weight of green oak wood.*
While I was editing the next picture, I zoomed in to count rings. This is about 22 feet up the trunk on the smaller of the two trees (2 1/2 feet in diameter instead of 3 1/2 feet in diameter of the larger tree). I counted 70 rings. Even if the base revealed 90 years of growth, this was a mere youngin’ in White Oaks trees that can live for 500-600 years.
*60 to 70 lbs per cubic foot- wow! Especially amazing considering the dried oak is 48 lbs/cu.ft
About five years ago one of my classes built two bluebird boxes to put just out the window of two classrooms at the school. One lasted one year and then got taken by vandals. The other one outside my window could be destroyed but not so easily taken because of the wiring that runs out the bottom of pipe pole, through concrete, underground, through the wall into my classroom and to my computer. I realize that wireless cameras exist, but this is what my students could afford. It is color, works at night by shining infrared lights, and has sound. At one time you could record segments of video, but the school techs lost the software that has to be reinstalled every year due to computer re-imaging.
There are two problems with the present set-up. Even with retreating the wood, five years is considerable weathering, so the roof piece is bowed and lichen encrusted, though still functional. The other problem is a matter of rushed planning on my part when it was built. The students were excited about the camera arriving; the box was already built; we quickly installed it and began observing nesting soon afterwards. The camera, however, was mounted too close to the subjects so that it has always been blurry. The new box has a ceiling below the roof where the camera will be installed and not susceptible to moving when the side panel is opened to clean out last year’s nest. The distance is increased sufficiently to enable in focus viewing.
Since there are three eggs in the present box now, the installation of this new box will wait until Fall or later. I had the time to build it now and the availability of the school shop, so I did. I may put a roof shingle on the top when I install it so that it will last more than 5 years.
Students totally love to see the progress of the birds building a nest, laying eggs, hatching, feeding, growing, and leaving the nest. They are amazed when they here the chirping, chagrinned when there is a runt that is underfed because the others poke their heads up faster and more consistently, and curious about gestation and developmental timings. We have 2 to 3 nesting each Spring. One year the bluebirds and tree swallows fought violently over which pair could nest first. At one point two males (one bluebird and one tree swallow) were rolling around on the ground, clawing and pecking. The students flew to the window to see what was happening. We have never been able to observe the hatching of the birds. It seems to always happen on the weekend or in the early morning. I have left at 5 PM and arrived at 7 AM the next morning to find several birds hatched.
I sincerely wish that I could do more of this kind of teaching, what I call “affective science”. Students need an emotional connection to what they are learning to prick and increase curiosity. I could give many reasons why this is not happening, but I’m not in the mood to wax political or negative, so I will leave that to your imagination. I recorded some aspects of the box build, but many details are also left out. I hope that you enjoy the pictures, but even more, I hope you will observe the world around you and give thanks to our Creator for its utter beauty and utility.
Cutting angled side pieces
All of the pieces
Drilling the bird opening
Trimming the bottom to fit
Pre-drilling holes
Screwing it together
Access door and camera attic
ceiling with camera opening
Nearly complete awaiting camera installation
If you hover over the pictures, you can see the captions.


