The digging all done (see “A Most Challenging Beginning“), it was time to start building up. Starting from a concrete floor requires forms. Check out the process and results at “Taking Forms.”
Posts Tagged ‘Project’
Progress at The Digs
Posted in Capentry, General, Project, tagged Carpentry, Concrete Forms, Project, Workshop on February 20, 2025| Leave a Comment »
A Most Challenging Beginning
Posted in General, Project, Work, tagged Clearing, Digging, Project, Recycling, Workshop on January 26, 2025| 1 Comment »
Toward the end of last year, I declared that I would reveal why my blog frequency had dropped off. This entry is the beginning of fulfilling that promise. After moving to East Tennessee in August of 2022, I was busy cleaning up the yard and arranging the house. I had it in my mind to build a workshop, perhaps a bit larger than the 12 x 20 shed I had constructed at the last permanent residence wherein we dwelled for 21 years (1). The most obvious place to put it for access and non-obstructiveness/obtrusiveness, was the back corner of the lot. However, there suspiciously resided there a rectangular area of brush. When I began to clear the vines and shrubbery, it revealed construction debris. I began to sort it for recycle, reuse (as filler), and reduction of payment for the landfill for acceptance (2). To see what I was up to for the initial months of this project, check out “Much Rubbish” (3).
- Obviously, permanent is more of a functional word than accurate word here.
- I had never lived in a locality where the public could not take their trash, even debris to the dump without a significant fee.
- Nehemiah 4:10
Beveled Deck
Posted in Capentry, Decks, General, Project, Woodworking, Work, tagged Carpentry, Challenge, Deck, Project, Woodworking on July 2, 2022| Leave a Comment »
I like the idea of building something unique into a deck, however, I must need to get better at estimating how long it will take to design and build something new and different. Obviously, this statement is somewhat self-contradictory. How can you anticipate and predict the length of an event, and therefore get better at estimating its length, which you have not observed before? The owners wanted clear sight of the swimming pool, so no railing. They wanted something functional but attractive. So, they came up with the idea of beveled steps and I was tasked with executing it. See how I did at Beveled Stairs.
Deck Renewal
Posted in Capentry, Decks, General, Photo, Project, Woodworking, Work, tagged Carpentry, Deck, Deck Repair, Project, Woodworking on May 16, 2021| Leave a Comment »
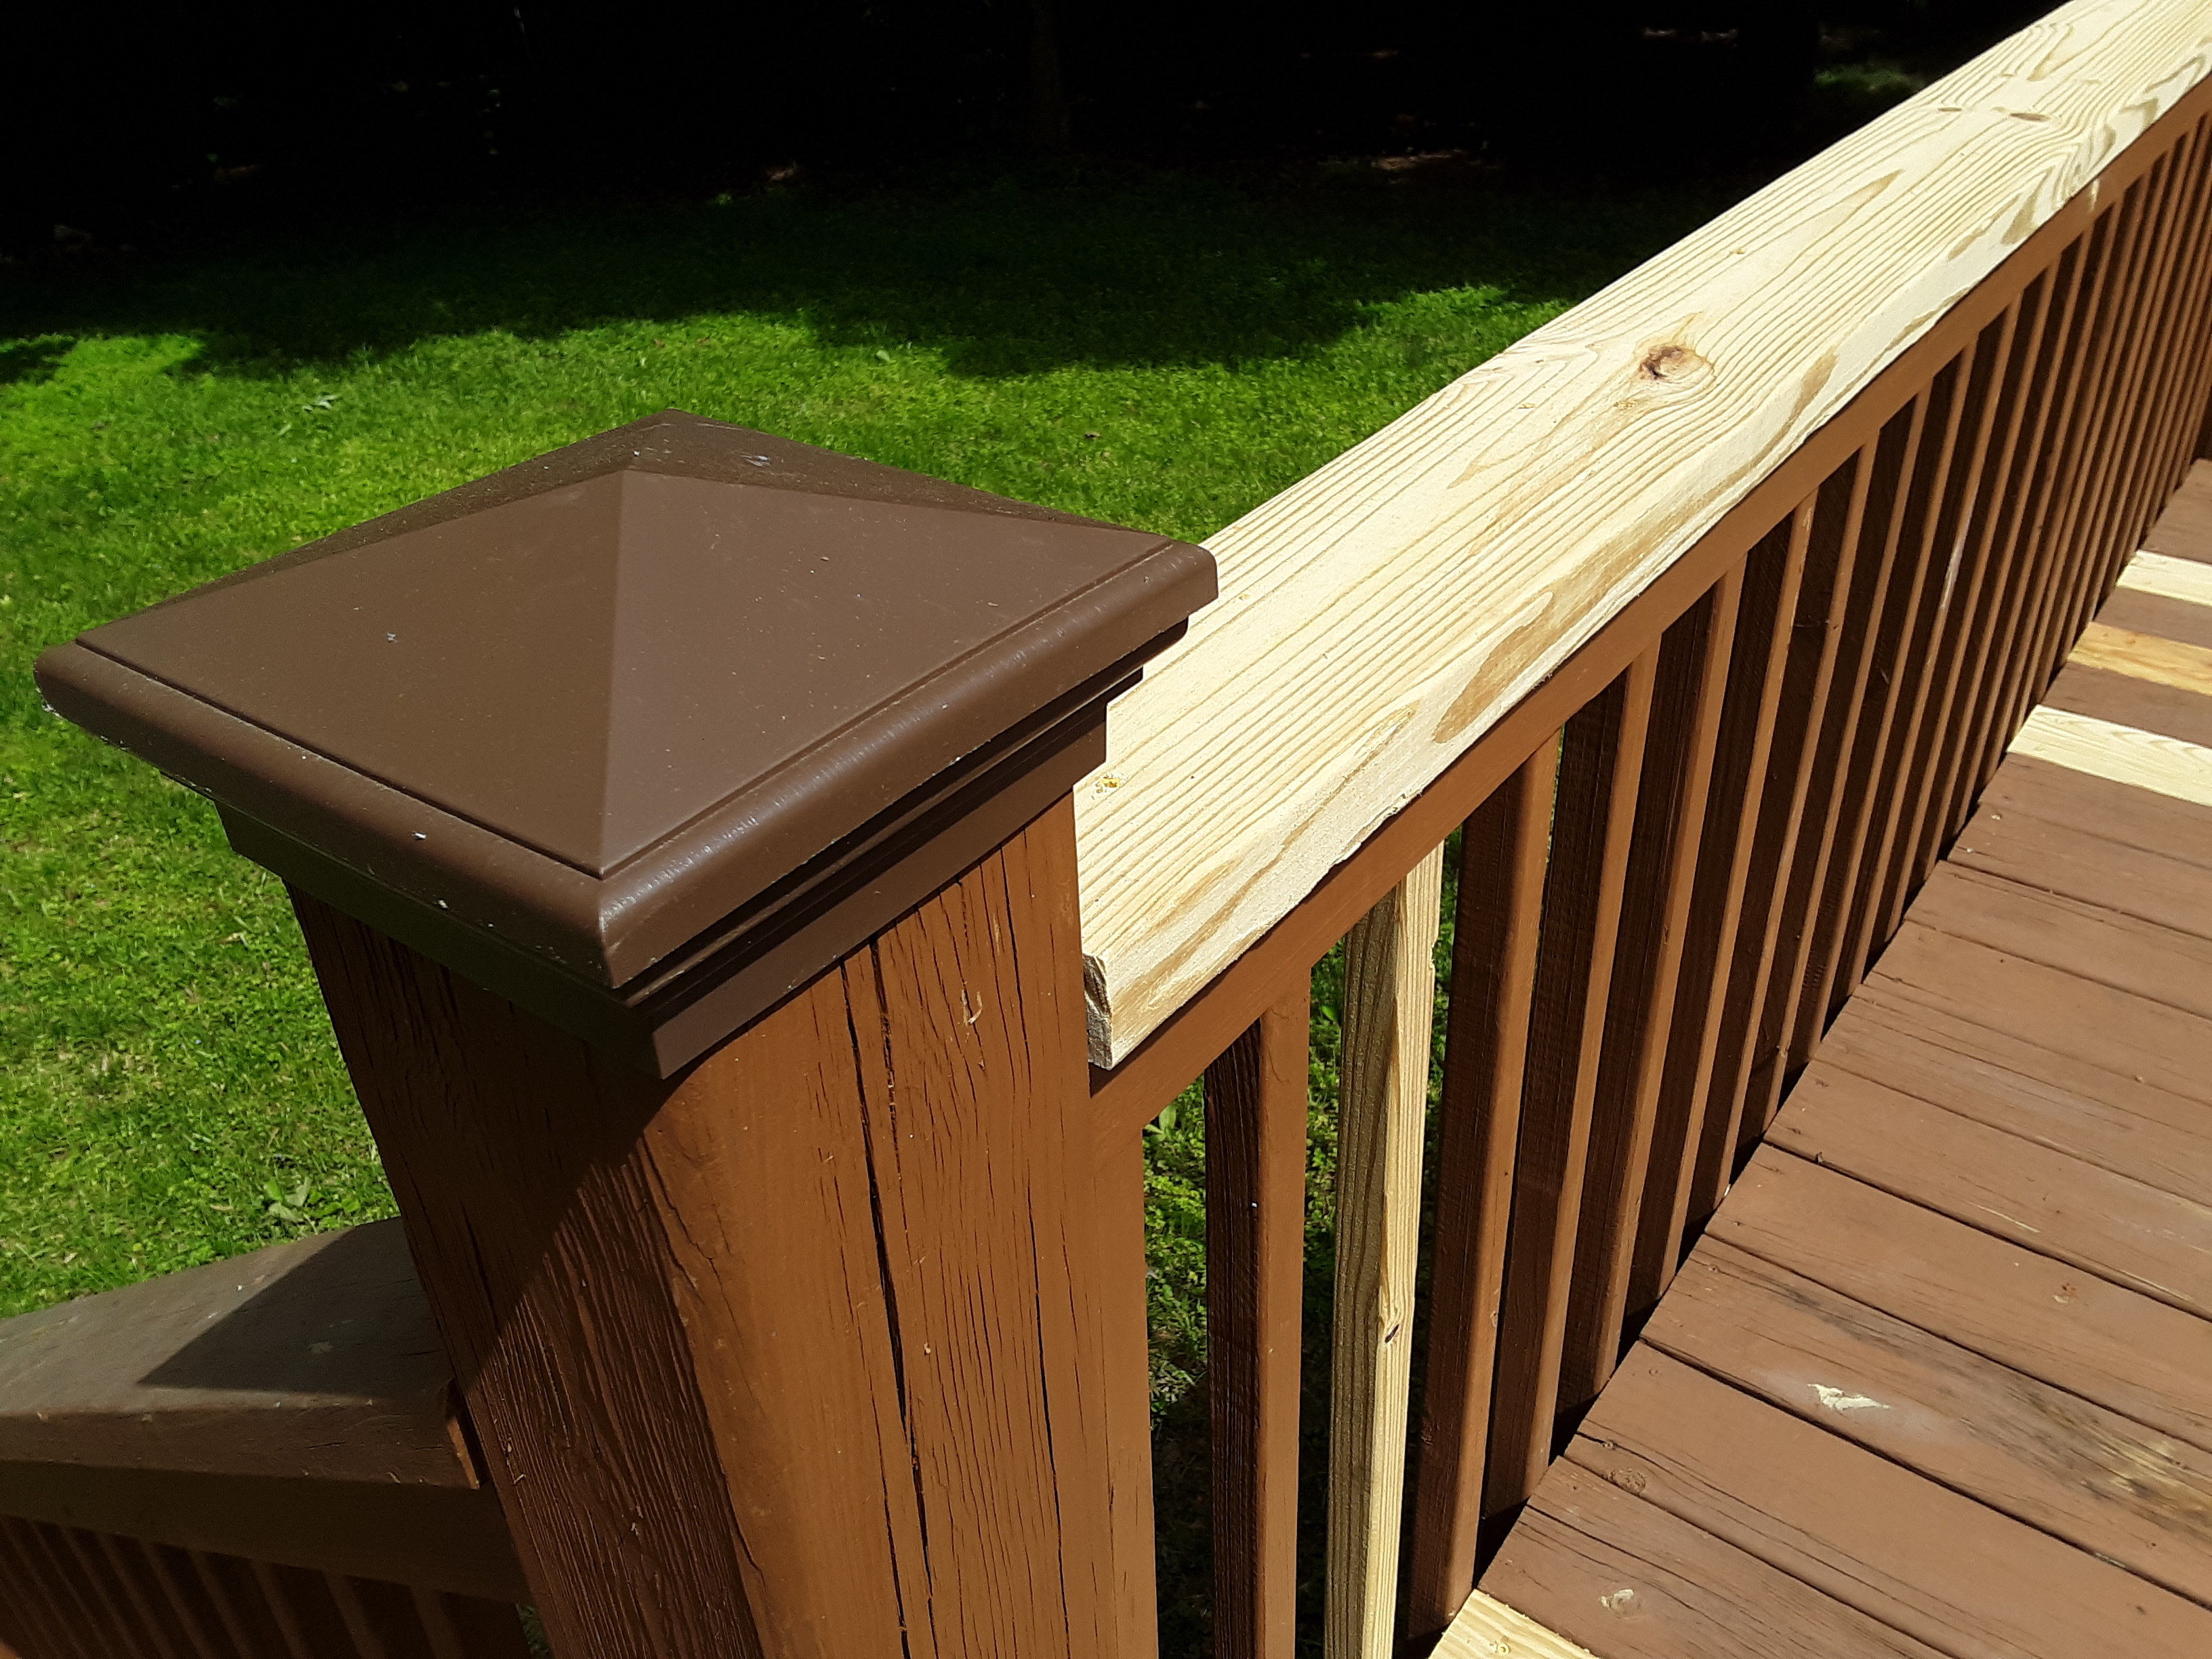
I renewed another deck near ruin. I had been asked to come and cut off the deteriorating beveled tops of the 6 x 6 posts so that a friend of the owner could install caps to protect the posts. Caps or top rails are a good idea because water and fungi will root a post from the top down. The owner asked me about the longevity of the deck. Upon quick inspection I saw that it had 8 to 10 16′ decking boards with rotten spots and some at ground level post deterioration and some top rail warping and rotting. Following is my effort to renew the deck.
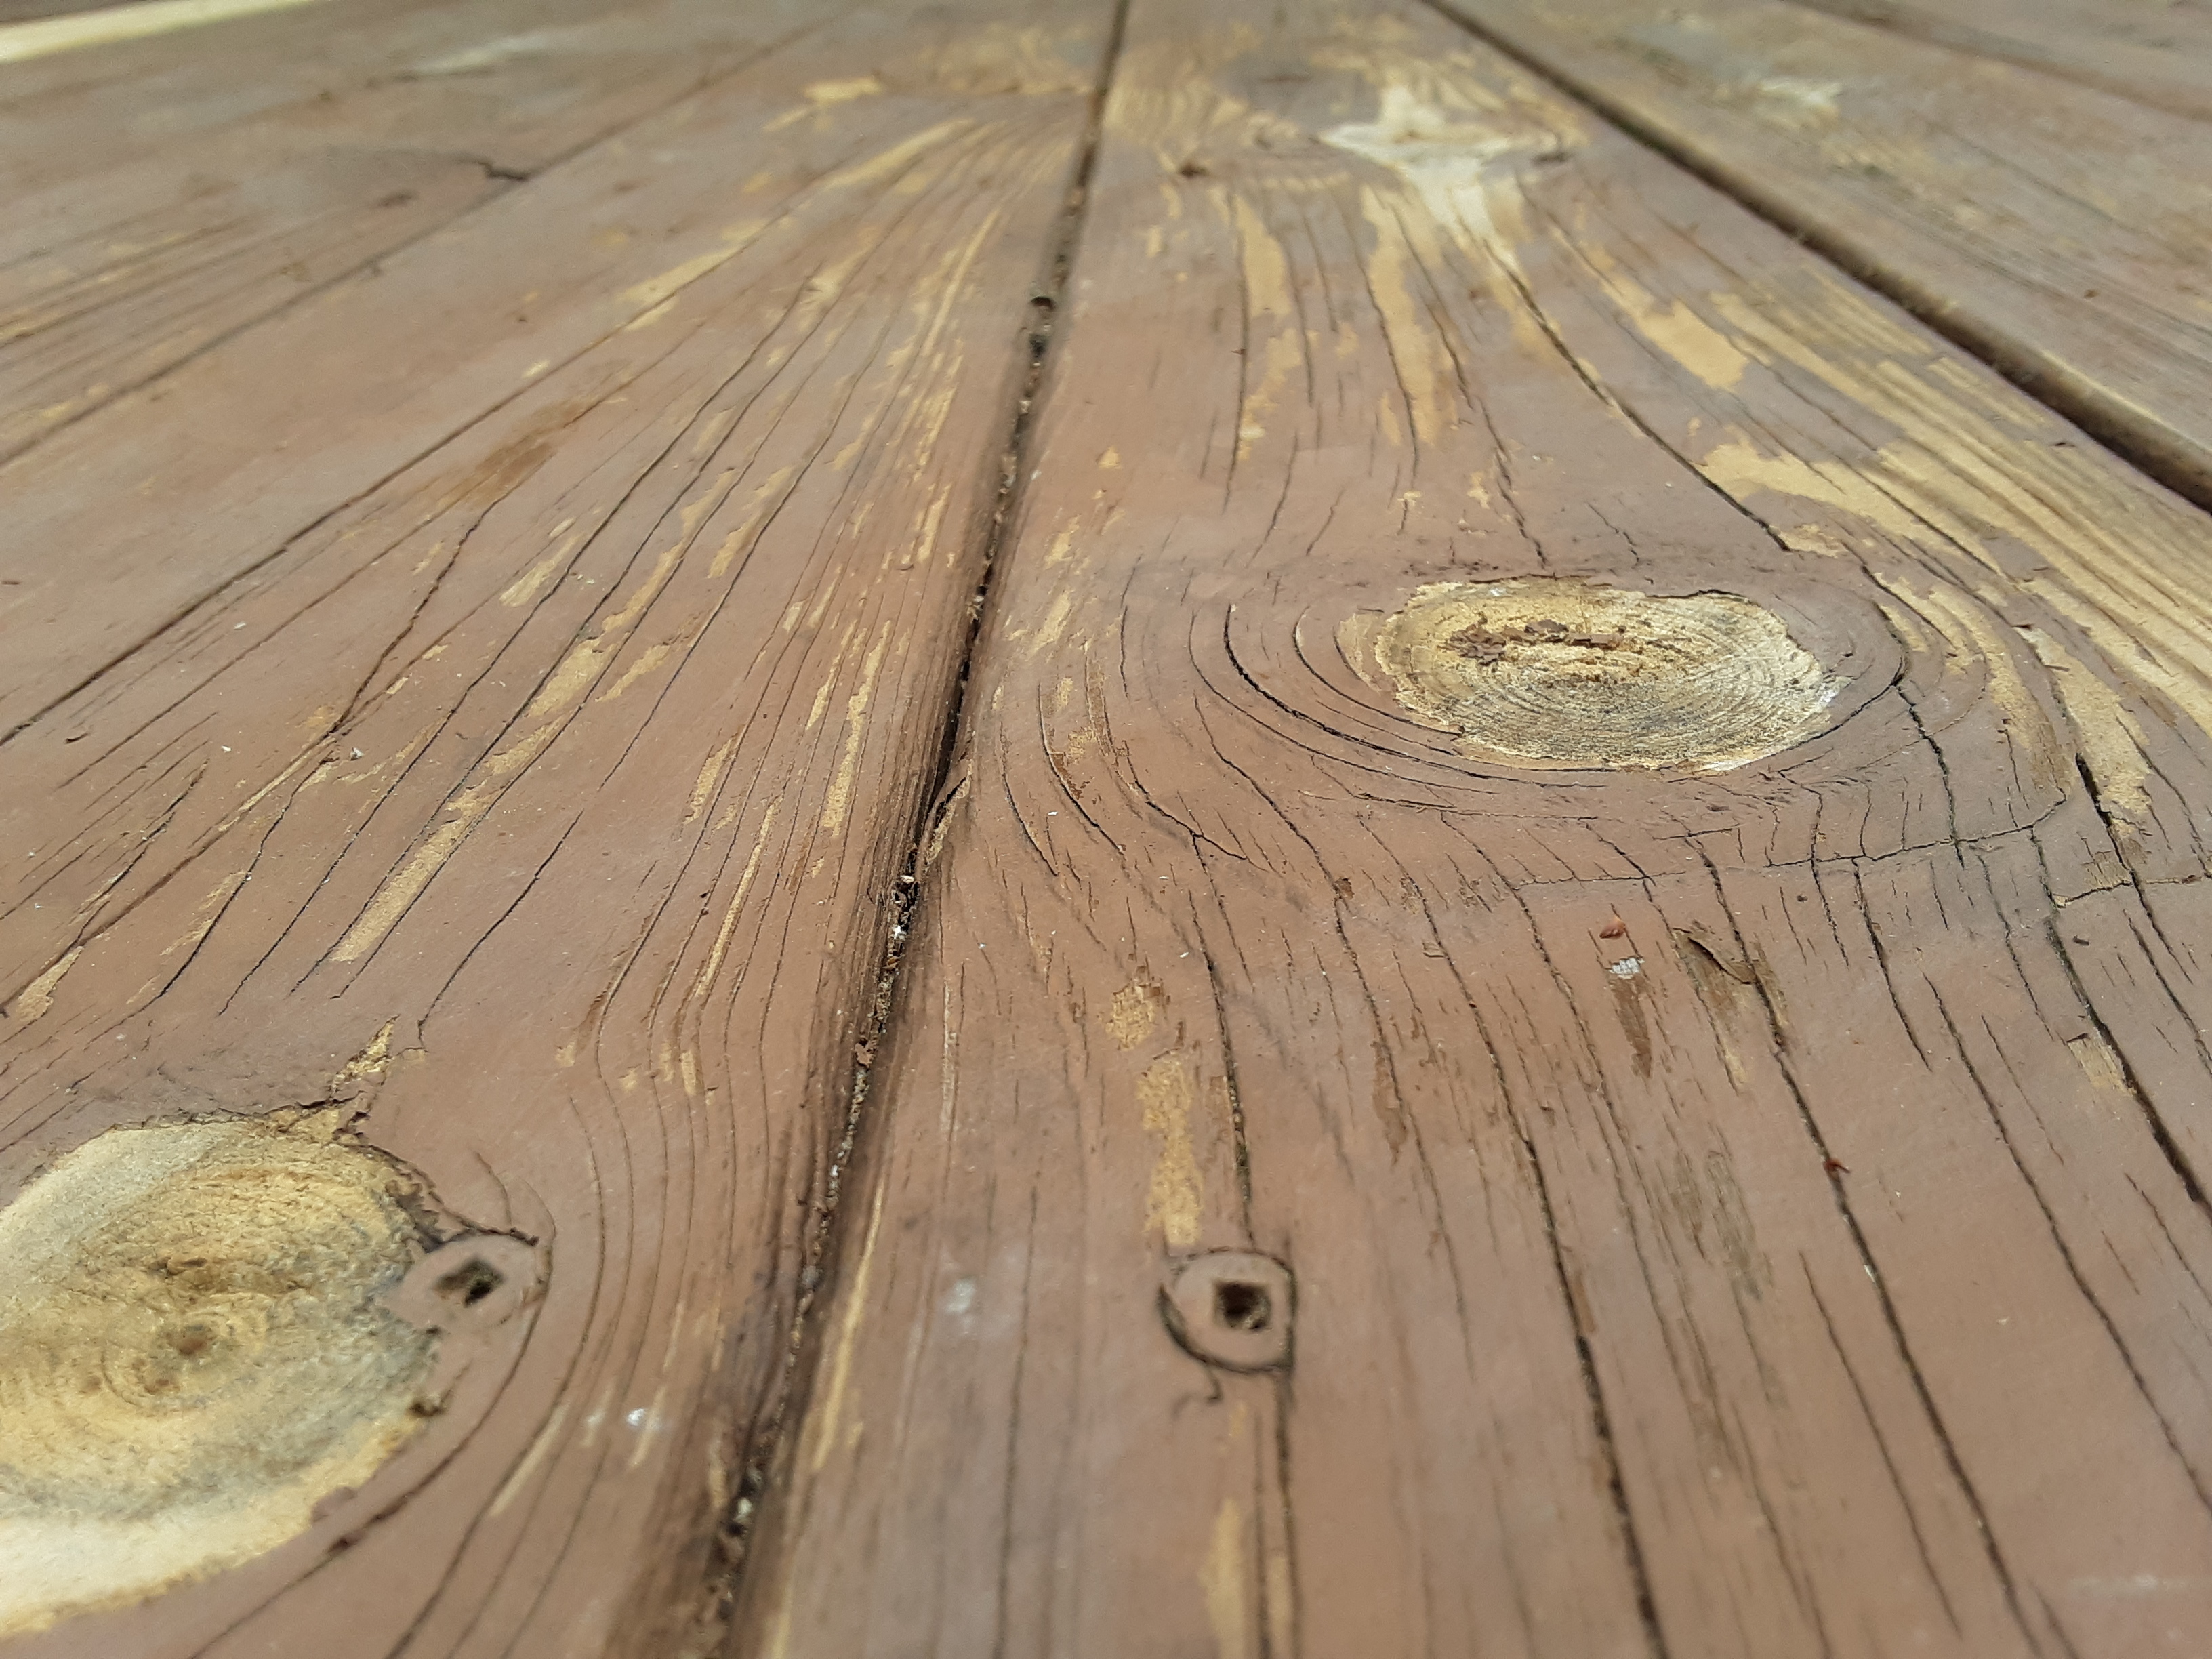
The owner requested that I pressure wash the deck before repair and restaining and provided a pressure washer borrowed from a friend at church. The deck had not been stained in five years, a time well within the stain can’s recommendations and “guarantees”, but the elements know no such time scales. This deck is close enough to trees, though not overhung by them, to get their leaf litter, catkins in Spring, and Yellow Poplar samaras. These get down between the decking boards and collect moisture, fungi, and bacteria (read “rot”). Particularly on this deck the gap between boards was not sufficient to allow this detritus to fall through, so it collected. You can see from the picture that the stain acted more like paint, clinging only to the surface and peeling when pressure washed. That is not good and may have been a large part of the deterioration. I would not have thought much of which deck treatment to use before I started repairing them, but I have some strong opinions now.

So, time consuming and tedious as it was, I got down with my knee pads and wire brushed and whisk broomed the boards.

This deck had been put together with screws, square drive heads, so there was no warping in the decking.
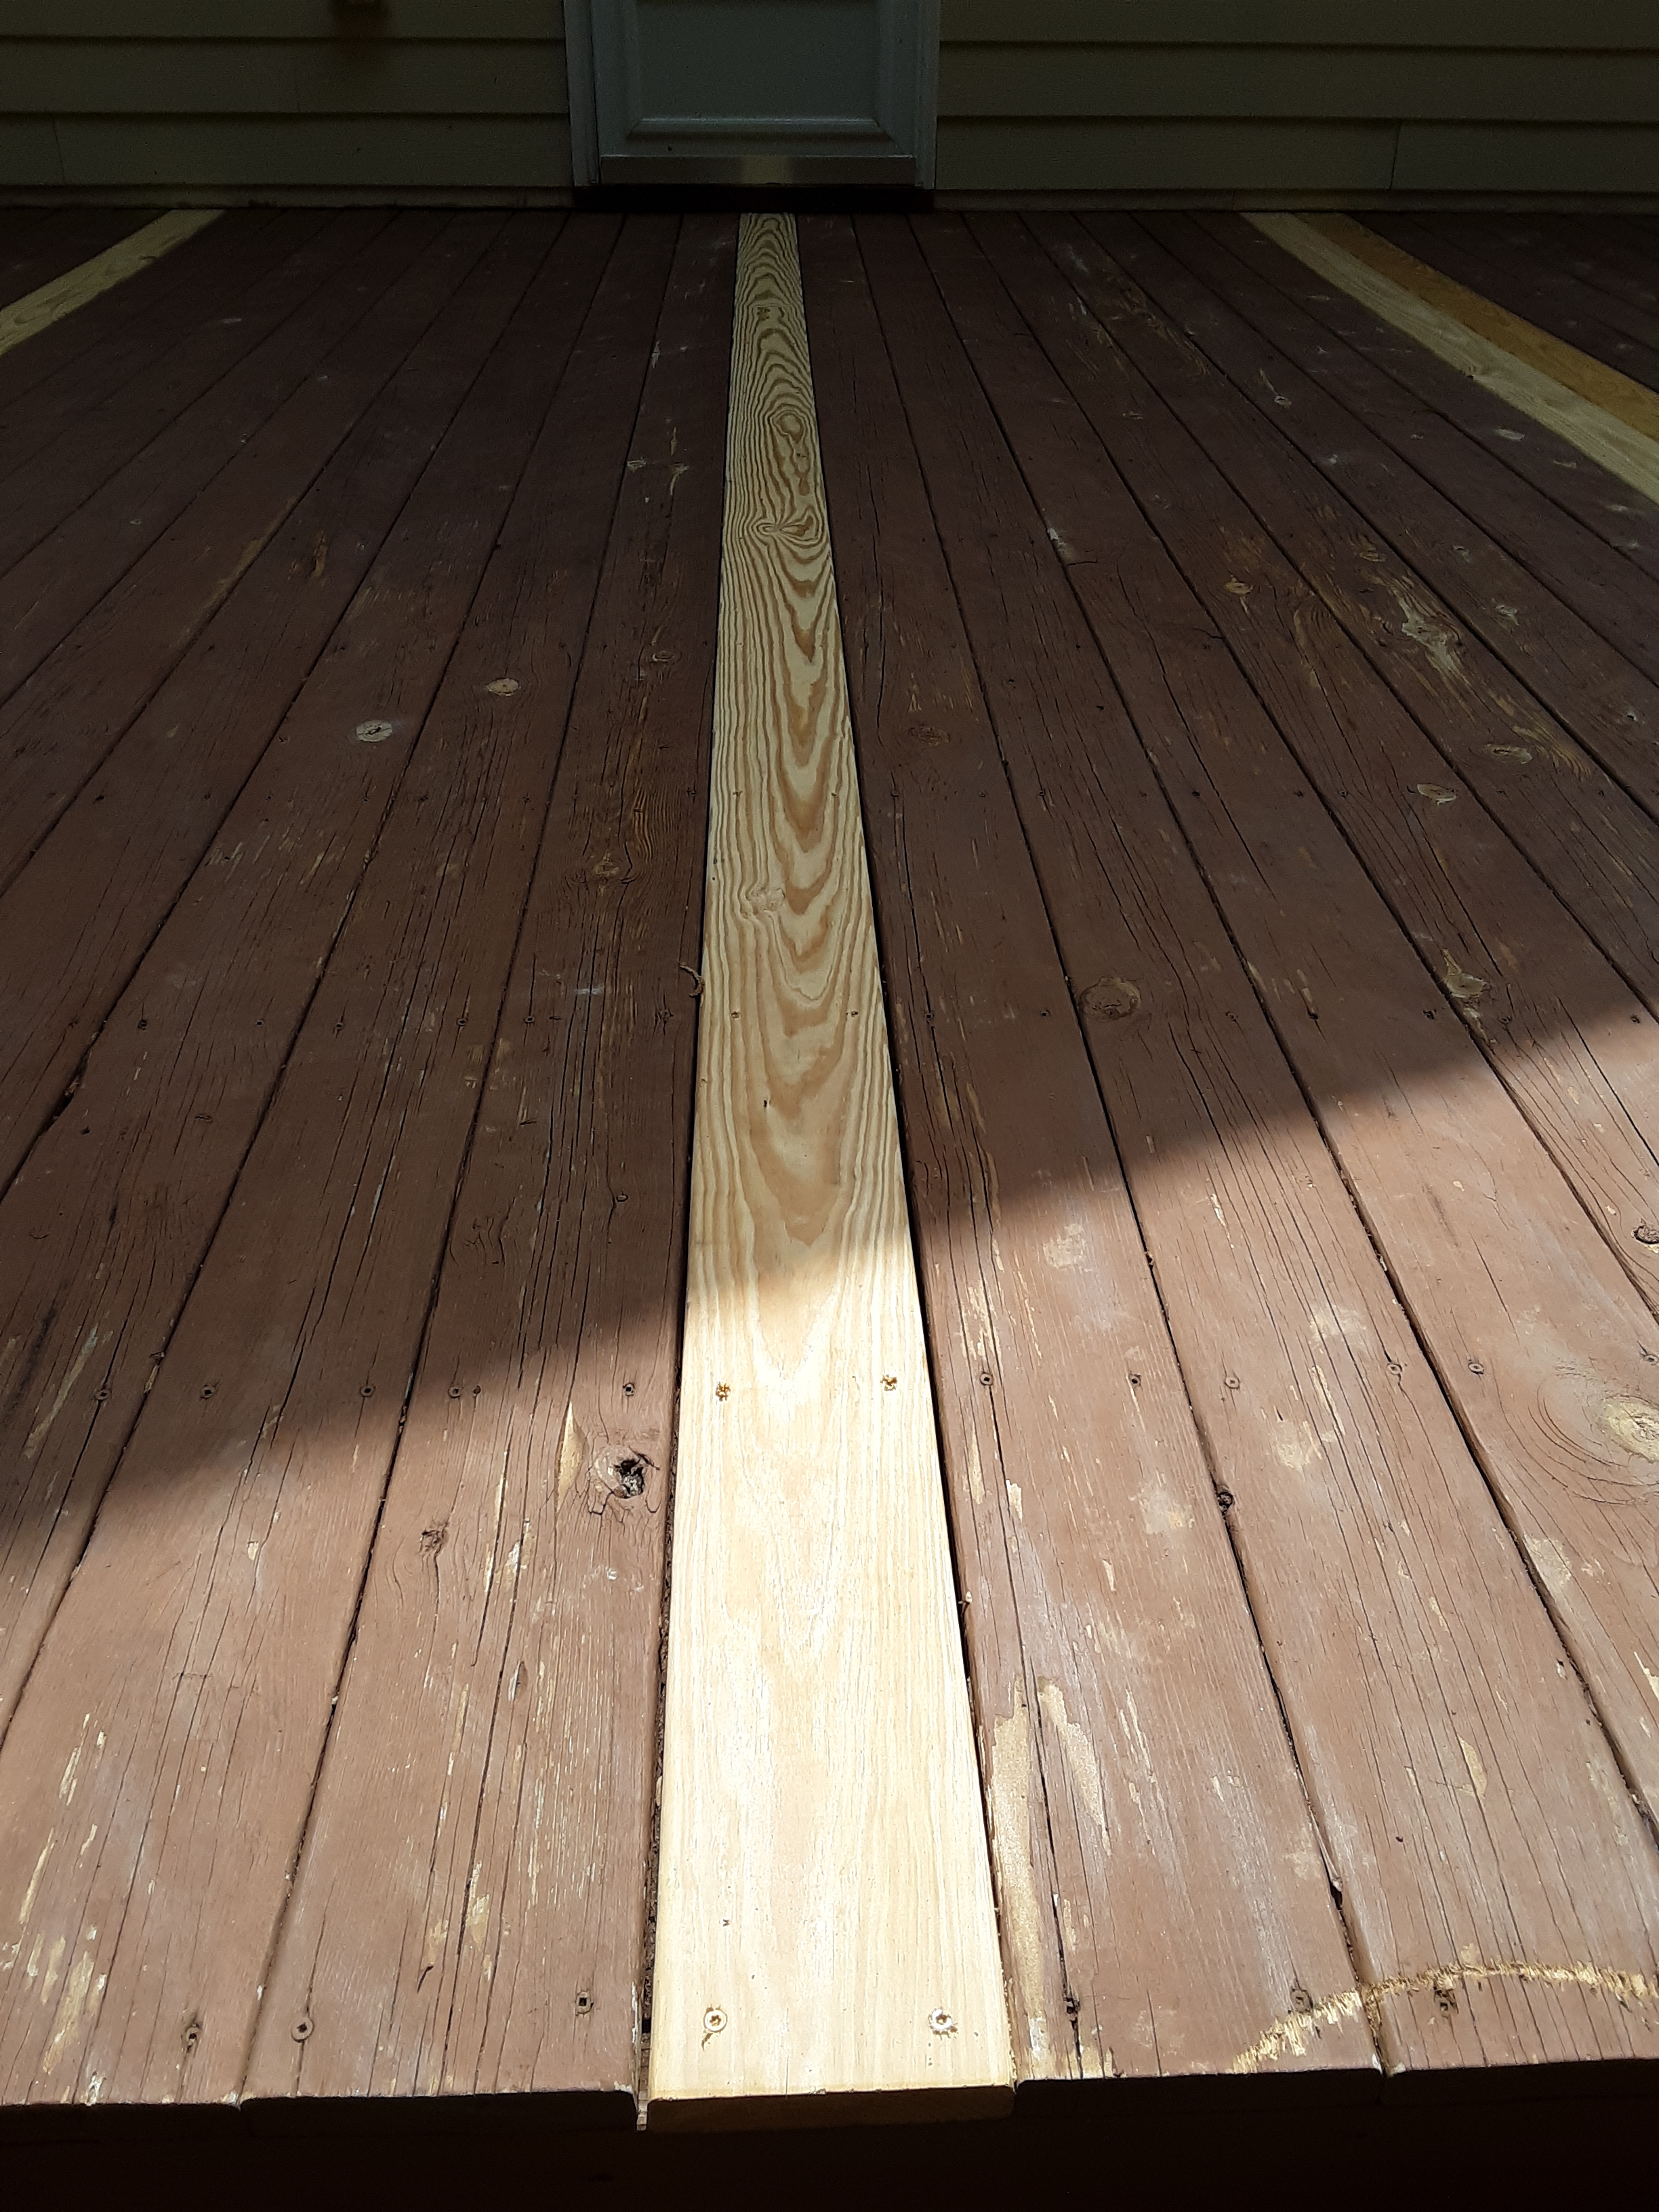
I ended up replacing ten decking boards and was pleased with the ones I was able to pick out.
The caps are plastic and functional and I had to replace only two top rails and two balusters.
I feel like the end result looks like new and will last another good many years. I suggested to the owner that she treat the top surfaces yearly to prevent the deterioration that was happening. With a roller and stain the decking and top rails would take no more than 1 1/2 hours to treat. The look and longevity will be satisfying.

If you look closely, you can see the tar that I put around the base of the posts. In my experience, the interface of post to ground, an inch or two above and below grade is where the most intense deterioration occurs. Though the treated lumber is rated for below grade, and actually does fair quite well in the ground, it does not do so well at the interface. I guess the conditions of moisture, air, and temperature are conducive to rotting bacterial and fungal varieties.
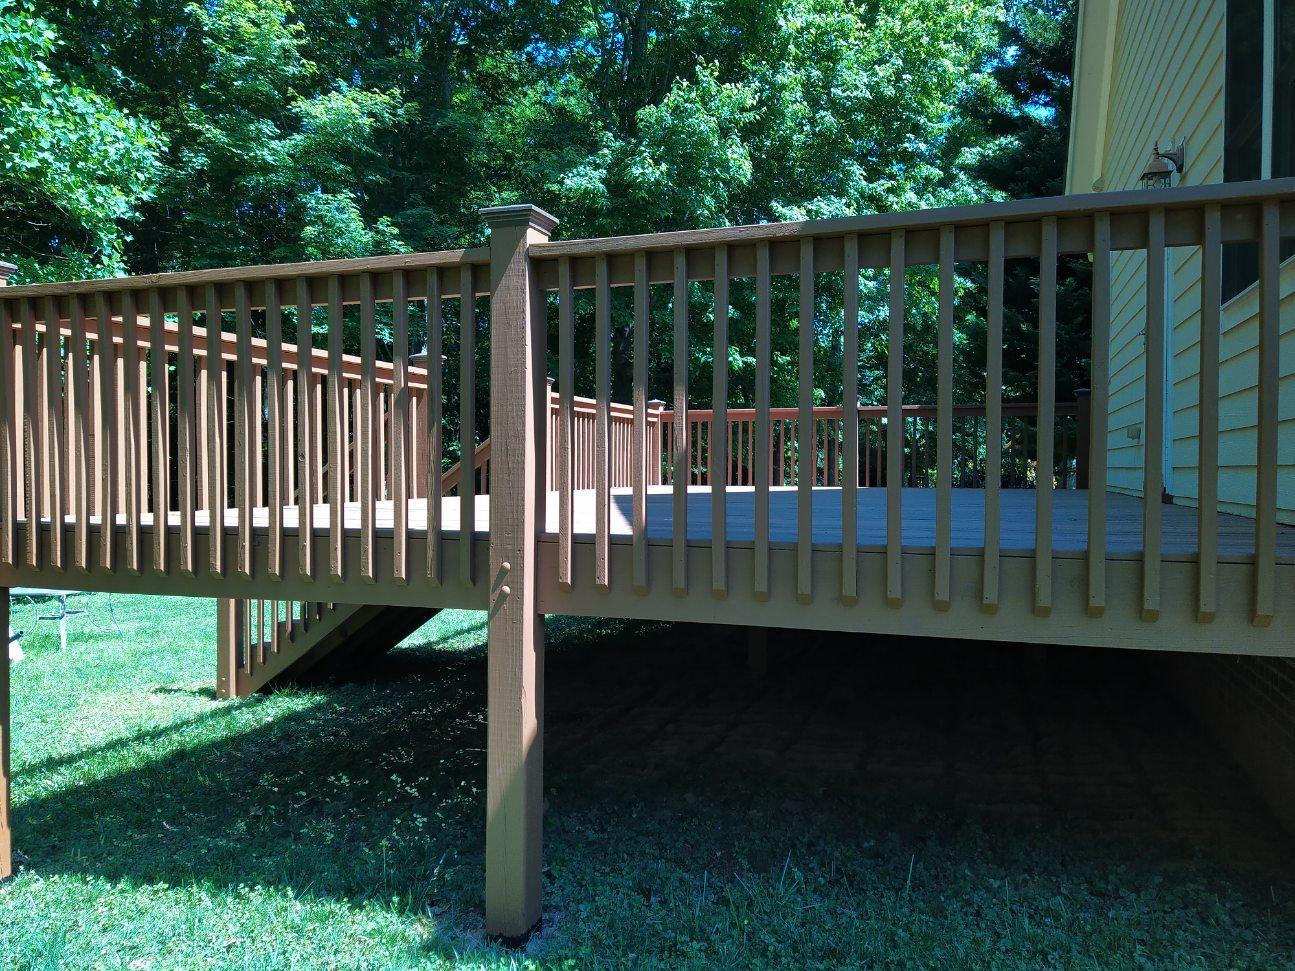
By the time it weathers and she treats the decking boards again in a year, you won’t even be able to tell the new boards from the old as in this picture.

I am reminded of the preacher in Ecclesiastes who is reciting a polemic on the vanity of life. Several times he softens the blow of the discouraging speech with a commendation similar to the following: “There is nothing better for a man than to eat and drink and tell himself that his labor is good. This also I have seen that it is from the hand of God.” (Ecclesiastes 2:24) At a later time He even calls this enjoyment of life “the gift from God” (Eccl 3:13). So I end with thanksgiving to God for giving me strength to work, money for bills from my labor, and satisfaction that I have renewed a product to increased usefulness and slowed the deterioration in this fallen world for the benefit of a fellow being (in fact, fellow saint in this case). It is a gift from God that I can pass along to someone.
Something New
Posted in Capentry, Creating, General, Photo, Project, Woodworking, tagged Carpentry, Climbing Wall, Playhouse, Playset, Project, Woodworking on April 6, 2021| 3 Comments »
I just finished a large project that took several months. Other responsibilities, weather, special order lumber, and specialty hardware delayed progress but did not prevent completion. It was an intense and satisfying project. Follow me as I show you the progress on S’s new playset.
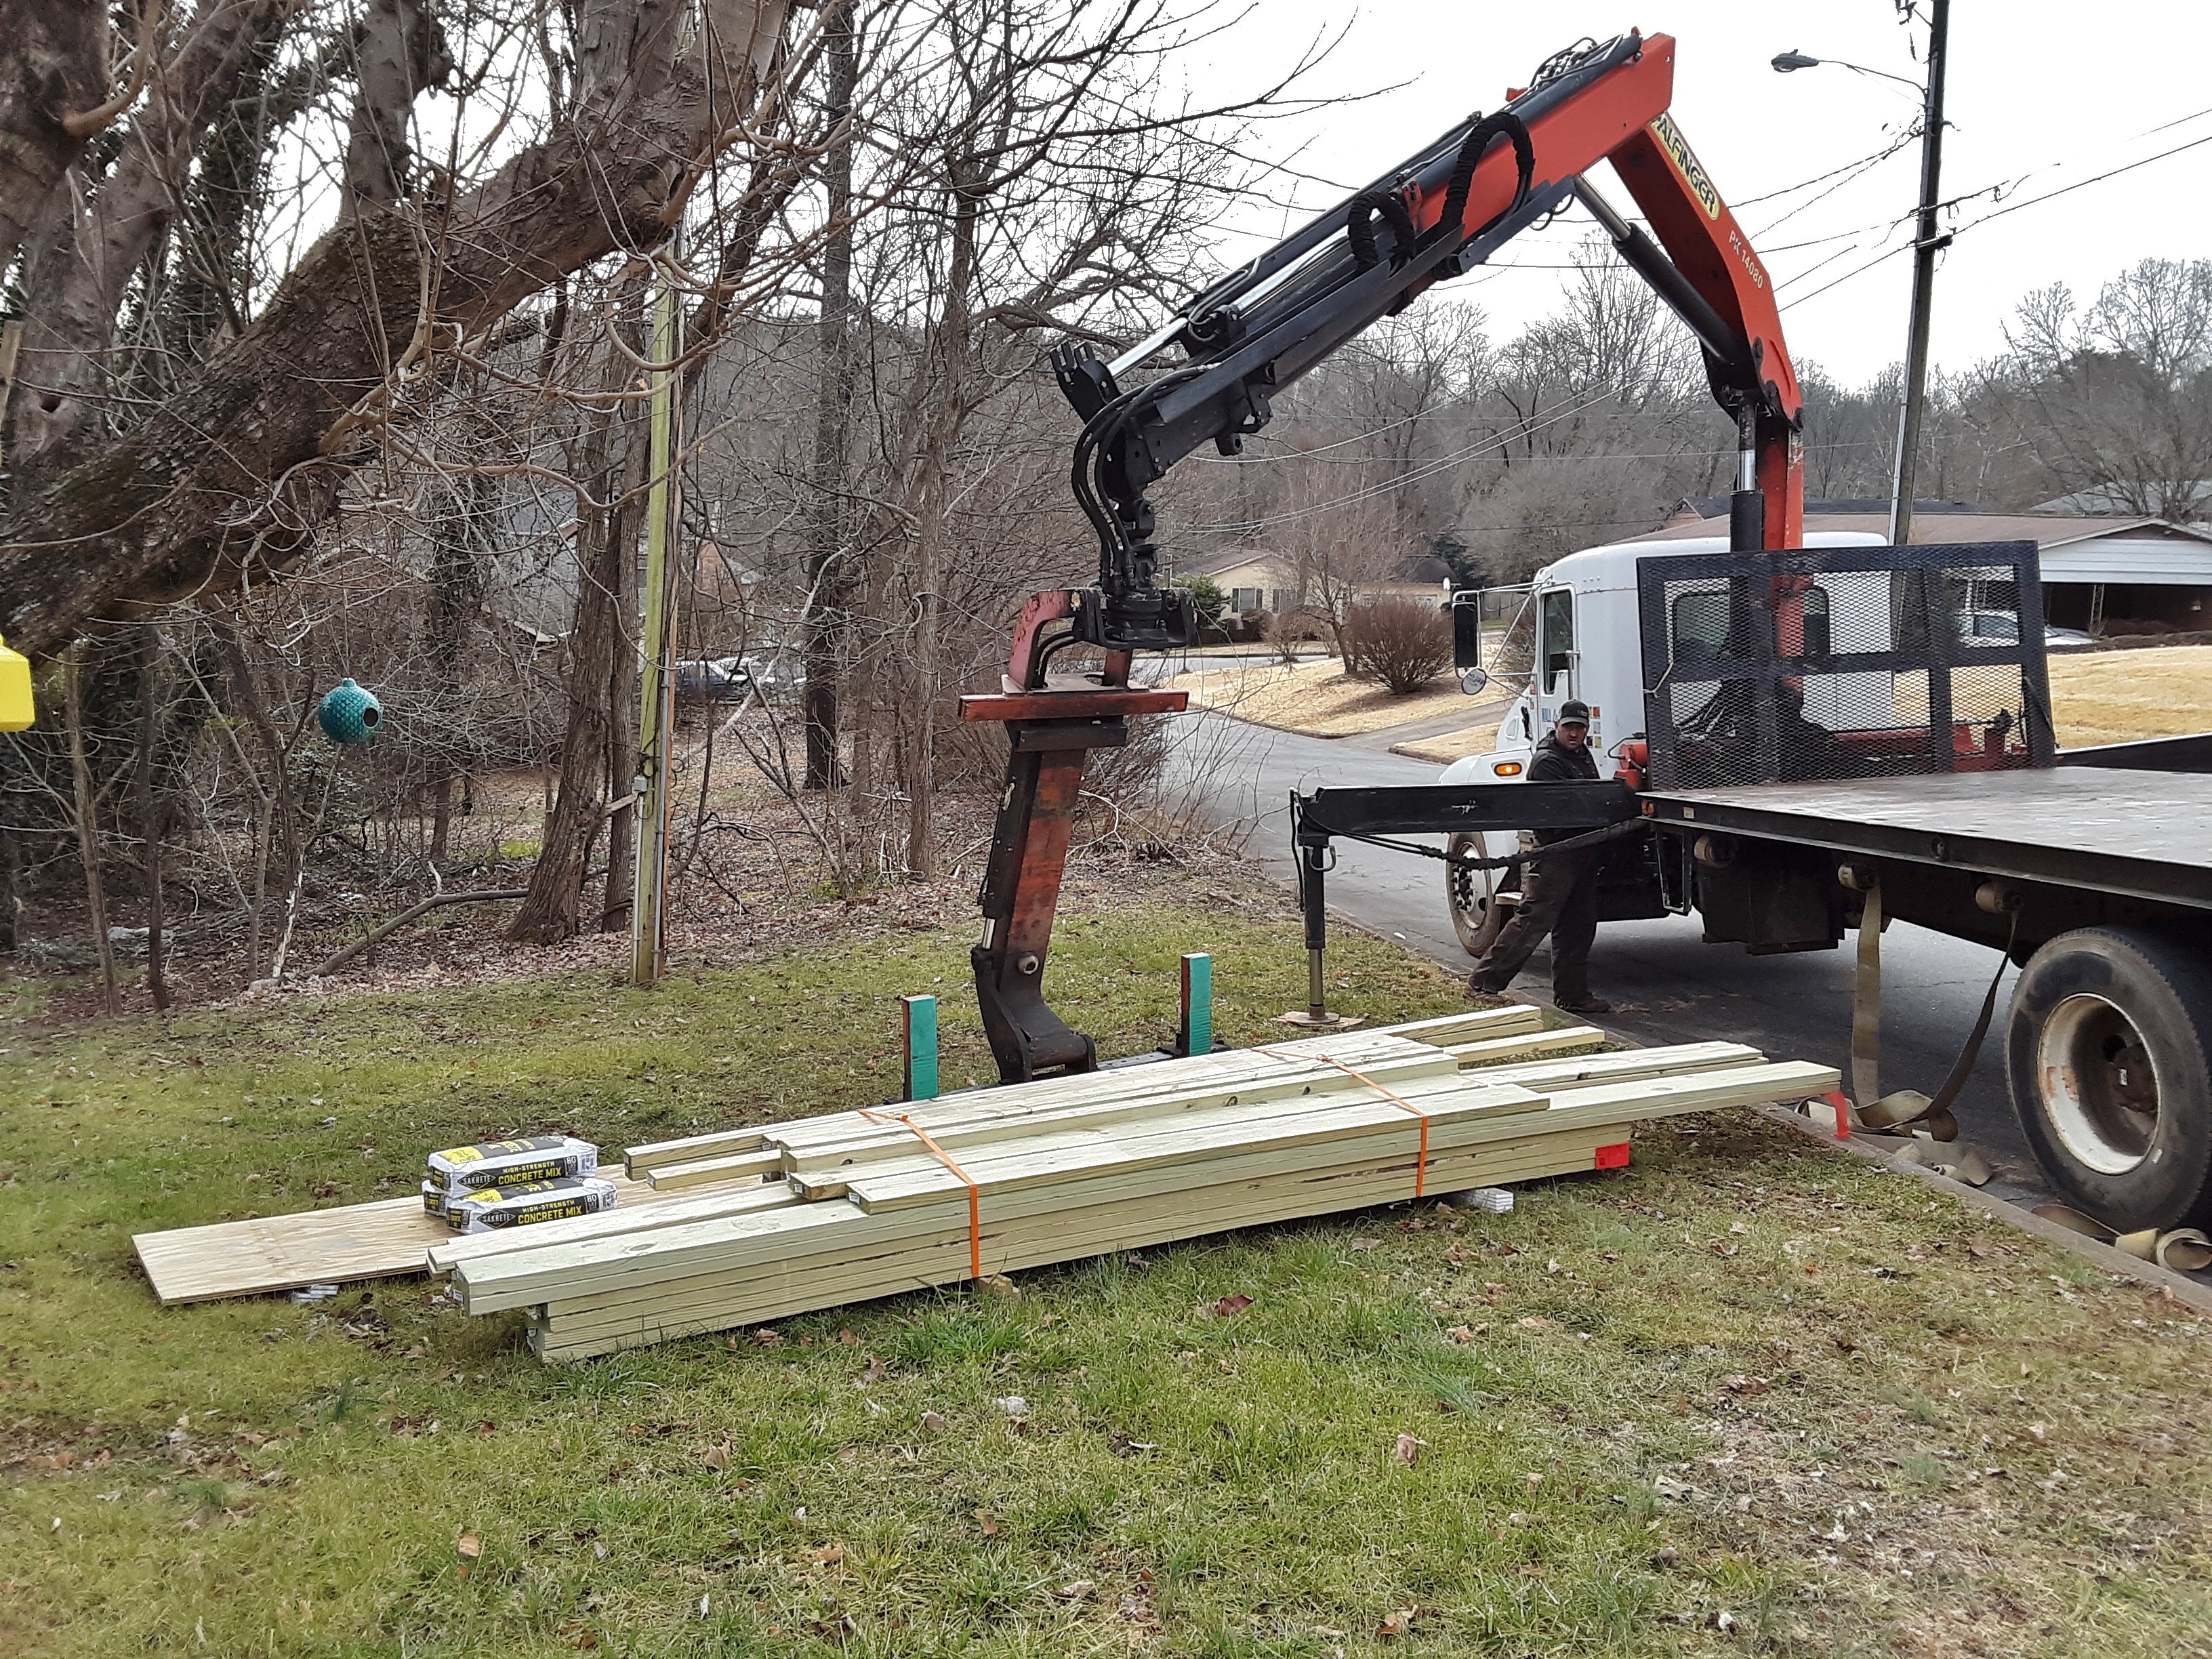
How do you haul and install 6 x 6 x 20 poles? Picking them up saved time in getting them and money for the customer.

I had help getting them in the hand dug 3′ deep holes.

The homeowner was amazed.

Next, the local lumber company delivered the majority of the lumber.

Because the winter was very wet, the truck could not bring it to the backyard, even though there was access. I hauled two or three boards at a time on my shoulders the next day.
Even though this is in the city, a vacant lot behind the worksite conceals a family of 7 deer. There are some very nice trees and thick underbrush to conceal the Whitetails.

Day 2 involved more digging and considerable plumbing (not water, but vertical with the world) and bracing.

My two helpers were always ready and waiting when I arrived, regardless of time of day or weather.

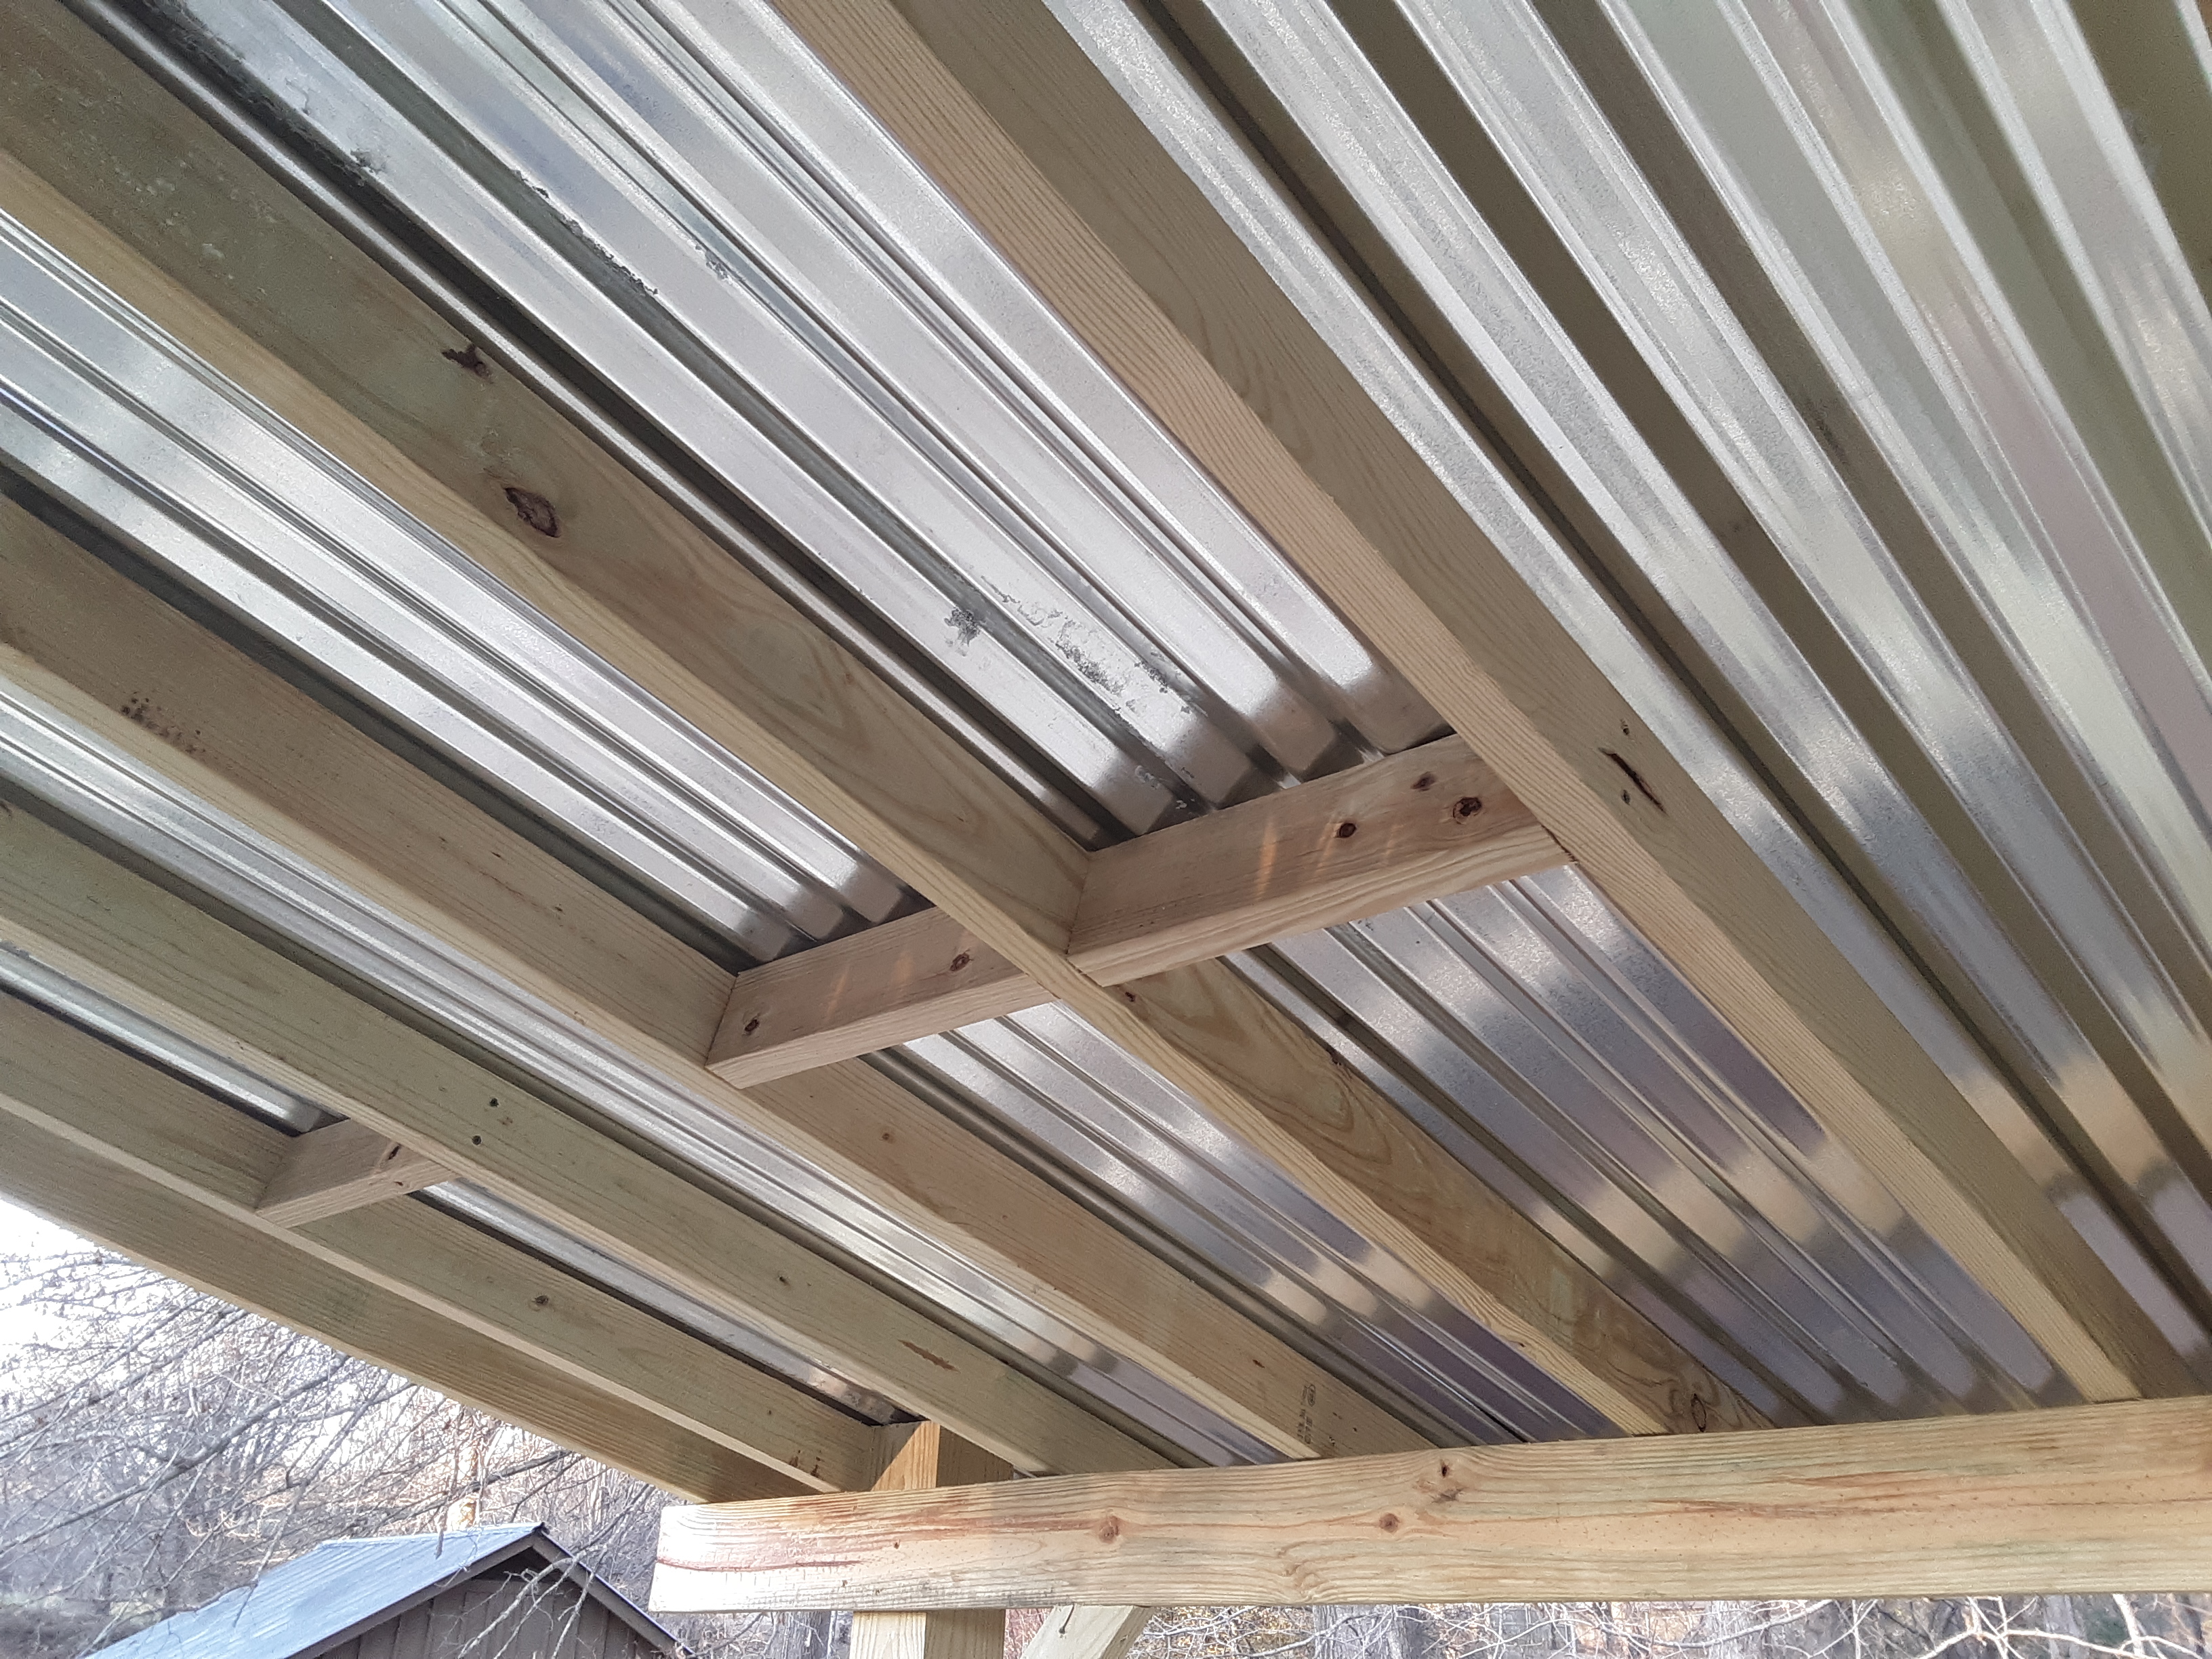
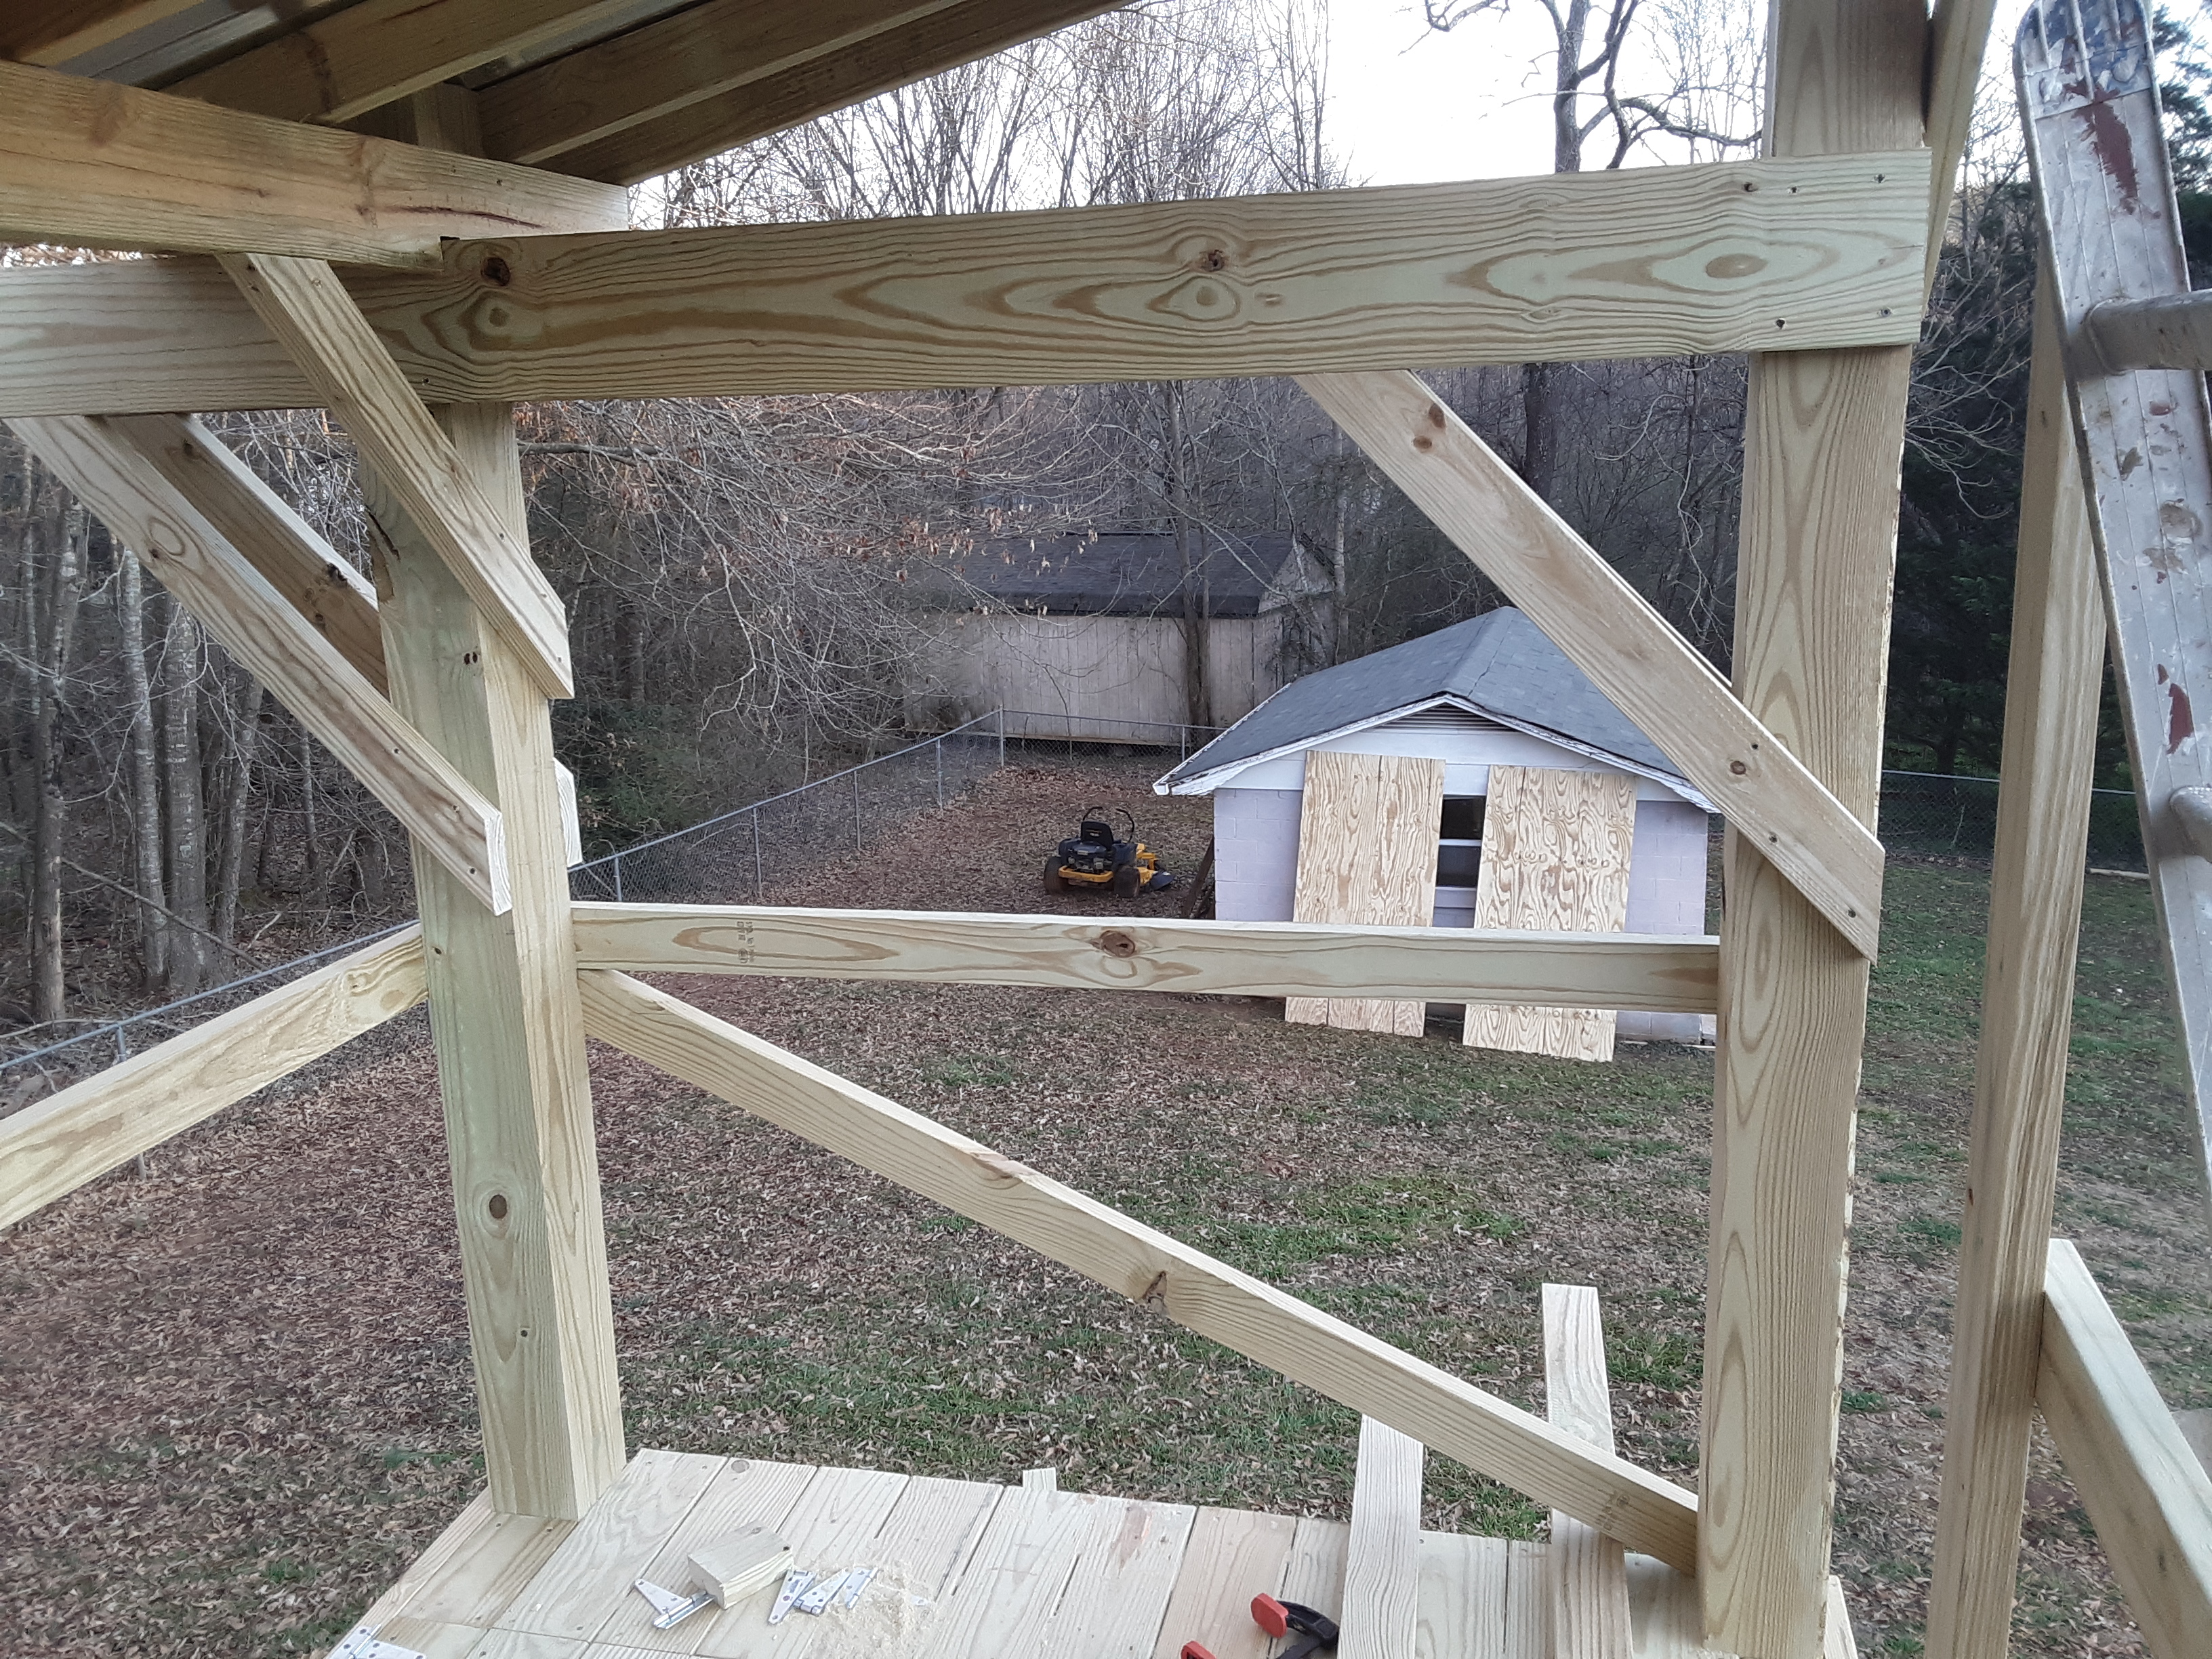
On day 3, I put in joists, the footboard for the climbing wall, and concreted the posts. The reason for the overkill on the posts’ depth, size and concrete was the planned zipline. Take note of the copious diagonals as it comes together. This structure is stiff.


Some days were longer than others and some saw more progress. The floor was satisfying and very useful for further progress. Hanging out on an extension ladder leaned against a single post putting up long boards is difficult for one person.

The double 2 x 8’s hanging 5′ off of the back will support an aerial silk. S, who is the ten year old girl this is being built for, is taking lessons.
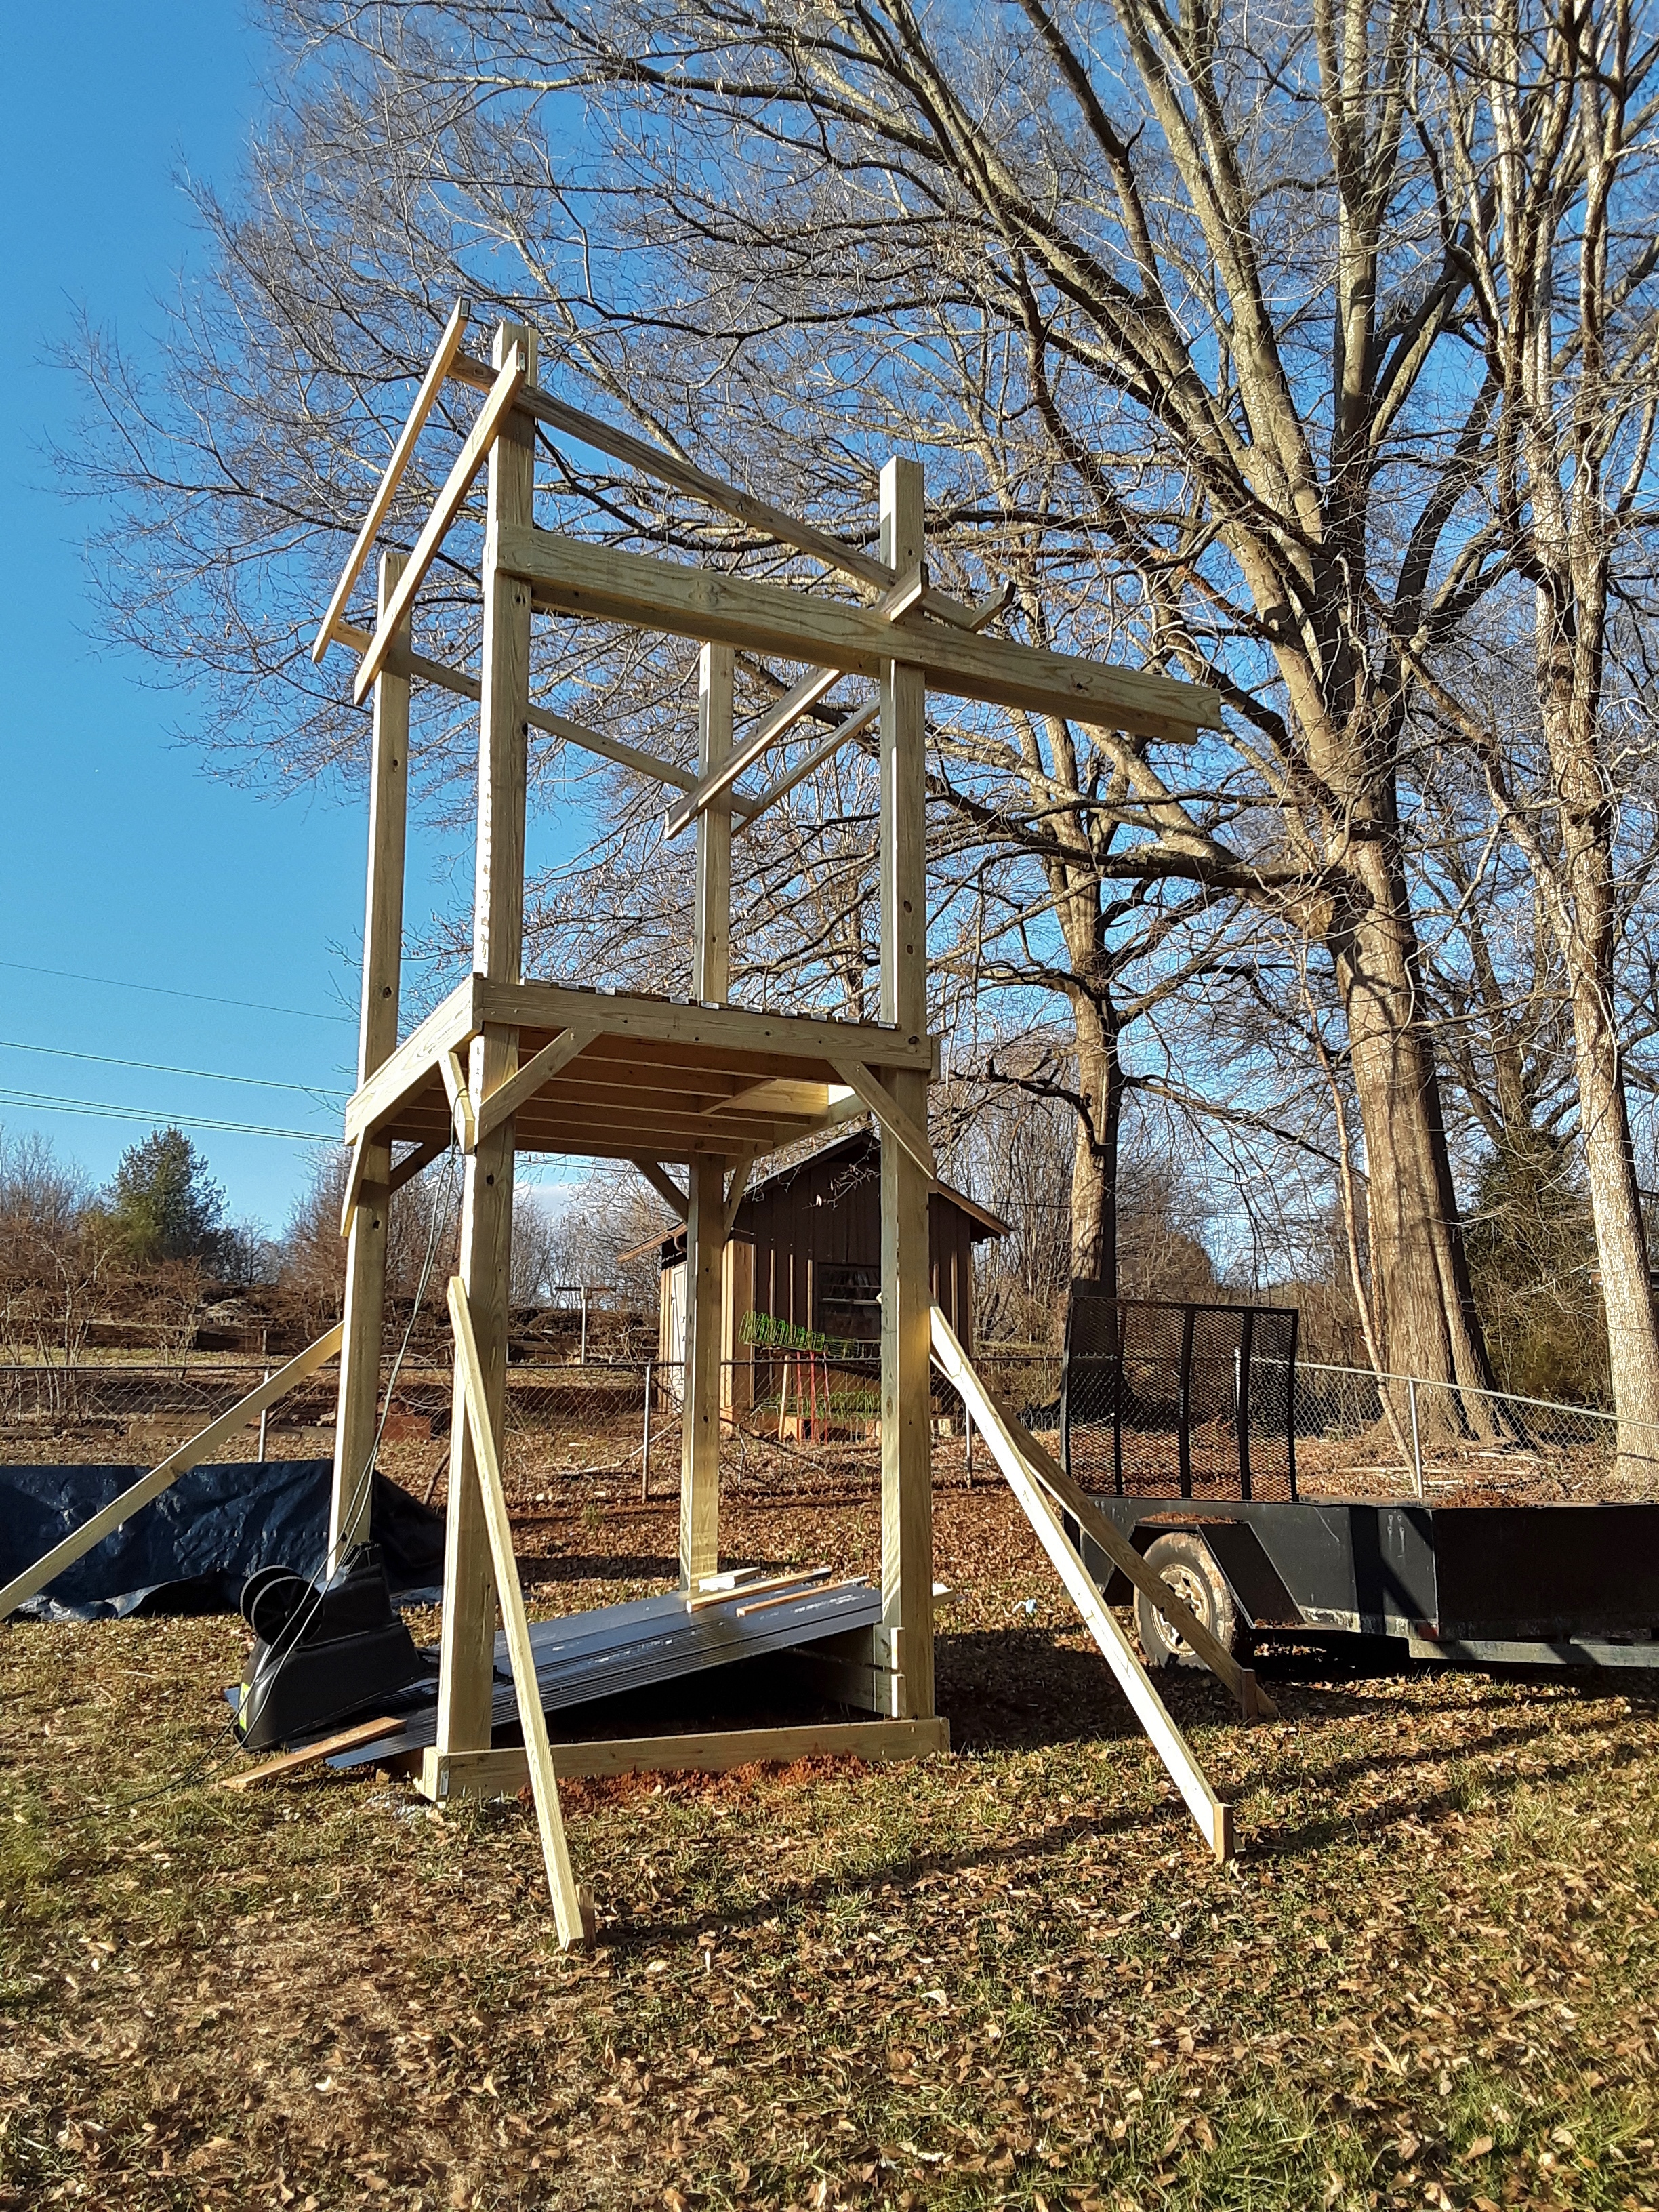
Day 5 saw the roof go on just in time to keep the floor dry from several days of torrent.
At about this point I lost track of what day I was on, since there were doctors’ appointments and multiple days of rain, short days and long days. I had nearly a whole day devoted to installing diagonals. The other part of that day saw the trapdoor go in. (1) I had to think like a kid when I designed this project. The trapdoor is an entrance from the top of the climbing wall. Think fun and adventure.

Can you guess where the zipline will attach? Diagonal City! Leaned against the shed are the 3/4″ treated plywood for the climbing wall.
We are along about day 8 so I will sign off for now. Another day I will show more progress on this cool playhouse. If you are interested in a playset, climbing wall, deck, and any number of other wood projects contact me through my facebook page, ww.facebook.com/decksandsuch
- The trapdoor image appears upside down when I load it, even after flipping it in the file. What is that about?
Lean-To Shed
Posted in Capentry, General, Photo, Project, Work, tagged Outdoors, Pictures, Project, Work on October 10, 2020| Leave a Comment »
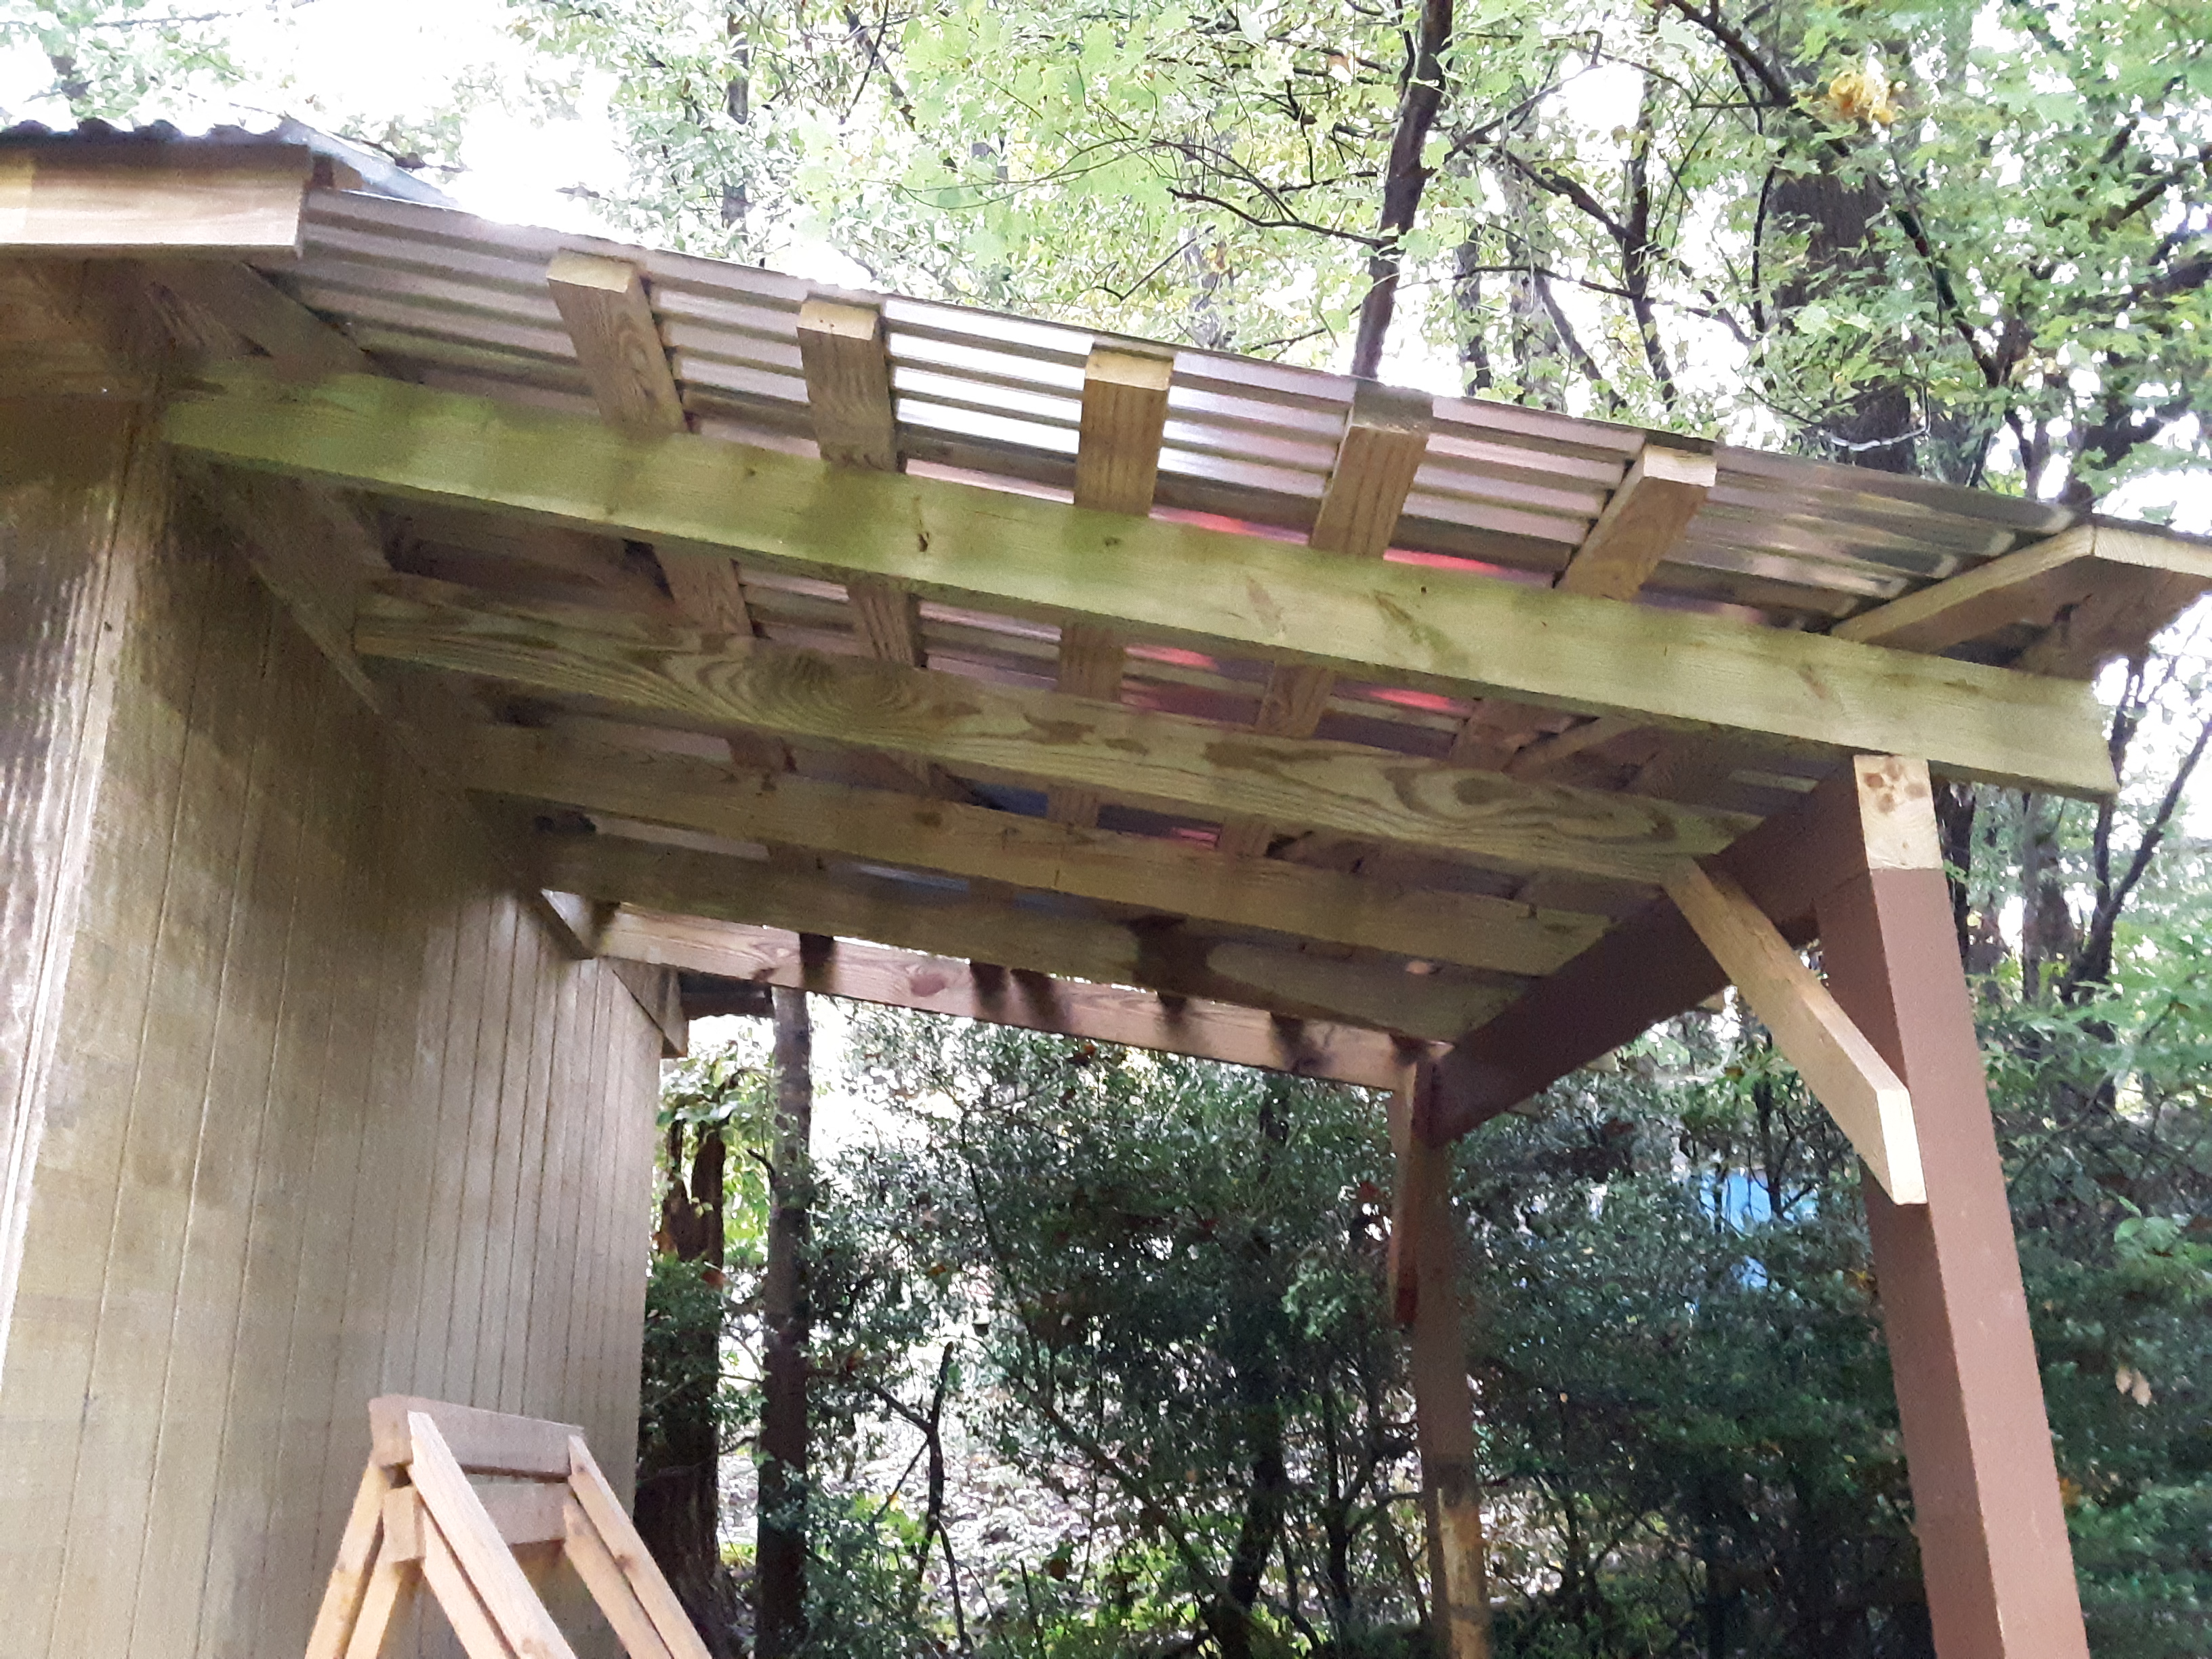
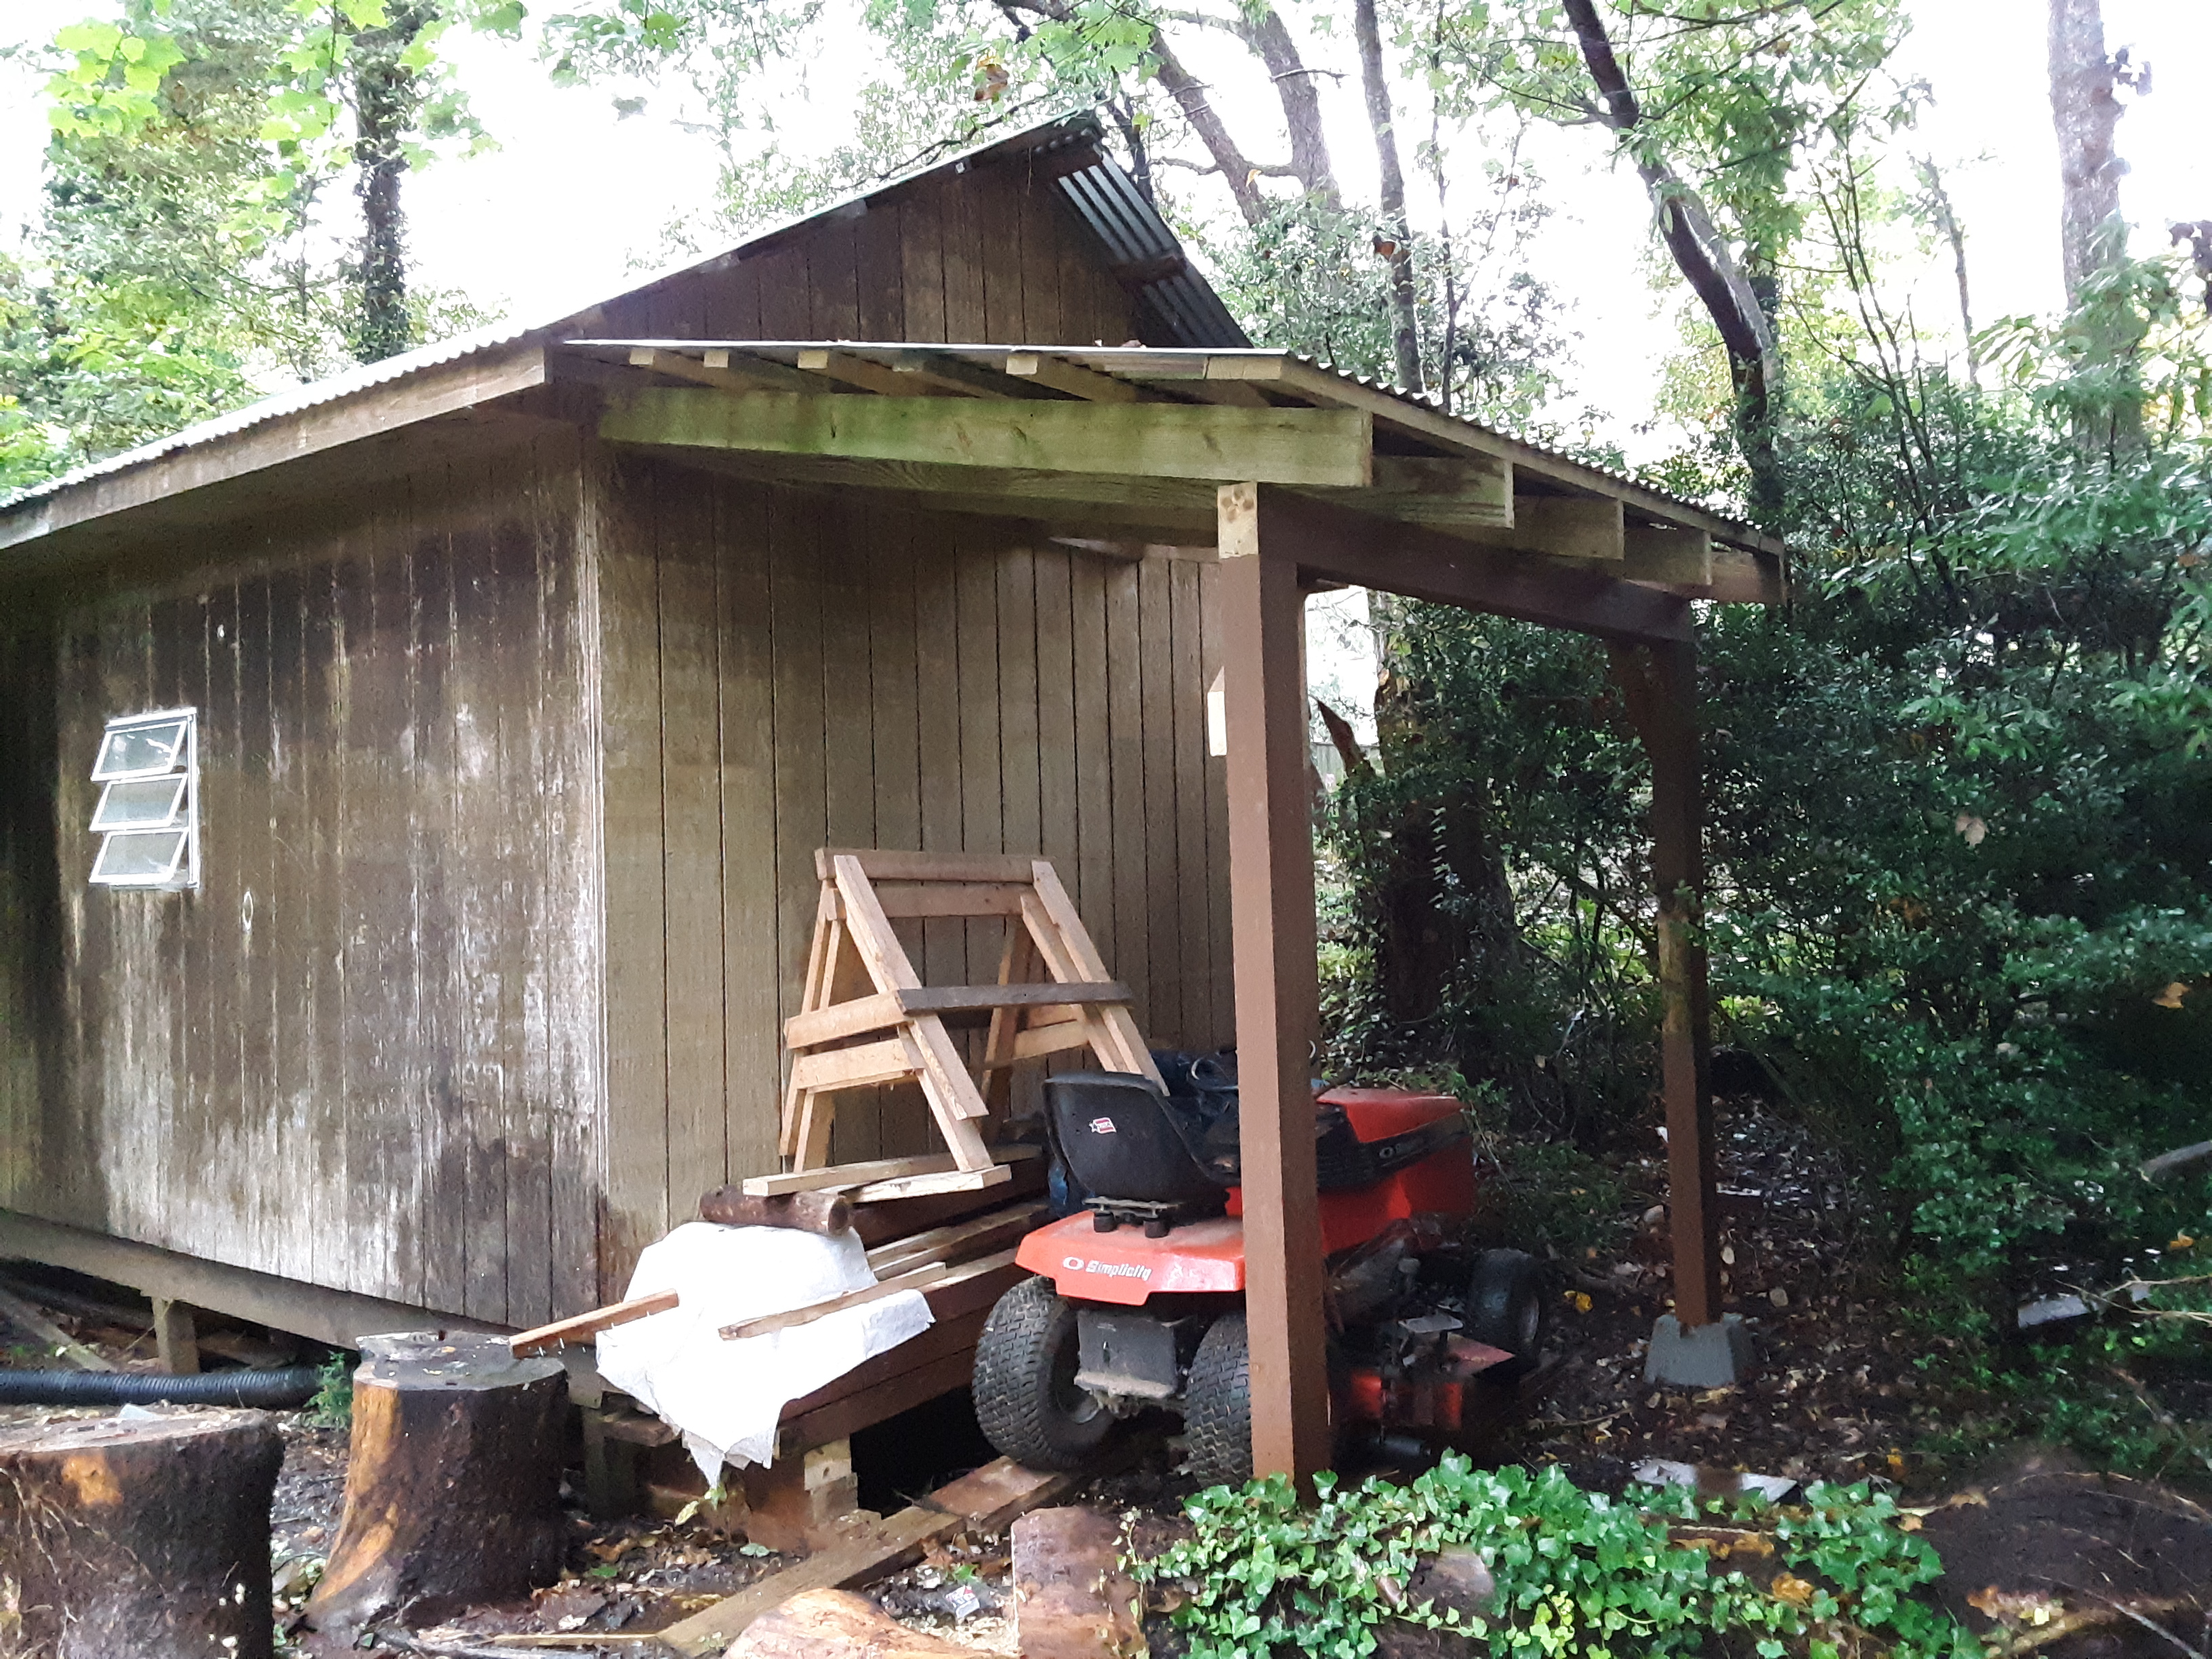
You wonder how some terms came to be. Then there are others so descriptive of their meaning and utility as to need no further explanation. An example is a Lean-To. Enough said.
I had bought a used riding mower in exchange for labor earlier in the summer. At 60 years of age, mowing a 3/4 acre lot with a push mower was becoming daunting rather than jaunty. When I first got the mower I parked it under my firewood shed to keep the seat dry and deck from further rust. But as Autumn approached I began considering where to put firewood in the dry if I should ever find any. So, I decided to build a lean to onto the side of my shed. The double doors of the shed were not wide enough for the deck of the mower and would require a tedious rework for the purpose of parking the behemoth in the already crowded storage/workspace. I did not want to buy the lumber since it has gone up considerably of late and this was just used mower. When a job required taking down an old deck, I put the better, slightly deteriorated boards aside into my truck for homegoing. One of my sons thought it impressive that I did the lean to in one day. I really took 3 hours of previous day to clear the space of shrubbery and set up the posts, but my wife did not tell him that. I did not think to catch quite the whole process, but following is my lean to build:


Some of the lumber was quite nice to be used. I had built the shed years before. I had hand built roof trusses that allowed a vaulted ceiling over the middle half of the 20′ long shed. I had plywood gussets at the top and ends of the trusses. It had a large Virginia Pine behind it at one point. On the a Friday after Thanksgiving several years ago while we were away at an extended family gathering, my third son was awakened by a loud crash. He looked outside to see everything covered in copious amounts of ice and the Virginia Pine snapped about three feet up its trunk and lying on the shed. The two foot diameter tree and ice broke one truss which slowed it down enough to only crack others. It was a tedious repair job. The new sheets of roofing did not hold onto the forest green Rustoleum paint very well. I need to sand it and try again.


The shed sits in a very wet spot, a fact I did not know when I built it there. For that reason I had to plant the lean to posts on concrete bases, “feet” if you will. The last two years have been very wet, even record wet last year.